All Activity
- Past hour
-
@jockThanks Jock, I know that and I agree with you. I could also take an Rpi4 with an SSD, but it is also for the fun of tinkering and checking if I still have "green fingers" The app is not critical as it's for displaying the welcome book and appliance manuals in some holiday rentals on the guests's phone from a QR code.
- Today
-

CSC Armbian for RK322x TV box boards
Vinicius Guastala replied to jock's topic in Rockchip CPU Boxes
@fabiobassa @jock you both are master-gods with the power of every god from all the mythologies known by the human kind! Next step for me now is to install it to the eMMC (if that's not possible, I will stick with SD boot only, no problem). I heard that there is the armbian-install command, so I will try it since the provided image is a XFCE Desktop one and I want a minimum image to free up resources since I just need a headless machine... Any suggestions for guides/documentations to install a minimal enviroment to emmc from the SD desktop enviroment? -
@Vinicius Guastala @jock indeed is a semi-god on those boxes 😅 ✋
-
CSC Armbian for RK322x TV box boards
Vinicius Guastala replied to jock's topic in Rockchip CPU Boxes
please ignore my previous comment. THE EXPERIMENTAL IMAGE DID BOOTED FROM SD CARD! IT WORKED I have forgotten to erase the flash on the first time... After I erased, it booted from the SD Card. I cannot thank you guys enough!!!! <3 <3 <3
-
CSC Armbian for RK322x TV box boards
Vinicius Guastala replied to jock's topic in Rockchip CPU Boxes
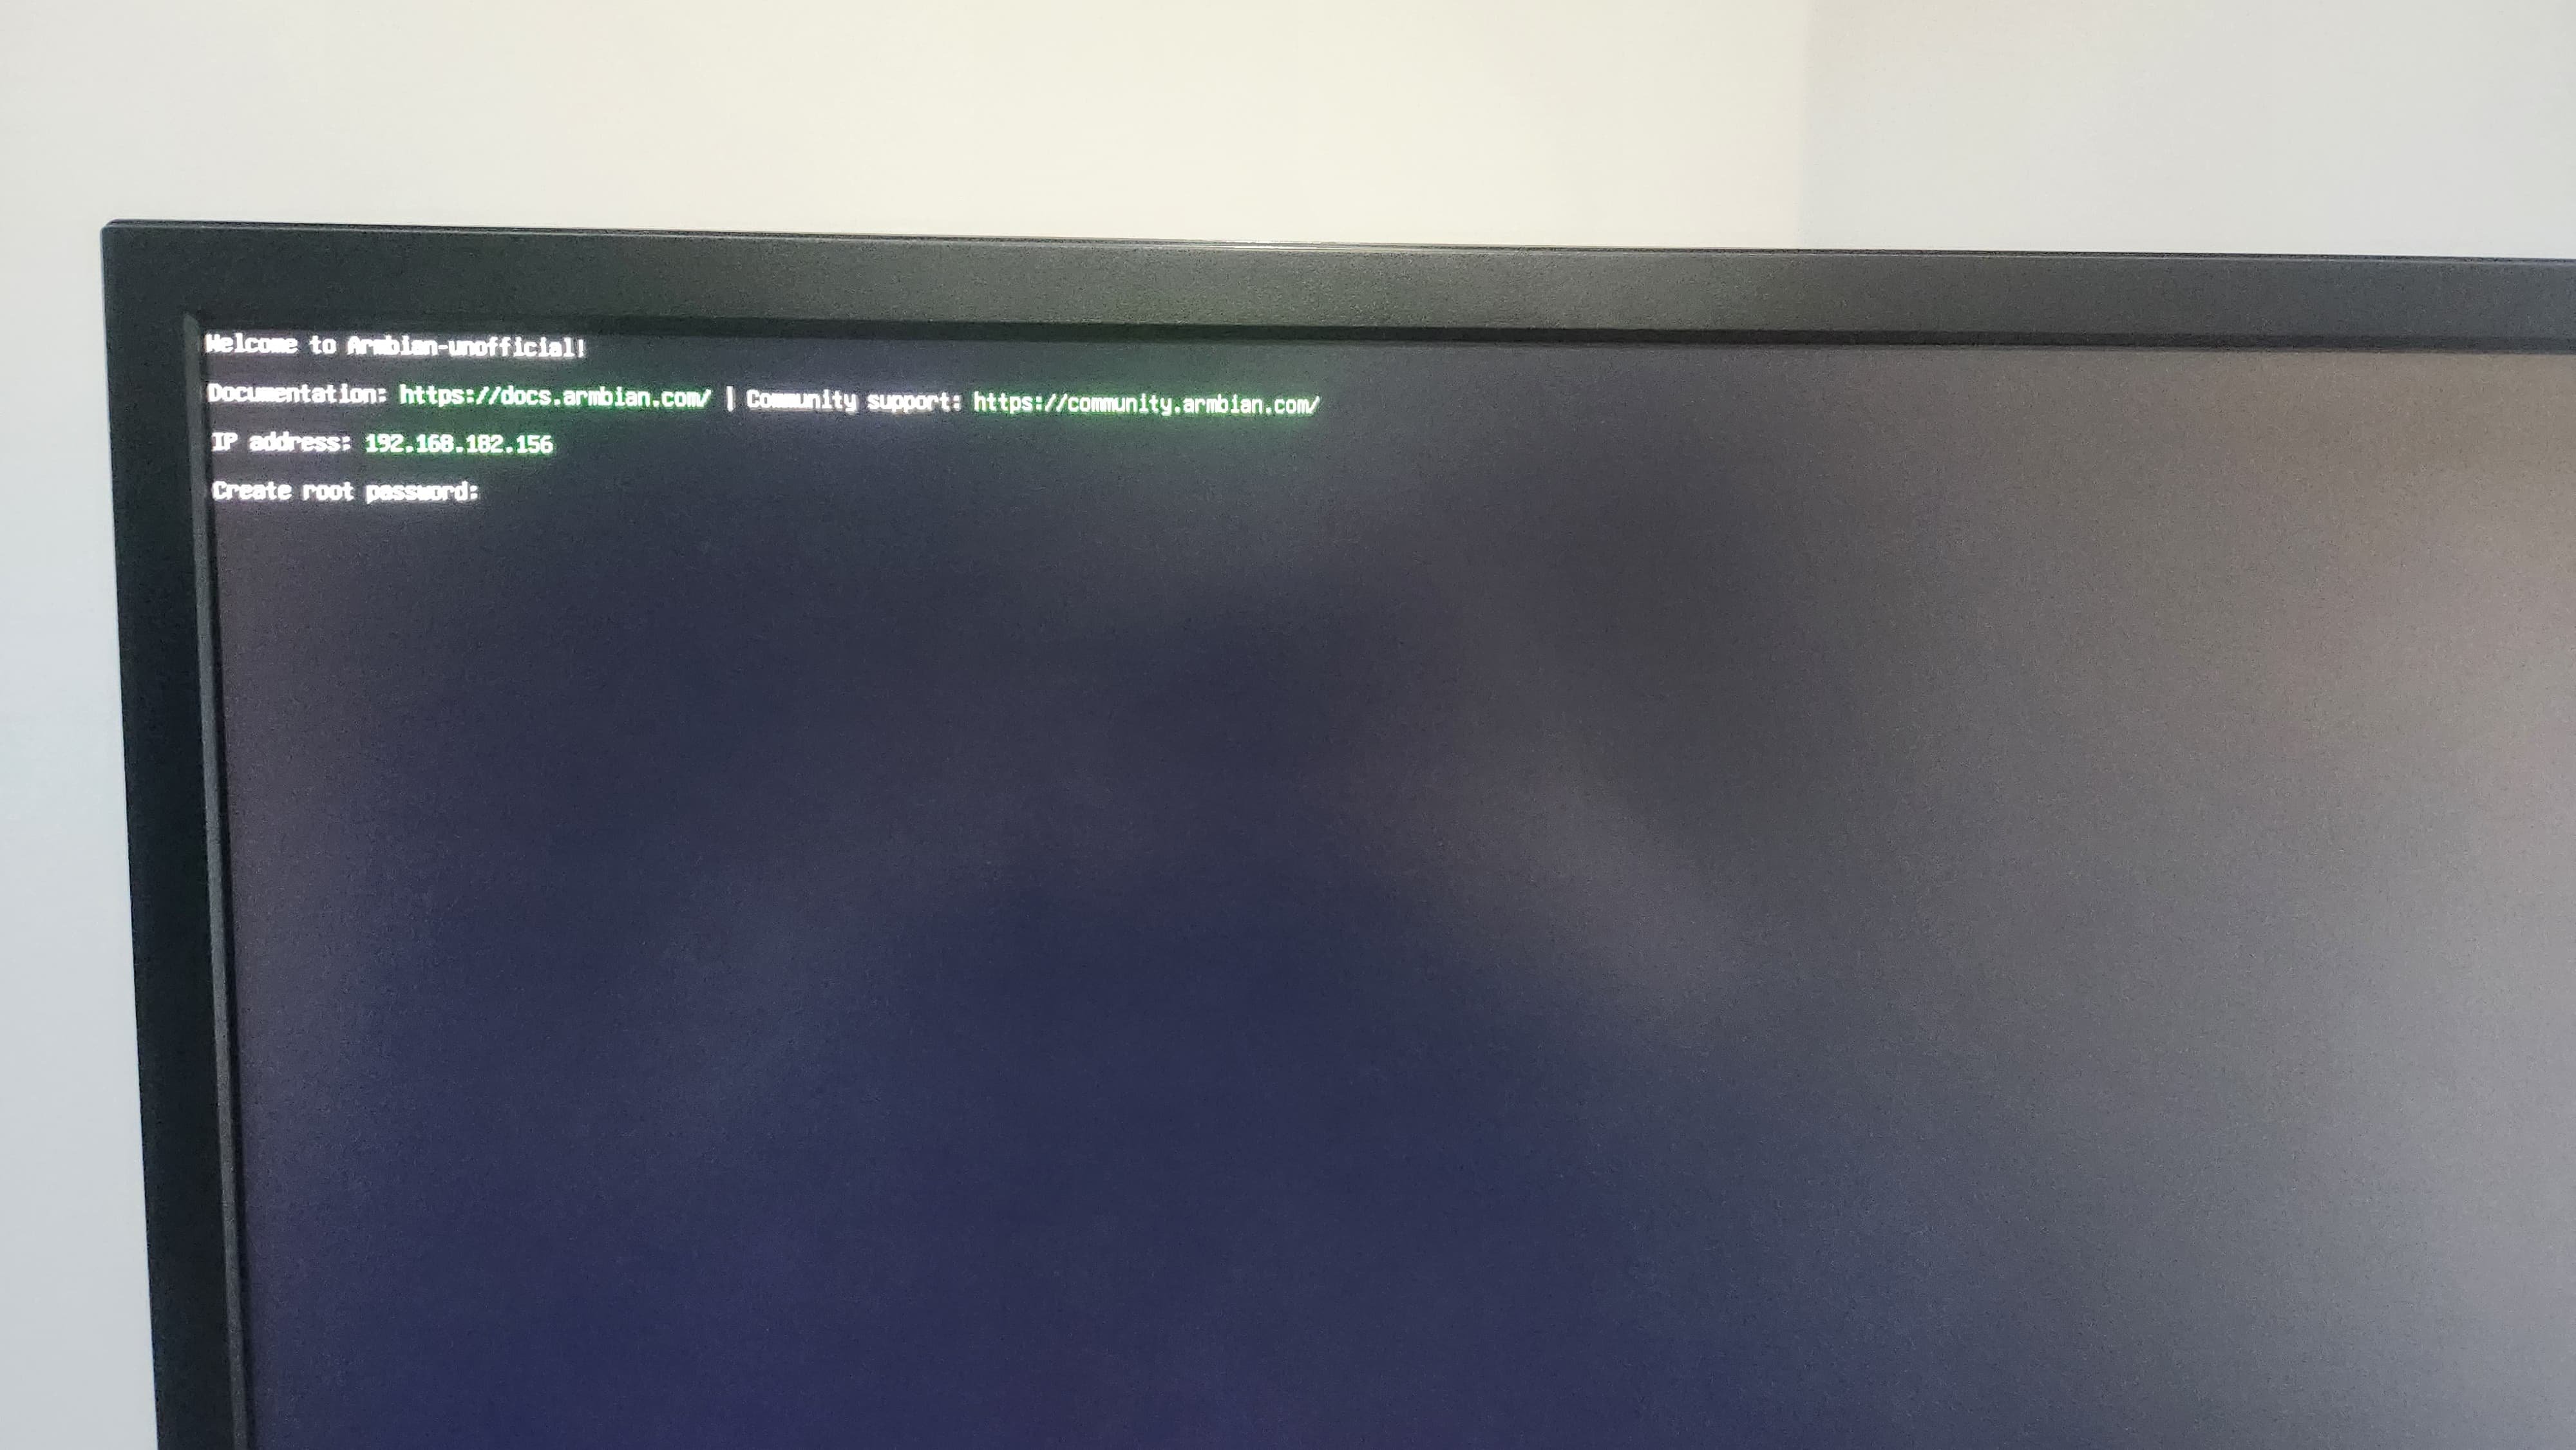
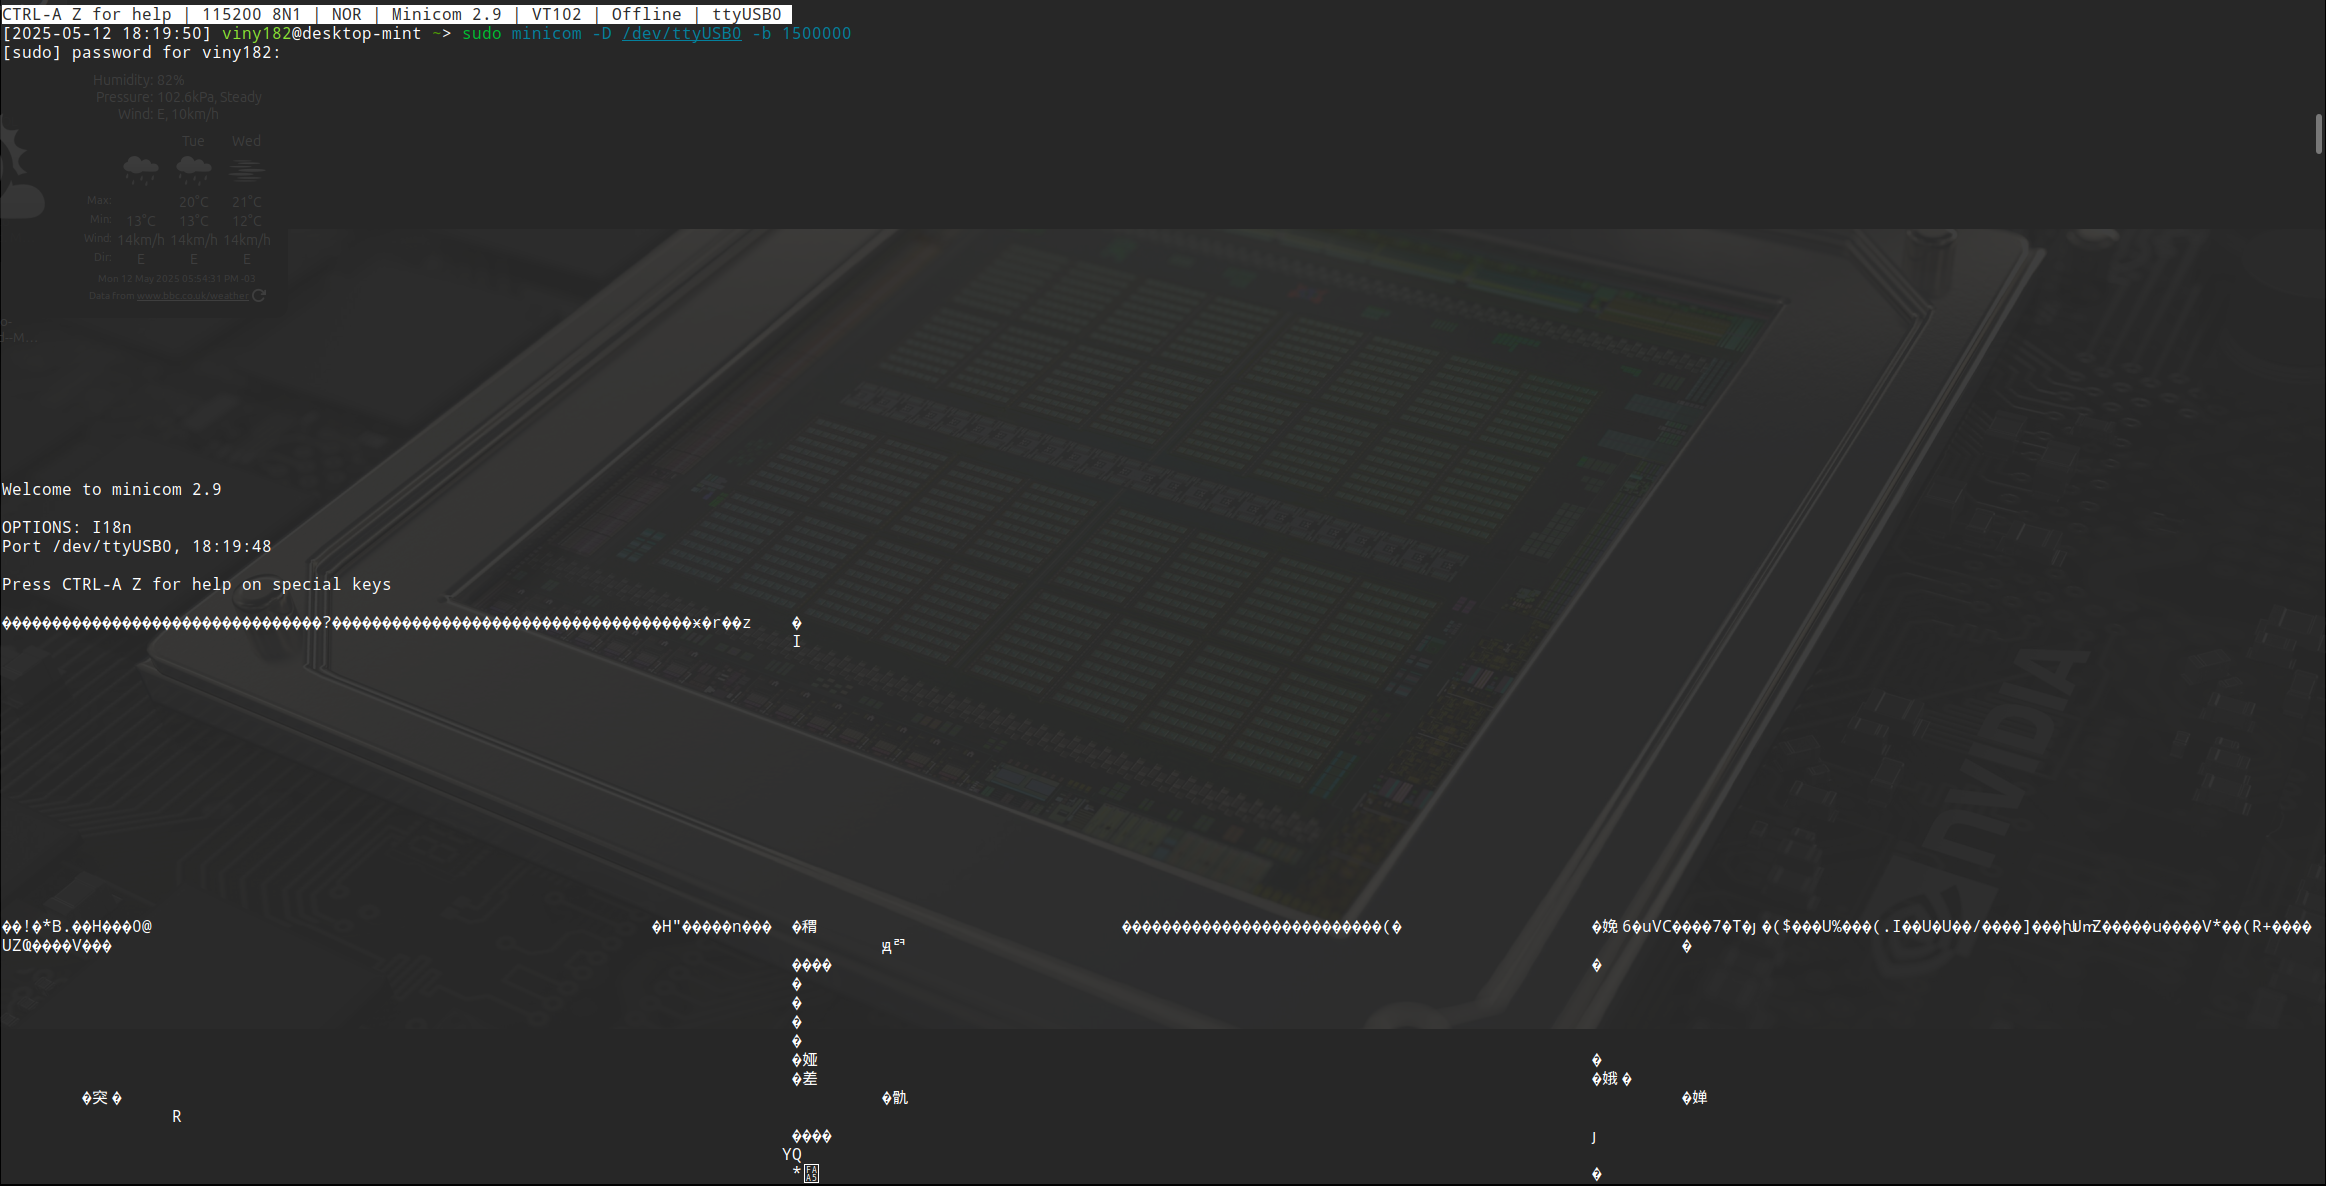
@fabiobassa and @jock, thanks for your quick responses! You are true heroes for this community. The suggested experimental image have not worked for me unfortunately. Same behavior, no Video and no Leds. However, a little progress on the UART search... Connecting my RX adapter pin to the SD Card 4th pin gave me the biggest console output so far, even though its just garbage, I see it as a little progress... Please see the attachment. Also, I think I was able to identify that the Samsung chip is a 1gb/8GB one from the "rkdeveloptool rfi" command... see it below with some more output from the rkdeveloptooll... [2025-05-12 18:49:03] viny182@desktop-mint ~> sudo rkdeveloptool list DevNo=1 Vid=0x2207,Pid=0x320b,LocationID=302 Loader [2025-05-12 18:49:17] viny182@desktop-mint ~> sudo rkdeveloptool list-partitions Not found any partition table! [2025-05-12 18:49:46] viny182@desktop-mint ~ [1]> sudo rkdeveloptool test-device Test Device OK. [2025-05-12 18:49:58] viny182@desktop-mint ~> sudo rkdeveloptool rfi Flash Info: Manufacturer: SAMSUNG, value=00 Flash Size: 7456 MB Flash Size: 15269888 Sectors Block Size: 512 KB Page Size: 2 KB ECC Bits: 0 Access Time: 40 Flash CS: Flash<0> [2025-05-12 18:50:19] viny182@desktop-mint ~> sudo rkdeveloptool read-flash-id Flash ID: 45 4D 4D 43 20 [2025-05-12 18:50:26] viny182@desktop-mint ~> sudo rkdeveloptool read-chip-info Chip Info: 41 32 32 33 0 0 0 0 0 0 0 0 0 0 0 0 [2025-05-12 18:50:41] viny182@desktop-mint ~> sudo rkdeveloptool read-capability Reading capabilities failed
-

PiRogue installation for NanoPI_R4S problems
Superuser replied to Superuser's topic in Software, Applications, Userspace
Everything is good, thanks for the help and sorry for confusion, I only should to change PiRogue default interface after installation, this is PiRogue interface detection problem... -
@Vinicius Guastala I agree with @fabiobassa, thanks for the very detailed post of your board and broad description of the behaviour. I would suggest you to erase the internal flash and try to boot from sdcard with this armbian image. It is an "experimental" image with opensource Trust OS; many recent boards are having issues with proprietary trust os, possibly yours has similar issues, so you could give a shot to this. By the way, the serial log output would be indeed very handy if you have the chance to find the serial port. Beware also that armbian (and multitool) use 115200bps baud rate for the serial, while proprietary software uses 1.5Mbps baud rate!
-
@gurzixo much better to steer to an officially supported SBC from armbian, if you need something reliable: https://www.armbian.com/download/?device_support=Platinum support&arch=aarch64
-
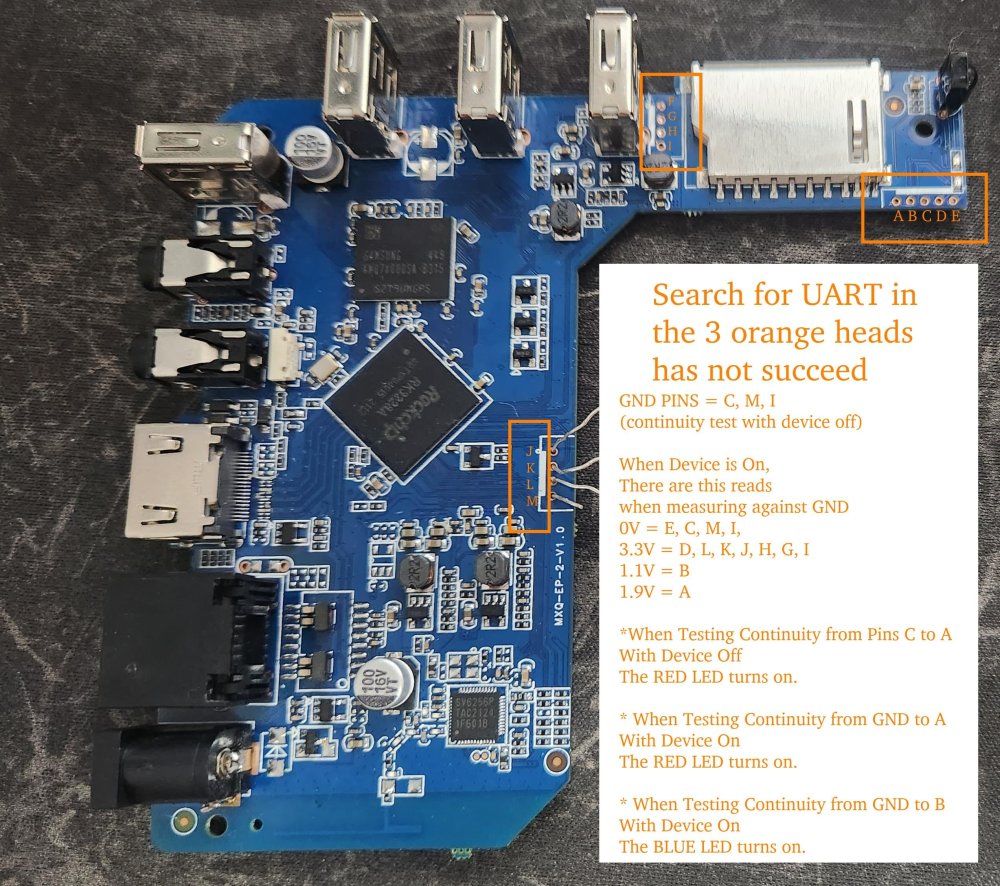
@Vinicius Guastala first of all thank you for so much detailled infos and your efforts to find any relevant pin on your board. Yes china manufacturers are well known to use the first avaible chip they have unused on desk so I am not at all surprised to have this frankstein model of a 322x Unfortunately I don't own such board, so really at the moment I have few clues to point you on the right direction. Mine are generic considerations: 1) no separate chips apart from cpu, just one big big chip = ECMP usually 8 giga rom, 1 giga ram ( good for you if it is 16/2 but i doubt) 2) to me looks more interesting the FGHI part for uart, REMEMBER that uart speed is 1500000 ( yes!!!!! one million 500000) but follow the tracks for any missing resistor/missing short that stop the uart signal from CPU to pads 3) if you have a radio-aficionado or a tv technician that owns an oscilloscope finding the uart pads will be easier Sorry if I am not any further useful for your case, cannot buy every single new board that comes out on market, but if for you is important feel free to send me one sample for study and development EDIT : I just remebered that if you are lucky because not all boards have enabled. you'll find a uart on the sd card reader, starting from most right pins and counting 4 . Let me be more clear : two small and two big, from right....on the 4 you will have a uart at 1.500.000 Of course if you put the sd in you will lose this signal, but at least confirm you have any readable character on that pin )
-
Not sure which board you are using but if you look at the u-boot defconfig file you will see the dram config in there. https://github.com/NickAlilovic/build/blob/v20250306/patch/u-boot/u-boot-h616/171-add-x98h-defconfig.patch The row with h616 is your dram config settings
-
Hello again Jock an all the other members of this topic ! After a long time without fiddling with those lovely boxes, I need now a low-cost Linux box (typically 4gb/64gb) for setting up a simple local web server with node/express/nginx. Would someone be kind enough to provide a working AliExpress link of such a box where at least Eth and maybe WiFi are working out of the box? Thanks a lot, Michel
-
CSC Armbian for RK322x TV box boards
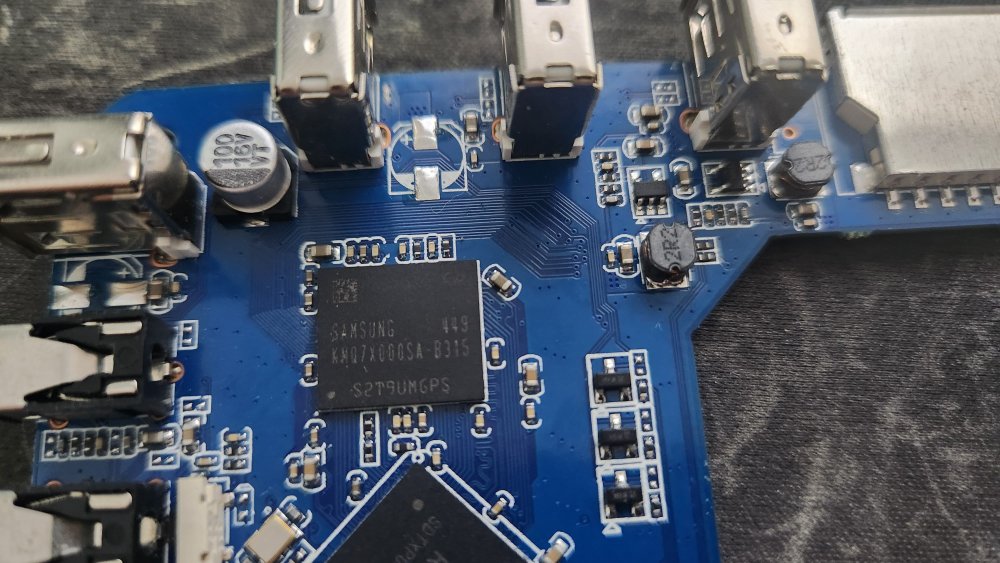
Vinicius Guastala replied to jock's topic in Rockchip CPU Boxes
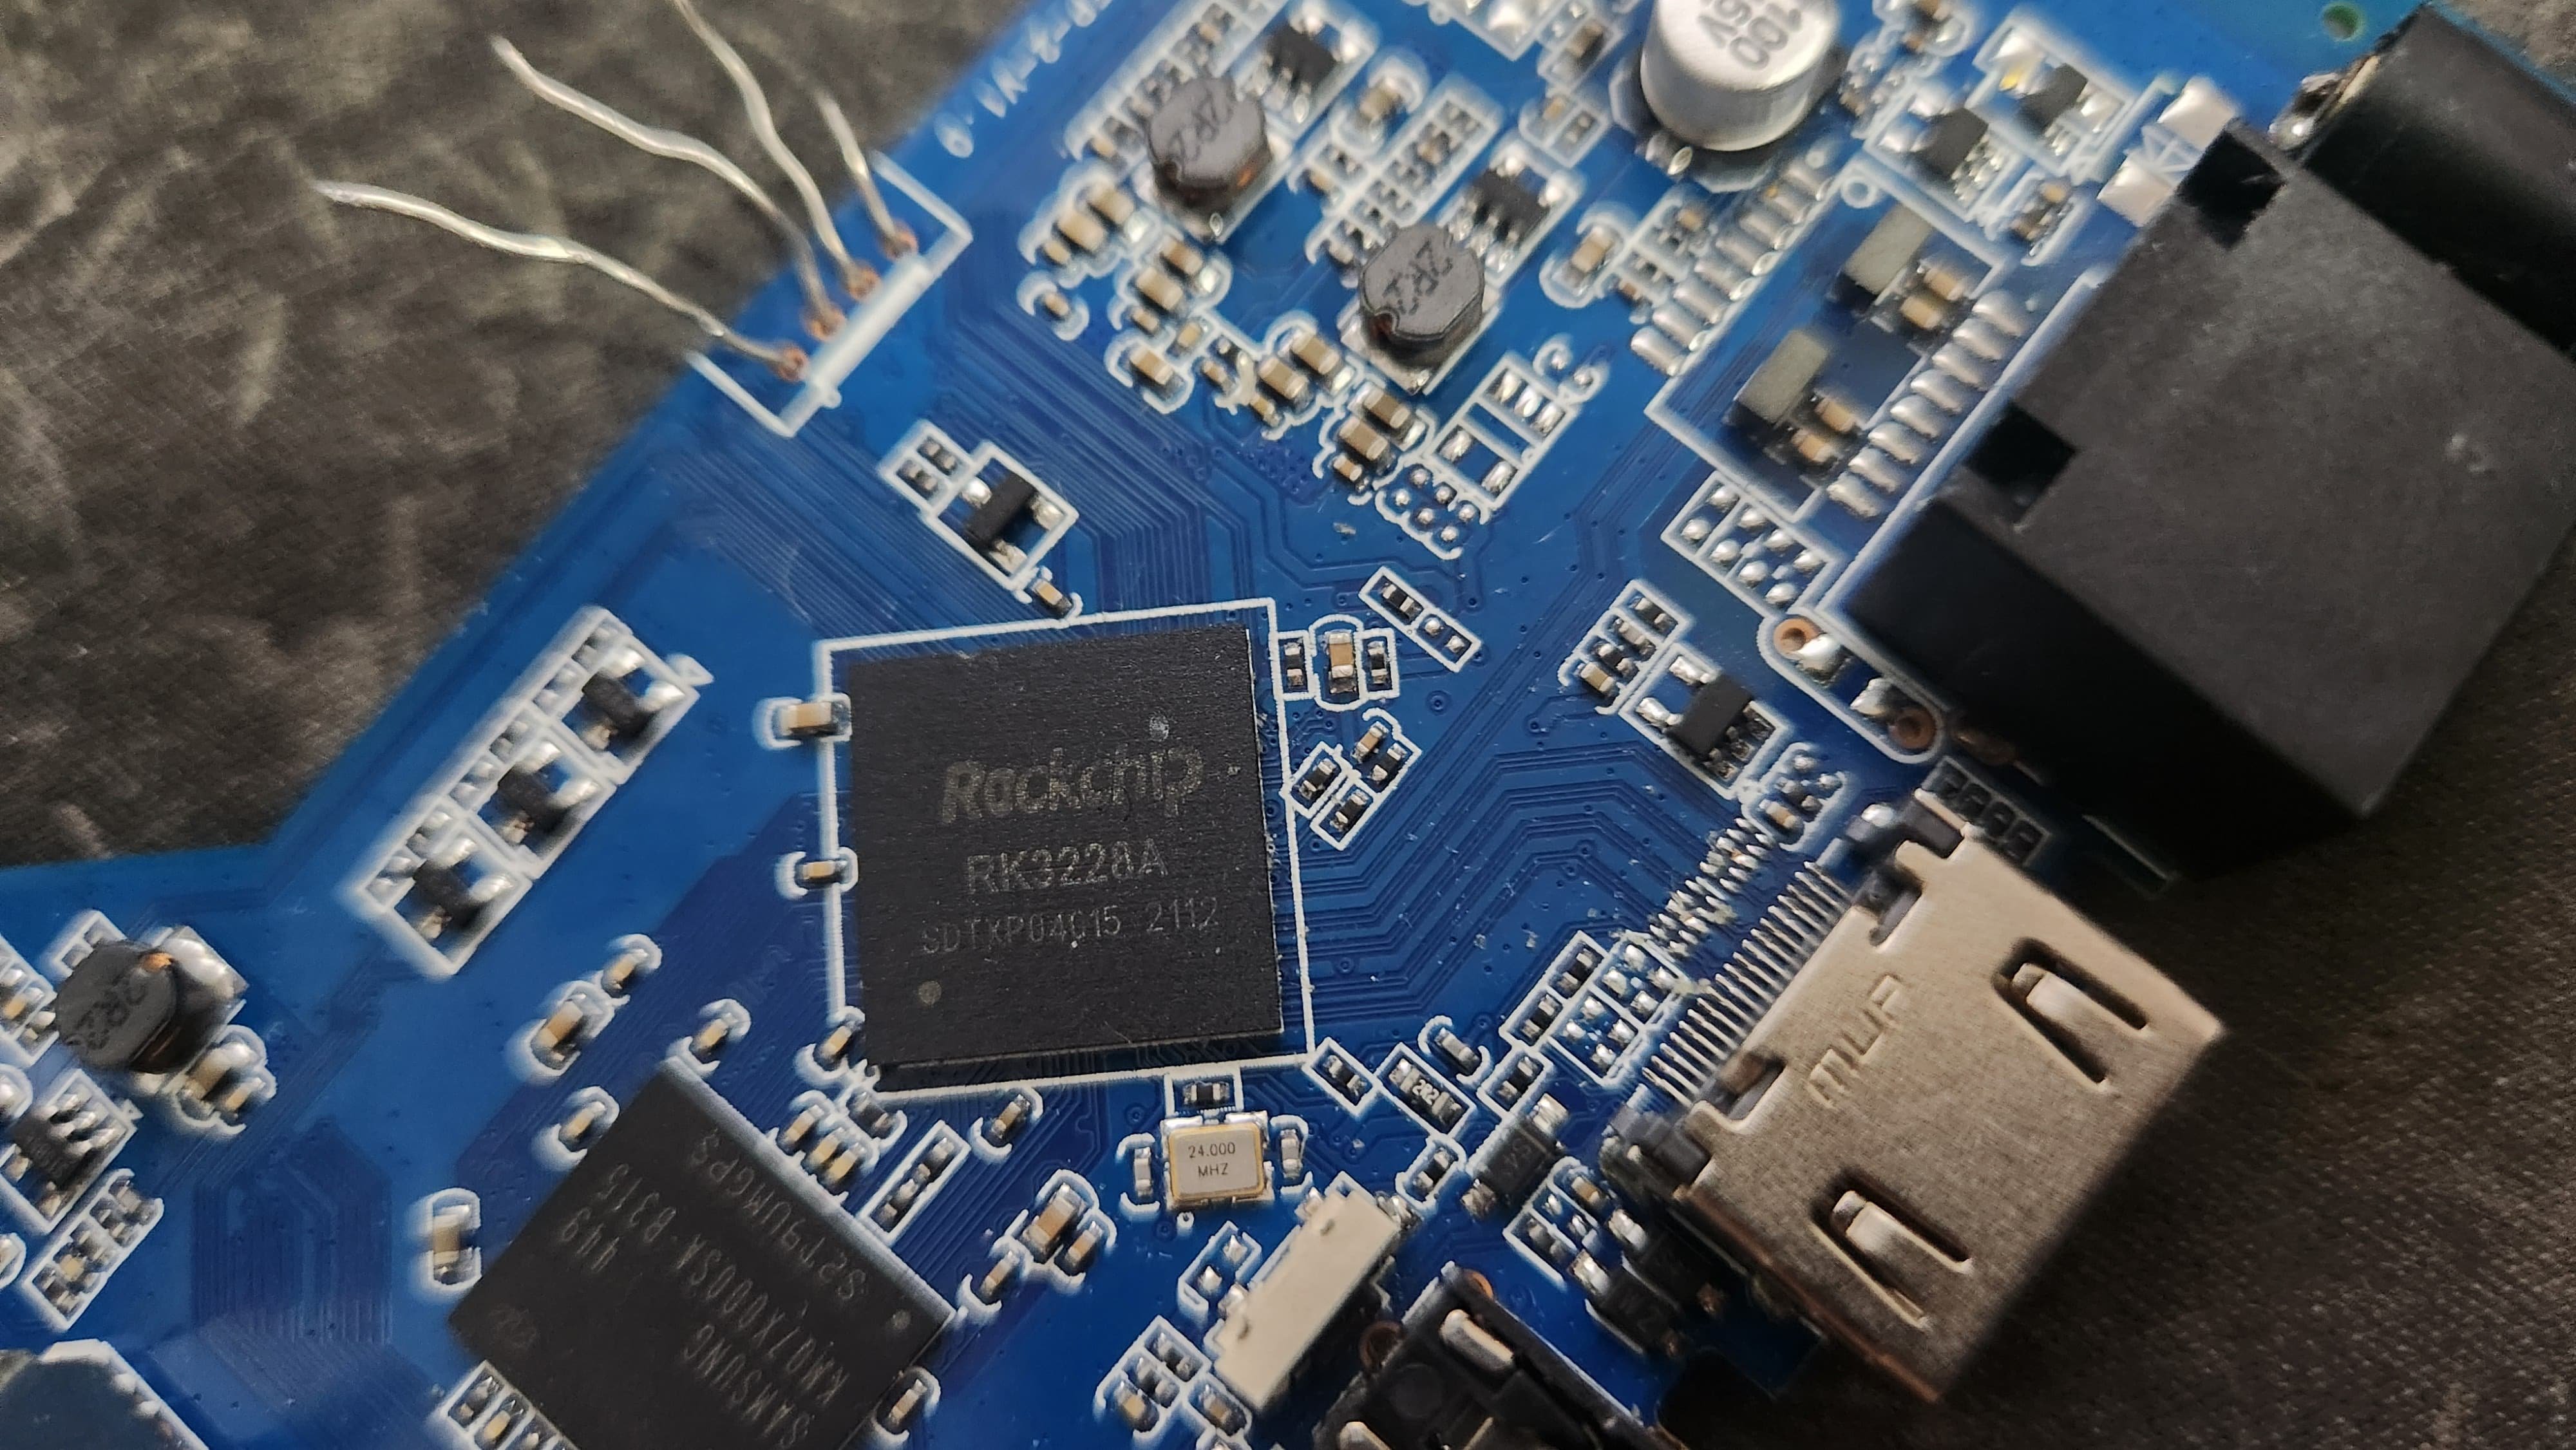
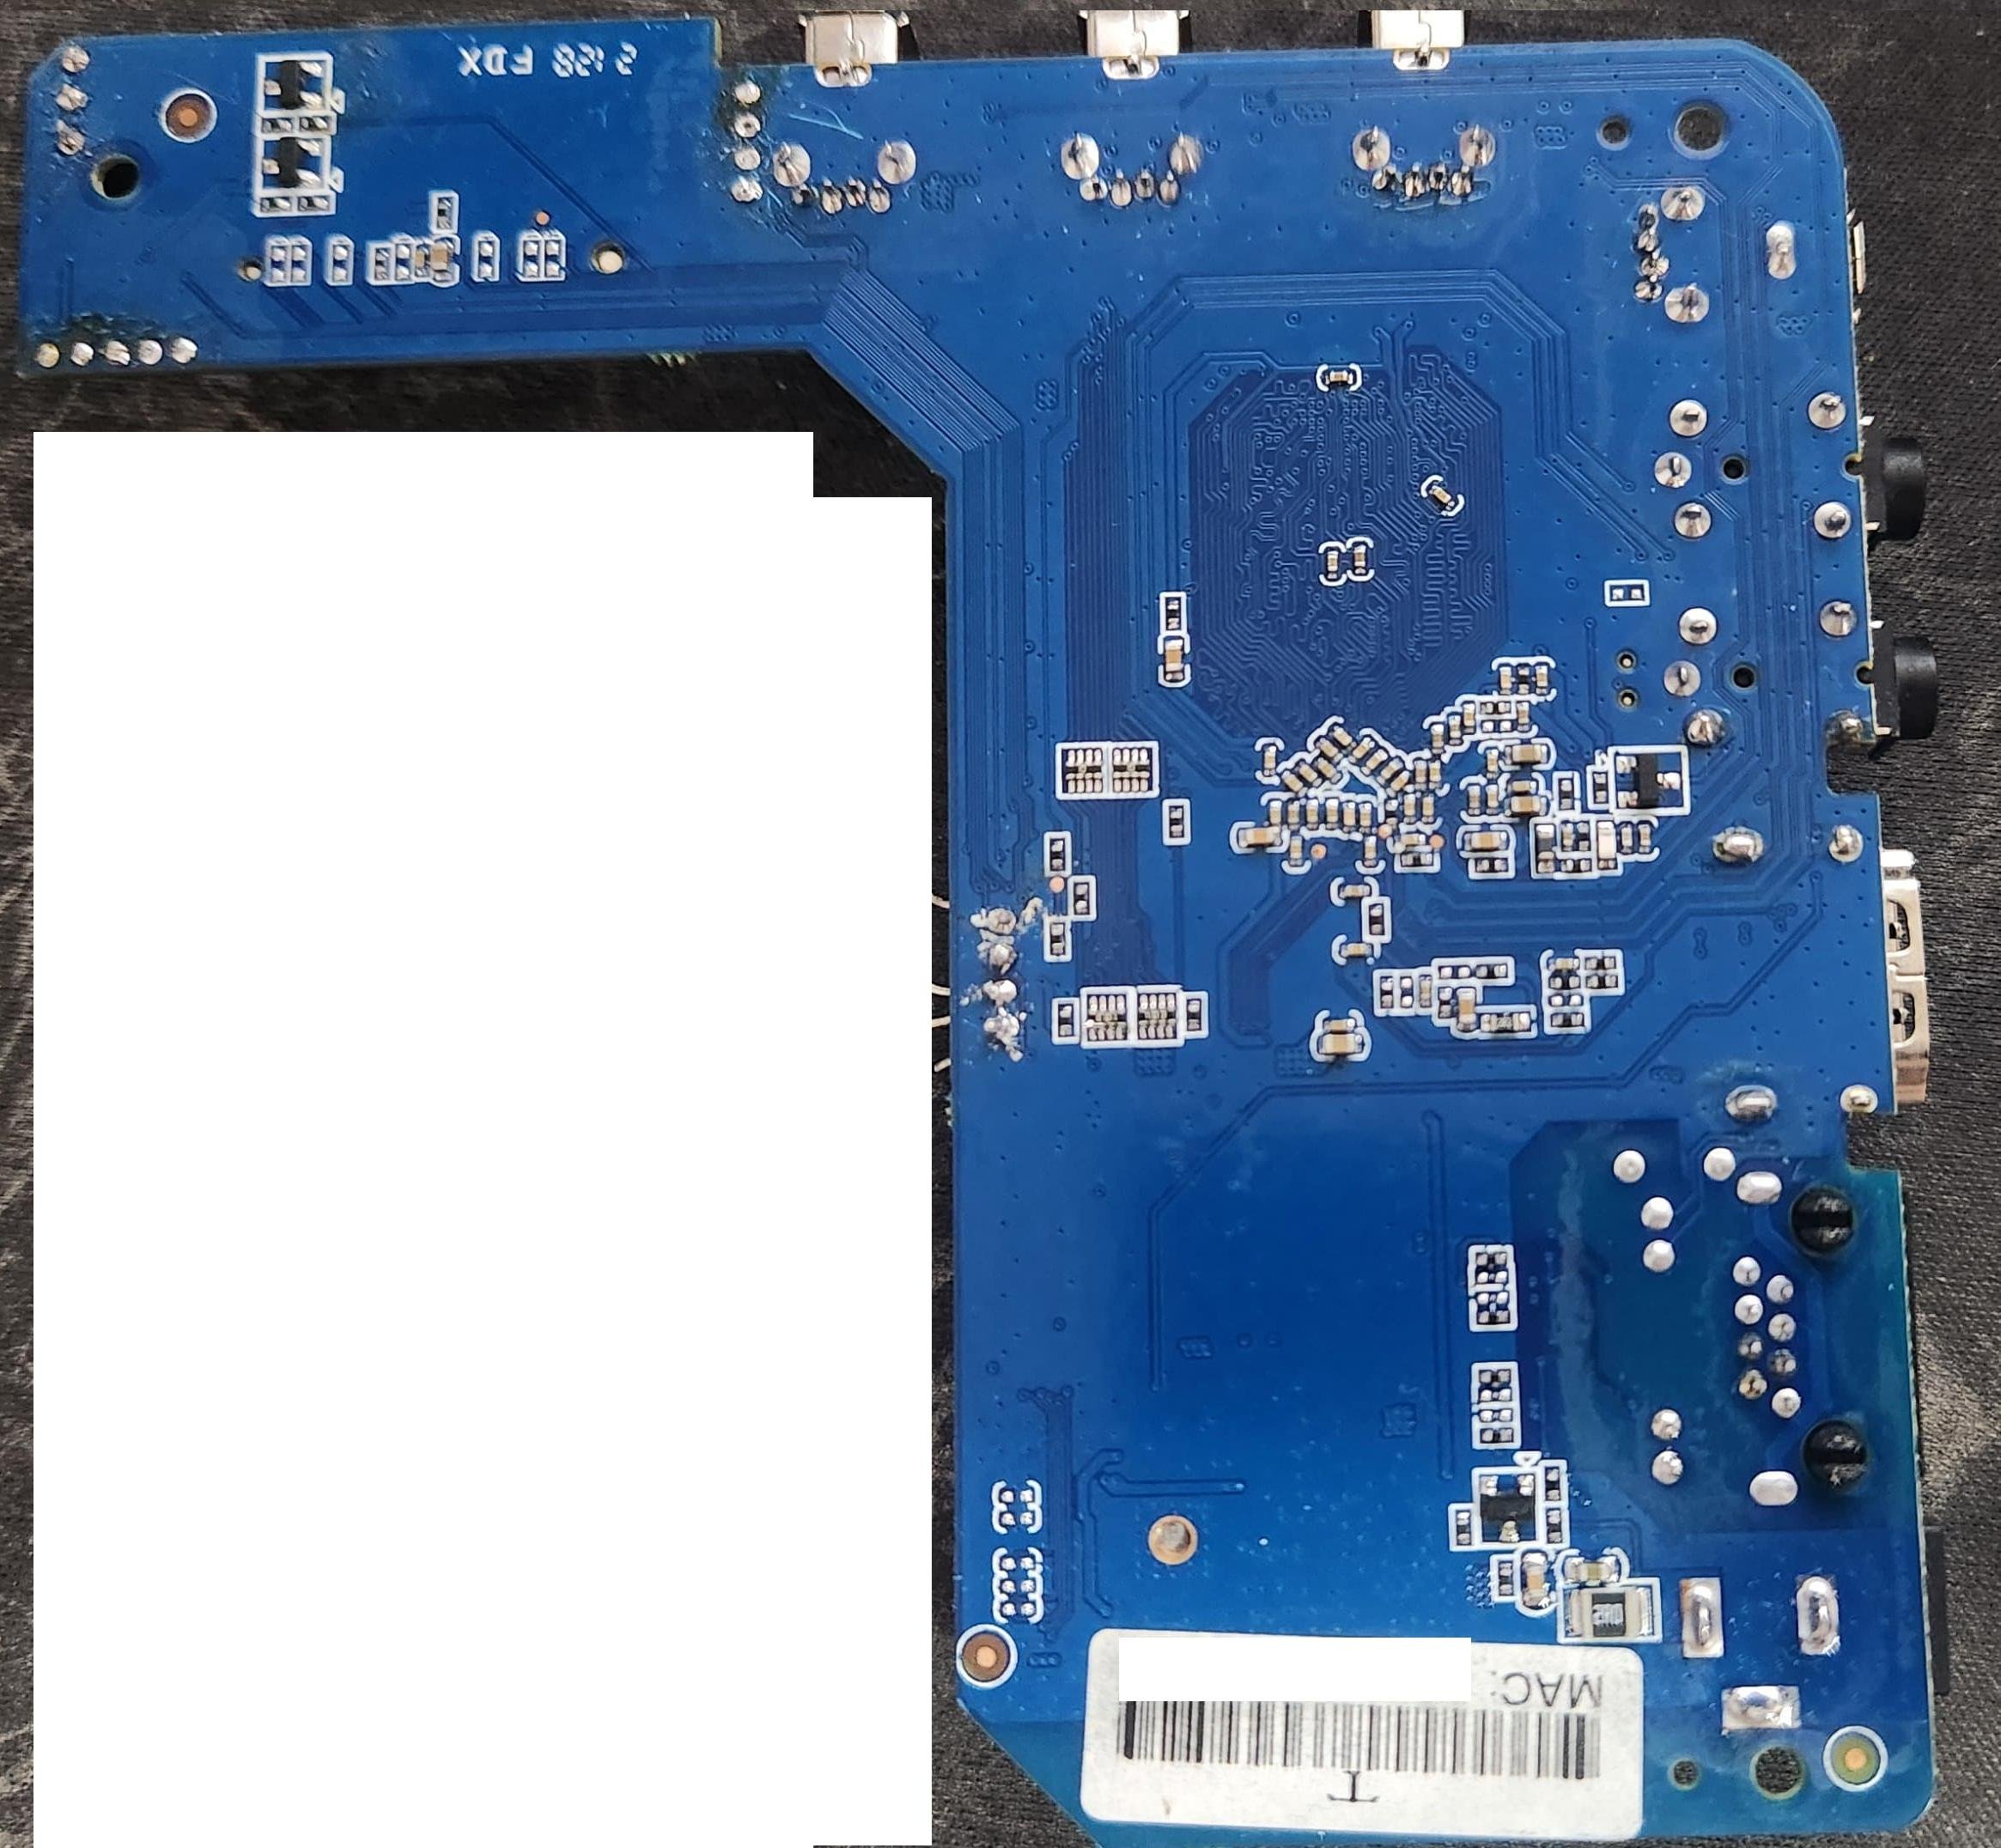
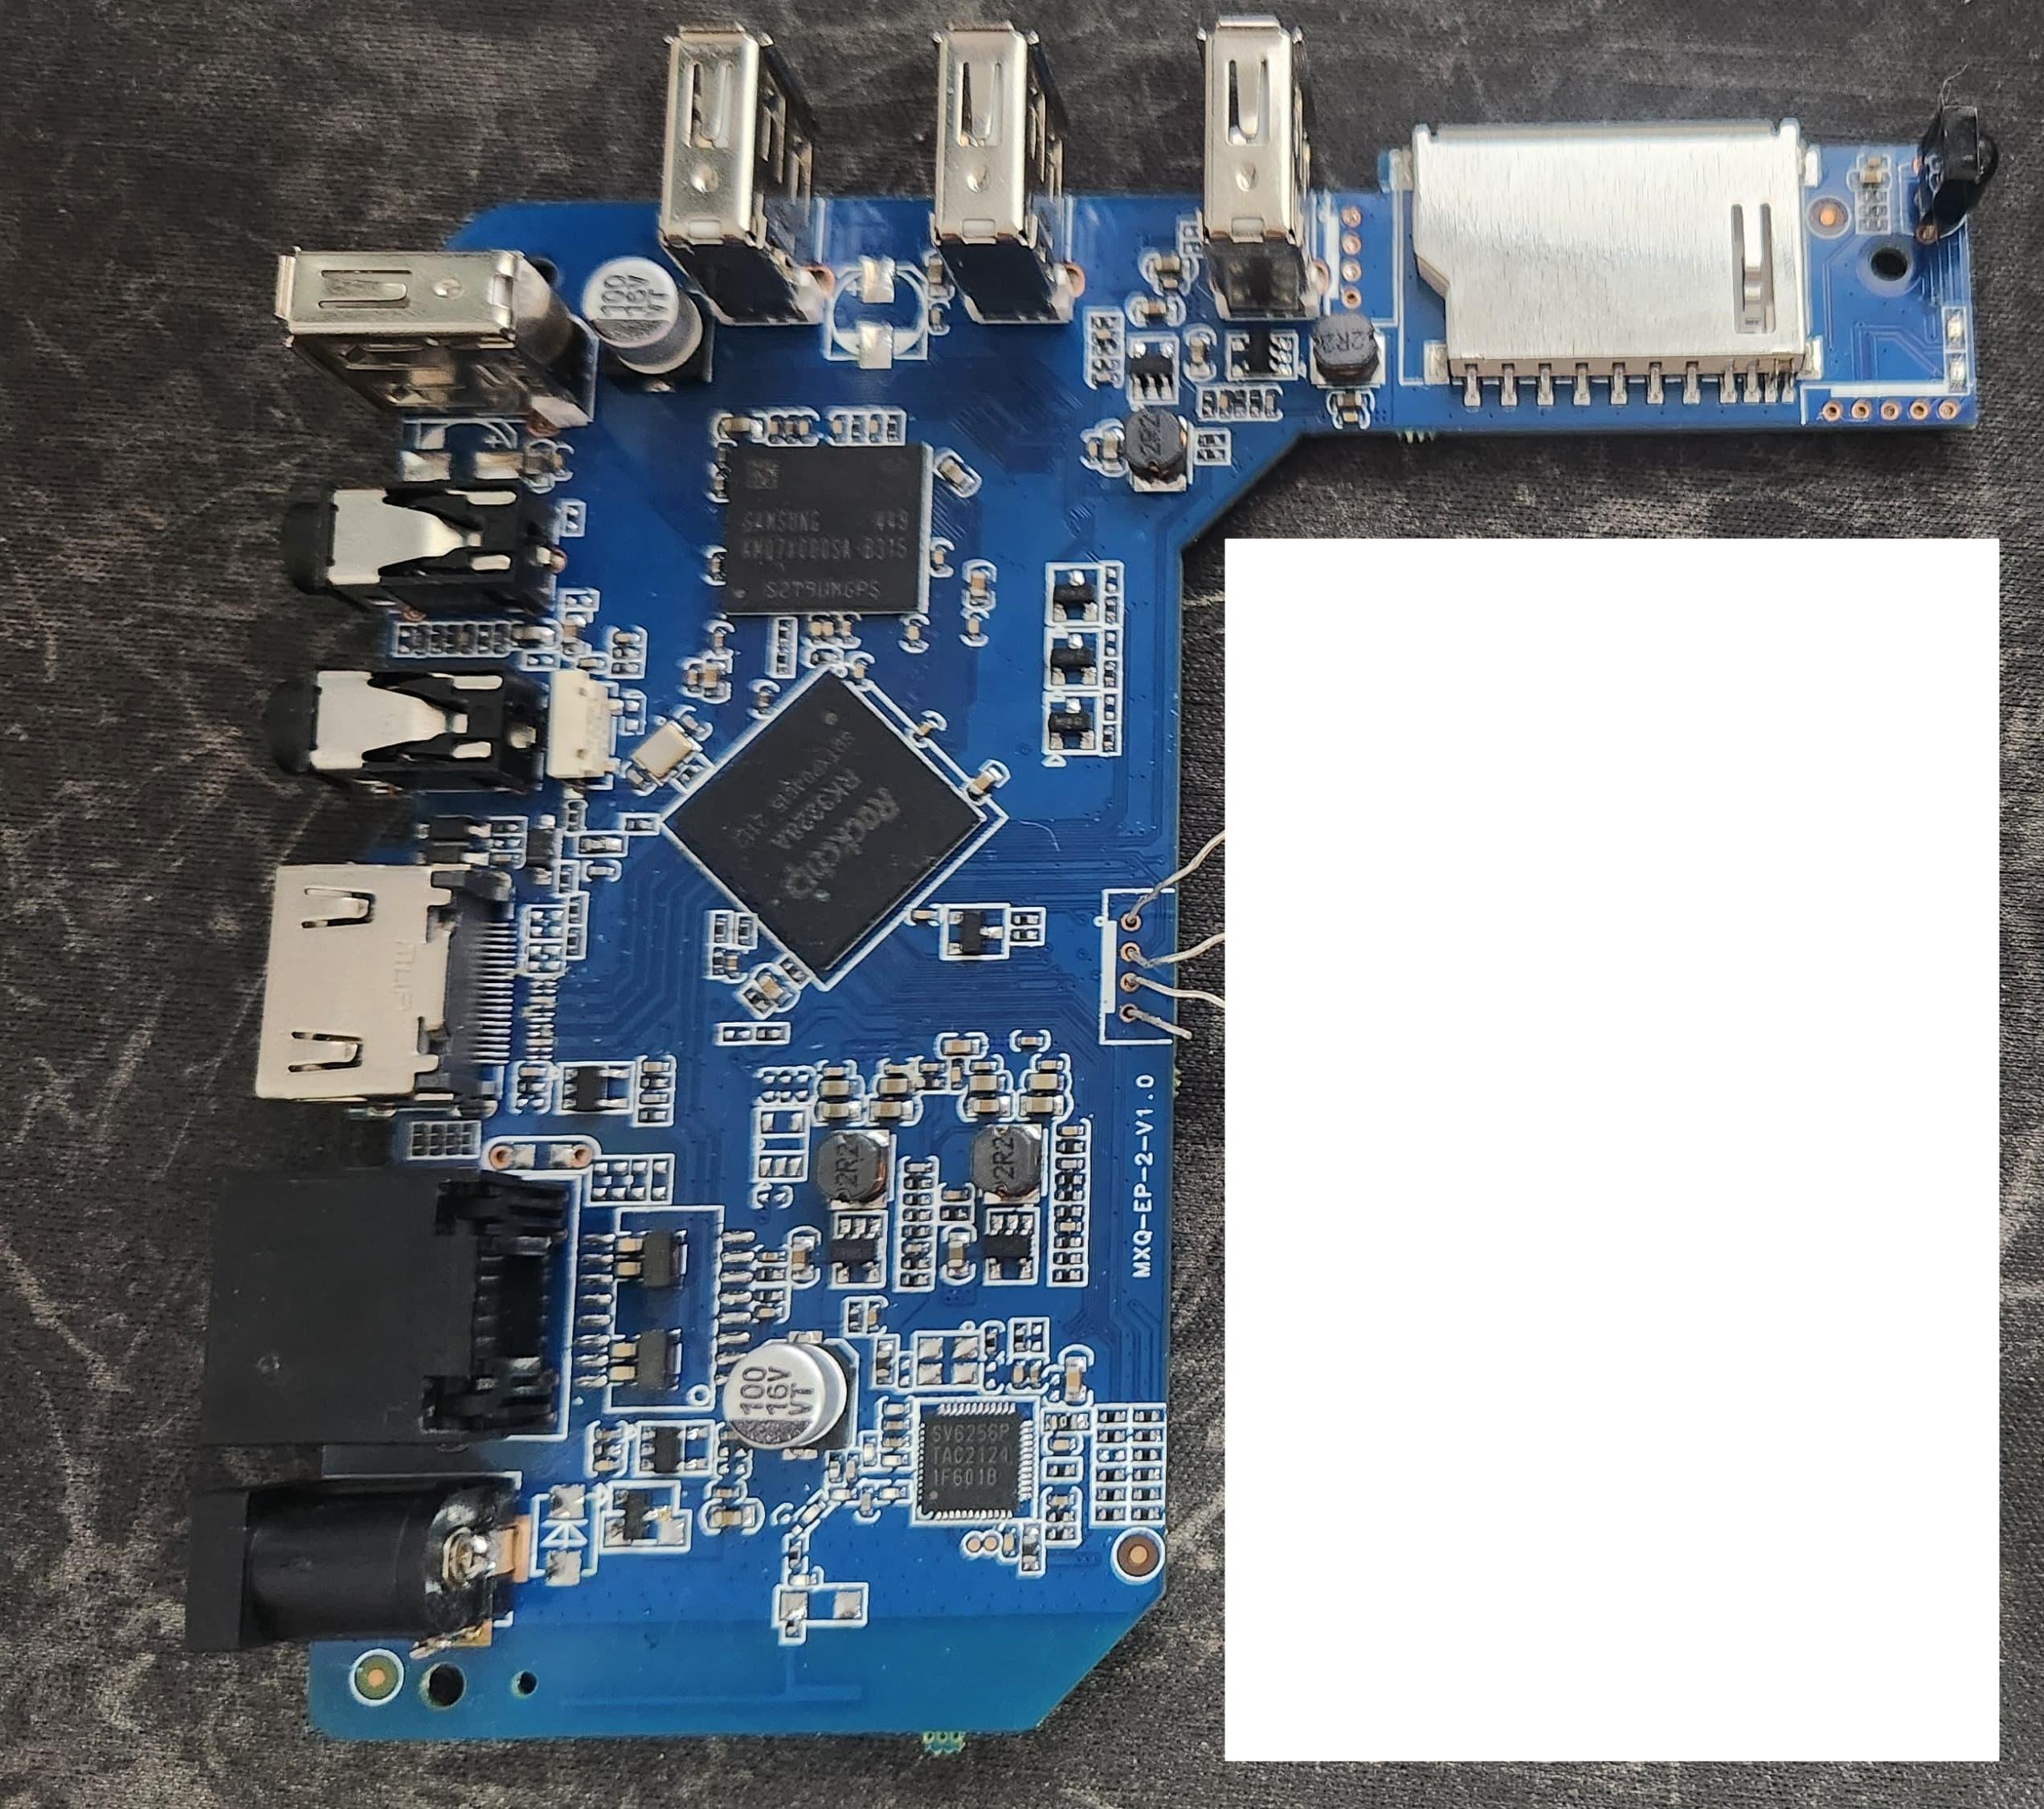
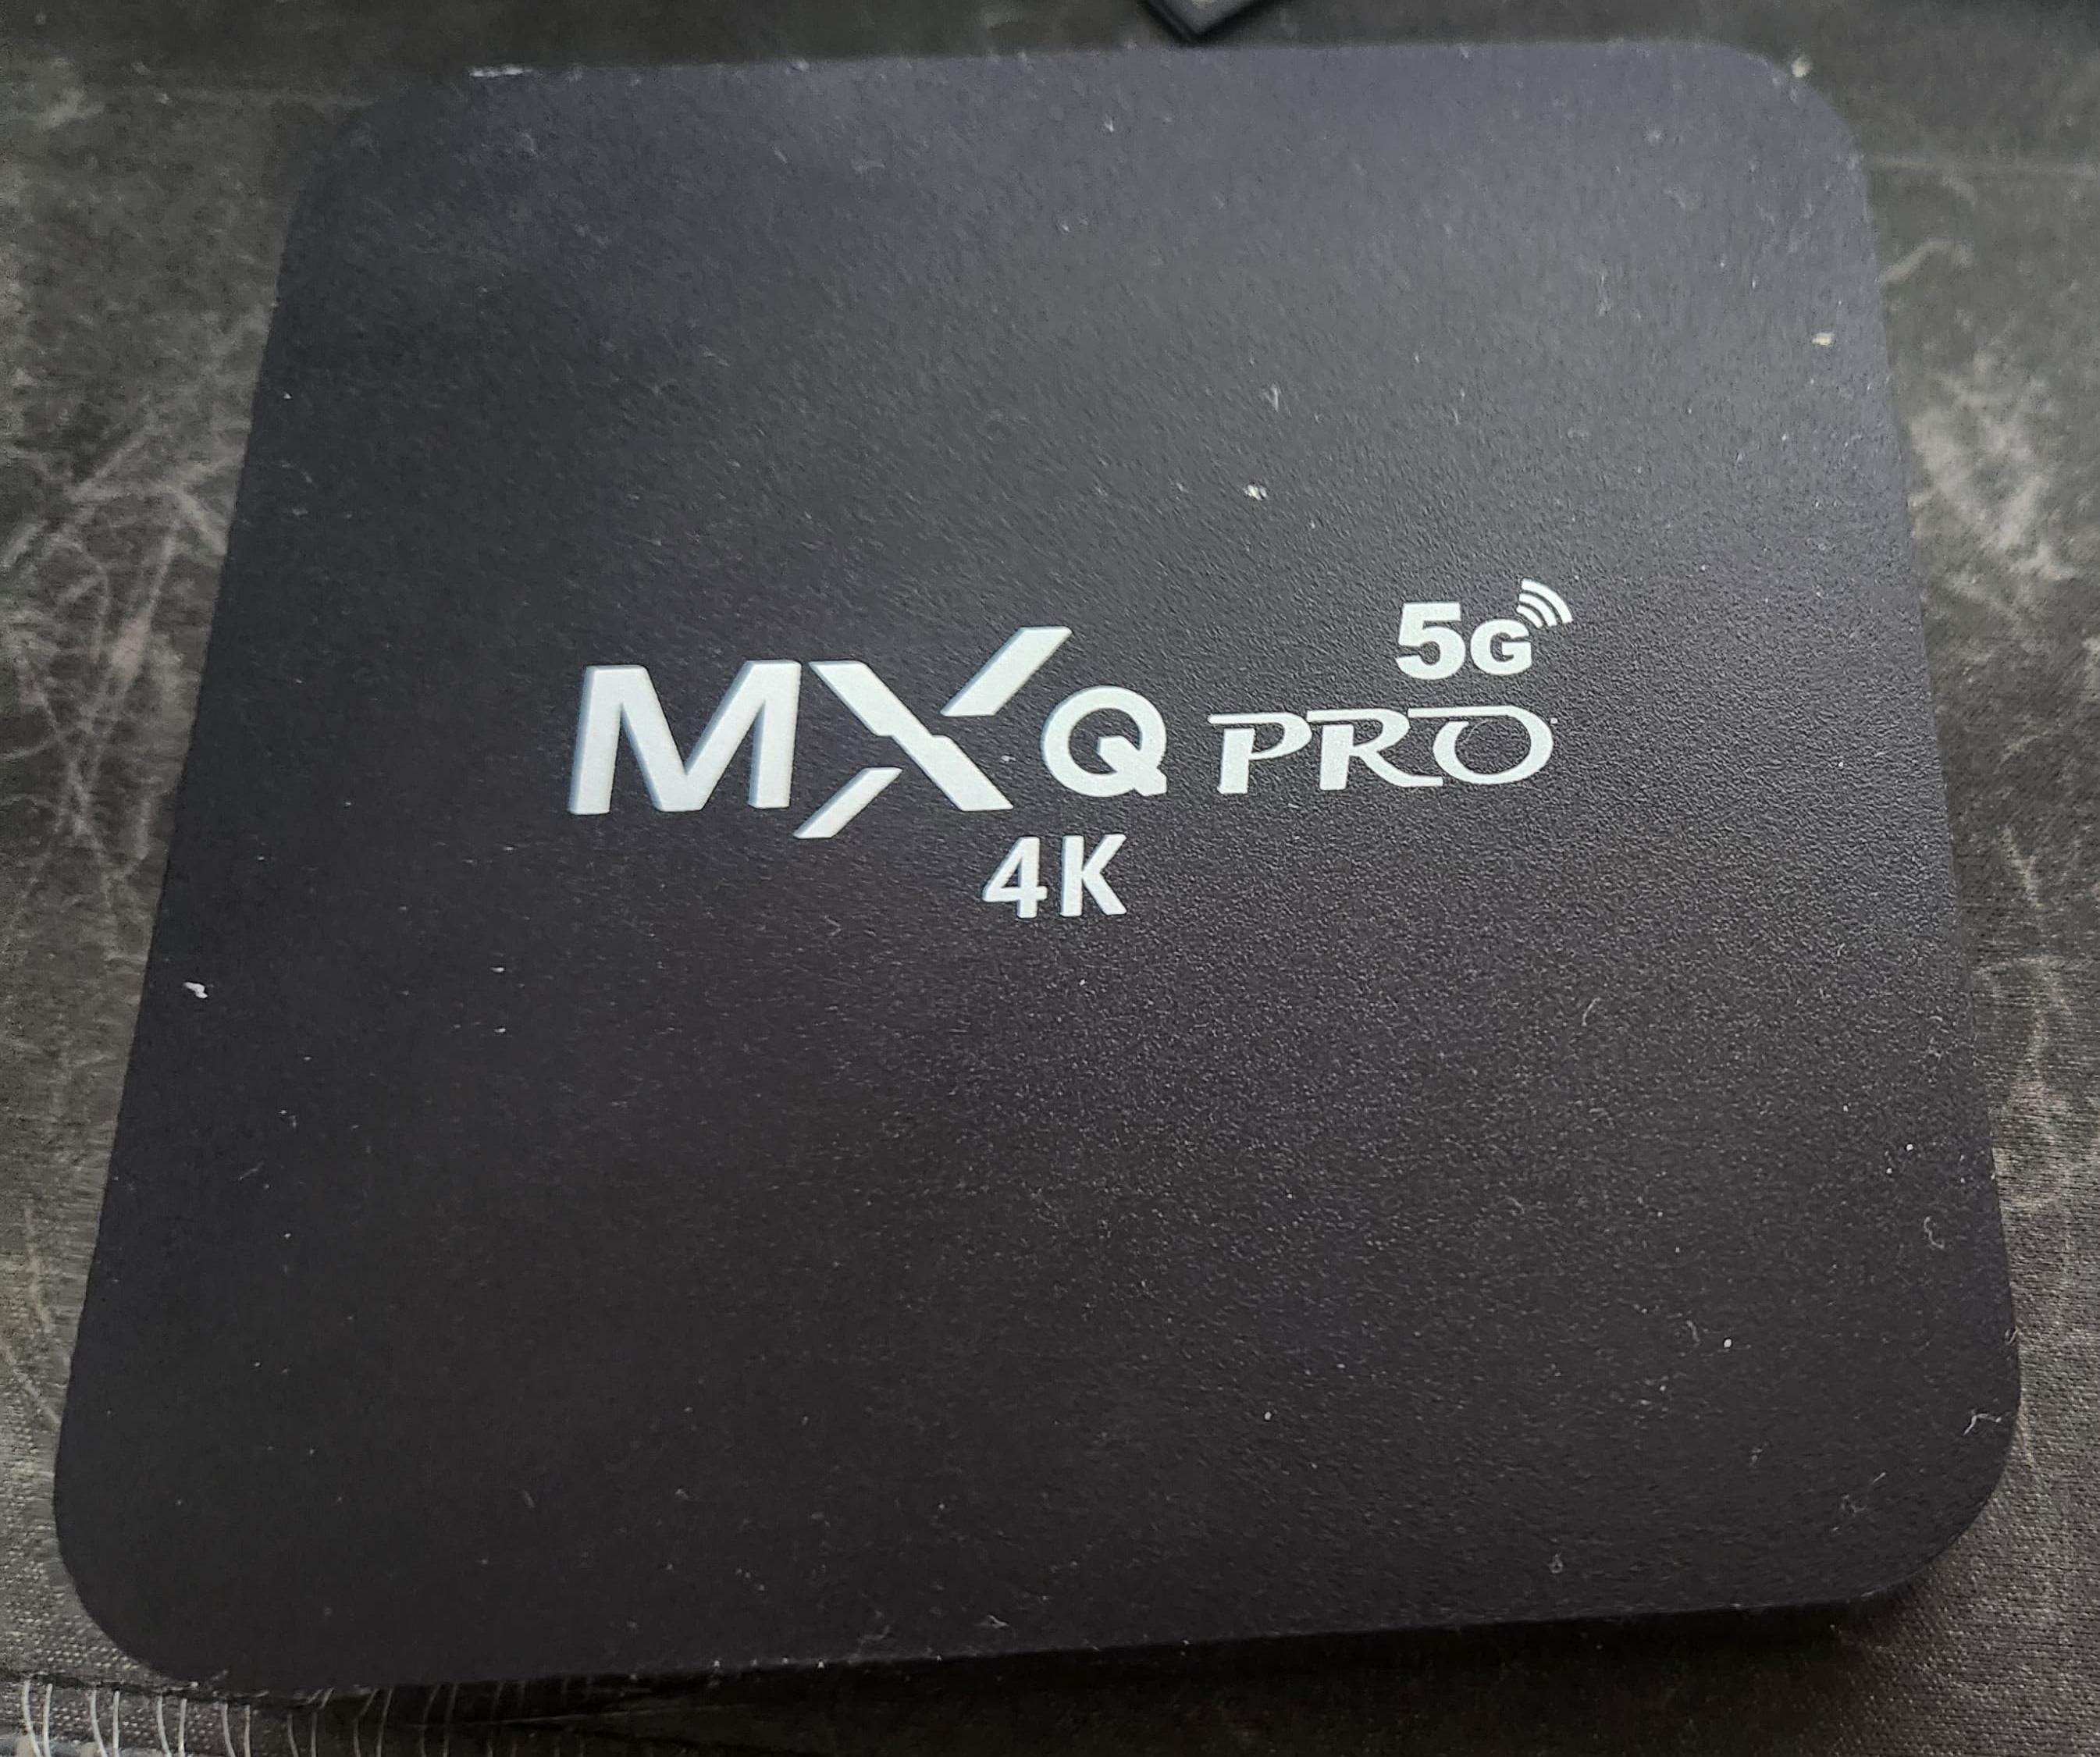
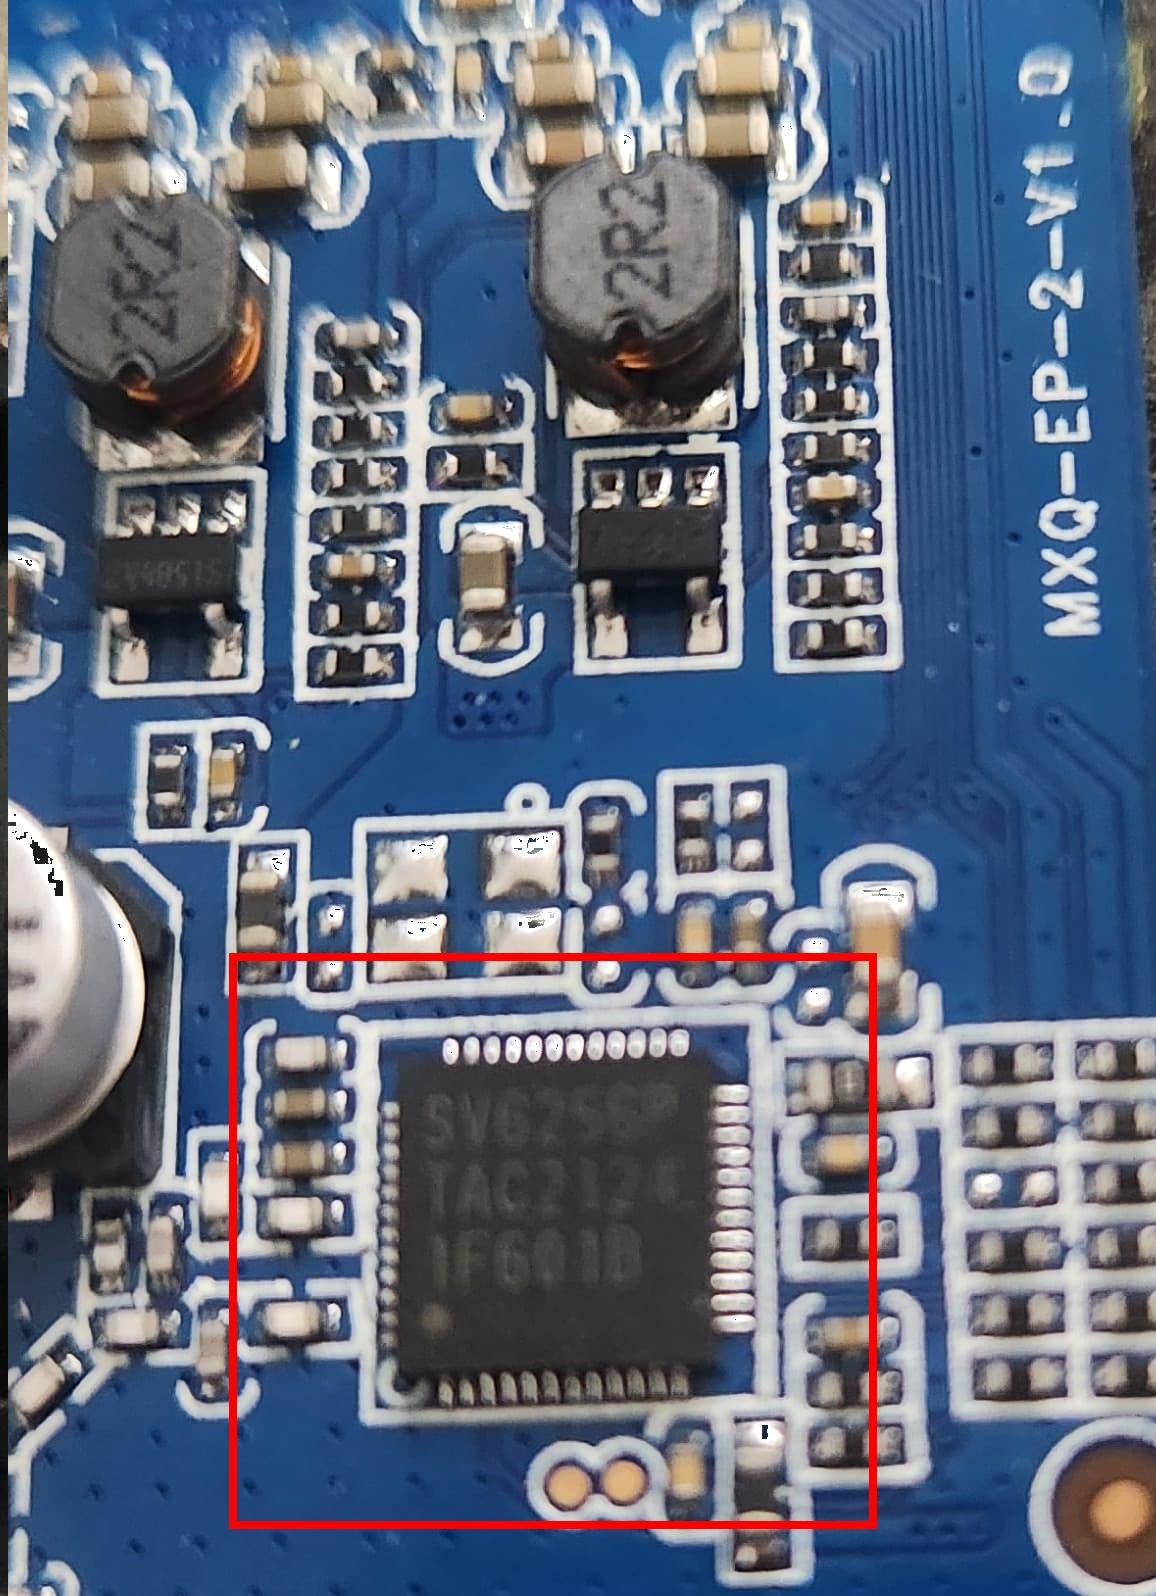
Hello Guys, This will be a long post, so I already apologize for that! I am trying to install armbian in the most generic MXQ PRO 5G 4K ever. No joking when I say it’s generic, because I have some proof that this Frankenstein monster is actually a MX9 and a MXQ 4K PRO merged together. Here are some board Details: MoBo: MXQ-EP-2-V1.0 CPU: Rockchip RK3228A Wifi: SV6256P Storage: Samsung KMQ7X000SA – B315 (Is this a ECMP 8GB+8GB or a emmc?) I call it a MXQ Frankenstein, for the following reasons: According to the info and the picture from this source, the “MX9 4K 5G” has the exactly same MoBo “MXQ-EP-2-V1.0”, but with the SV6152P wifi instead. According to this other forum post, the OP has posted pics from his "TXC2-MXQ-EP-V10” MoBo, which looks basically identical to my “MXQ-EP-2-V1.0”, but it has the SV6152p wifi like the MX9 4K 5G, but with a RK3229 CPU instead. This post was very useful for me because of the Short Pad for Mask Mode for this version is the same as mine. In this other post, we see the same “MXQ-EP-2-V1.0” Mobo, but with with a SanDisk storage chip instead. And in the same post, in the last comment we see another user with a 8GB/128GB variant with the same SV6152p wifi from the above “TXC2-MXQ-EP-V10” So including my version, it seems we have at least 5 different versions of this horrendous Frankenstein device, for the “lowering cost reasons” we already know…. Despite many tentatives, I am not able to make the “multitool” (or amrbian directly) to boot, from any method. Tried many times from SD, from USB and even after it is copied directly to the eMMC, all following the guides from the 1st page from this post, but also from other internet sources. Simply I’ve got a black screen output whenever the SD Card with multitool or armbian in inserted, with no leds turned at all. Unfortunately I have not done the backup from my original ROM before I have tried to write armbian directly to the emmc, because I did not know that was possible back then, and now I’m also not able to find my original ROM. I have tried many (10+) different ROMs, flashing from Linux and Windows, but I ending up having the same behavior as booting armbian, with no Video and no LEDs, until I finally came across to the ROM called “MXQ-EP-2-V1.0_SV6152P_OK By: (Zer013)” from this site. With said ROM, I was able at least to get the HDMI video and LED’s blinking, but I got stuck at a boot animation loop forever. For some reason, only when I flash it from Windows using BatchTool or RKDevTools it works. At least I was able to test different Loaders, and with this ROM, I have tested successfully all the loaders below, either flashing by Linux or Windows. (Remember: The device gave video and LEDs, but I still got stucked at ROM’s boot screen): RK322XMiniLoaderAll_V2.47_spectek_en_ddr2_rd_odt_171209.bin – This was extracted from the above ROM image that give me workin LEDS and HDMI Video rk322x_loader_v1.10.238_256 from a 2020 comment on this thread from a guy trying to overclock his ddr memory. rk322x_loader_v1.10.238_256.bin from first page, from the “Installation (without SD card, board with eMMC)” section I was trying to flash different loaders in hope that some of them would make my armbian to boot from the SD card, but without any luck unfortunately. I have also tried to erase the flash completely to force the SD Card boot, but I have got the same no-screen / no-leds behavior. If anybody has any ideas on how to go further to install armbian in this board, I would appreciate a lot! I don’t need the wifi for the purpose I intend to use it, so minimal installation is more than enough for me. I’ve been turning it on mostly with just the USB cable in the OTG port, so at least I can check the device status with lsusb in linux. Sometimes I do some tests with the power cable turned on, and I have noticed the same behavior as well. Does it make any different to turn it on by USB or Power Connector? I’m still not able to find the Serial UART pins, even after I have tried soldering my USB-TTL in different points of the Board as there is no printed info, so this also adds to the overall complexity. Despite my efforts with the multimeter, I was not able to identify them yet. Since I’m afraid to burn another USB-TLS adapter, I’m being cautious and only using the GND and RX pins from the adapter. So far, I have found 2 interesting pins, but they only give me gibberish text, despite trying different baud rates (I have tried them all). Most promissing PIN for now is the pin labeled “K” in the pic below, as it is the one that gives me more output when the device is booting, almost in the same time as a normal system boot… So my “guess” is that the Pink K is the board TX pin… Attached there are all the photos of the mentioned components from my board.


-
 It loooks like the Panfrost gpu driver is made as a module in the kernel configuration, marked with an M and not *. If I want this module to be built into the kernel, can I change it from M to * to do this? When built as a module, how do I turn it on? Is it in armbian-config (under overlays) or some other place?
 -
Server vs Desktop images
sakittelsen replied to sakittelsen's topic in Software, Applications, Userspace
Thanks, found it. run this command to start building with an extension: ./compile.sh ENABLE_EXTENSIONS=mesa-vpu -
https://docs.armbian.com/Developer-Guide_Build-Switches/ Look for ENABLE_EXTENSIONS
-
Server vs Desktop images
sakittelsen replied to sakittelsen's topic in Software, Applications, Userspace
How do I enable those extensions during the image build? -
Here is an sample implementation of both: https://forum.armbian.com/topic/51915-server-vs-desktop-images/#findComment-218346
-
You can see here what the most important one does: https://github.com/armbian/build/blob/main/extensions/mesa-vpu.sh
-

sleep & wake on same pin for NanoPi Neo v1.4 Armbian-23 6.1.63
dandan7932 replied to dandan7932's topic in Allwinner sunxi
Hey Dandaman46, I managed to kinda hack the functionality i wanted with the wake-up timer and a magnetic hall effect sensor (A3144 or DRV5053) : import os import OPi.GPIO as GPIO from OPi.pin_mappings import sunxi assert sunxi("PG11") == 203 # GPIO-G11 - Wake/Sleep Pin DRV5053 button_wake = "PG11" GPIO.add_event_detect(button_wake, GPIO.RISING, callback=None, bouncetime=200) GPIO.setmode(GPIO.SUNXI) GPIO.setwarnings(False) # disable when production ready.. GPIO.setup(button_wake, GPIO.IN) # PG11 as Sleep/Wake Pin # pull it LOW (magnet away) to wake (needs pull-down resistor?) # pull HIGH (magnet near) to sleep (needs pull-up resistor?) if GPIO.input(button_wake) == GPIO.HIGH: os.system("echo +5 > /sys/class/rtc/rtc0/wakealarm") os.system("echo mem > /sys/power/state") elif GPIO.input(button_wake) == GPIO.LOW: pass -
Yes, that sound right. Now I have to learn how to use backports or ppa ...
-
Server vs Desktop images
sakittelsen replied to sakittelsen's topic in Software, Applications, Userspace
Does this include graphics, like gpu driver, mesa, opengl, vulkan and so on? -
Hm sounds like it all boils down to mesa. Ubuntu Noble has kisak ppa to provide a more current version while Debian can pull more recent mesa packages from backports. mesa-vpu extension should deal with that.
-
Keyboard layout missing
sakittelsen replied to sakittelsen's topic in Software, Applications, Userspace
3000 EUR is a bit steep I'll use armbian+config for now. -
I have problems with gpu drivers. Some builds have Panfrost drivers, and some har software rendering. Often, Ubuntu has Panfrost, but Bookworm has Software. Prebuilt images often have Panfrost, but if I build the same image myself, there is no gpu driver. Learning about overlays, and looks like I have to enable gpu drivers there. I want to use Debian and not Ubuntu, but Ubuntu seens to have better hardware support (audio/video drivers). Not sure if that is just something I "think"
-
Did you also start screen or minicom on the SBC ? For example: screen /dev/ttyS0 115200 And on PC: screen /dev/ttyUSB0 115200 Make sure you use the same speed on both sides.