All Activity
- Today
-
Yes @Nick A. Tried that also. Copilot mentioned this to me: 🟦 If you want to keep fighting this board… I can help you explore: - FEL mode flashing - Using the vendor Android recovery to write eMMC - Dumping the vendor kernel and trying to boot it - Porting the vendor MMC driver (very advanced) But I want to be honest with you: none of these paths are easy, and none guarantee success. Now, I asked it to elaborate on the idea: Let’s unpack this in a way that actually makes sense, Brow — because FEL sounds simple (“just plug in USB and flash it”), but on H618 TV boxes it becomes a whole different beast. I’ll keep it clean, structured, and honest. --- 🟦 Why FEL mode sounds easy On paper, FEL is Allwinner’s built‑in USB recovery mode: - You connect the box to a PC - Press a button or short two pads - The SoC enters FEL - You use sunxi-fel to upload U‑Boot or write eMMC In theory, it’s the “ultimate backdoor” for fixing a broken board. --- 🟥 Why FEL is complicated on your specific device Your Transpeed 8K618‑T is not a dev board. It’s a mass‑produced TV box with: - No FEL button - No exposed pads - No documentation - No schematic - No guarantee the USB port even supports FEL - Vendor boot ROM sometimes disables FEL - USB port may be wired through a hub or switch - Some boxes require opening the case and shorting tiny test pads - Some require holding reset while powering - Some require UART strap pins - Some require a special cable - Some simply do not support FEL at all So the first complication is: You don’t know how to enter FEL on this board. --- 🟥 Second complication: FEL only gives you RAM access FEL lets you: - Upload a U‑Boot binary into RAM - Execute it - Use that U‑Boot to access eMMC But here’s the catch: You must provide a U‑Boot binary that supports your hardware. Mainline U‑Boot does not support: - Your weird SD wiring - Your PMIC - Your DRAM timing - Your eMMC layout - Your HDMI - Your regulators Vendor U‑Boot does, but: - You don’t have the vendor U‑Boot binary - You don’t have the vendor DRAM init code - You don’t have the vendor MMC driver - You don’t have the vendor DTB So even if FEL works, you still need a working U‑Boot image to upload — and we don’t have one. --- 🟥 Third complication: writing eMMC through FEL is slow and fragile Even if you get FEL working and even if you get a working U‑Boot: - Writing eMMC over FEL is extremely slow - If the connection drops, you brick the device - You must manually partition eMMC - You must manually install boot0, boot1, U‑Boot, DTB, rootfs - You must manually fix extlinux.conf - You must manually fix environment variables This is not like flashing a Raspberry Pi. It’s more like doing open‑heart surgery with a butter knife. --- 🟥 Fourth complication: your board’s MMC subsystem is already unstable We’ve already seen: - SD card hangs - MMC controller wedges - Linux freezes on /dev/mmcblk* - Armbian initramfs fails - MiniArch freezes - Vendor kernel is the only thing that works If the MMC hardware is unstable under Linux, it may also be unstable under FEL‑booted U‑Boot. Meaning: Even if FEL works, you might not be able to write eMMC reliably. --- 🟦 So why did I say FEL is complicated? Because on a proper Allwinner dev board, FEL is easy. But on a cheap TV box with undocumented wiring, FEL becomes a puzzle with these problems: | Problem | Why it matters | |--------|----------------| | No FEL button | You don’t know how to enter FEL | | Unknown test pads | You may need to open the board | | Vendor may disable FEL | Some boxes block FEL in BOOT0 | | USB wiring unknown | FEL may not work on the exposed port | | Need vendor U‑Boot | Mainline U‑Boot won’t boot your hardware | | Need vendor DRAM init | Otherwise RAM won’t initialize | | Need vendor MMC driver | Otherwise eMMC won’t be writable | | MMC hardware unstable | Even FEL‑booted U‑Boot may hang | This is why FEL is not a magic fix here. --- 🟩 Could we try FEL anyway? Yes — if you want, I can guide you through: - Checking if FEL is available - Finding the FEL pads - Using sunxi-fel - Dumping BOOT0 - Dumping vendor U‑Boot - Rebuilding a hybrid U‑Boot - Flashing eMMC manually But I want you to understand the reality: It’s a research project, not a guaranteed solution. --- 🟦 If you want to try FEL, I can walk you through step 1 right now Step 1 is simple: Connect the box to your PC via USB‑A to USB‑A cable, then power it on. On your PC, run: ` sunxi-fel version ` If it prints something → FEL works. If it says “no device found” → we need to try hardware tricks. Just tell me if you want to go down this path.
-
Perhaps you need to set the UART baud rate to 115200bps. Original stock firmware and binaries uses 1.5Mbps, armbian bootloader is set to 115200bps for broader compatibility. You should at least get the ddr initialization messages, there are no chances you get no uart output with armbian unless the image is invalid itself.
-
@Harleyyyu, I tried swapping uboot and trust offsets as you suggested. I performed a full erase, injected the parameter, and flashed them at 0x2000 (Trust) and 0x4000 (U-Boot). Here is the log of the process: ./rkdeveloptool ld DevNo=1 Vid=0x2207,Pid=0x320b,LocationID=101 Maskrom ./rkdeveloptool db rk322x_loader_v1.10.238_256.bin Downloading bootloader succeeded. ./rkdeveloptool ef Erasing flash complete. ./rkdeveloptool rfi Flash Info: Manufacturer: SAMSUNG, value=00 Flash Size: 7216 MB Flash Size: 14778368 Sectors Block Size: 512 KB Page Size: 2 KB ECC Bits: 0 Access Time: 40 Flash CS: Flash<0> ./rkdeveloptool ul rk322x_loader_v1.10.238_256.bin Upgrading loader succeeded. ./rkdeveloptool prm parameter.txt Writing parameter succeeded. ./rkdeveloptool ppt **********Partition Info(parameter)********** NO LBA Name 00 00002000 uboot 01 00004000 trust 02 0000A800 resource 03 00012000 kernel 04 00018000 boot 05 00028000 system ./rkdeveloptool wl 0x2000 BBtrust_with_ta_ga4fd2d1.img Write LBA from file (100%) ./rkdeveloptool wl 0x4000 AAuboot_extraido.img Write LBA from file (100%) ./rkdeveloptool wl 0xA800 CCresources-linux.img Write LBA from file (100%) ./rkdeveloptool wl 0x12000 DDkernel.img Write LBA from file (100%) ./rkdeveloptool wl 0x18000 EEboot.img Write LBA from file (100%) ./rkdeveloptool wl 0x28000 FFparticao_linux.ext4 Write LBA from file (100%) ./rkdeveloptool rd Reset Device OK. Resulting Boot Log (Swapped Offsets): Still fails with the signature error. Interestingly, at addr:0x2000, the header now reads 0x4d524150 (ASCII for "PARM"), meaning the Bootrom is seeing the parameter/GPT signature where it expected a loader component. DDR Version V1.10 20190926 In ID:0xFFF 300MHz LPDDR3 Bus Width=32 Col=11 Bank=8 Row=14 CS=1 Die Bus-Width=32 Size=1024MB mach:4 OUT Boot1 Release Time: May 13 2019 17:02:59, version: 2.56 ChipType = 0xc, 421 mmc2:cmd19,100 SdmmcInit=2 0 BootCapSize=2000 UserCapSize=7216MB FwPartOffset=2000 , 2000 SdmmcInit=0 NOT PRESENT StorageInit ok = 163350 SecureMode = 0 SecureInit ret = 0, SecureMode = 0 atags_set_bootdev: ret:(0) GPT 0x63337df8 signature is wrong recovery gpt... GPT 0x63337df8 signature is wrong recovery gpt fail! tag:LOADER error,addr:0x2000 hdr 633377e0 + 0x0:0x4d524150,0x000002f8,0x4d524946,0x45524157, tag:LOADER error,addr:0x4000 hdr 633377e0 + 0x0:0x00,0x00,0x00,0x00,0x00,0x00,0x00,0x00,0x00,57, tag:LOADER error,addr:0x4800 hdr 633377e0 + 0x0:0x00,0x00,0x00,0x00,0x00,0x00,0x00,0x00,0x00,0x00,0x00,0x00,0x00,0x00,0x00x00000000,0x00000000,0x00000000,0x00000000, tag:LOADER error,addr:0x6000 hdr 633377e0 + 0x0:0x00,0x00,0x00,0x00,0x00,ag:LOADER error,addr:0x5800 hdr 633377e0 + 0x0:0x00000000,0x00000000,0x00000000,0x00000000, tag:LOADER error,addr:0x780000000,0x00000000,0x00000000,0x00000000, tag:TOS error,addr:0x6800 hdr 633377e0 + 0x0:0x00,0x00,0x00,0x00,0x00,0x0TOS error,addr:0x6000 hdr 633377e0 + 0x0:0x00000000,0x00000000,0x00000000,0x00000000, tag:TOS error,addr:0x8000 0000,0x00000000,0x00000000,0x00000000, tag:TOS error,addr:0x9000 hdr 633377e0 + 0x0:0x00,0x00,0x00,0x00,0x00,0x00,0x00,0x00,0x00,0x00, UsbHook ...251116 powerOn 772192 @jock, the flash chip is definitely healthy as it was working perfectly with the stock Android firmware yesterday. I am following the guides strictly and initializing with the db command every time. To give you a clear reference, here is what happens when I follow your "Installation without SD card" (flashing the raw image to eMMC) after a full ef (erase flash): ./rkdeveloptool ld DevNo=1 Vid=0x2207,Pid=0x320b,LocationID=101 Maskrom ./rkdeveloptool rd 3 Reset Device failed! ./rkdeveloptool db rk322x_loader_v1.10.238_256.bin Downloading bootloader succeeded. ./rkdeveloptool ef Erasing flash complete. ./rkdeveloptool wl 0x0 Armbian_community_26.2.0-trunk.357_Rk322x-box_forky_current_6.18.7_minimal.img Write LBA from file (100%) Result: Absolute silence. No LED, no UART output. Finally, if I try to boot Multitool from the SD Card after zeroing the internal flash, I get the specific Trust OS freeze I mentioned before. The serial output confirms that TEE-CORE starts but hangs right after: Internal flash zeroing process: ./rkdeveloptool ld DevNo=1 Vid=0x2207,Pid=0x320b,LocationID=101 Maskrom ./rkdeveloptool db rk322x_loader_v1.10.238_256.bin Downloading bootloader succeeded. ./rkdeveloptool ppt Not found any partition table! ./rkdeveloptool ppt Not found any partition table! ./rkdeveloptool ef Erasing flash complete. Result: □□DDR Version V1.11 20200910_dbg In ID:0xFFF 300MHz LPDDR3 Bus Width=32 Col=11 Bank=8 Row=14 CS=1 Die Bus-Width=32 Size=1024MB mach:4 OUT Boot1 Release Time: May 13 2019 17:02:59, version: 2.56 ChipType = 0xc, 423 mmc2:cmd19,100 SdmmcInit=2 0 BootCapSize=2000 UserCapSize=7216MB FwPartOffset=2000 , 2000 mmc0:cmd5,20 SdmmcInit=0 0 BootCapSize=0 UserCapSize=7604MB FwPartOffset=2000 , 0 StorageInit ok = 179763 SecureMode = 0 SecureInit ret = 0, SecureMode = 0 atags_set_bootdev: ret:(0) GPT 0x63337df8 signature is wrong recovery gpt... GPT 0x63337df8 signature is wrong recovery gpt fail! LOADER Check OK! 0x61000000, 290821 TOS Check OK! 0x68400000, 359530 Enter Trust OS INF [0x0] TEE-CORE:init_primary_helper:377: Initializing (1.1.0-333-gc9d95d1 #2 2018年 08月 17日 星期五 03:32:22 UTC arm) INF [0x0] TEE-CORE:init_primary_helper:378: Release version: 2.0 INF [0x0] TEE-CORE:init_primary_helper:379: Next entry point address: 0x61000000 [2accGZ3G��غ��ؾeػؼ The device is identified as SAMSUNG by the loader, but it's physically a Kingston eMCP (O8EMCP08). Could this manufacturer ID mismatch be causing the Trust OS to misconfigure the RAM timings and freeze? Is there a patched loader or a specific trust.img for these Kingston eMCP variants?
-
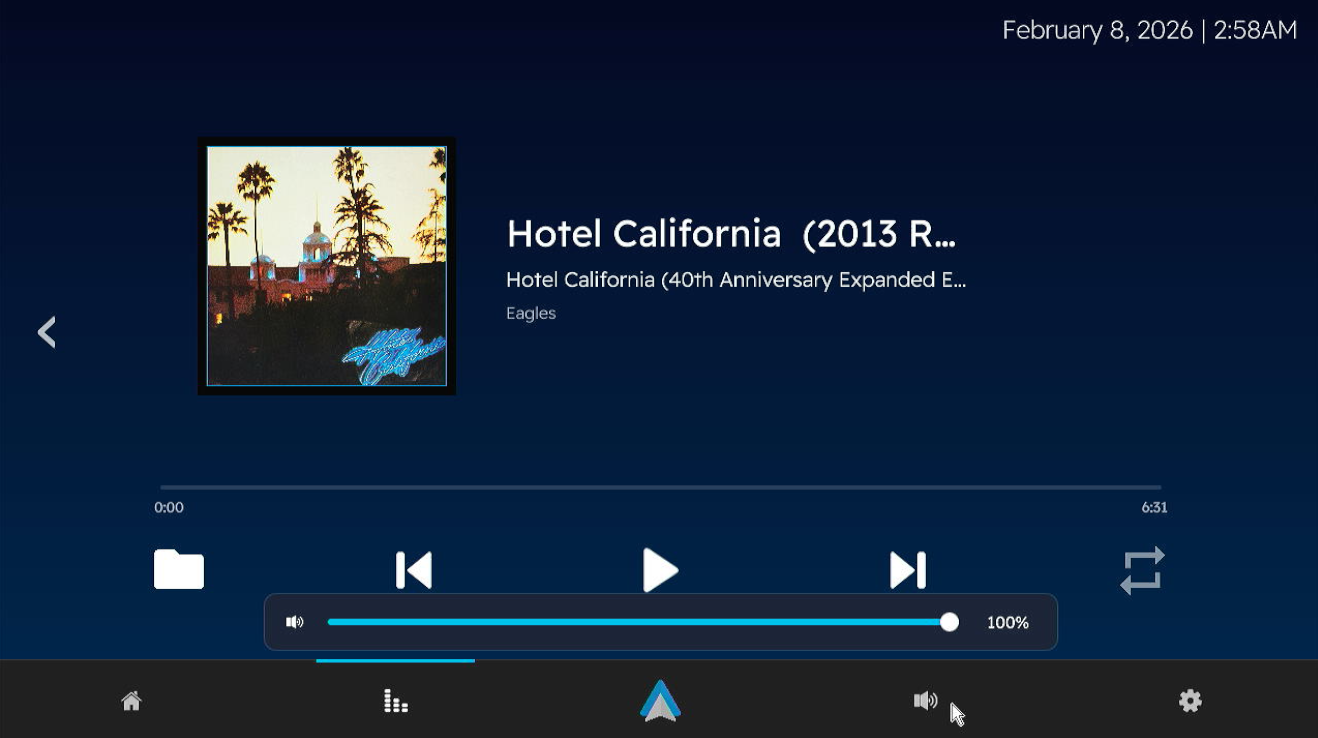
 Version 3.1.0 Has been released! I won't be going into details like last time, this build also includes the fixes for "known issues" from version 3 Alpha build. Bugs Found? Open a ticket in https://github.com/Harleythetech/openauto-rk3229-armbian/issues Download: Github: OpenAuto RK322x - oark322x-3.1.0-beta


-
@Bones558 I made custom u-boot to fix the boot splash but so far it only works on mico-HDMI.
-
Two addons: I compiled on another notebook and stumbled over a RAM error message from Armbian compile.sh. Notebook has 8GB, so I added the recommended KERNEL_BTF=no to the ./compile.sh args. A dkms status says, the bcmdhd is built and active. Also, I started an experient to port the Spacemit PVR code drop (GPU) mentioned earlier. This is really untested, but at least builds on my board: https://codeberg.org/sven-ola/mesa-spacemit-k1/releases. Now trying to spice up some cinnamon, but may need a cooking recipe for the binary shared libs...
-
@maxsub: I have not really analyzed Armbian build caching until now. Maybe a previous build for another spacemit board prevents the DKMS from being included? Anyhow, re-installing / updating a kernel image should trigger any active DKMS modules to rebuild for the new kernel on the board, so this looks correct. LG // Sven-Ola
-
The bcmdhd dkms is getting built and the debs are being updated if I use SKIP_ARMBIAN_REPO=yes. [🐳|🔨] Building for 6.18.9-edge-spacemit [🐳|🔨] [🐳|🔨] Building initial module bcmdhd-spacemit-sdio/101.10.591.84.37-4 for 6.18.9-edge-spacemit [🐳|🔨] The kernel is built without module signing facility, modules won't be signed [🐳|🔨] [🐳|🔨] Building module(s)............................... done. [🐳|🔨] Installing /lib/modules/6.18.9-edge-spacemit/updates/dkms/bcmdhd.ko.xz [🐳|🔨] Installing /lib/modules/6.18.9-edge-spacemit/updates/dkms/dhd_static_buf.ko.xz [🐳|🔨] Running depmod.... done. [🐳|🔨] Processing triggers for man-db (2.13.1-1) ... When installing the image deb the previous dkms gets deleted. Preparing to unpack linux-image-edge-spacemit_26.02.0-trunk_riscv64__6.18.9-S3aec-D0000-P87b2-C50afHfe35-HK01ba-Vc222-B052a-R448a.deb ... Armbian 'linux-image-edge-spacemit' for '6.18.9-edge-spacemit': 'prerm' starting. dkms: removing module bcmdhd-spacemit-sdio/101.10.591.84.37-4 for kernel 6.18.9-edge-spacemit (riscv64) Module bcmdhd-spacemit-sdio/101.10.591.84.37-4 for kernel 6.18.9-edge-spacemit (riscv64): Before uninstall, this module version was ACTIVE on this kernel. Deleting /lib/modules/6.18.9-edge-spacemit/updates/dkms/bcmdhd.ko.xz Deleting /lib/modules/6.18.9-edge-spacemit/updates/dkms/dhd_static_buf.ko.xz ......... It gets built during install of the image deb: Autoinstall of module bcmdhd-spacemit-sdio/101.10.591.84.37-4 for kernel 6.18.9-edge-spacemit (riscv64) Building module(s).............................................. Installing /lib/modules/6.18.9-edge-spacemit/updates/dkms/bcmdhd.ko.xz Installing /lib/modules/6.18.9-edge-spacemit/updates/dkms/dhd_static_buf.ko.xz Running depmod.....
-
@marcosdsdba Can you take a picture or just tell us the Wi-Fi chip you have on your board?
-
@Rodrigo Campos The 20251226 build uses a newer kernel, but audio through the A/V out port is currently broken. I haven't had time to fix it yet, so if you don't need that port, feel free to use this version.
-
If you can pull the factory DTB from that board that would be great. I need it to get Wifi working
-
Hi dear @Nick A, I need your help to understand the branch to use in your repository, the main one is 20250306, but there are several branches that looks like more recent, like 20251226. May you explains what is more recent/better to use for an Transpeed M98?
-

Super console cube X3 seems can't boot.
gnutux landia replied to gnutux landia's topic in Amlogic CPU Boxes
I buy a different USB uart Usbuart Maybe I can do what you suggest. I need to wait to the item arrives at my home. When It arrives I post here to the device read uart method. -
@sven-ola The dkms did not get installed by the build. I manually installed it and the wifi works. I am trying the build with SKIP_ARMBIAN_REPO now as I did not have that before.
-
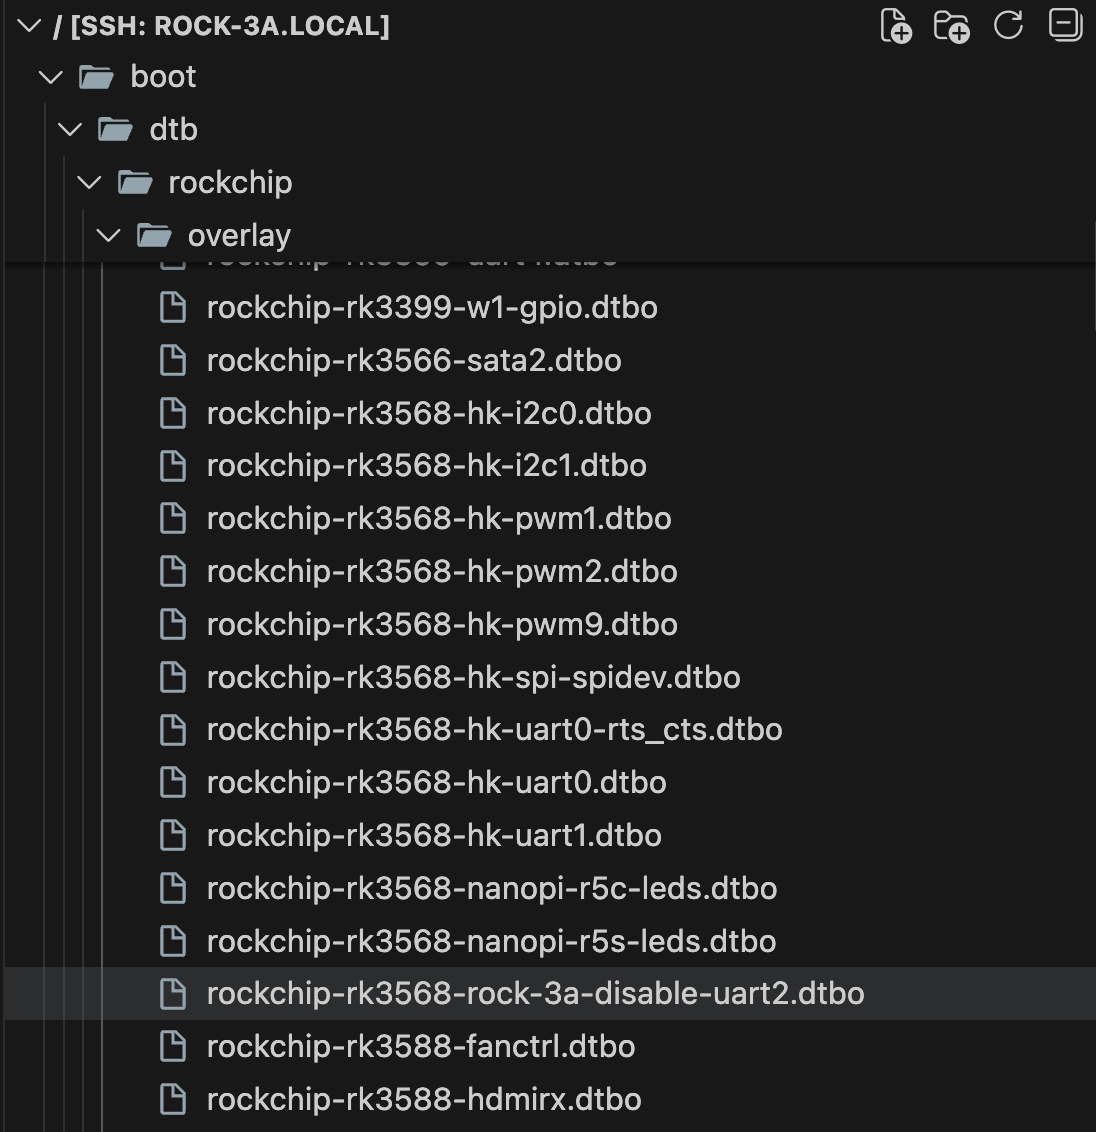
I am trying to setup Raxda Display 8 HD with Radxa ROCK 3A. On official Radxa OS, I used Rsetup tool to setup overlay for `Radxa Display 8 HD' using official guide. How can I do same on Dedicated applications images with Armbian Linux v6.12 ( Home Assistant ) ? I have read Device Tree overlays guide on armbian docs but I can't find overlay for lcd display in files:

-
Thank you! That worked like a charm
-
@Robin Hoo I don't have UFS so I can't test it. But I think if you add enable_extension "ufs" to https://raw.githubusercontent.com/NickAlilovic/build/refs/heads/Radxa-A7A/config/boards/radxa-cubie-a7a.csc it might work. git clone https://github.com/NickAlilovic/build.git --branch Radxa-A7A cd build echo 'enable_extension "ufs" ' >> config/boards/radxa-cubie-a7a.csc or echo 'enable_extension "ufs" ' >> config/boards/radxa-cubie-a7z.csc ./compile.sh
-
Tried this? https://gist.github.com/c0m4r/b3fea6342bcf5a1b25b608fc36100d68#pwm-fan-control Ie: download the script and systemd service, edit the script to your liking (or try default) and activate the service. As default It configures to user_space and checks temps every 10s. https://raw.githubusercontent.com/c0m4r/radxa_rock5c_lite/refs/heads/main/usr/local/bin/rock5c_fan_pwm ########################################################## # Radxa Rock 5C fan PWM control script # Author: https:///github.com/c0m4r # License: Public Domain ########################################################## # PWM control path PWM_PATH="/sys/devices/platform/pwm-fan/hwmon" # Configuration INTERVAL=10 # Temperature check interval (seconds) FAN_OFF=1 # 1 = turn off fan below MIN_TEMP after cooldown, 0 = keep at min RPM COOLDOWN=300 # time to wait before turning off the fan when FAN_OFF=1 # Critical temp protection POWEROFF_ON_CRIT=1 # 1 = shutdown when the temperature reaches a critical value, 0 = disable CRITICAL_TEMP=70 # Critical temperature (shutdown) # PWM Values (proper) SAFE_PWM_MIN=105 # Safe minimum PWM to keep fan spinning PWM_LOW=125 # 45–50°C (~50% speed) PWM_MID=165 # 50–55°C (~65% speed) PWM_HIGH=200 # 55–60°C (~80% speed) PWM_MAX=255 # >60°C (100% speed) # PWM Values (temporary - use these instead of proper if the fan spins at max all the time) #SAFE_PWM_MIN=50 # Safe minimum PWM to keep fan spinning #PWM_LOW=60 # 45–50°C (~50% speed) #PWM_MID=70 # 50–55°C (~65% speed) #PWM_HIGH=80 # 55–60°C (~80% speed) #PWM_MAX=255 # >60°C (100% speed) # Constants (requires also changes in code) MIN_TEMP=47 # Minimum temperature (PWM_MIN) MAX_TEMP=60 # Maximum temperature (PWM_MAX) # Set thermal policy thermal_zones=$(ls -1 /sys/class/thermal | grep thermal_zone) if [[ "$thermal_zones" ]]; then for i in /sys/class/thermal/thermal_zone*/policy ; do echo "user_space" > "$i" done else echo "No sensors found, check kernel support, setting fan to high for now!" echo $PWM_HIGH > ${PWM_PATH}/hwmon*/pwm1 exit 1 fi # Set PWM_MIN based on FAN_OFF mode if [ "$FAN_OFF" -eq 1 ]; then PWM_MIN=0 # Allow fan to turn off after cooldown else PWM_MIN=$SAFE_PWM_MIN # Keep fan at minimal safe RPM all the time fi # Validate PWM path if [ ! -d "$PWM_PATH" ]; then echo "Error: PWM control file not found: $PWM_PATH" exit 1 fi # Initialize variables current_pwm=$(cat ${PWM_PATH}/hwmon*/pwm1) # Start at current PWM last_high_temp_time=0 # Track last high temp for cooldown echo "Initializing fan at PWM $current_pwm" echo "$current_pwm" > ${PWM_PATH}/hwmon*/pwm1 # Main loop while true; do for i in /sys/class/thermal/thermal_zone*/policy ; do echo "user_space" > "$i" done <snip>
-

CSC Armbian for RK3318/RK3328 TV box boards
SuzSinclair replied to jock's topic in Rockchip CPU Boxes
Thanks for the feedback , i have finally downloaded this version and burn into sd card , put in sd card then reconnect power, the system normal boot i cant see armbian screen, the blue light is on, and nothing on screen or dark screen can someone point me please what is happening.
-
 The drm_prime error is somehow "normal": AFAIR mpv was trying each hardware decoder in turn and, if it does not support the codec, prints the error and tries the next hardware decoder in line. If you try to decode h.265, perhaps it first picks an hardware decoder which does not support such codec with such parameters and prints the error, then tries another decoder which is capable and everything works. Usually rockchip devices have two hardware decoders, Hantro and rkvdec; Hantro does not support h.265 at all on older chips, but rkvdec does.
 -
@ArturHey you did a lot of experimentation, but actually I think you are stuck on something different. GPT partition error message is something you can totally ignore, either because stock firmware usually don't provide a GPT partition, and armbian images neither do. The rockchip miniloader supports GPT partition table, but it is not mandatory to work. If there's a GPT partition, the miniloader searches for "uboot" and "trust" partitions to use them as hints for the base addresses. If there's no GPT partition, it will just use default base addresses and look for the LOADER and TRUST signatures. Anyway, armbian does not use anything from that: there is no rockchip miniloader, neither are GPT partitions or other proprietary code, except for the Trust OS, which is embedded into u-boot. The boot process is totally different on armbian. Now, the issue you have with flash not being recognized by rkdeveloptool makes me think about three possibile situations: a bug in rkdeveloptool you are still in maskrom mode and did not upload the usbplug firmware with rkdeveloptool db (ie: the board is not yet initialized) a broken flash in the eMCP part You can, for example, refer to the procedure Installation (without SD card, board with eMMC) described in the first post of this thread if you want to write a raw image in the flash memory but I always suggest to erase the flash memory and test the image via sdcard first, rather than installing the image immediately, because you can softbrick the board. About the non-booting multitool, you should post some logs from the serial uart, but probably the main issue is related to the trust os which freezes the board after few seconds.
-
I now found a workaround, basically adding the following to the top of /boot/boot.cmd setenv usbstoragequirks "0x2537:0x1066:u,0x2537:0x1068:u" and running mkimage -C none -A arm -T script -d /boot/boot.cmd /boot/boot.scr (as shown at the bottom of /boot/boot.cmd However this is not sustainable, and it would still be preferable if the inclusion of armbianEnv.txt could be fixed, ESPECIALLY considering that the download page https://www.armbian.com/odroid-n2/ gives the following (useless due to this issue) advise: On modern kernels adding “video=HDMI-A-1:1920x1080M@60D” to boot /boot/armbianEnv.txt (extraargs=) should force HDMI to 1080p instead of the 4K native resolution.
-
Probably because nobody had use for those until today. Feel free to send a PR adding whats missing.
-
 https://www.armbian.com/download/ https://github.com/armbian/os/releases https://github.com/armbian/community/releases
 -
 Hey, Where can I find the latest images for the Odroid HC1 and ZeroPi? https://www.armbian.com/odroid-xu4/ https://www.armbian.com/zero-pi/ I understand that both SBCs are quite old and probably long forgotten by Armbian users, but I need a clean install on both and am looking for the latest existing images. I tried looking at https://armbian.lv.auroradev.org/archive, but it seems not everything is there. Thanks in advance for any help. PS Anyone still using these SBCs? Are there any alternatives in 2026 at reasonable prices?