


Marko Buršič
-
Posts
60 -
Joined
-
Last visited
Content Type
Forums
Store
Crowdfunding
Applications
Events
Raffles
Community Map
Posts posted by Marko Buršič
-
-
After some tests I have found out that this works OK with a kernel that has the ds1307 enabled as default in .config . Currently 5.4.44-rockchip64 has this rtc enabled by default (it is back again, thankfully) and it compiled as module, rk808 is compiled as device. When using above mentined .dtbo the system recognises the ds1307 at boot and then it links as /dev/rtc0, so no kernel built from trunk is needed anymore.
-
Thank you @martinayotte, you saved me days of pain. The problem was that single line, while editing in putty terminal window, the numeric keypad doesn't work properly, so I have messed the file by myself.
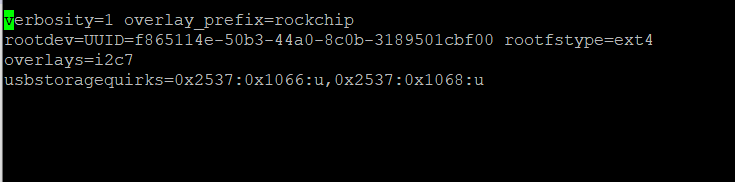
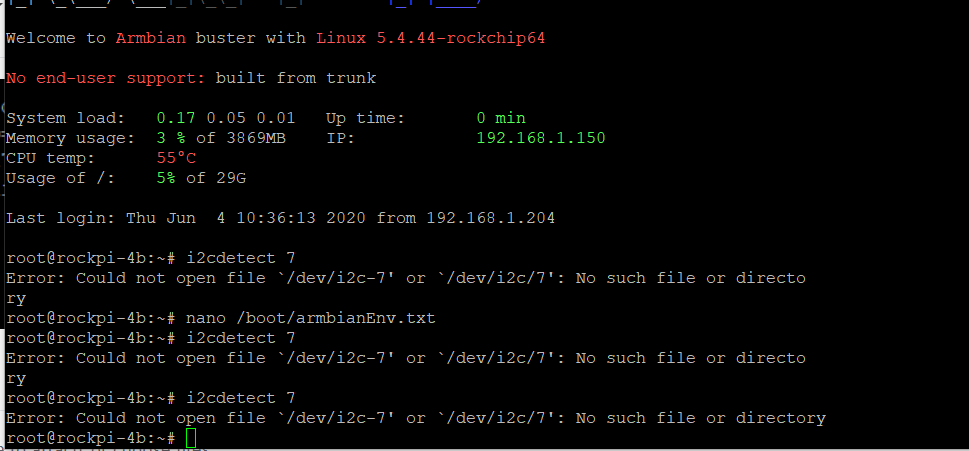
I find difficult to debug my .dtbo file, something is not accepted and it is reverted back, so overlays do work now just until I add my .dtbo. Does this verbosity setting may help to adjust the debug level while booting? I can't see any debug text of the overlay sequence, so I don't know where exactly goes wrong.
-
10 hours ago, Igor said:
You mean changes does not affect on the build resoult?Yes. I can change the configuration, uncheck media drivers, uncheck feildbus drivers, ....an so many drivers, but I got everything built. For now, I do think I will leave as it is, since the new armbian+ new kernel boots only in 15s compared to previous armbian version it took more than 200s.
-
This overlays settings worked well until I have compiled my own .dtbo file and call it with overlay=..xyz... , after that all yet working overlays stopped working, even if I removed them. The boot process now skips this overlay settings.
After examination, I have found file "/boot/boot.scr" and "/boot/dtb-5.4.44-rockchip64/rockchip/overlay/rockchip-fixup.scr" had some garbage characters at beginning. I didn't change anything, neither I did open them before, those files simply got garbage.
After deleting the garbage chars, it won't boot anymore. Before I had tried also spi-spidev and spi-nor
-
-
Thank you. I was struggling to find the solution by myself (before your post), so I ended with this (if I remember correctly):
git clone https://github.com/armbian/build --branch v20.05The version v20.05.2 was installed. I hope it is the same as your way (still learning). A strange thing now is that I wanted to remove lots of useless drivers, then I did a kernel configuration, deselected many options, what I got is that almost every driver is now compiled and loaded. I will try again tomorrow, ...never ending story.
-
Ok, but how should I install it? I did
git clone https://github.com/armbian/buildShould I use
git clone https://github.com/armbian/build/tree/v20.05instead?
-
@piter75 The funny thing is that now the Armbian version is 20.08, but Release versions say it should come only in August???
-
-
Hi,
I don't have an idea why it stucks. Armbian_20.05.0-trunk_Rockpi-4b_buster_current_5.4.43
EDIT:
I have downloaded the pre-build image Armbian_20.05.1_Rockpi-4b_buster_current_5.4.43 and it works. It boots at an astonishing speed, only 18 sec which is a miracle. How can I build the same kernel? Is sufficient to copy just a .config file?
T T DDR Version 1.13 20180801
In
Channel 0: LPDDR4,50MHz
CS = 0
MR0=0x98
MR4=0x3
MR5=0xFF
MR8=0x8
MR12=0x4D
MR14=0x4D
MR18=0x0
MR19=0x0
MR24=0x8
MR25=0x0
CS = 1
MR0=0x18
MR4=0x2
MR5=0xFF
MR8=0x8
MR12=0x4D
MR14=0x4D
MR18=0x0
MR19=0x0
MR24=0x8
MR25=0x0
Bus Width=32 Col=10 Bank=8 Row=15/15 CS=2 Die Bus-Width=16 Size=2048MB
Channel 1: LPDDR4,50MHz
CS = 0
MR0=0x98
MR4=0x2
MR5=0xFF
MR8=0x8
MR12=0x4D
MR14=0x4D
MR18=0x0
MR19=0x0
MR24=0x8
MR25=0x0
CS = 1
MR0=0x18
MR4=0x2
MR5=0xFF
MR8=0x8
MR12=0x4D
MR14=0x4D
MR18=0x0
MR19=0x0
MR24=0x8
MR25=0x0
Bus Width=32 Col=10 Bank=8 Row=15/15 CS=2 Die Bus-Width=16 Size=2048MB
256B stride
channel 0
CS = 0
MR0=0x98
MR4=0x3
MR5=0xFF
MR8=0x8
MR12=0x72
MR14=0x72
MR18=0x0
MR19=0x0
MR24=0x8
MR25=0x0
CS = 1
MR0=0x18
MR4=0x2
MR5=0xFF
MR8=0x8
MR12=0x72
MR14=0x72
MR18=0x0
MR19=0x0
MR24=0x8
MR25=0x0
channel 1
CS = 0
MR0=0x98
MR4=0x2
MR5=0xFF
MR8=0x8
MR12=0x72
MR14=0x72
MR18=0x0
MR19=0x0
MR24=0x8
MR25=0x0
CS = 1
MR0=0x18
MR4=0x2
MR5=0xFF
MR8=0x8
MR12=0x72
MR14=0x72
MR18=0x0
MR19=0x0
MR24=0x8
MR25=0x0
channel 0 training pass!
channel 1 training pass!
change freq to 400MHz 0,1
channel 0
CS = 0
MR0=0x98
MR4=0x82
MR5=0xFF
MR8=0x8
MR12=0x72
MR14=0x72
MR18=0x0
MR19=0x0
MR24=0x8
MR25=0x0
CS = 1
MR0=0x18
MR4=0x2
MR5=0xFF
MR8=0x8
MR12=0x72
MR14=0x72
MR18=0x0
MR19=0x0
MR24=0x8
MR25=0x0
channel 1
CS = 0
MR0=0x98
MR4=0x2
MR5=0xFF
MR8=0x8
MR12=0x72
MR14=0x72
MR18=0x0
MR19=0x0
MR24=0x8
MR25=0x0
CS = 1
MR0=0x18
MR4=0x2
MR5=0xFF
MR8=0x8
MR12=0x72
MR14=0x72
MR18=0x0
MR19=0x0
MR24=0x8
MR25=0x0
channel 0 training pass!
channel 1 training pass!
change freq to 800MHz 1,0
ch 0 ddrconfig = 0x101, ddrsize = 0x2020
ch 1 ddrconfig = 0x101, ddrsize = 0x2020
pmugrf_os_reg[2] = 0x3AA1FAA1, stride = 0xD
OUT
U-Boot SPL board init

U-Boot SPL 2017.09-armbian (Jun 01 2020 - 06:46:11)
Trying to boot from MMC2
Card did not respond to voltage select!
mmc_init: -95, time 10
spl: mmc init failed with error: -95
Trying to boot from MMC1
NOTICE:  BL31: v1.3(debug):65aa5ce
NOTICE:  BL31: Built : 10:47:37, Jun 19 2018
NOTICE:  BL31: Rockchip release version: v1.1
INFO:    GICv3 with legacy support detected. ARM GICV3 driver initialized in EL3
INFO:    Using opteed sec cpu_context!
INFO:    boot cpu mask: 0
INFO:    plat_rockchip_pmu_init(1151): pd status 3e
INFO:    BL31: Initializing runtime services
WARNING: No OPTEE provided by BL2 boot loader, Booting device without OPTEE initialization. SMC`s destined for OPTEE will return SMC_UNK
ERROR:   Error initializing runtime service opteed_fast
INFO:    BL31: Preparing for EL3 exit to normal world
INFO:    Entry point address = 0x200000
INFO:    SPSR = 0x3c9


U-Boot 2017.09-armbian (Jun 01 2020 - 06:46:11 +0000)

Model: Radxa ROCK Pi 4
DRAM:  3.9 GiB
DCDC_REG1@vdd_center: ; enabling
DCDC_REG2@vdd_cpu_l: ; enabling
DCDC_REG3@vcc_ddr: ; enabling (ret: -38)
DCDC_REG4@vcc_1v8: set 1800000 uV; enabling
LDO_REG1@vcc1v8_dvp: set 1800000 uV; enabling
LDO_REG2@vcc3v0_touch: set 3000000 uV; enabling
LDO_REG3@vcc1v8_pmu: set 1800000 uV; enabling
LDO_REG4@vcc_sd: set 3300000 uV; enabling
LDO_REG5@vcca3v0_codec: set 3000000 uV; enabling
LDO_REG6@vcc_1v5: set 1500000 uV; enabling
LDO_REG7@vcca1v8_codec: set 1800000 uV; enabling
LDO_REG8@vcc_3v0: set 3000000 uV; enabling
SWITCH_REG1@vcc3v3_s3: ; enabling (ret: -38)
SWITCH_REG2@vcc3v3_s0: ; enabling (ret: -38)
vcc1v8-s0@vcc1v8_s0: set 1800000 uV; enabling (ret: -38)
dc-12v@dc_12v: set 12000000 uV; enabling (ret: -38)
vcc-sys@vcc_sys: set 5000000 uV; enabling (ret: -38)
vcc3v3-sys@vcc3v3_sys: set 3300000 uV; enabling (ret: -38)
vcc-phy-regulator@vcc_phy: ; enabling (ret: -38)
vdd-log@vdd_log: ; enabling (ret: -38)
MMC:   sdhci@fe330000: 0, dwmmc@fe320000: 1
SF: unrecognized JEDEC id bytes: ff, ff, ff
*** Warning - spi_flash_probe_bus_cs() failed, using default environment

In:    serial@ff1a0000
Out:   serial@ff1a0000
Err:   serial@ff1a0000
Model: Radxa ROCK Pi 4
boot mode 0.
Net:   eth0: ethernet@fe300000
Hit any key to stop autoboot:  0
Card did not respond to voltage select!
mmc_init: -95, time 10
switch to partitions #0, OK
mmc0(part 0) is current device
Scanning mmc 0:1...
starting USB...
USB0:   USB EHCI 1.00
USB1:   USB EHCI 1.00
USB2:   Register 2000140 NbrPorts 2
Starting the controller
USB XHCI 1.10
USB3:   Register 2000140 NbrPorts 2
Starting the controller
USB XHCI 1.10
scanning bus 0 for devices... 1 USB Device(s) found
scanning bus 1 for devices... 1 USB Device(s) found
scanning bus 2 for devices... 1 USB Device(s) found
scanning bus 3 for devices... 1 USB Device(s) found
       scanning usb for storage devices... 0 Storage Device(s) found

Device 0: unknown device
ethernet@fe300000 Waiting for PHY auto negotiation to complete.... done
Speed: 1000, full duplex
BOOTP broadcast 1
BOOTP broadcast 2
DHCP client bound to address 192.168.1.134 (257 ms)
*** Warning: no boot file name; using 'C0A80186.img'
Using ethernet@fe300000 device
TFTP from server 192.168.1.1; our IP address is 192.168.1.134
Filename 'C0A80186.img'.
Load address: 0x800800
Loading: T T T T T T T T T T
Retry count exceeded; starting again
missing environment variable: pxeuuid
missing environment variable: bootfile
Retrieving file: pxelinux.cfg/01-36-bb-f1-14-ce-8a
Speed: 1000, full duplex
-
SOLVED:
I does work in kernel 5.4.38.
[ 2921.666286] usb 6-1: new SuperSpeed Gen 1 USB device number 3 using xhci-hcd
[ 2921.687193] usb 6-1: New USB device found, idVendor=0781, idProduct=5583, bcdDevice= 1.00
[ 2921.687208] usb 6-1: New USB device strings: Mfr=1, Product=2, SerialNumber=3
[ 2921.687219] usb 6-1: Product: Ultra Fit
[ 2921.687228] usb 6-1: Manufacturer: SanDisk
[ 2921.687240] usb 6-1: SerialNumber: 0501634ed22050222bcbb18b9662cf60a71d58eb3accd361176c490dac57c439b94200000000000000000000f62b26dbff9d0f108355810778267974
[ 2921.688502] usb-storage 6-1:1.0: USB Mass Storage device detected
[ 2921.689030] scsi host1: usb-storage 6-1:1.0
[ 2922.691087] scsi 1:0:0:0: Direct-Access SanDisk Ultra Fit 1.00 PQ: 0 ANSI: 6
[ 2922.691920] sd 1:0:0:0: Attached scsi generic sg0 type 0
[ 2922.692134] sd 1:0:0:0: [sdb] 60088320 512-byte logical blocks: (30.8 GB/28.7 GiB)
[ 2922.692987] sd 1:0:0:0: [sdb] Write Protect is off
[ 2922.693002] sd 1:0:0:0: [sdb] Mode Sense: 43 00 00 00
[ 2922.694608] sd 1:0:0:0: [sdb] Write cache: disabled, read cache: enabled, doesn't support DPO or FUA
[ 2922.724780] sdb: sdb1
[ 2922.728106] sd 1:0:0:0: [sdb] Attached SCSI removable disk
-
It's not so difficult as it seems, to build a module for driver.
Copy header and source packages, in my case linux-headers-current-rockchip64_20.05.0-trunk_arm64.deb and linux-source-current-rockchip64_20.05.0-trunk_all to your board. Then install:
dpkg -i linux-headers-current-rockchip64_20.05.0-trunk_arm64.debIt does automatically all. Next is to install source:
dpkg -i linux-source-current-rockchip64_20.05.0-trunkThis step only copies a tar.xf file into a directory /usr/src/ , but if you untar it it will reside in /usr/src/ directory, so let's make a new dir:
mkdir /usr/src/linux-source-$(uname -r)And move the tar.xz file into that dir. (Perhaps there is a also different way to untar that untars into new dir, but I don't know it). Next untar the source archive:
tar xf linux-source-5.4.38-rockchip64.tar.xz(5.4.38 is the current, you may have a newer file)
Now both headers and source is installed, let's build a driver. Exactly my fbtft device from staging dir.
cd /usr/src/linux-source-5.4.38-rockchip64/drivers/staging/fbtft/
Rename Makefile to Makefile.bak. Then write a new Makefile with nano Makefile:
obj-m += fb_ssd1322.o

all:
        make -C /lib/modules/$(shell uname -r)/build M=$(PWD) modules

clean:
        make -C /lib/modules/$(shell uname -r)/build M=$(PWD) clean
Save this, to make the fb_ssd1322 (or whichever you want) and execute make.
make
make -C /lib/modules/5.4.38-rockchip64/build M=/usr/src/linux-source-5.4.38-rockchip64/drivers/staging/fbtft modules
make[1]: Entering directory '/usr/src/linux-headers-5.4.38-rockchip64'
  CC [M]  /usr/src/linux-source-5.4.38-rockchip64/drivers/staging/fbtft/fb_ssd1322.o
  Building modules, stage 2.
  MODPOST 1 modules
  CC [M]  /usr/src/linux-source-5.4.38-rockchip64/drivers/staging/fbtft/fb_ssd1322.mod.o
  LD [M]  /usr/src/linux-source-5.4.38-rockchip64/drivers/staging/fbtft/fb_ssd1322.ko
The driver module fb_ssd1322.ko is generated.
To be continued .... (removing the driver, replacing the new one and installing back)
-
Hi,
I have one silly problem developing a FBTFT device driver for SSD1322 display : https://github.com/MarkoBursic/fbtft---SSD1322/blob/master/fb_ssd1322.c
The initialisation starts OK, all GPIOs (DC, RESET, CS) follows as they should, since the data is sent through a function write_reg. For example :
write_reg(par, 0xA0, 0x14, 0x11);
It asserts DC low, then sends 0xA0, then asserts DC high and sends 0x14 and 0x11. Within every sent character (8bit bata) the CS toggles. The problem becomes when I want to send video data, I guess a function write_vmem is called. But here the entire tx buffer is filled and then streamed.
for (y = 0; y < bl_height; y++) {

		for (x = 0; x < bl_width / 2; x++) {

			*buf = cpu_to_le16(rgb565_to_y(vmem16[offset++])) >> 8 & 0xF0;

			*buf++ |= cpu_to_le16(rgb565_to_y(vmem16[offset++])) >> 12;

		}

}

/* Write data */

ret = par->fbtftops.write(par, par->txbuf.buf, bl_width/2*bl_height);
In fact the whole buffer is sent from SPI but the CS doesn't toggle every 8-th clock pulse, it is just asserted low and then streamed out whole 8kB.
Is there any settings on SPI to tell that it has to toggle, for example the dtb ovelay for FBTFT device has a setting: buswidth=<8>; but it seems that it doesn't take care of it. Any advice?
p.s.: the code was cloned from other sites that have used this device on RPi.
EDIT:
Problem is solved. I had a test example from BuyDisplay.com written for RPi, which sent data with toggling CS for each sent byte. I have patched this example and found out that SSD1322 works even better with a continuous stream without toggling CS when sending VRAM buffer. Later, the problem on my Rockpi4 and linux FBTFT driver was found to be a RES signal, which is active low. Therefore the display was hold in reset every time due to wrong parameter setting in DT overlay.
-
@martinayotte May I upload your patch for pull request?
-
If I understand well, then you may have also a third CS, let's say CS2 (GPIO4_D5). Then a declaration would become:
cs-gpios = <0>, <&gpio4 0x1a, 0x00>, <&gpio4 0x1d, 0x00> And of course new node spidev@2{.....reg = <2>...} ?
-
Got it working. I have changed the main .dtb file, but who knows it could be stripped to .dtbo as plugin, since I have manually added phandles, so not best suitable if the software gets updated.
The main added nodes are as follows:
1. In the pinctrl/spi1 node is added a subnode of definition of GPIO pin spi1/spi1-cs1 : 0x04 means GPIO4 conteller, 0x1a means pin D2 (therefore GPIO4_D2), 0x00 means a common GPIO (not linked to special functions), 0xb0 means no pull-up/down configured. A phandle of 0x302 is added by myself manually, I guess a dtbo overlay could do it symbolically.
spi1 {

            spi1-clk {
                rockchip,pins = < 0x01 0x09 0x02 0xb3 >;
                phandle = < 0x4e >;
            };

            spi1-cs0 {
                rockchip,pins = < 0x01 0x0a 0x02 0xb3 >;
                phandle = < 0x51 >;
            };

            spi1-rx {
                rockchip,pins = < 0x01 0x07 0x02 0xb3 >;
                phandle = < 0x50 >;
            };

            spi1-tx {
                rockchip,pins = < 0x01 0x08 0x02 0xb3 >;
                phandle = < 0x4f >;
            };
            spi1-cs1 {
                rockchip,pins = < 0x04 0x1a 0x00 0xb0 >;
                phandle = < 0x302 >;
            };
2. In spi1 controller node (spi@ff1d0000) is added a reference to new CS pin : cs-gpios = <0>, <0x16 0x1a 0x00>; Where <0> is found working experimental, I have no idea what's its meaning, but changing this to <1> throws exception of IRQ, probably links the pin to IRQ controller. 0x16 is a handle to GPIO4 controller, 0x1a is a pin number D2 (so, GPIO4_D2) , 0x00 means ACTIVE_HIGH.
Spidev@0 works on hardware CS0 which is GPIO1_B2 (reg=<0>) , meanwhile the spidev@1 works with cs-gpios, GPIO4_D2 (reg=<1>). If enabled flash it would work with CS0, my LCD is still in research phase.
I got spidev1.0 and spidev1.1, traced the functionality with DSO, they both seems to work. It has to have newer kernel (mine 5.4.38) and kernel patched with add-csgpio-to-rockchip-spi.patch, the one provided by @martinayotte published in this post.
spi@ff1d0000 { compatible = "rockchip,rk3399-spi\0rockchip,rk3066-spi"; reg = < 0x00 0xff1d0000 0x00 0x1000 >; clocks = < 0x08 0x48 0x08 0x15c >; clock-names = "spiclk\0apb_pclk"; interrupts = < 0x00 0x35 0x04 0x00 >; dmas = < 0x49 0x0c 0x49 0x0d >; dma-names = "tx\0rx"; pinctrl-names = "default"; pinctrl-0 = < 0x4e 0x4f 0x50 0x51 0x302>; #address-cells = < 0x01 >; #size-cells = < 0x00 >; status = "okay"; phandle = < 0xda >; cs-gpios = <0>, <0x16 0x1a 0x00>; spidev@0 { compatible = "rockchip,spidev"; reg = <0>; status = "okay"; spi-max-frequency = < 0x989680 >; }; spidev@1 { compatible = "rockchip,spidev"; reg = <1>; status = "okay"; spi-max-frequency = < 0x989680 >; }; spiflash@0 { compatible = "jedec,spi-nor"; reg = < 0x00 >; spi-max-frequency = < 0x989680 >; status = "disabled"; }; mytft:mytft@0{ compatible = "solomon,ssd1322"; reg = <1>; pinctrl-names = "default"; pinctrl-0 = <0x300 0x301>; spi-max-frequency = <1000000>; buswidth = <8>; rotate = <0>; bgr = <0>; fps = <20>; dc-gpios = <0x16 0x1c 0x00>; // phandle to gpio4=0x16 , pin Nr = D4=0x1c, GPIO_ACTIVE_HIGH = 0x00 reset-gpios = <0x16 0x1d 0x00>; // phandle to gpio4=0x16 , pin Nr = D5=0x1d, GPIO_ACTIVE_HIGH = 0x00 debug = <0>; status = "disabled"; }; }; -
My personal thoughts (Rockpi 4B):
I have been experimenting both legacy 4.4.y (rockcip64- ayufan) and current 5.4.y (linux-mainline). The legacy kicks on in 15 seconds, while the newer one takes more than 3 minutes. I wanted to ad some device via DT overlay. Well in legacy kernel it fails any attempt to modify .dtb or add a .dtbo , further time to time it throws kernel exceptions that I haven't figured out what's behind. On the other side we have 5.4.y kernel that is slow to boot, but it can handle lots of abusing. Tried with device tree overlays, if something is wrong it reverts back or it throws exceptions, but almost never fail.
I already disabled I2S0, because it shares same GPIOs as different device on board, I have enabled SPI1 and added two devices with help of cs-gpios patch: 1st flash on SPI1.0, and a 2nd a SPI device with cs-gpio on SPI1.1. The newer kernel is flexible, but slow to boot ("langsam aber sicher").
-
I did in Vagrant, at module directory:
make -C /lib/modules/`uname -r`/build M=`pwd` modules obj-m=FILENAME.o
FILENAME is the name of module e.g. fb_ssd1322
I don't exactly know if the modules were built for host system or for the target system, but what's important is that I have found the error in the driver source. I made a user patch, now it is building new Armbian image, will see.
-
@Igor Actually I want to make a new driver for fbtft which is not included in mainline kernel, I did a userpatch but when it compiles it gives an error and I don't know why. It takes hours on Vagrant to compile, so I am looking for alternatives to compile only those modules, instead of making entire image.
So my intention is not build/load existing drivers, rather to build these working drivers to then compile my non-working driver and make a final userpatch. I have installed headers, but it seems that compiler does not include them, any hint?
-
@Werner Thanks for that, they really installed. @Igor Will try next time, but I don't think I will find this feature, I have built many times and never seen this option. But I did switch back to official Armbian buster with Linux 5.4.32-rockchip64 image. I did update, upgrade, install headers, linux source everything now has the same version. What I want is to compile a driver module: /drivers/staging/fbtft So I did:
cd cd linux-source-5.4.32-rockchip64/drivers/staging/fbtft/
make fb_ssd1306I got errors:
root@rockpi-4b:~/fbtft# make fb_ssd1306
cc fb_ssd1306.c -o fb_ssd1306
fb_ssd1306.c:10:10: fatal error: linux/init.h: No such file or directory
#include <linux/init.h>
^~~~~~~~~~~~~~
compilation terminated.
make: *** [<builtin>: fb_ssd1306] Error 1
It looks like the header files are not properly found. How should I correctly set the directive? Any help is very appreciated.
-
-
Made a new compilation, now becomes: Armbian buster with Linux 5.4.36-rockchip64, still headers are the same: linux-headers-5.4.32-rockchip64.
-
Armbianmonitor:
I had compiled the Armbian image: Buster server. It shows like: Linux version 5.4.35-rockchip64 (root@ubuntu-bionic) ???
 uname -r
5.4.35-rockchip64
If I download the linux headers it downloads them, but version 5.4.32-rockchip64. If I do :
apt-get source linux-source-$(uname -r)
Reading package lists... Done
E: You must put some 'source' URIs in your sources.list
root@rockpi-4b:~#
I can't compile the device drivers, since the headers are different.
-
Hi,
I wonder if there exists one method to make the end user a friendly way to access the web server. So I have Armbian with hotspot enabled, if I want to look at specific web page running on the board, I have to know the IP of the wlan0 and specific port of the web server. For example in google chrome I have to insert: http://172.24.1.1:3000
This is very difficult for end user, who has minimal knowledge. Is there any way, that for example you log on the hotspot, then open google chrome and start browse for any arbitrary page (let's say www.google.com) at port 80 and then it's automatically redirected to port 3000, except for all other web servers on the same IP. If I write 172.24.1.1:9090 it may not redirect.
Wrong linux headers and source, part 2
in Rockchip
Posted
Installed the image Armbian_20.08.1_Rockpi-4b_buster_current_5.8.6.img.xz . Then, in armbian-config -> Software, I had installed linux headers + source.
I got two new directories:
linux-headers-5.7.15-rockchip64
linux-source-5.7.15-rockchip64
If I execute:
uname - rI get:
root@pi:~# uname -r
5.8.6-rockchip64
The kernel version and installed source/headers are not the same, so they are useless. How to get the correct source/headers?
EDIT:
When first boot, the OS asked for locale/timezone settings, I did hit ENTER as default and it set the locale language to Slovene. When doing apt-get update, there was an error saying about missing files on the server.
Since I am not very familiar with this language I changed to en.US-UTF-8. Then I redo apt-get update, it updated without problems.
I had removed headers and source via armbian-config. Done update & upgrade, this time no problems. The version is now 5.6.12-rockhip64
Reinstalled back headers, correctly. Installed source, this time I had to choose which one, so I choose 5.6.12-rockhip64
It seems solved, now. The local language could be an issue.