Active threads
Showing topics posted in for the last 365 days.
- Past hour
-

Gaming experience with Orange Pi 5 (RK3588) on Armbian
KhanhDTP replied to KhanhDTP's topic in Orange Pi 5
Armbian 25.11.2 Noble XFCE (BSP Kernel: 6.1.115) + PanVk - mesa 26.0 (https://launchpad.net/~ernstp/+archive/ubuntu/mesaaco) + Box64 arm64 v0.4.1 ed9827920 (https://ryanfortner.github.io/box64-debs/) + ge-proton10-29 (https://github.com/GloriousEggroll/proton-ge-custom/releases/tag/GE-Proton10-29) (GE-proton is more likely to be segment fault-proof than other wine-proton versions) + dgVoodoo2 (https://github.com/dege-diosg/dgVoodoo2/releases) + DXVK-stripped v2.4.1 ~40fps@720p (medium settings, no AA) box64 environment variables: Fallout New Vegas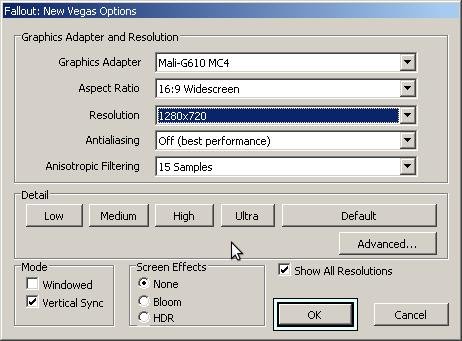
.thumb.jpg.7ded6e0df281a95b18d3cf842bdf6a1b.jpg)
.thumb.jpg.bd1ac014bd6d3828906c34e391ae73ff.jpg)
- Today
-
 Is this guide still relevant? Armbian-config has a completely different menu now
 -

Help in installing Armbian On an andoid tv box with amologic chip
SteeMan replied to KOUSA's topic in Amlogic CPU Boxes
You are not using Armbian. Ophub is a fork of Armbian. They do not contribute to Armbian development nor do they participate in these forums. You need to go to ophub to ask this question, as no one here can help you. -

Starting kernel... after power losses Nanopi Neo Air
eselarm replied to whiteblaine's topic in Allwinner sunxi
What is in armbianEnv.txt then? Anyway you need to load and edit it such that you make sure loglevel=7 Then there will be more text after Starting kernel ... You also seem to have a power and/or reliability problem w.r.t. cables as characters are missing in your debug log text. -
High chance this uses some proprietary hardware for 3.5mm audio jack. It has been like that for decades and you probably need to find some firmware blob somewhere maybe. I have also a similar situation, most part s of the computer work fine with Debian Trixie etc, but it took ages to get sound working and still buggy, endless beep or crash occasionally. If you are lucky is it maybe only a mute setting or so, use aumix etc to look what is going on. Not something Armbian specific I guess, but up to you to figure out. Then also mention various versions, what BIOS/UEFI version the computer is loaded with, what Armbian kernel and also specific image release (if it is an unmodified image writer based installation).
-
Hi, is it still working now?
-
@sicxnull This might be the patch that fixed it. It's in mainline u-boot now. I would use a newer u-boot. https://lists.denx.de/pipermail/u-boot/2025-March/582900.html
- Yesterday
-

to get 32768 clk from GPIO1 D4 on RK3328
robertoj replied to emresensoy's topic in Advanced users - Development
Linux is not a real time operating system Realtime OSes have a 1 ms accuracy You need an arduino dedicated only to make your square wave -
Amlogic s905x (s912) Print Server is Not Working
SteeMan replied to Aufa Aji's topic in Software, Applications, Userspace
Moved to userspace forum -
Just use dd (on linux) or balea etcher (windows/mac) to write the armbian image to an sdcard.
-
 Weston 15.0 has arrived, bringing a brand new Lua-based shell for fully customizable window management, an experimental Vulkan renderer, and a host of improvements to color handling, media playback, and display performance. View the full article
 -
@MeJune You can check out my work starting with the 'Add warpme kernel 6.17' commit here: https://github.com/NickAlilovic/build/commits/v20251014/ I’m using warpme patches from his minimyth2 repo, though I’ve modified them to ensure they apply correctly. I also used my own patches for Transpeed, as his implementation differs from mine. u-boot: https://github.com/warpme/minimyth2/tree/master/script/bootloaders/u-boot-aw/files https://github.com/warpme/minimyth2/blob/master/script/bootloaders/u-boot-aw/Makefile kernel: https://github.com/warpme/minimyth2/tree/master/script/kernel/linux-6.19/files https://github.com/warpme/minimyth2/blob/master/script/kernel/linux-6.19/Makefile An easier way to do this is to create a board config and use the official Armbian patch set. While Transpeed is already mainlined, the implementation is incomplete. You will still need a patch to include your missing Transpeed DTS nodes. If you are happy with 6.17, then use this build: https://github.com/NickAlilovic/build/commits/v20251014/ This build generates a kernel .deb package in output/debs. You can use it to upgrade your existing Armbian installation. I haven't tried this myself, so I make no promises that it will work; please ensure you have a backup before proceeding. Backing Up the SD Card (from another PC) The most reliable way to back up an SD card is to create a full disk image on a separate computer. sudo dd if=/dev/sdX of=armbian_backup.img bs=1M status=progress If your system is running on eMMC, you can back it up to an external USB or SD card using built-in Armbian tools. Using armbian-ddbr: Many Armbian builds include this utility specifically for eMMC backup/restore. Boot Armbian from an external SD card (so the eMMC is not in use). Run the command: sudo armbian-ddbr. Select the backup option to create a compressed image of your internal storage. Using armbian-config: Some versions offer a "Backup" or "Clone" option under the System or Maintenance menus
-
i recently purchased an orange pi 5 plus 16gb with the wifi / bt card, the aluminum wifi case, fan and 1tb ssd. when i go to the official website i see different images there none of which seem to work 100%. i mean i was able to get each up and running but what i noticed is that the graphical drivers would not load. i saw a youtube video claiming armbian has the right driver support for the mali 610 gpu. can someone assist me getting this to work? im big into emulation gaming and right now it doesnt even have Vulkan support i crave. someone help thanks
-
 Boot with serial attached and see if the DRAM is being properly detected. If not this patch would appear to solve the issue. https://lore.kernel.org/linux-sunxi/2813637.mvXUDI8C0e@jernej-laptop/T/#t
 -
You should pipe the output from a serial console cable to another computer where you store it. Make sure kernel cmdline loglevel=7 AFAIR the OPI5+ can only use 5V as input supply power. Your 100W PSU might be a standard spec one so it does only deliver 3A at 5V. This might be a perfect 5.000V, but an extra cable in between will drop that a bit and the risk is then that short higher power drap will either make the 5V goo too low and/or the PSU will cut the power because more than 3A drawn during a short peak. You will need to look at powering first. Usually 5V only SBC's can be powered via other input then the USB-C input. You need to read the instruction for your OPI5+, and also OPi5, those might be different. OPI5+ and also OPi5 should transcode at more or less the same speed, large amount of memory does not really matter as it is just HW processing blocks doing the work in a rather limited memory space. You should do a manual CLI jellyfin-ffmpeg based transcode, see /var/log/jellyfin how commandline arguments for that specific video look like (and simplify it, output to 1 file instead of chunks m3u8). And or search this forum, I at least have posted examples for check/test earlier. You might also try to reproduce it with a publiclicy know video, look for big buck bunny test vids or so.
- Last week
-
Hi Gaetano, I'd be suprised if Buster did work with such a newer kernel. dwc2 is Pi specific and will not work on Allwinner/Sunxi hardware. The OTG usb controller is completely different, please see the wiki: https://linux-sunxi.org/USB_OTG_Controller_Register_Guide Overlays will only load overlays found in /boot/dtb/overlay/ while user defined ones exist in /boot/overlay-user/ As expected otg is the default mode, firstly those warnings are normal when decompiling the dtb back dts as not everything gets translated back. For small modifications you can use sudo armbian-add-overlay which compiles the overlay and places it within /boot/overlay-user This problem seems to occur every now and again in some kernel releases, please refer to here: for a solution. I would refer back to the board schematic before adjusting the dts. On the Pcduino2 and Pcduino3, the OTG micro USB passes through a small resistor rather than a fuse so causes a slight voltage drop. Just make sure that you have a good quality lead that ensures the board gets 5V but slightly over is better. sudo armbianmonitor -m Stop monitoring using [ctrl]-[c] Time CPU load %cpu %sys %usr %nice %io %irq Tcpu PMIC DC-IN C.St. 22:19:42 960 MHz 0.39 14% 9% 5% 0% 0% 0% 33.7 °C 30.2 °C 5.34V 0/6^C Best of luck Ryzer
-
I see there is a "UART" on the front board image, but I guess it does not work for you. Check the sorroundings for possibile missing resistors, sometimes they remove some small SMD resistors to make the UART non-functional. Also note that you must use an adapter that is capable of 1.5Mbps; not all of them can reach such baud rates (AFAIR pl2303 can't, but CH301 should work)
-
 Some logs that might help in resolving: cat /proc/asound/card0/eld* monitor_name SONY AVAMP connection_type HDMI eld_version [0x2] CEA-861D or below edid_version [0x3] CEA-861-B, C or D manufacture_id 0xd94d product_id 0x9301 port_id 0x0 support_hdcp 0 support_ai 1 audio_sync_delay 0 speakers [0x5f] FL/FR LFE FC RL/RR RC RLC/RRC sad_count 12 sad0_coding_type [0xc] MLP (Dolby TrueHD) sad0_channels 2 sad0_rates [0x1ec0] 44100 48000 88200 96000 176400 192000 sad1_coding_type [0xc] MLP (Dolby TrueHD) sad1_channels 6 sad1_rates [0x1ec0] 44100 48000 88200 96000 176400 192000 sad2_coding_type [0xc] MLP (Dolby TrueHD) sad2_channels 8 sad2_rates [0x6c0] 44100 48000 88200 96000 sad3_coding_type [0xb] DTS-HD sad3_channels 2 sad3_rates [0x1ec0] 44100 48000 88200 96000 176400 192000 sad4_coding_type [0xb] DTS-HD sad4_channels 6 sad4_rates [0x1ec0] 44100 48000 88200 96000 176400 192000 sad5_coding_type [0xb] DTS-HD sad5_channels 8 sad5_rates [0x6c0] 44100 48000 88200 96000 sad6_coding_type [0x1] LPCM sad6_channels 2 sad6_rates [0x1ee0] 32000 44100 48000 88200 96000 176400 192000 sad6_bits [0xe] 16 20 24 sad7_coding_type [0x1] LPCM sad7_channels 6 sad7_rates [0x1ee0] 32000 44100 48000 88200 96000 176400 192000 sad7_bits [0xe] 16 20 24 sad8_coding_type [0x1] LPCM sad8_channels 8 sad8_rates [0x1ee0] 32000 44100 48000 88200 96000 176400 192000 sad8_bits [0xe] 16 20 24 sad9_coding_type [0x2] AC-3 sad9_channels 6 sad9_rates [0xe0] 32000 44100 48000 sad9_max_bitrate 680000 sad10_coding_type [0x7] DTS sad10_channels 6 sad10_rates [0x6e0] 32000 44100 48000 88200 96000 sad10_max_bitrate 1536000 sad11_coding_type [0xa] E-AC-3/DD+ (Dolby Digital Plus) sad11_channels 8 sad11_rates [0xc0] 44100 48000 dmesg | grep -i hdmi [ 0.024452] /vop@fdd90000: Fixed dependency cycle(s) with /hdmi@fde80000 [ 0.024468] /hdmi@fde80000: Fixed dependency cycle(s) with /vop@fdd90000 [ 0.030657] /hdmi@fde80000: Fixed dependency cycle(s) with /hdmi-con [ 0.030674] /hdmi-con: Fixed dependency cycle(s) with /hdmi@fde80000 [ 1.328504] dwhdmiqp-rockchip fde80000.hdmi: registered DesignWare HDMI QP I2C bus driver [ 1.329303] rockchip-drm display-subsystem: bound fde80000.hdmi (ops rockchip_drm_fini [rockchipdrm]) [77523.181767] hdmi-audio-codec hdmi-audio-codec.4.auto: HDMI: Unknown ELD version 0 [77523.184450] hdmi-audio-codec hdmi-audio-codec.4.auto: ASoC error (-19): at snd_soc_dai_prepare() on i2s-hifi [77529.747875] hdmi-audio-codec hdmi-audio-codec.4.auto: HDMI: Unknown ELD version 0 [77529.749599] hdmi-audio-codec hdmi-audio-codec.4.auto: ASoC error (-19): at snd_soc_dai_prepare() on i2s-hifi [84820.893274] hdmi-audio-codec hdmi-audio-codec.4.auto: HDMI: Unknown ELD version 0 [84947.092875] dwhdmiqp-rockchip fde80000.hdmi: registered DesignWare HDMI QP I2C bus driver [84947.100550] rockchip-drm display-subsystem: bound fde80000.hdmi (ops rockchip_drm_fini [rockchipdrm])
 -
Collabora is excited to see Monado at the heart of the new OpenXR runtime for Android XR, a major milestone for Open Source XR interoperability. View the full article
-
Collabora is excited to see Monado at the heart of the new OpenXR runtime for Android XR, a major milestone for Open Source XR interoperability. View the full article
-
 Disclaimer: I know it's not a good idea XD Is it possible somehow to upgrade the prebuilt image Armbian 12/OpenMediaVault 7 to Armbian 13/OpenMediaVault 8? Is there a guide?
 -
Concerns before trying to boot Armbian from SD card on GS King-X
SteeMan replied to marfalk's topic in Amlogic CPU Boxes
As long as you don't install Armbian to your emmc, you should be able to still boot android by removing the SD and/or usb drives. Once you install to emmc you will overwrite the android installation -

[Latest] Armbian Build HDMI Audio support Fix
rsbuffalo replied to just_facking_about's topic in Radxa Dragon Q6A
To get audio working on the Radxa Dragon (QCS6490) when the standard UCM (Use Case Manager) fails, you have to bypass the "official" path and manually bridge the hardware to the software. Here is the complete summary of the "manual bridge" method developed. I installed Armbian 25.11.1 Edge Image and below is how I fixed HDMI Audio. Step 1: Create the Hardware Bridge Script This script manually flips the hardware switches in the Qualcomm DSP that route audio to the HDMI/DisplayPort pins. File: /usr/local/bin/fix-hdmi-audio.sh Command: sudo nano /usr/local/bin/fix-hdmi-audio.sh Bash #!/bin/bash # Wait for hardware to initialize sleep 2 # Open the HDMI/DP Audio Bridge amixer -c 0 cset name='DISPLAY_PORT_RX_0 Audio Mixer MultiMedia1' 1 # Set initial hardware volume amixer -c 0 cset name='stream0.vol_ctrl0 MultiMedia1 Playback Volu' 75% Make it executable: sudo chmod +x /usr/local/bin/fix-hdmi-audio.sh Step 2: Create the Systemd Service This ensures the hardware switches are flipped automatically every time the board boots up. File: /etc/systemd/system/hdmi-audio.service Command: sudo nano /etc/systemd/system/hdmi-audio.service Ini, TOML [Unit] Description=Fix HDMI Audio Routing After=sound.target [Service] Type=oneshot ExecStart=/usr/local/bin/fix-hdmi-audio.sh RemainAfterExit=yes [Install] WantedBy=multi-user.target Enable it: Bash sudo systemctl daemon-reload sudo systemctl enable hdmi-audio.service Step 3: Configure the Desktop Audio Sink Since the system's "Built-in Audio" often defaults to a "Dummy Output" when UCM is broken, we force PulseAudio to create a manual "Sink" pointing directly to the hardware. File: /etc/pulse/default.pa Command: sudo nano /etc/pulse/default.pa Add these lines to the very bottom of the file: Plaintext # Manually bridge PulseAudio to the working hardware path load-module module-alsa-sink device=plughw:0,0 sink_name=Manual_HDMI sink_properties=device.description=HDMI_Audio_Output set-default-sink Manual_HDMI Step 4: Clean Up UCM (Optional but Recommended) To stop the "HDMI Audio failure" warnings during boot, you can ensure your UCM files are at least syntactically correct, even if the system ignores them. File: /usr/share/alsa/ucm2/QCS6490RadxaDra/HiFi.conf Plaintext Syntax 2 SectionDevice."HDMI" { Comment "HDMI Output" Value { PlaybackPriority 200 PlaybackPCM "hw:0,0" } } SectionVerb { EnableSequence [] DisableSequence [] } Summary of the Audio Path By following these steps, you have constructed the following data flow: Hardware: Qualcomm DSP (Card 0, Device 0). Bridge: amixer opens the path from the CPU to the HDMI port. ALSA: Provides the plughw:0,0 interface. PulseAudio: Grabs that interface and names it "HDMI_Audio_Output." Applications: YouTube/Browsers send audio to the "Default Sink," which is now your working HDMI path. Now I will put all these commands into a single "one-click" shell script so you can save it as a backup for future installs? The Radxa Dragon Audio "One-Click" Fix Create the file: nano fix_audio.sh Paste the code below. Run it: chmod +x fix_audio.sh && sudo ./fix_audio.sh Bash #!/bin/bash echo "🚀 Starting Radxa Dragon QCS6490 Audio Fix..." # 1. Create the Hardware Bridge Script echo "🔧 Creating hardware bridge script..." cat <<EOF | sudo tee /usr/local/bin/fix-hdmi-audio.sh > /dev/null #!/bin/bash # Wait for hardware to initialize sleep 2 # Open the HDMI/DP Audio Bridge amixer -c 0 cset name='DISPLAY_PORT_RX_0 Audio Mixer MultiMedia1' 1 # Set initial hardware volume amixer -c 0 cset name='stream0.vol_ctrl0 MultiMedia1 Playback Volu' 75% EOF sudo chmod +x /usr/local/bin/fix-hdmi-audio.sh # 2. Create the Systemd Service echo "⚙️ Creating boot-time service..." cat <<EOF | sudo tee /etc/systemd/system/hdmi-audio.service > /dev/null [Unit] Description=Fix HDMI Audio Routing After=sound.target [Service] Type=oneshot ExecStart=/usr/local/bin/fix-hdmi-audio.sh RemainAfterExit=yes [Install] WantedBy=multi-user.target EOF # 3. Enable and Start the Service sudo systemctl daemon-reload sudo systemctl enable hdmi-audio.service sudo systemctl start hdmi-audio.service # 4. Configure PulseAudio Sink echo "🔉 Configuring PulseAudio/PipeWire sink..." PA_CONFIG="/etc/pulse/default.pa" if [ -f "$PA_CONFIG" ]; then # Check if we already added the fix to avoid duplicates if ! grep -q "Manual_HDMI" "$PA_CONFIG"; then cat <<EOF | sudo tee -a "$PA_CONFIG" > /dev/null # Manually bridge PulseAudio to the working hardware path load-module module-alsa-sink device=plughw:0,0 sink_name=Manual_HDMI sink_properties=device.description=HDMI_Audio_Output set-default-sink Manual_HDMI EOF fi else echo "⚠️ Warning: /etc/pulse/default.pa not found. You may need to manualy add the sink to your specific sound server config." fi echo "✅ Success! Please reboot to finalize settings." echo " After reboot, select 'HDMI_Audio_Output' in Sound Settings if it doesn't auto-switch." Why this works for your specific board: This script performs a "Direct Injection." Instead of asking the operating system to figure out where the audio goes (which fails because the Qualcomm UCM profiles are currently buggy), it tells the hardware exactly which gate to open and tells the software exactly which "sink" to pour the audio into. -

Efforts to develop firmware for H96 MAX V56 RK3566 4G/32G
Hqnicolas replied to Hqnicolas's topic in Rockchip CPU Boxes
Salve Marcão, did you try this method? https://github.com/armbian/community/releases/ https://forum.armbian.com/topic/28895-efforts-to-develop-firmware-for-h96-max-v56-rk3566-8g64g/page/8/#findComment-187569 -
Thank you for the support. I made a short break tinkering with the tv box, but recently I did try installing to emmc, using the install-aml.sh script. Everything working as expected. I should have been more careful in the first place. It was a good lesson anyway. Tnx
.jpg.a7a6d8ce77b06030b64a05bd475456f8.jpg)
.jpg.328179377d68b8ad8e269fb550b0f90a.jpg)


