Search the Community
Showing results for 'clone sd card'.
-
I have a pair of Orange Pi 3's acting as redundant PiHoles on my home network. After a bit of tinkering and configuring, I have them set up the way I want, and would like to keep them that way. Of course, a good backup plan is essential to this. Looking online, I found Image-Utils for Raspberry Pi, but that is limited in support for only the Raspbian OS. Is there a good system out there to make a cloneable image of an SD card in an Orange Pi, either from the Pi itself to a remote source (NFS mount, etc.), or from a remote source pulling from the Pi? I'd like to schedule this as a CRON job, so that in the event of a hardware failure, I can just restore the image to a new SD card and deploy it with minimal loss. Thank you!
-
My Radxa Rock 4SE does not boot since community-build 25.8.0-trunk.228. Current local builds based on the "main" branch are also affected. The bootloader log gives the following error: Checking hash(es) for config config-1 ... OK Checking hash(es) for Image atf-1 ... sha256+ OK Checking hash(es) for Image u-boot ... sha256+ OK Checking hash(es) for Image fdt-1 ... sha256+ OK Checking hash(es) for Image atf-2 ... sha256+ OK Checking hash(es) for Image atf-3 ... sha256+ OK ERROR: not expected type found -4001165690437497392 This source suggests, that it might be a problem with the ATF. However, my knowledge about details of the boot process are unforunately not sufficient to find a solution to this problem. How to reproduce? Download https://github.com/armbian/community/releases/download/25.8.0-trunk.228/Armbian_community_25.8.0-trunk.228_Rock-4se_bookworm_current_6.12.33_minimal.img.xz Install on SD card Try to boot Rock 4 SE from SD card image
-
TV Box Name: Sunvell T95Z plus Octagon shaped box (Beware – apparently a lot of variants) CPU Amlogics S912 Armbian build file name: Armbian_community_25.5.0-trunk.370_Aml-s9xx-box_noble_current_6.12.23 DTB file used: meson-gxm-vega-s96.dtb (but several seem to work… none with wifi out of the box) Kernel Version: 6.12.24 Distribution Installed (focal, buster, etc): Noble Working Ethernet (Yes/No): Yes Max Ethernet Speed that works (100/1000): Not sure how to determine... Does wifi work (Yes/No): YES *** See Below Does bluetooth work (Yes/No): Not tested Does HDMI audio work (Yes/No): Yes Additional Comments (provide any additional information you feel is important): Tested many files. Ubuntu (noble) seemed much more usable than Debian (bookworm) Also tested Armbian_community_25.5.0-trunk.334_Aml-s9xx-box_bookworm_current_6.12.21 _gnome_desktop.img.xz Armbian_community_25.5.0-trunk.334_Aml-s9xx-box_noble_current_6.12.21 _gnome_desktop.img.xz Armbian_community_25.5.0-trunk.334_Aml-s9xx-box_oracular_edge_6.14.0 _gnome_desktop.img.xz Armbian_community_25.5.0-trunk.334_Aml-s9xx-box_oracular_edge_6.14.0.img.xz Since I am trying to learn server/media center/adguard or pihole stuff – chose the server headless install eventually. Learning has started. **** Thank you thank you to @ZuiMelanieForno and their post here: But basically looks like the easy way is to create a soft link of the ap6330 driver file as the brcm4330 file that must be loaded by default. sudo mv /lib/firmware/brcm/brcmfmac4330-sdio.txt /lib/firmware/brcm/brcmfmac4330-sdio.txt.old sudo ln -s /lib/firmware/brcm/brcmfmac-ap6330-sdio.txt /lib/firmware/brcm/brcmfmac4330-sdio.txt Not sure of this solution will survive update. (UPDATE: Confirmed - it does not survive update - but doing the commands again and a reboot seemed to work.) I have installed pihole and had it running. I had jellyfin running. Rebuilt from 0 again and am trying to do inside of docker containers. Dockers seems running but still some learning to go. If I write my sd to my eMMC – can reset to 0 again by booting from an sd card … and when ready burn that to eMMC? Or should I keep the writes to the eMMC as few as possible? I own two of these boxes – Identical on the outside but the newer one (bought probably 1 year later) does NOT have an eMMC. It has the dreaded NAND chip(BiWIN 16GB)… Also a different wifi module I think…. (LTM8830) Oh and – can I just say I love pulling this thing out of retirement and having a tiny low cost media server in the house. Thanks @balbes150 and @SteeMan and Everyone for their hard work! This is amazing... until I blow it up again...
-
Hi! I have an old Allwinner A10 based tablet that runs on Android. I want to install some other OS on it. I tried the instructions on linux-sunxi.org and created a page for the tablet: https://linux-sunxi.org/Softwinners_crane I extracted the FEX file from an image I got from the manufacturers a long time ago: http://github.com/linux-sunxi/sunxi-boards/pull/72/files The linux-sunxi mailing list pointed out that my tablet is similar to Topwise A721, so I used that dts file to compile u-boot and the kernel, and tried to boot it through an SD card. Trying to boot that, u-boot starts, and then gets stuck at "Starting kernel..." Then I found this: After following this and building armbian, I realised that there is no script.bin to replace anymore (I'm guessing because now we use device trees?), so unable to boot this as well. What should I do to make this work with armbian? My guess is that I need to create a new dts or correct the Topwise A721 dts (https://github.com/torvalds/linux/blob/master/arch/arm/boot/dts/allwinner/sun4i-a10-topwise-a721.dts) and then try again. The only problem is that I have no experience with device trees. Would really appreciate help on getting this to work, thanks! :)
-
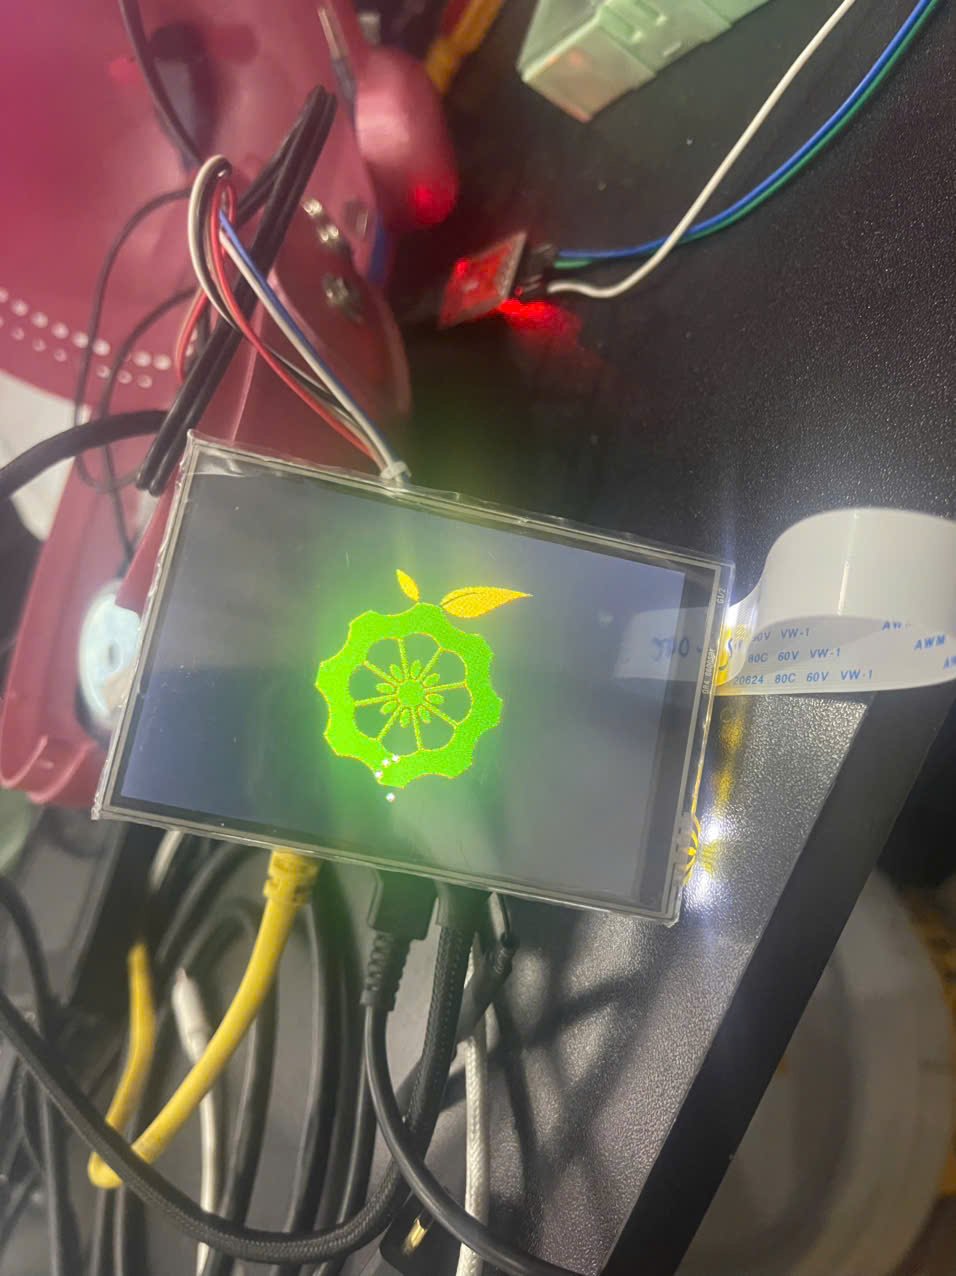
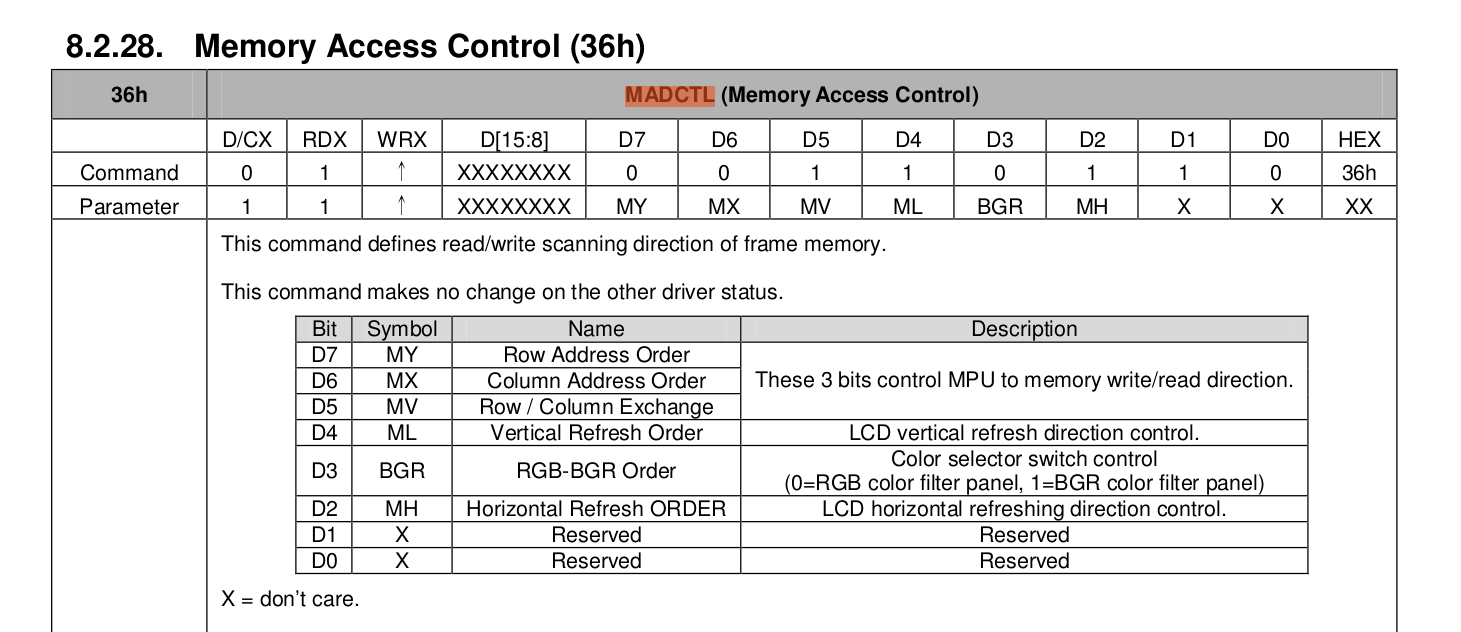
Hello, I have a new LCD which I believe is an ili4988 (although the vendor says ili9486 and st7796) https://www.aliexpress.us/item/3256803856059047.html I have read somewhere, that I can use an ili9341 spi driver, only by changing the resolution and changing the initialization script. I looked in the waveshare website and github, they don't have anything for the ili9488 Then, I found some arduino code in http://www.lcdwiki.com/3.5inch_SPI_Module_ILI9488_SKU%3AMSP3520 (look for the "3.5 inch SPI Module Package(ILI9488)" link, then find the LCDWIKI_SPI.cpp The initialization sequence is in line 1697: I am currently trying to convert it to a DTS-format init string, so that it fits my ili9341-fb.dts, which I made earlier this year: I am unsure how to start the init line, can someone help me? Then, when I have that init string confirmed, I can use: https://github.com/notro/panel-mipi-dbi/wiki https://blog.csdn.net/CNflysky/article/details/125171176 To switch to the mipi-dbi driver, which would get me DRM (instead of FB)
-
TV Box Name: Sunvell T95Z plus Octagon shaped box (I wrote it before – but Beware – apparently a lot of variants) CPU Amlogics S912 Armbian build file name: Armbian_community_25.8.0-trunk.277_Aml-s9xx-box_noble_current_6.12.34 DTB file used: meson-gxm-t95z-plus.dtb – (my other T95z uses meson-gxm-vega-s96.dtb) Kernel Version: 6.12.34 Distribution Installed (focal, buster, etc): Noble Working Ethernet (Yes/No): Yes Max Ethernet Speed that works (100/1000): Not sure how to determine... Does wifi work (Yes/No): No Does bluetooth work (Yes/No): Not tested Does HDMI audio work (Yes/No): Yes Additional Comments (provide any additional information you feel is important): This is my second T95z plus box build. Using as headless server and both seem solid. Confirming what others have said – the build is different inside. This has a different wifi card and eemc. I have a 3rd T95z plus that has the dreaded NAND chip too. Having fun and learning. Using as a simple NAS now with a ZFS pool and works just fine.
-

Building Armbian Distribution with Kernel 6.10 for Orange Pi 5 Pro
C127 replied to Sergey Dulimov's topic in Rockchip
Hello everyone. @salas I have just implemented the out-of-box (OOB) network driver functionality in a new commit to the repository. This should serve as a temporary patch for now (or potentially a permanent one, depending on if/when the driver gets mainlined into the Linux kernel). @whywontitwork Thank you very much for the feedback and for testing the image. I need a bit more information to help track down the issue. My suspicion is that the system is successfully loading u-boot but failing to load the kernel. However, without debug logs, it's difficult to know the real cause. To help diagnose this, could you please tell me how you flashed the image? I flash my builds to a microSD card using the Balena Etcher software. Are you using the same method or a different one? I appreciate your support in getting the Orange Pi 5 Pro maintained! One of my main motivations for starting this project was to get Panthor support for the Mali GPU too. I can confirm that on my end, with the image I've built, the latest version of the drivers works correctly. Getting Vulkan and OpenGL running on an RK3588 board! -
 Two days ago I upgraded the kernel to 25.5.1 (6.12.30-current-sunxi) from 25.2.3 (6.12.20-current-sunxi). Since then I have no longer been able to play a certain title (FLAC file) in mocp. In case it's relevant, the title is: "Malukah - Awake (The Dragonborn Comes)". Symptoms: dmesg starts showing kernel trace output at 1:43 of the song mocp finally stalls at 1:52 and it's impossible to interact with it from that point on Is there anyone here who would be able to provide pointers on how to debug this? I am a developer and I have done some work with Yocto/OE before and wouldn't be afraid to get at this with a debugger. Since it's nicely reproducible, I could switch between those package versions to investigate. From the trace output it looks as if this is in exfat code. Makes sense, since the song is getting played from a USB key that is exfat-formatted. Here's the dmesg output with the two traces towards the end. I decided to include a few messages up to the point where systemd starts: [ 0.000000] Booting Linux on physical CPU 0x0 [ 0.000000] Linux version 6.12.30-current-sunxi (build@armbian) (arm-linux-gnueabihf-gcc (Ubuntu 13.2.0-23ubuntu4) 13.2.0, GNU ld (GNU Binutils for Ubuntu) 2.42) #1 SMP Thu May 22 12:29:54 UTC 2025 [ 0.000000] CPU: ARMv7 Processor [410fc074] revision 4 (ARMv7), cr=50c5387d [ 0.000000] CPU: div instructions available: patching division code [ 0.000000] CPU: PIPT / VIPT nonaliasing data cache, VIPT aliasing instruction cache [ 0.000000] OF: fdt: Machine model: Cubietech Cubietruck [ 0.000000] Memory policy: Data cache writealloc [ 0.000000] Reserved memory: created CMA memory pool at 0x4a000000, size 96 MiB [ 0.000000] OF: reserved mem: initialized node default-pool, compatible id shared-dma-pool [ 0.000000] OF: reserved mem: 0x4a000000..0x4fffffff (98304 KiB) map reusable default-pool [ 0.000000] Zone ranges: [ 0.000000] Normal [mem 0x0000000040000000-0x000000006fffffff] [ 0.000000] HighMem [mem 0x0000000070000000-0x00000000bfcfffff] [ 0.000000] Movable zone start for each node [ 0.000000] Early memory node ranges [ 0.000000] node 0: [mem 0x0000000040000000-0x00000000bfcfffff] [ 0.000000] Initmem setup node 0 [mem 0x0000000040000000-0x00000000bfcfffff] [ 0.000000] On node 0, zone HighMem: 768 pages in unavailable ranges [ 0.000000] psci: probing for conduit method from DT. [ 0.000000] psci: Using PSCI v0.1 Function IDs from DT [ 0.000000] percpu: Embedded 19 pages/cpu s48588 r8192 d21044 u77824 [ 0.000000] pcpu-alloc: s48588 r8192 d21044 u77824 alloc=19*4096 [ 0.000000] pcpu-alloc: [0] 0 [0] 1 [ 0.000000] Kernel command line: root=UUID=ad99c006-e2fa-4070-8fbe-9e08f643dd62 rootwait rootfstype=ext4 console=ttyS0,115200 console=tty1 hdmi.audio=EDID:0 disp.screen0_output_mode=1920x1080p60 consoleblank=0 loglevel=1 ubootpart=5b507211-01 ubootsource=mmc usb-storage.quirks=0x2537:0x1066:u,0x2537:0x1068:u sunxi_ve_mem_reserve=0 sunxi_g2d_mem_reserve=0 sunxi_fb_mem_reserve=16 cgroup_enable=memory swapaccount=1 [ 0.000000] Unknown kernel command line parameters "ubootpart=5b507211-01 ubootsource=mmc sunxi_ve_mem_reserve=0 sunxi_g2d_mem_reserve=0 sunxi_fb_mem_reserve=16 cgroup_enable=memory", will be passed to user space. [ 0.000000] Dentry cache hash table entries: 131072 (order: 7, 524288 bytes, linear) [ 0.000000] Inode-cache hash table entries: 65536 (order: 6, 262144 bytes, linear) [ 0.000000] Built 1 zonelists, mobility grouping on. Total pages: 523520 [ 0.000000] mem auto-init: stack:all(zero), heap alloc:on, heap free:off [ 0.000000] SLUB: HWalign=64, Order=0-3, MinObjects=0, CPUs=2, Nodes=1 [ 0.000000] allocated 2097152 bytes of page_ext [ 0.000000] ftrace: allocating 47264 entries in 139 pages [ 0.000000] ftrace: allocated 139 pages with 4 groups [ 0.000000] rcu: Hierarchical RCU implementation. [ 0.000000] rcu: RCU restricting CPUs from NR_CPUS=8 to nr_cpu_ids=2. [ 0.000000] Rude variant of Tasks RCU enabled. [ 0.000000] Tracing variant of Tasks RCU enabled. [ 0.000000] rcu: RCU calculated value of scheduler-enlistment delay is 25 jiffies. [ 0.000000] rcu: Adjusting geometry for rcu_fanout_leaf=16, nr_cpu_ids=2 [ 0.000000] RCU Tasks Rude: Setting shift to 1 and lim to 1 rcu_task_cb_adjust=1 rcu_task_cpu_ids=2. [ 0.000000] RCU Tasks Trace: Setting shift to 1 and lim to 1 rcu_task_cb_adjust=1 rcu_task_cpu_ids=2. [ 0.000000] NR_IRQS: 16, nr_irqs: 16, preallocated irqs: 16 [ 0.000000] GIC: Using split EOI/Deactivate mode [ 0.000000] rcu: srcu_init: Setting srcu_struct sizes based on contention. [ 0.000000] arch_timer: cp15 timer(s) running at 24.00MHz (phys). [ 0.000000] clocksource: arch_sys_counter: mask: 0xffffffffffffff max_cycles: 0x588fe9dc0, max_idle_ns: 440795202592 ns [ 0.000002] sched_clock: 56 bits at 24MHz, resolution 41ns, wraps every 4398046511097ns [ 0.000018] Switching to timer-based delay loop, resolution 41ns [ 0.000435] clocksource: timer: mask: 0xffffffff max_cycles: 0xffffffff, max_idle_ns: 79635851949 ns [ 0.001281] Console: colour dummy device 80x30 [ 0.001311] printk: legacy console [tty1] enabled [ 0.001505] Calibrating delay loop (skipped), value calculated using timer frequency.. 48.00 BogoMIPS (lpj=96000) [ 0.001530] CPU: Testing write buffer coherency: ok [ 0.001607] pid_max: default: 32768 minimum: 301 [ 0.010543] LSM: initializing lsm=capability,yama,apparmor [ 0.013707] Yama: becoming mindful. [ 0.014095] AppArmor: AppArmor initialized [ 0.015557] Mount-cache hash table entries: 2048 (order: 1, 8192 bytes, linear) [ 0.015592] Mountpoint-cache hash table entries: 2048 (order: 1, 8192 bytes, linear) [ 0.021695] CPU0: thread -1, cpu 0, socket 0, mpidr 80000000 [ 0.044852] Setting up static identity map for 0x40100000 - 0x40100054 [ 0.048263] rcu: Hierarchical SRCU implementation. [ 0.048283] rcu: Max phase no-delay instances is 1000. [ 0.048858] Timer migration: 1 hierarchy levels; 8 children per group; 1 crossnode level [ 0.054065] smp: Bringing up secondary CPUs ... [ 0.071012] CPU1: thread -1, cpu 1, socket 0, mpidr 80000001 [ 0.071303] smp: Brought up 1 node, 2 CPUs [ 0.071330] SMP: Total of 2 processors activated (96.00 BogoMIPS). [ 0.071345] CPU: All CPU(s) started in HYP mode. [ 0.071352] CPU: Virtualization extensions available. [ 0.071568] Memory: 1933492K/2094080K available (10240K kernel code, 1685K rwdata, 9100K rodata, 1024K init, 409K bss, 57468K reserved, 98304K cma-reserved, 1307648K highmem) [ 0.073644] devtmpfs: initialized [ 0.086909] VFP support v0.3: implementor 41 architecture 2 part 30 variant 7 rev 4 [ 0.087516] clocksource: jiffies: mask: 0xffffffff max_cycles: 0xffffffff, max_idle_ns: 7645041785100000 ns [ 0.087579] futex hash table entries: 512 (order: 3, 32768 bytes, linear) [ 0.096245] pinctrl core: initialized pinctrl subsystem [ 0.099654] NET: Registered PF_NETLINK/PF_ROUTE protocol family [ 0.107107] DMA: preallocated 256 KiB pool for atomic coherent allocations [ 0.108097] audit: initializing netlink subsys (disabled) [ 0.108752] audit: type=2000 audit(0.100:1): state=initialized audit_enabled=0 res=1 [ 0.109807] thermal_sys: Registered thermal governor 'fair_share' [ 0.109827] thermal_sys: Registered thermal governor 'bang_bang' [ 0.109838] thermal_sys: Registered thermal governor 'step_wise' [ 0.110006] cpuidle: using governor ladder [ 0.110071] cpuidle: using governor menu [ 0.110879] hw-breakpoint: found 5 (+1 reserved) breakpoint and 4 watchpoint registers. [ 0.110905] hw-breakpoint: maximum watchpoint size is 8 bytes. [ 0.121698] /soc/lcd-controller@1c0c000: Fixed dependency cycle(s) with /soc/hdmi@1c16000 [ 0.121833] /soc/lcd-controller@1c0c000: Fixed dependency cycle(s) with /soc/display-backend@1e40000 [ 0.121937] /soc/lcd-controller@1c0c000: Fixed dependency cycle(s) with /soc/display-backend@1e60000 [ 0.122055] /soc/lcd-controller@1c0d000: Fixed dependency cycle(s) with /soc/hdmi@1c16000 [ 0.122158] /soc/lcd-controller@1c0d000: Fixed dependency cycle(s) with /soc/display-backend@1e40000 [ 0.122261] /soc/lcd-controller@1c0d000: Fixed dependency cycle(s) with /soc/display-backend@1e60000 [ 0.122578] /soc/hdmi@1c16000: Fixed dependency cycle(s) with /soc/lcd-controller@1c0d000 [ 0.122732] /soc/hdmi@1c16000: Fixed dependency cycle(s) with /soc/lcd-controller@1c0c000 [ 0.123085] /soc/interrupt-controller@1c81000: Fixed dependency cycle(s) with /soc/interrupt-controller@1c81000 [ 0.123248] /soc/display-frontend@1e00000: Fixed dependency cycle(s) with /soc/display-backend@1e40000 [ 0.123439] /soc/display-frontend@1e00000: Fixed dependency cycle(s) with /soc/display-backend@1e60000 [ 0.123615] /soc/display-frontend@1e20000: Fixed dependency cycle(s) with /soc/display-backend@1e40000 [ 0.123773] /soc/display-frontend@1e20000: Fixed dependency cycle(s) with /soc/display-backend@1e60000 [ 0.123862] /soc/display-backend@1e40000: Fixed dependency cycle(s) with /soc/lcd-controller@1c0d000 [ 0.123940] /soc/display-backend@1e40000: Fixed dependency cycle(s) with /soc/lcd-controller@1c0c000 [ 0.124009] /soc/display-backend@1e40000: Fixed dependency cycle(s) with /soc/display-frontend@1e20000 [ 0.124077] /soc/display-backend@1e40000: Fixed dependency cycle(s) with /soc/display-frontend@1e00000 [ 0.124170] /soc/display-backend@1e60000: Fixed dependency cycle(s) with /soc/lcd-controller@1c0d000 [ 0.124249] /soc/display-backend@1e60000: Fixed dependency cycle(s) with /soc/lcd-controller@1c0c000 [ 0.124317] /soc/display-backend@1e60000: Fixed dependency cycle(s) with /soc/display-frontend@1e20000 [ 0.124386] /soc/display-backend@1e60000: Fixed dependency cycle(s) with /soc/display-frontend@1e00000 [ 0.125215] /soc/lcd-controller@1c0c000: Fixed dependency cycle(s) with /soc/hdmi@1c16000 [ 0.125339] /soc/lcd-controller@1c0c000: Fixed dependency cycle(s) with /soc/display-backend@1e40000 [ 0.125455] /soc/lcd-controller@1c0c000: Fixed dependency cycle(s) with /soc/display-backend@1e60000 [ 0.125804] /soc/lcd-controller@1c0d000: Fixed dependency cycle(s) with /soc/hdmi@1c16000 [ 0.125918] /soc/lcd-controller@1c0d000: Fixed dependency cycle(s) with /soc/display-backend@1e40000 [ 0.126030] /soc/lcd-controller@1c0d000: Fixed dependency cycle(s) with /soc/display-backend@1e60000 [ 0.128237] /soc/lcd-controller@1c0d000: Fixed dependency cycle(s) with /soc/hdmi@1c16000 [ 0.128436] /soc/lcd-controller@1c0c000: Fixed dependency cycle(s) with /soc/hdmi@1c16000 [ 0.128705] /soc/hdmi@1c16000: Fixed dependency cycle(s) with /soc/lcd-controller@1c0d000 [ 0.128943] /soc/hdmi@1c16000: Fixed dependency cycle(s) with /soc/lcd-controller@1c0c000 [ 0.131769] /soc/pinctrl@1c20800: Fixed dependency cycle(s) with /soc/pinctrl@1c20800/clk-out-a-pin [ 0.136344] /soc/display-frontend@1e00000: Fixed dependency cycle(s) with /soc/display-backend@1e40000 [ 0.136455] /soc/display-frontend@1e00000: Fixed dependency cycle(s) with /soc/display-backend@1e60000 [ 0.136830] /soc/display-frontend@1e20000: Fixed dependency cycle(s) with /soc/display-backend@1e40000 [ 0.136924] /soc/display-frontend@1e20000: Fixed dependency cycle(s) with /soc/display-backend@1e60000 [ 0.137304] /soc/display-frontend@1e20000: Fixed dependency cycle(s) with /soc/display-backend@1e40000 [ 0.137470] /soc/display-frontend@1e00000: Fixed dependency cycle(s) with /soc/display-backend@1e40000 [ 0.137604] /soc/lcd-controller@1c0d000: Fixed dependency cycle(s) with /soc/display-backend@1e40000 [ 0.137736] /soc/lcd-controller@1c0c000: Fixed dependency cycle(s) with /soc/display-backend@1e40000 [ 0.137883] /soc/display-backend@1e40000: Fixed dependency cycle(s) with /soc/lcd-controller@1c0d000 [ 0.138028] /soc/display-backend@1e40000: Fixed dependency cycle(s) with /soc/lcd-controller@1c0c000 [ 0.138142] /soc/display-backend@1e40000: Fixed dependency cycle(s) with /soc/display-frontend@1e20000 [ 0.138279] /soc/display-backend@1e40000: Fixed dependency cycle(s) with /soc/display-frontend@1e00000 [ 0.138694] /soc/display-frontend@1e20000: Fixed dependency cycle(s) with /soc/display-backend@1e60000 [ 0.138884] /soc/display-frontend@1e00000: Fixed dependency cycle(s) with /soc/display-backend@1e60000 [ 0.139055] /soc/lcd-controller@1c0d000: Fixed dependency cycle(s) with /soc/display-backend@1e60000 [ 0.139186] /soc/lcd-controller@1c0c000: Fixed dependency cycle(s) with /soc/display-backend@1e60000 [ 0.139302] /soc/display-backend@1e60000: Fixed dependency cycle(s) with /soc/lcd-controller@1c0d000 [ 0.139477] /soc/display-backend@1e60000: Fixed dependency cycle(s) with /soc/lcd-controller@1c0c000 [ 0.139661] /soc/display-backend@1e60000: Fixed dependency cycle(s) with /soc/display-frontend@1e20000 [ 0.139780] /soc/display-backend@1e60000: Fixed dependency cycle(s) with /soc/display-frontend@1e00000 [ 0.142414] /soc/hdmi@1c16000: Fixed dependency cycle(s) with /hdmi-connector [ 0.142644] /hdmi-connector: Fixed dependency cycle(s) with /soc/hdmi@1c16000 [ 0.154682] cryptd: max_cpu_qlen set to 1000 [ 0.232124] raid6: neonx8 gen() 582 MB/s [ 0.300278] raid6: neonx4 gen() 822 MB/s [ 0.368453] raid6: neonx2 gen() 825 MB/s [ 0.436671] raid6: neonx1 gen() 677 MB/s [ 0.504833] raid6: int32x8 gen() 252 MB/s [ 0.572914] raid6: int32x4 gen() 289 MB/s [ 0.641009] raid6: int32x2 gen() 365 MB/s [ 0.709128] raid6: int32x1 gen() 337 MB/s [ 0.709142] raid6: using algorithm neonx2 gen() 825 MB/s [ 0.777211] raid6: .... xor() 614 MB/s, rmw enabled [ 0.777223] raid6: using neon recovery algorithm [ 0.779037] iommu: Default domain type: Translated [ 0.779063] iommu: DMA domain TLB invalidation policy: strict mode [ 0.780359] SCSI subsystem initialized [ 0.780941] libata version 3.00 loaded. [ 0.781297] usbcore: registered new interface driver usbfs [ 0.781366] usbcore: registered new interface driver hub [ 0.781432] usbcore: registered new device driver usb [ 0.781783] pps_core: LinuxPPS API ver. 1 registered [ 0.781798] pps_core: Software ver. 5.3.6 - Copyright 2005-2007 Rodolfo Giometti <giometti@linux.it> [ 0.781825] PTP clock support registered [ 0.782595] Advanced Linux Sound Architecture Driver Initialized. [ 0.784208] NetLabel: Initializing [ 0.784231] NetLabel: domain hash size = 128 [ 0.784242] NetLabel: protocols = UNLABELED CIPSOv4 CALIPSO [ 0.784360] NetLabel: unlabeled traffic allowed by default [ 0.785656] clocksource: Switched to clocksource arch_sys_counter [ 0.798624] VFS: Disk quotas dquot_6.6.0 [ 0.798981] VFS: Dquot-cache hash table entries: 1024 (order 0, 4096 bytes) [ 0.799863] AppArmor: AppArmor Filesystem Enabled [ 0.816412] NET: Registered PF_INET protocol family [ 0.816787] IP idents hash table entries: 16384 (order: 5, 131072 bytes, linear) [ 0.903926] tcp_listen_portaddr_hash hash table entries: 512 (order: 0, 4096 bytes, linear) [ 0.904136] Table-perturb hash table entries: 65536 (order: 6, 262144 bytes, linear) [ 0.904189] TCP established hash table entries: 8192 (order: 3, 32768 bytes, linear) [ 0.904385] TCP bind hash table entries: 8192 (order: 5, 131072 bytes, linear) [ 0.904778] TCP: Hash tables configured (established 8192 bind 8192) [ 0.905038] UDP hash table entries: 512 (order: 2, 16384 bytes, linear) [ 0.905134] UDP-Lite hash table entries: 512 (order: 2, 16384 bytes, linear) [ 0.906025] NET: Registered PF_UNIX/PF_LOCAL protocol family [ 0.906649] Trying to unpack rootfs image as initramfs... [ 0.910989] Initialise system trusted keyrings [ 0.911155] Key type blacklist registered [ 0.912237] workingset: timestamp_bits=14 max_order=19 bucket_order=5 [ 0.912442] zbud: loaded [ 0.915119] squashfs: version 4.0 (2009/01/31) Phillip Lougher [ 0.926275] fuse: init (API version 7.41) [ 0.942065] integrity: Platform Keyring initialized [ 0.942166] xor: measuring software checksum speed [ 0.945010] arm4regs : 1159 MB/sec [ 0.950057] 8regs : 656 MB/sec [ 0.954923] 32regs : 680 MB/sec [ 0.957769] neon : 1170 MB/sec [ 0.957807] xor: using function: neon (1170 MB/sec) [ 0.957845] Key type asymmetric registered [ 0.957862] Asymmetric key parser 'x509' registered [ 0.958690] bounce: pool size: 64 pages [ 0.959359] Block layer SCSI generic (bsg) driver version 0.4 loaded (major 247) [ 0.960113] io scheduler mq-deadline registered [ 0.960146] io scheduler kyber registered [ 0.960735] io scheduler bfq registered [ 0.977058] ledtrig-cpu: registered to indicate activity on CPUs [ 0.995929] Serial: 8250/16550 driver, 8 ports, IRQ sharing disabled [ 1.014369] sun4i-drm display-engine: bound 1e00000.display-frontend (ops 0xc0bb0c8c) [ 1.014715] sun4i-drm display-engine: bound 1e20000.display-frontend (ops 0xc0bb0c8c) [ 1.015235] sun4i-drm display-engine: bound 1e60000.display-backend (ops 0xc0bb03f8) [ 1.015729] sun4i-drm display-engine: bound 1e40000.display-backend (ops 0xc0bb03f8) [ 1.016653] sun4i-drm display-engine: No panel or bridge found... RGB output disabled [ 1.016699] sun4i-drm display-engine: bound 1c0c000.lcd-controller (ops 0xc0bae8e8) [ 1.017975] sun4i-drm display-engine: No panel or bridge found... RGB output disabled [ 1.018031] sun4i-drm display-engine: bound 1c0d000.lcd-controller (ops 0xc0bae8e8) [ 1.020256] sun4i-drm display-engine: bound 1c16000.hdmi (ops 0xc0bb1688) [ 1.022796] [drm] Initialized sun4i-drm 1.0.0 for display-engine on minor 0 [ 1.022975] sun4i-drm display-engine: [drm] Cannot find any crtc or sizes [ 1.032968] brd: module loaded [ 1.039581] sun4i-drm display-engine: [drm] Cannot find any crtc or sizes [ 1.047130] loop: module loaded [ 1.055585] usbcore: registered new interface driver usb-storage [ 1.057950] sunxi-rtc 1c20d00.rtc: registered as rtc0 [ 1.058027] sunxi-rtc 1c20d00.rtc: setting system clock to 2025-07-02T08:56:46 UTC (1751446606) [ 1.058332] i2c_dev: i2c /dev entries driver [ 1.062076] sunxi-wdt 1c20c90.watchdog: Watchdog enabled (timeout=16 sec, nowayout=0) [ 1.064151] sun4i-ss 1c15000.crypto-engine: no reset control found [ 1.064308] sun4i-ss 1c15000.crypto-engine: Die ID 0 [ 1.066426] clocksource: hstimer: mask: 0xffffffff max_cycles: 0xffffffff, max_idle_ns: 6370868154 ns [ 1.066943] hid: raw HID events driver (C) Jiri Kosina [ 1.067216] usbcore: registered new interface driver usbhid [ 1.067237] usbhid: USB HID core driver [ 1.067954] armv7-pmu pmu: hw perfevents: no interrupt-affinity property, guessing. [ 1.071446] hw perfevents: enabled with armv7_cortex_a7 PMU driver, 5 (8000000f) counters available [ 1.095873] NET: Registered PF_INET6 protocol family [ 2.127070] Freeing initrd memory: 13656K [ 2.182392] Segment Routing with IPv6 [ 2.182617] In-situ OAM (IOAM) with IPv6 [ 2.182903] NET: Registered PF_PACKET protocol family [ 2.182935] NET: Registered PF_KEY protocol family [ 2.182985] bridge: filtering via arp/ip/ip6tables is no longer available by default. Update your scripts to load br_netfilter if you need this. [ 2.183410] Key type dns_resolver registered [ 2.184170] Registering SWP/SWPB emulation handler [ 2.196828] registered taskstats version 1 [ 2.197160] Loading compiled-in X.509 certificates [ 2.214355] zswap: loaded using pool zstd/zbud [ 2.215911] Key type .fscrypt registered [ 2.215942] Key type fscrypt-provisioning registered [ 2.226935] Btrfs loaded, zoned=no, fsverity=yes [ 2.307518] Key type encrypted registered [ 2.307567] AppArmor: AppArmor sha256 policy hashing enabled [ 2.328245] sun4i-pinctrl 1c20800.pinctrl: supply vcc-pi not found, using dummy regulator [ 2.328719] gpio gpiochip0: Static allocation of GPIO base is deprecated, use dynamic allocation. [ 2.331261] sun4i-pinctrl 1c20800.pinctrl: initialized sunXi PIO driver [ 2.332777] sun4i-pinctrl 1c20800.pinctrl: supply vcc-ph not found, using dummy regulator [ 2.336072] sun4i-pinctrl 1c20800.pinctrl: supply vcc-pb not found, using dummy regulator [ 2.337794] printk: legacy console [ttyS0] disabled [ 2.338531] 1c28000.serial: ttyS0 at MMIO 0x1c28000 (irq = 71, base_baud = 1500000) is a 16550A [ 2.338635] printk: legacy console [ttyS0] enabled [ 2.343112] 1c28800.serial: ttyS2 at MMIO 0x1c28800 (irq = 72, base_baud = 1500000) is a 16550A [ 2.343750] serial serial0: tty port ttyS2 registered [ 2.345203] sun4i-pinctrl 1c20800.pinctrl: supply vcc-pa not found, using dummy regulator [ 2.345901] sun7i-dwmac 1c50000.ethernet: IRQ eth_wake_irq not found [ 2.345938] sun7i-dwmac 1c50000.ethernet: IRQ eth_lpi not found [ 2.345954] sun7i-dwmac 1c50000.ethernet: IRQ sfty not found [ 2.346126] sun7i-dwmac 1c50000.ethernet: PTP uses main clock [ 2.346202] sun7i-dwmac 1c50000.ethernet: no regulator found [ 2.346880] sun7i-dwmac 1c50000.ethernet: Version ID not available [ 2.346924] sun7i-dwmac 1c50000.ethernet: DWMAC1000 [ 2.346940] sun7i-dwmac 1c50000.ethernet: No HW DMA feature register supported [ 2.346954] sun7i-dwmac 1c50000.ethernet: TX Checksum insertion supported [ 2.346969] sun7i-dwmac 1c50000.ethernet: Normal descriptors [ 2.346982] sun7i-dwmac 1c50000.ethernet: Ring mode enabled [ 2.378420] axp20x-i2c 1-0034: AXP20x variant AXP209 found [ 2.394479] input: axp20x-pek as /devices/platform/soc/1c2ac00.i2c/i2c-1/1-0034/axp20x-pek/input/input0 [ 2.400618] axp20x-i2c 1-0034: Backup (RTC) battery charging is disabled [ 2.400815] axp20x-i2c 1-0034: AXP20X driver loaded [ 2.406857] sun4i-pinctrl 1c20800.pinctrl: supply vcc-pf not found, using dummy regulator [ 2.413840] sunxi-mmc 1c0f000.mmc: Got CD GPIO [ 2.418221] ahci-sunxi 1c18000.sata: supply ahci not found, using dummy regulator [ 2.418494] ahci-sunxi 1c18000.sata: supply phy not found, using dummy regulator [ 2.438244] sunxi-mmc 1c0f000.mmc: initialized, max. request size: 16384 KB [ 2.465843] ahci-sunxi 1c18000.sata: controller can't do PMP, turning off CAP_PMP [ 2.465933] ahci-sunxi 1c18000.sata: SSS flag set, parallel bus scan disabled [ 2.465982] ahci-sunxi 1c18000.sata: AHCI vers 0001.0100, 32 command slots, 3 Gbps, platform mode [ 2.466005] ahci-sunxi 1c18000.sata: 1/1 ports implemented (port mask 0x1) [ 2.466021] ahci-sunxi 1c18000.sata: flags: ncq sntf stag pm led clo only pio slum part ccc [ 2.468318] scsi host0: ahci-sunxi [ 2.469308] ata1: SATA max UDMA/133 mmio [mem 0x01c18000-0x01c18fff] port 0x100 irq 119 lpm-pol 0 [ 2.474777] of_cfs_init [ 2.474978] of_cfs_init: OK [ 2.478704] mmc0: host does not support reading read-only switch, assuming write-enable [ 2.480932] mmc0: new high speed SDHC card at address b368 [ 2.484061] mmcblk0: mmc0:b368 NCard 3.70 GiB [ 2.713012] clk: Disabling unused clocks [ 2.713235] PM: genpd: Disabling unused power domains [ 2.713266] ALSA device list: [ 2.713278] #0: sun4i-codec [ 2.713992] mmcblk0: p1 [ 2.780858] ata1: SATA link up 3.0 Gbps (SStatus 123 SControl 300) [ 2.782832] ata1.00: Model 'Samsung SSD 840 EVO 500GB', rev 'EXT0CB6Q', applying quirks: noncqtrim zeroaftertrim nodmalog [ 2.782904] ata1.00: supports DRM functions and may not be fully accessible [ 2.782919] ata1.00: ATA-9: Samsung SSD 840 EVO 500GB, EXT0CB6Q, max UDMA/133 [ 2.782939] ata1.00: 976773168 sectors, multi 1: LBA48 NCQ (depth 32) [ 2.783422] ata1.00: Features: Trust [ 2.783673] ata1.00: supports DRM functions and may not be fully accessible [ 2.784145] ata1.00: configured for UDMA/133 [ 2.785048] scsi 0:0:0:0: Direct-Access ATA Samsung SSD 840 CB6Q PQ: 0 ANSI: 5 [ 2.787212] sd 0:0:0:0: Attached scsi generic sg0 type 0 [ 2.787270] sd 0:0:0:0: [sda] 976773168 512-byte logical blocks: (500 GB/466 GiB) [ 2.787381] sd 0:0:0:0: [sda] Write Protect is off [ 2.787406] sd 0:0:0:0: [sda] Mode Sense: 00 3a 00 00 [ 2.787559] sd 0:0:0:0: [sda] Write cache: enabled, read cache: enabled, doesn't support DPO or FUA [ 2.787919] sd 0:0:0:0: [sda] Preferred minimum I/O size 512 bytes [ 2.806306] sda: sda1 sda2 sda3 [ 2.807527] sd 0:0:0:0: [sda] Attached SCSI disk [ 2.816074] Freeing unused kernel image (initmem) memory: 1024K [ 2.816726] Run /init as init process [ 2.816754] with arguments: [ 2.816773] /init [ 2.816784] with environment: [ 2.816794] HOME=/ [ 2.816805] TERM=linux [ 2.816815] ubootpart=5b507211-01 [ 2.816826] ubootsource=mmc [ 2.816837] sunxi_ve_mem_reserve=0 [ 2.816847] sunxi_g2d_mem_reserve=0 [ 2.816858] sunxi_fb_mem_reserve=16 [ 2.816869] cgroup_enable=memory [ 3.909998] sunxi-mmc 1c12000.mmc: allocated mmc-pwrseq [ 3.933806] sunxi-mmc 1c12000.mmc: initialized, max. request size: 16384 KB [ 4.061411] mmc1: new high speed SDIO card at address 0001 [ 4.211031] sun5i-a13-gpadc-iio: Failed to locate of_node [id: 0] [ 4.283436] sun7i-dwmac 1c50000.ethernet end0: renamed from eth0 [ 4.301983] axp20x-gpio axp20x-gpio: DMA mask not set [ 4.327476] axp20x-gpio axp20x-gpio: AXP209 pinctrl and GPIO driver loaded [ 4.355581] axp20x-battery-power-supply axp20x-battery-power-supply: DMA mask not set [ 4.371464] axp20x-usb-power-supply axp20x-usb-power-supply: DMA mask not set [ 5.873099] EXT4-fs (sda1): mounted filesystem ad99c006-e2fa-4070-8fbe-9e08f643dd62 ro with ordered data mode. Quota mode: none. [ 14.571324] platform sound: deferred probe pending: asoc-simple-card: parse error [ 14.571365] platform 1c13400.phy: deferred probe pending: platform: supplier axp20x-usb-power-supply not ready [ 14.571381] platform 1c13000.usb: deferred probe pending: platform: supplier 1c13400.phy not ready [ 14.571395] platform 1c14000.usb: deferred probe pending: platform: supplier 1c13400.phy not ready [ 14.571409] platform 1c1c000.usb: deferred probe pending: platform: supplier 1c13400.phy not ready [ 14.571422] platform 1c14400.usb: deferred probe pending: platform: supplier 1c13400.phy not ready [ 14.571436] platform 1c1c400.usb: deferred probe pending: platform: supplier 1c13400.phy not ready [ 14.571449] platform axp20x-battery-power-supply: deferred probe pending: (reason unknown) [ 14.571462] platform axp20x-usb-power-supply: deferred probe pending: (reason unknown) [ 17.843978] systemd[1]: Inserted module 'autofs4' [ 18.117493] systemd[1]: systemd 255.4-1ubuntu8.8 running in system mode (+PAM +AUDIT +SELINUX +APPARMOR +IMA +SMACK +SECCOMP +GCRYPT -GNUTLS +OPENSSL +ACL +BLKID +CURL +ELFUTILS +FIDO2 +IDN2 -IDN +IPTC +KMOD +LIBCRYPTSETUP +LIBFDISK +PCRE2 -PWQUALITY +P11KIT +QRENCODE +TPM2 +BZIP2 +LZ4 +XZ +ZLIB +ZSTD -BPF_FRAMEWORK -XKBCOMMON +UTMP +SYSVINIT default-hierarchy=unified) [ 18.117576] systemd[1]: Detected architecture arm. ... SNIP ... [90829.705266] 8<--- cut here --- [90829.708505] Unable to handle kernel NULL pointer dereference at virtual address 00000255 when write [90829.717695] [00000255] *pgd=00000000 [90829.721519] Internal error: Oops: 805 [#1] SMP THUMB2 [90829.726679] Modules linked in: nls_utf8 cifs cifs_arc4 nls_ucs2_utils cifs_md4 netfs exfat snd_usb_audio snd_hwdep binfmt_misc snd_seq_dummy snd_usbmidi_lib snd_seq_oss snd_seq_midi snd_seq_midi_event snd_seq snd_rawmidi snd_seq_device uas lima gpu_sched drm_shmem_helper axp20x_adc sunxi_cedrus(C) sun4i_gpadc_iio v4l2_mem2mem videobuf2_dma_contig videobuf2_memops videobuf2_v4l2 sunxi_cir videobuf2_common videodev mc display_connector cpufreq_dt evdev brcmfmac_wcc sch_fq_codel bonding brcmfmac brcmutil cfg80211 rfkill dm_mod autofs4 ext4 mbcache jbd2 axp20x_usb_power axp20x_battery industrialio pinctrl_axp209 sun4i_gpadc pwm_sun4i sunxi phy_generic uio_pdrv_genirq pwrseq_simple uio realtek [90829.788428] CPU: 1 UID: 1000 PID: 14406 Comm: mocp Tainted: G C 6.12.30-current-sunxi #1 [90829.797976] Tainted: [C]=CRAP [90829.800979] Hardware name: Allwinner sun7i (A20) Family [90829.806223] PC is at mmioset+0x90/0xa4 [90829.810015] LR is at exfat_get_block+0x58b/0x638 [exfat] [90829.815374] pc : [<c0ab76b0>] lr : [<bfbdf847>] psr: 8003b833 [90829.821651] sp : f2559b48 ip : 00000255 fp : 00000000 [90829.826890] r10: 00004931 r9 : 00926255 r8 : c5a21400 [90829.832128] r7 : d09bc5c0 r6 : 00000000 r5 : 00000200 r4 : 00000055 [90829.838668] r3 : 00000001 r2 : 000001a7 r1 : 00000000 r0 : 00000255 [90829.845209] Flags: Nzcv IRQs on FIQs on Mode SVC_32 ISA Thumb Segment none [90829.852537] Control: 50c5387d Table: 536e006a DAC: 00000051 [90829.858294] Register r0 information: non-paged memory [90829.863367] Register r1 information: NULL pointer [90829.868089] Register r2 information: non-paged memory [90829.873156] Register r3 information: non-paged memory [90829.878221] Register r4 information: non-paged memory [90829.883286] Register r5 information: non-paged memory [90829.888356] Register r6 information: NULL pointer [90829.893082] Register r7 information: slab buffer_head start d09bc5c0 pointer offset 0 size 64 [90829.901656] Register r8 information: slab kmalloc-1k start c5a21400 pointer offset 0 size 1024 [90829.910306] Register r9 information: non-paged memory [90829.915380] Register r10 information: non-paged memory [90829.920533] Register r11 information: NULL pointer [90829.925338] Register r12 information: non-paged memory [90829.930495] Process mocp (pid: 14406, stack limit = 0xfea269c0) [90829.936437] Stack: (0xf2559b48 to 0xf255a000) [90829.940814] 9b40: d09bc240 2e2746cd 00000001 d09bc5c0 00000000 c597c86c [90829.949011] 9b60: 00000001 00000024 c5a21400 00000000 c597c800 d09bc240 00000000 0012aace [90829.957211] 9b80: 0012aacd 00000000 00000000 00000000 00000000 2e2746cd 00000000 00004931 [90829.965406] 9ba0: d09bc5c0 00000000 00000001 00000200 e1bc1760 d09bc240 00000200 c032a52f [90829.973601] 9bc0: d09bc5c0 00000000 00000000 00004932 00000000 ef5b9864 bfbdf2bd 00000000 [90829.981796] 9be0: e5afa800 00000000 00000054 d09bc240 00000000 00000000 00000000 00000000 [90829.989993] 9c00: 00000000 00000000 00000000 2e2746cd 00afa800 e22e4a80 00000001 00000000 [90829.998200] 9c20: f2559c98 c2840400 00000008 00000008 00004932 c032c541 f2559cb0 00000000 [90830.006409] 9c40: 255febb0 00000009 00000000 00000000 ef5b9864 f2559cb0 e1bc1760 c2840400 [90830.014612] 9c60: 00000000 00000001 00012cc0 00080000 00260000 f2559dd4 ef5b9864 00000001 [90830.022812] 9c80: 00000001 0000000b 00112cca e1bc186c 0000091c c032cfb1 00000000 ef5b9864 [90830.031006] 9ca0: 00000001 00000001 255febaf 00000000 00000000 00000000 ef5b9864 00000000 [90830.039202] 9cc0: 255febb1 00000000 00000200 00000000 c2840400 00000000 00000000 00000000 [90830.047396] 9ce0: 00000000 00000000 00000000 00000000 000048e0 bfbdf2bd 00260000 2e2746cd [90830.055591] 9d00: bfb86090 f2559dd4 f2559dd4 c0286967 00000000 ef5b9864 00000000 00000000 [90830.063788] 9d20: 00000000 00000000 00000000 00000000 00000001 00000100 f2559d38 f2559d38 [90830.071985] 9d40: 00000000 2e2746cd 0000000a 0000000b e5afa800 f2559dd4 e1bc1878 c0286bc3 [90830.080182] 9d60: e5afa800 e1bc1868 ffffffeb 00400040 e1bc1878 e5afa800 e1bc1868 8c140000 [90830.088384] 9d80: f2559e4c e1bc1868 ef80aae4 e5afa800 000008fc f2559f28 000008fa c027dd25 [90830.096580] 9da0: e5afae4c ede0f780 ede0f7e8 000008fd f2559dec c15adf00 00000000 00000000 [90830.104777] 9dc0: 00001fa0 e5afa800 e5afa800 2e2746cd 00000000 ede0f780 e1bc1868 ede0f7e8 [90830.112973] 9de0: 00000926 00000001 00000001 00000000 00000000 2e2746cd 00000002 00926255 [90830.121170] 9e00: 00000004 008fabe0 00000000 e1bc1760 b117bb9c 00000001 f2559f28 c027dfc5 [90830.129370] 9e20: f2559f10 c0ae793f c250c988 00000000 e5afa800 c01b36e1 e5afa800 c01b3b53 [90830.137568] 9e40: e1bc1868 ede0f780 e5afa800 00000003 ef5b8cb8 ef80ab74 ef80aae4 00000000 [90830.145762] 9e60: 00000000 00000000 00000000 00000000 00000000 00000000 00000000 00000000 [90830.153960] 9e80: 00000000 00000000 00000000 00000000 00000000 00000000 00000000 00000000 [90830.162153] 9ea0: 00000000 00000000 00000000 00000000 00000000 00000000 00000000 00000000 [90830.170347] 9ec0: 00000000 00000000 00000000 2e2746cd e5afa800 bfbe6225 ede0f780 e5afa800 [90830.178542] 9ee0: 00001fa0 f2559f80 b117bb9c 00000001 bfb87c80 c02f0a13 00000000 00000002 [90830.186737] 9f00: 00000001 f2559f00 c265aa00 00000000 00000000 00000000 b117bb9c 00001fa0 [90830.194933] 9f20: 00000001 00000000 ede0f780 00000000 008fabe0 00000000 00000000 00000000 [90830.203129] 9f40: 00000000 00004004 00000000 00000000 b12007d4 2e2746cd b12007d4 ede0f783 [90830.211332] 9f60: ede0f780 008fabe0 00000000 c01002a0 e5afa800 00000003 b120076c c02f114b [90830.219536] 9f80: 008fabe0 00000000 c0102455 2e2746cd 00000001 00001fa0 b117bb9c 00000004 [90830.227731] 9fa0: 00000003 c0100061 00001fa0 b117bb9c 00000004 b117bb9c 00001fa0 00000000 [90830.235929] 9fc0: 00001fa0 b117bb9c 00000004 00000003 00001fa0 00001fa0 b12007f0 b120076c [90830.244122] 9fe0: 00000003 b117bad0 b6ac36d1 b6a396c6 80030030 00000004 00000000 00000000 [90830.252311] Call trace: [90830.252331] mmioset from exfat_get_block+0x58b/0x638 [exfat] [90830.260706] exfat_get_block [exfat] from block_read_full_folio+0xf7/0x2b0 [90830.267634] block_read_full_folio from do_mpage_readpage+0x71/0x498 [90830.274031] do_mpage_readpage from mpage_readahead+0x8d/0xe4 [90830.279818] mpage_readahead from read_pages+0x4b/0x1e8 [90830.285078] read_pages from page_cache_ra_unbounded+0xbf/0x12c [90830.291027] page_cache_ra_unbounded from filemap_get_pages+0x385/0x554 [90830.297674] filemap_get_pages from filemap_read+0xd1/0x34c [90830.303276] filemap_read from vfs_read+0x1b3/0x228 [90830.308191] vfs_read from ksys_read+0x53/0xa8 [90830.312668] ksys_read from ret_fast_syscall+0x1/0x5c [90830.317751] Exception stack(0xf2559fa8 to 0xf2559ff0) [90830.322822] 9fa0: 00001fa0 b117bb9c 00000004 b117bb9c 00001fa0 00000000 [90830.331019] 9fc0: 00001fa0 b117bb9c 00000004 00000003 00001fa0 00001fa0 b12007f0 b120076c [90830.339214] 9fe0: 00000003 b117bad0 b6ac36d1 b6a396c6 [90830.344288] Code: 3a04 dbf0 2b02 bfb8 (f80c) 1b01 [90830.349338] ---[ end trace 0000000000000000 ]--- [90830.354108] ------------[ cut here ]------------ [90830.358863] WARNING: CPU: 1 PID: 14406 at kernel/exit.c:886 do_exit+0x62d/0x744 [90830.366383] Modules linked in: nls_utf8 cifs cifs_arc4 nls_ucs2_utils cifs_md4 netfs exfat snd_usb_audio snd_hwdep binfmt_misc snd_seq_dummy snd_usbmidi_lib snd_seq_oss snd_seq_midi snd_seq_midi_event snd_seq snd_rawmidi snd_seq_device uas lima gpu_sched drm_shmem_helper axp20x_adc sunxi_cedrus(C) sun4i_gpadc_iio v4l2_mem2mem videobuf2_dma_contig videobuf2_memops videobuf2_v4l2 sunxi_cir videobuf2_common videodev mc display_connector cpufreq_dt evdev brcmfmac_wcc sch_fq_codel bonding brcmfmac brcmutil cfg80211 rfkill dm_mod autofs4 ext4 mbcache jbd2 axp20x_usb_power axp20x_battery industrialio pinctrl_axp209 sun4i_gpadc pwm_sun4i sunxi phy_generic uio_pdrv_genirq pwrseq_simple uio realtek [90830.427987] CPU: 1 UID: 1000 PID: 14406 Comm: mocp Tainted: G D C 6.12.30-current-sunxi #1 [90830.428023] Tainted: [D]=DIE, [C]=CRAP [90830.428029] Hardware name: Allwinner sun7i (A20) Family [90830.428036] Call trace: [90830.428050] unwind_backtrace from show_stack+0x11/0x14 [90830.428091] show_stack from dump_stack_lvl+0x37/0x42 [90830.428114] dump_stack_lvl from __warn+0xbf/0xe8 [90830.428138] __warn from warn_slowpath_fmt+0x113/0x118 [90830.428161] warn_slowpath_fmt from do_exit+0x62d/0x744 [90830.428186] do_exit from make_task_dead+0x77/0x11c [90830.428214] make_task_dead from die+0x2a5/0x364 [90830.428235] die from die_kernel_fault+0x6f/0x84 [90830.428258] die_kernel_fault from do_translation_fault+0x1/0x88 [90830.428283] do_translation_fault from 0xc160323c [90830.428338] ---[ end trace 0000000000000000 ]--- The issue is easy enough to work around, simply downgrade to the working version: # apt install linux-image-current-sunxi=25.2.3 armbian-firmware=25.2.3 linux-dtb-current-sunxi=25.2.3 Reading package lists... Done Building dependency tree... Done Reading state information... Done The following packages will be DOWNGRADED: armbian-firmware linux-dtb-current-sunxi linux-image-current-sunxi 0 upgraded, 0 newly installed, 3 downgraded, 0 to remove and 0 not upgraded. Need to get 136 MB of archives. After this operation, 3,704 kB disk space will be freed. Do you want to continue? [Y/n] y Get:1 http://fi.mirror.armbian.de/apt noble/main armhf armbian-firmware all 25.2.3 [94.1 MB] Get:2 http://fi.mirror.armbian.de/apt noble/main armhf linux-dtb-current-sunxi armhf 25.2.3 [211 kB] Get:3 http://fi.mirror.armbian.de/apt noble/main armhf linux-image-current-sunxi armhf 25.2.3 [41.5 MB] Fetched 103 MB in 19s (5,509 kB/s) dpkg: warning: downgrading armbian-firmware from 25.5.1 to 25.2.3 (Reading database ... 49560 files and directories currently installed.) Preparing to unpack .../armbian-firmware_25.2.3_all.deb ... Unpacking armbian-firmware (25.2.3) over (25.5.1) ... dpkg: warning: downgrading linux-dtb-current-sunxi from 25.5.1 to 25.2.3 Preparing to unpack .../linux-dtb-current-sunxi_25.2.3_armhf.deb ... Armbian 'linux-dtb-current-sunxi' for '6.12.20-current-sunxi': 'preinst' starting. Armbian 'linux-dtb-current-sunxi' for '6.12.20-current-sunxi': 'preinst' finishing. Unpacking linux-dtb-current-sunxi (25.2.3) over (25.5.1) ... dpkg: warning: downgrading linux-image-current-sunxi from 25.5.1 to 25.2.3 Preparing to unpack .../linux-image-current-sunxi_25.2.3_armhf.deb ... Armbian 'linux-image-current-sunxi' for '6.12.30-current-sunxi': 'prerm' starting. Armbian 'linux-image-current-sunxi' for '6.12.30-current-sunxi': 'prerm' finishing. Armbian 'linux-image-current-sunxi' for '6.12.20-current-sunxi': 'preinst' starting. ls: cannot access '/var/lib/initramfs-tools': No such file or directory Armbian 'linux-image-current-sunxi' for '6.12.20-current-sunxi': 'preinst' finishing. Unpacking linux-image-current-sunxi (25.2.3) over (25.5.1) ... Armbian 'linux-image-current-sunxi' for '6.12.30-current-sunxi': 'postrm' starting. Armbian 'linux-image-current-sunxi' for '6.12.30-current-sunxi': 'postrm' finishing. Setting up linux-image-current-sunxi (25.2.3) ... Armbian 'linux-image-current-sunxi' for '6.12.20-current-sunxi': 'postinst' starting. update-initramfs: Generating /boot/initrd.img-6.12.20-current-sunxi I: The initramfs will attempt to resume from /dev/sda3 I: (UUID=ae1efffa-3fde-41fc-ab76-99e60ecca21c) I: Set the RESUME variable to override this. update-initramfs: Converting to u-boot format Armbian: update last-installed kernel symlink to 'zImage'... '/boot/zImage' -> 'vmlinuz-6.12.20-current-sunxi' Armbian: Debian compat: linux-update-symlinks install 6.12.20-current-sunxi boot/vmlinuz-6.12.20-current-sunxi I: /boot/vmlinuz.old is now a symlink to vmlinuz-6.12.20-current-sunxi I: /boot/initrd.img.old is now a symlink to initrd.img-6.12.20-current-sunxi I: /boot/vmlinuz is now a symlink to vmlinuz-6.12.20-current-sunxi I: /boot/initrd.img is now a symlink to initrd.img-6.12.20-current-sunxi Armbian 'linux-image-current-sunxi' for '6.12.20-current-sunxi': 'postinst' finishing. Setting up linux-dtb-current-sunxi (25.2.3) ... Armbian 'linux-dtb-current-sunxi' for '6.12.20-current-sunxi': 'postinst' starting. Armbian: DTB: symlinking /boot/dtb to /boot/dtb-6.12.20-current-sunxi... 'dtb' -> 'dtb-6.12.20-current-sunxi' Armbian 'linux-dtb-current-sunxi' for '6.12.20-current-sunxi': 'postinst' finishing. Setting up armbian-firmware (25.2.3) ... # apt-mark hold linux-image-current-sunxi armbian-firmware linux-dtb-current-sunxi linux-image-current-sunxi set on hold. armbian-firmware set on hold. linux-dtb-current-sunxi set on hold.
 -
Well its equivalent so other than vendor not beeing in a database does not count as custom in my books, but that is beside the point. Armbian correctly recognizes the size and I can write to it and that is important. Now flashing an existing image is simple. My preferred way is dd as described by Piter75: dd if=uboot.img of=/dev/mtdblock0 bs=4K for u-boot images and dd if=idbloader.img of=/dev/mtdblock0 seek=64 bs=512 conv=sync dd if=u-boot.itb of=/dev/mtdblock0 seek=16384 bs=512 conv=sync if used with image tree blob. Nice thing is that if new u-boot hangs or does not boot I can just short pin 23-25 to boot from SD card and try again. Since I have an 8Mb flash I would really like to bake in m.2 to SATA drivers - for ASM1166 in my case. Any pointers are welcome. DeMo
-

Desktop not showing Armbian 25.5.1 Noble Gnome, Orange Pi 5
compent replied to compent's topic in Orange Pi 5
Lightdm wasn't seen as being installed but I installed it just to see what happened but no change. sudo nano /home/*/.xsession-errors gave the following information. Xsession: X session started for test at Fri 20 Jun 07:04:16 BST 2025 dbus-update-activation-environment: setting DBUS_SESSION_BUS_ADDRESS=unix:path=> dbus-update-activation-environment: setting DISPLAY=:10.0 localuser:test being added to access control list dbus-update-activation-environment: setting QT_ACCESSIBILITY=1 dbus-update-activation-environment: setting USER=test dbus-update-activation-environment: setting LANGUAGE=en_GB.UTF-8 dbus-update-activation-environment: setting XDG_SESSION_TYPE=x11 dbus-update-activation-environment: setting HOME=/home/test dbus-update-activation-environment: setting XRDP_PULSE_SINK_SOCKET=xrdp_chansrv> dbus-update-activation-environment: setting XRDP_PULSE_SOURCE_SOCKET=xrdp_chans> dbus-update-activation-environment: setting DBUS_SESSION_BUS_ADDRESS=unix:path=> dbus-update-activation-environment: setting PULSE_SCRIPT=/etc/xrdp/pulse/defaul> dbus-update-activation-environment: setting LOGNAME=test dbus-update-activation-environment: setting XDG_SESSION_CLASS=user dbus-update-activation-environment: setting PATH=/usr/local/sbin:/usr/local/bin> dbus-update-activation-environment: setting XRDP_SOCKET_PATH=/run/xrdp/sockdir dbus-update-activation-environment: setting XDG_RUNTIME_DIR=/run/user/1000 dbus-update-activation-environment: setting DISPLAY=:10.0 dbus-update-activation-environment: setting LANG=en_GB.UTF-8 I flashed an older image and this latest one (that had been working fine for a few weeks) and both ran fine from Micro SD cards or USB. I'm not sure what connection Efe Çetin has as it's an Orange Pi 5 board, so perhaps they have some form of official input to design. I'd love to know what triggered the change. And yes, like many things, no guarantees but if what happens can give pointers to preventing it happening to others in the future or recording potential solutions for those that might end up in the same position. -
 I have attempted this with the vendor kernels and the mainline kernels, and they both do the same thing. The vendor kernel cannot see the EMMC at all after running updates on it. So that version would kill itself when updated even if it did install and boot off the emmc. The wifi also doesnt work on the mainline, so the options are mainline with no wifi or vendor with no emmc. Install to SD card --> to through setup wizard --> change firmware to 5b instead of 5.--> reboot --> armbian-install --> boot from emmc, system on emmc ---> spends a long time on counting files ---> file transfer screen flashes by in 1 second. --> shutdown ---> boot from emmc. ---> completely dead, the lights on the board never even flash green like they do with an SD inserted This has worked in the past, many many versions ago, but it did not do this when it worked "spends a long time on counting files ---> file transfer screen flashes by in 1 second" Files appear to be there though when mounting the filesystem. Correct uuids in the armbianEnv and fstab I also attempted to just burn it from the sd to the emmc with dd, but that also didnt work How can I load a current version of amrbian onto my emmc for the orange pi 5b?
 -
Hello everyone. I can't flash Armbian to EMMC on the OrangePi 5B board. I made an SD card, booted, ran armbian-install, selected Boot from EMMC/System on EMMC, the recording process was successful, but after that the board stops booting at all. When I boot from the SD card again, I see that EMMC is not a device in the system. There is no main mmcblk0, no mmcblk0boot0, no mmcblk0boot1. I was able to get EMMC back only after re-flashing the standard Android firmware using RKDevTool via maskrom. When I flash Android to EMMC and then boot from the SD card with Armbian, /dev/mmcblk0, /dev/mmcblk0boot0 and /dev/mmcblk0boot1 are back in place. Accordingly, I have some confusion: 1. Why, when booting from an SD card after flashing EMMC, none of the three devices mmcblk0, mmcblk0boot0 and mmcblk0boot1 are visible? What can be flashed there so that it falls off completely? 2. Why, when processing armbian-install, the system does not boot and how can I flash Armbian to EMMC? I am using the image: Armbian_24.11.2_Orangepi5_bookworm_vendor_6.1.75_minimal.img.xz, I have previously tried others, including larger images with a graphical environment. My board: Orange Pi 5B 16G/128G, revision 1.2. I have changed boards, tried three pieces.
-

Can't flash Armbian to EMMC on Orange Pi 5B
Matthijs Kooijman replied to sns1081's topic in Rockchip
To add a datapoint: In the past, I've been succesfully installing to eMMC using `armbian-install` using an Armbian 24.2.1 Jammy image. IIRC I had to change the `ftdfile=` line in `/boot/armbianEnv.txt` (as documented at https://www.armbian.com/orangepi-5/) but it otherwise worked right away. Now recently I have been playing with newer bootloaders and images and kernels (in order to fix an issue where a reboot hangs), and in that process I updated the U-boot on the eMMC, which caused booting from eMMC to fail, and when booting from SD card, I no longer have the eMMC device so I cannot fix this (I think this might be exactly what @sns1081 describes in the first post of this topic). I've been trying to fix this (see this post for details), but on my previous attempt I could not get `rkdeveloptool` to work: it kept giving "Write LBA failed!" errors on on the `wl` command. I suspected this was because I needed the `db` (download bootloader) command first to download and run a bootloader to then handle the `wl` command, but I could not find the right spl_loader file. But with this thread (and in particular this post by @Andrius Vainorius) offered a filename I could google and then found it here: https://dl.radxa.com/rock5/sw/images/loader/rock-5b/release/ With that, at least the db and wl commands work: ❯ sudo ~/bin/rkdeveloptool db ~/Downloads/rk3588_spl_loader_v1.15.113.bin Downloading bootloader succeeded. ❯ sudo ~/bin/rkdeveloptool wl 0 some_img.img Write LBA from file (100%) For this, I cannected USB-C cable to the J11 USB connector in the middle, powered up via the USB-C connector in the corner and pressed the maskrom button on powerup. Note that it did not seem to be necessary to have the rkdeveloptool and the images to write in the same directory, as suggested by others here. Note that the the "some_img.img" is an image I lifted from an SD-card with Armbian 24.2.1 Jammy, so it is not the original clean image, but it does have the same stuff on it. Just the above commands recovered my board: It can boot from eMMC again and the /dev/mmcblk0 eMMC device is available again (both when booting from eMMC and when booting from SD). Analyzing why eMMC was broken before, I compared the serial output from the broken and fixed cases. The main difference is here seems to be the u-boot SPL version. AFAIU, this is what happens: Some ROM bootloader boots, which loads U-boot SPL from eMMC U-boot SPL checks SD-card and then eMMC to load the main U-boot Maybe there is another bootloader stage involved (between ROM and SPL, since there is some serial output before SPL shows up that is different between both cases). Here's a diff of the serial output between both cases (up to the moment where U-boot runs and no more interesting differences appear): --- old-opi5.txt 2025-07-02 21:20:08.631329154 +0200 +++ old-opi5-emmc-fixed.txt 2025-07-02 23:01:17.982196616 +0200 @@ -1,26 +1,24 @@ -üDDR d5483af87d cym 23/11/23-16:15:24,fwver: v1.15 +þDDR V1.11 f1474cf52f cym 23/05/09-11:02:36 LPDDR4X, 2112MHz channel[0] BW=16 Col=10 Bk=8 CS0 Row=16 CS1 Row=16 CS=2 Die BW=16 Size=2048MB channel[1] BW=16 Col=10 Bk=8 CS0 Row=16 CS1 Row=16 CS=2 Die BW=16 Size=2048MB channel[2] BW=16 Col=10 Bk=8 CS0 Row=16 CS1 Row=16 CS=2 Die BW=16 Size=2048MB channel[3] BW=16 Col=10 Bk=8 CS0 Row=16 CS1 Row=16 CS=2 Die BW=16 Size=2048MB Manufacturer ID:0x1 -CH0 RX Vref:29.3%, TX Vref:22.8%,21.8% -CH1 RX Vref:28.9%, TX Vref:20.8%,21.8% +CH0 RX Vref:28.5%, TX Vref:23.8%,22.8% +CH1 RX Vref:29.3%, TX Vref:20.8%,20.8% CH2 RX Vref:29.3%, TX Vref:22.8%,21.8% -CH3 RX Vref:27.9%, TX Vref:20.8%,20.8% +CH3 RX Vref:26.7%, TX Vref:21.8%,21.8% change to F1: 528MHz change to F2: 1068MHz change to F3: 1560MHz change to F0: 2112MHz out U-Boot SPL board init -U-Boot SPL 2017.09 (Feb 25 2025 - 08:48:59) -sfc cmd=9fH(6BH-x4) -unrecognized JEDEC id bytes: ff, ff, ff -unknown raw ID ff ff ff -Trying to boot from MMC2 -spl: partition error +U-Boot SPL 2017.09 (Feb 09 2024 - 18:56:36) +unknown raw ID 0 0 0 +unrecognized JEDEC id bytes: 00, 00, 00 +Trying to boot from MMC1 Trying fit image at 0x4000 sector ## Verified-boot: 0 ## Checking atf-1 0x00040000 ... sha256(7efcd01a0f...) + OK @@ -29,7 +27,7 @@ ## Checking atf-2 0xff100000 ... sha256(1163474a5b...) + OK ## Checking atf-3 0x000f0000 ... sha256(da90adf3a4...) + OK Jumping to U-Boot(0x00200000) via ARM Trusted Firmware(0x00040000) -Total: 304.579/460.237 ms +Total: 245.95 ms INFO: Preloader serial: 2 NOTICE: BL31: v2.3():v2.3-589-g3389cfdda:derrick.huang @@ -42,11 +40,10 @@ INFO: valid_cpu_msk=0xff bcore0_rst = 0x0, bcore1_rst = 0x0 INFO: system boots from cpu-hwid-0 INFO: idle_st=0x21fff, pd_st=0x11fff9, repair_st=0xfff70001 -ERROR: dfs get fsp_params[0] error, 0xfead0004 != 0xfead0003 -ERROR: dfs get fsp_params[1] error, 0x1111 != 0xfead0003 -ERROR: dfs get fsp_params[2] error, 0x0 != 0xfead0003 -ERROR: dfs get fsp_params[3] error, 0x60241520 != 0xfead0003 -ERROR: loader&trust unmatch!!! Please update trust if need enable dmc +INFO: dfs DDR fsp_params[0].freq_mhz= 2112MHz +INFO: dfs DDR fsp_params[1].freq_mhz= 528MHz +INFO: dfs DDR fsp_params[2].freq_mhz= 1068MHz +INFO: dfs DDR fsp_params[3].freq_mhz= 1560MHz INFO: BL31: Initialising Exception Handling Framework INFO: BL31: Initializing runtime services WARNING: No OPTEE provided by BL2 boot loader, Booting device without OPTEE initialization. SMC`s destined for OPTEE will return SMC_UNK @@ -67,18 +64,8 @@ CR: M/C/I Using default environment -no mmc device at slot 1 -Card did not respond to voltage select! -do_rkimg_test: dev_desc is NULL! mmc@fe2c0000: 0, mmc@fe2e0000: 1 -Card did not respond to voltage select! -PCIe-0 Link Fail - -Device 0: unknown device -Card did not respond to voltage select! -switch to partitions #0, OK -mmc0 is current device -Bootdev(scan): mmc 0 +Bootdev(atags): mmc 0 MMC0: Legacy, 52Mhz PartType: EFI DM: v2 Since in both cases, the main U-boot (Feb 09 2024) runs from the SD-card, I suspect that the U-boot SPL (or the preceding bootloader, if any) is somehow involved in setting up the eMMC properly, and the new one does not do the setup properly (or otherwise messes something up). Next things I could try are: Flash a recent Armbian image (different version/flavors) to eMMC using rkdeveloptool and see if any of those produce a working system/eMMC. Figure out how the boot process *really* works and what parts of the eMMC are loaded in what order and how Compare a working and broken armbian image (in the areas that contain bootloader-stuff) and swap out some of these parts to see what is the part that breaks it. However, my main issue is fixing reboots on the older armbian system we are using, so I might not get around to the above anytime soon (OTOH, it seems the newer U-boot SPL actually fixes the reboot issue, so that could motivate me to see if we can upgrade to the new u-boot version without losing eMMC). -

Desktop not showing Armbian 25.5.1 Noble Gnome, Orange Pi 5
laibsch replied to compent's topic in Orange Pi 5
Yes, your logs show hundreds of errors, so it will be hard to pinpoint which one it is exactly. Here's a few things I can suggest that might move you along. "sudo service restart lightdm" # see if X now comes up on your TV, assuming that lightm is what you are using "sudo nano /home/*/.xsession-errors" # check the errors listed in those log files, they are more specific Can you try to flash an (older) image to a microSD card, boot off it and see what the results are? @Efe Çetin is the maintainer of your board, maybe he has a comment? Your board is in community-maintained status for armbian. There are no guarantees. -
 I have installed Armbian community images several times on different tv boxes that have an Amlogic S905x3, and usually there was no sound ♫. I wanted to get sound out of the tv box. So, I purchased a generic USB sound card audio dongle from Aliexpress for about $2 to $3 USD. (see attached photo). The USB audio device is described in Linux as a Texas Instruments PCM2902 Audio Codec (USB PnP Sound Device device 0 USB Audio), and when you run the command lsusb you will see the id numbers 08bb:2902. However, the specific hardware chip in the device that you receive may be different. I updated the databases for repositories by running sudo apt update -y and installed necessary packages to support the USB audio device and to use a graphical desktop such as XFCE4, for example: sudo apt install -y smplayer alsa-base alsa-oss alsa-tools alsa-utils alsamixergui pulseaudio pavucontrol pavumeter You can use smplayer or vlc or another as long as it is modern media player or audio player. Now make a backup copy of these two text files /etc/modules and /etc/modprobe.d/alsa-base.conf and save the backup copies in your home directory. Without quotes, edit the text file /etc/modules and write “snd-usb-audio” at the end of the file. Also, edit the text file /etc/modprobe.d/alsa-base.conf and change a few things. Put a hash # symbol in front of every “options snd-usb-audio index=-2” that you see in the file /etc/modprobe.d/alsa-base.conf . I found two of them. Add these two lines of text to the bottom of /etc/modprobe.d/alsa-base.conf without quotes. "alias snd-card-0 snd-usb-audio" "options snd-usb-audio index=0" Make sure that your user is in the 'audio' group. Run the usermod command against a regular user (not root) that you want to use often. And reboot. sudo usermod -a G audio {username here} sudo reboot Login to the graphical desktop, open the volume control program by clicking on the panel Applications, Multimedia, PulseAudio Volume Control. Click the Configuration tab at the far right of the volume control program and change the profile to Analog Stereo. * Important – now connect a headset, earphone, or amplifier to the 3.5mm (⅛’’) 🎧 headphone receptacle on the USB audio dongle and play some sounds, music or youtube. You can use wav audio files in the directory /usr/share/sounds/alsa/ if you don't have an internet connection.
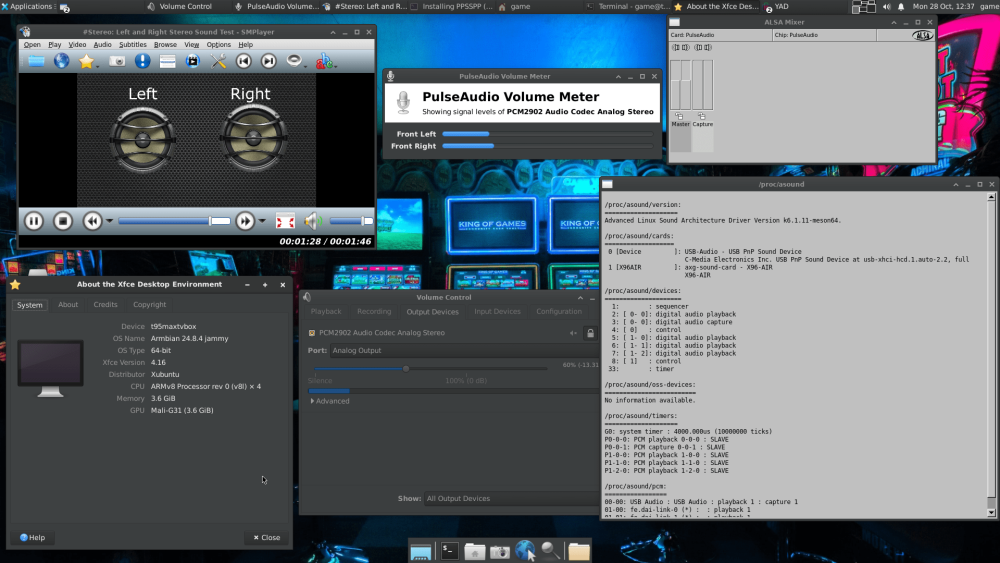
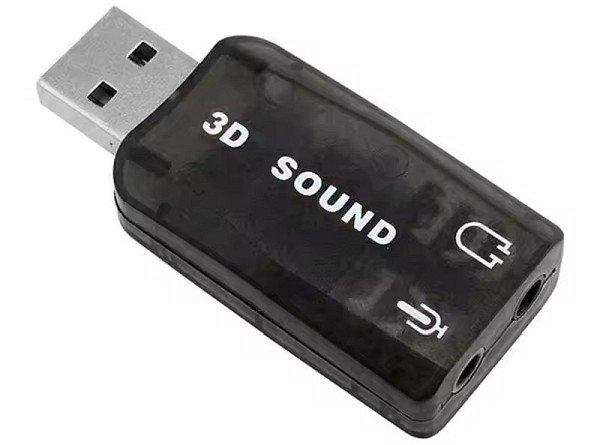
-
 🏆 Become a sponsor, help to add other boards in armbian standart, you don't need to be a programmer to help the community, just need a copy of the ARM BOARD and a x86 computer to compile new versions. If you like what you see here and want to help: Donate Armbian the like button only costs a few dollars. Armbian Needs you help! This Armbian adventure was summarized in my Public Github Repository. H96 MAX V56 RK3566 8gb Ram SD-Card unofficial images: Tutorial SD-Card Version v0.5 ARMBIAN BETA unofficial H96 MAX V56 RK3566 8gb EMMC Chainloader to mainline HotnikQ unofficial images: Tutorial EMMC Version V0.7 ARMBIAN BETA unofficial H96 MAX V56 RK3566 8gb EMMC Mainline Boot Hzdm unofficial images: Tutorial EMMC Version v0.8 ARMBIAN unofficial H96 MAX V56 RK3566 8gb EMMC Mainline Boot Hzdm unofficial images: Tutorial EMMC Version v0.9 ARMBIAN BETA unofficial H96 MAX V56 RK3566 8gb EMMC Chainloader to mainline HotnikQ unofficial images: Tutorial EMMC Version v1.0 ARMBIAN unofficial H96 MAX V56 RK3566 8gb EMMC Hzdm Mainline Boot Custom unofficial images: Tutorial Build Your own Armbian EMMC unofficial image H96 MAX V56 RK3566 EMMC Raspiblitz HotnikQ unofficial images: Tutorial Build Raspiblitz on EMMC Armbian Bullseye unofficial H96 MAX V56 RK3566 8gb EMMC Hzdm Mainline Boot unofficial images: Tutorial Build Your own V1.1 Armbian EMMC unofficial image H96 MAX V56 RK3566 8gb Vendor Kernel 5.1.16 Tutorial Build Your own Armbian Rockchip Kernel vendor Kernel 5.1.16 Armbian Joshua Riek Ubuntu Rockchip Images kernel 5.1 H96 MAX V56 RK3566 8gb Vendor Kernel 6.1.43 Tutorial Build Your own Armbian Rockchip Kernel vendor Kernel 6.1.43 Armbian Joshua Riek Ubuntu Rockchip Images Kernel 6.1 H96 MAX V56 RK3566 8gb EMMC Ning Mainline Kernel: Armbian EMMC official image Armbian Desktop Gnome kernel The Latest official Debian BookWorm Server Kernel Minimal The Latest official Desktop Test Images: Pre-Build Desktop 22.04 Armbian Test Image (PT-BR) Community Official Images: Armbian_community_25.2.0-trunk.410_H96-tvbox-3566_bookworm_current_6.12.11_minimal.img.xz Armbian_community_25.2.0-trunk.410_H96-tvbox-3566_noble_current_6.12.11_gnome_desktop.img.xz Bleding Edge images: Armbian-unofficial_25.02.0-trunk_H96-tvbox-3566_noble_edge_6.13.0_cinnamon_desktop.tar.xz Armbian-unofficial_25.02.0-trunk_H96-tvbox-3566_jammy_edge_6.13.0_cinnamon_desktop.tar.xz Armbian-unofficial_25.02.0-trunk_H96-tvbox-3566_bookworm_edge_6.13.0_cinnamon_desktop.tar.xz Armbian-unofficial_25.02.0-trunk_H96-tvbox-3566_noble_edge_6.13.0_minimal.tar.xz Armbian-unofficial_25.02.0-trunk_H96-tvbox-3566_bookworm_edge_6.13.0_minimal.tar.xz Armbian-unofficial_25.02.0-trunk_H96-tvbox-3566_jammy_edge_6.13.0_minimal.tar.xz Joshua-Riek Vendor Images: Joshua-Riek-ubuntu-22.04-preinstalled-desktop-arm64-h96max-v56 Joshua-Riek-ubuntu-22.04-preinstalled-server-arm64-h96max-v56 Joshua-Riek-ubuntu-24.04-preinstalled-desktop-arm64-h96max-v56 Joshua-Riek-ubuntu-24.04-preinstalled-server-arm64-h96max-v56 Software description: V0.5 = @armbian The Armbian SD card image "Compiled From Armbian Project" V0.8 = @hzdm Project with Mainline Bootloader "Boot the 64gb Emmc Armbian with Mainline Rockchip" V0.9 = @hzdm Release Mainline Bootloader "Boot the 32gb and 64gb Emmc Armbian with Mainline Rockchip" V1.0 = @hotnikq The Armbian SD card inside the Android Legacy Rockchip Image "Two Original Glued Images: Android boot for Linux" V1.2 = @ning Release Device Tree and Bootloader to longterm 6.6.27 Kernel "Boot with Mainline Rockchip" V1.3 = @Hqnicolas Github PR Enable h96 Rk3566 TV-Box device for Kernel 6.8 V1.4 = @pocosparc Github PR Enable OpenVFD and IR controller V1.5 = @dfahren Github PR Update U-boot 2025.01 for Kernel 6.12+ Video drivers: https://developer.arm.com/downloads/-/mali-drivers/bifrost-kernel https://docs.mesa3d.org/download.html https://docs.mesa3d.org/drivers/panfrost.html Wifi Driver: https://drive.google.com/file/d/1B1LmAylalETcnBEWiPiJHL0MjK5xlIV4/view?usp=sharing UEFI: https://github.com/hqnicolas/h96v56_uefi/releases/tag/v1.2.1 Or Just Live install Wifi Driver: cd /lib/firmware/brcm/ sudo wget https://github.com/CoreELEC/brcmfmac_sdio-firmware-aml/raw/master/firmware/brcm/fw_bcm4335b0_ag.bin sudo ln -s fw_bcm4335b0_ag.bin brcmfmac4335-sdio.h96-TVbox,rk3566.bin sudo reboot now nmcli dev wifi sudo rmmod brcmfmac_wcc brcmfmac brcmutil modprobe brcmfmac Topic description: This topic aims to demonstrate the path taken to the Armibian EMMC solution. In our path we create a lot of ready-to-use ROM files, some users burn an use this images without learning with the Linux compilation process. the name of the topic is efforts but that's no effort at all, you should try compile your own images. Device Capability Test: Using Rockchip SoCs NPU. Drivers: https://github.com/rockchip-linux/rknpu2 User Guide: https://github.com/rockchip-linux/rknpu2/blob/master/doc/Rockchip_RKNPU_User_Guide_RKNN_API_V1.4.0_EN.pdf OpenCV: https://opencv.org/blog/2022/11/29/working-with-neural-processing-units-npus-using-opencv/ A discussion on Reddit: https://www.reddit.com/r/OrangePI/comments/12b3jmj/accessing_the_npu_on_the_orange_pi/ Transformers models: https://github.com/usefulsensors/useful-transformers Usage: https://www.crowdsupply.com/useful-sensors/ai-in-a-box/ Usage: https://youtu.be/pN8mKZ5wpdQ
 -
Hi. I get recent Standard Images for this Board Lamobo R1 with the A20 Sunxi from here: https://sd-card-images.johang.se/ works great. Cheers
-
Hello i have an Tanix tx3 mini,with s905w processor. After a boot fail i can restore armbian, and i must to flash again android, and the box Is work again. Now i can't flash armbian because the box don't boot from microSD, any help?
-
 shrink-backup is a bash script for backing up your SBC:s into an img file Version 1.2 Info updated: 20 Oct, 2024. shrink-backup I made this script because I wanted a universal method of backing up my SBC:s into img files as fast as possible (with rsync), no matter what os is in use. Supports backing up root & boot (if existing) partitions. Data from other partitions will be written to root if not excluded (exception for btrfs, all existing subvolumes in /etc/fstab will be created). Please see Info section. Autoexpansion tested on Raspberry Pi os (bookworm and older), Armbian, Manjaro-arm, DietPi and ArchLinuxARM for rpi with ext4 or f2fs root partition. (Now also experimental btrfs functionality, please read further down) Full support for usage inside webmin (including "custom command" button). Latest release: shrink-backup.v1.2 Testing branch if you want to have the absolute latest version. There might be bugs. Very fast restore thanks to minimal size of img file. Can back up any device as long as root is ext4 or f2fs (experimental btrfs) Default device that will be backed up is determined by scanning what disk-device root resides on. This means that if boot is a partition, that partition must be on the same device and before the root partition. Backing up/restoring, to/from: usb-stick /dev/sdX with Raspberry pi os has been tested and works. Ie, writing an sd-card img to a usb-stick and vice versa works. Ultra-fast incremental backups to existing img files. See wiki for information about installation methods, usage and examples. Ideas and feedback is always appreciated, whether it's positive or negative. Please just keep it civil. If you find a bug or think something is missing in the script, please file a Bug report or Feature request Don't forget to ensure the script is executable. To restore a backup, simply "burn" the img file to a device using your favorite method. When booting up a restored image with autoresize active, wait until the the reboot sequence has occured. The login prompt may very well become visible before the autoresize function has rebooted. Usage: shrink-backup -h Script for creating an .img file and subsequently keeing it updated (-U), autoexpansion is enabled by default Directory where .img file is created is automatically excluded in backup ######################################################################## Usage: sudo shrink-backup [-Uatyelhz] [--fix] [--loop] [--f2fs] imagefile.img [extra space (MiB)] -U Update existing img file (rsync to existing img) Optional [extra space] extends img size of root partition -a Autoresize root partition (extra space is ignored) When used in combination with -U: Expand if partition is >=256MiB smaller than resize2fs recommended minimum Shrink if partition is >=512MiB bigger than resize2fs recommended minimum -t Use exclude.txt in same folder as script to set excluded directories One directory per line: "/dir" or "/dir/*" to only exclude contents -y Disable prompts in script (please use this option with care!) -e DO NOT expand filesystem when image is booted -l Write debug messages to logfile shrink-backup.log located in same directory as script -z Make script zoom at light-speed, only question prompts might slow it down Can be combined with -y for UNSAFE ultra mega superduper speed --fix Try to fix the img file if -a fails with a "broken pipe" error --loop [img] Loop img file and exit, works in combination with -l & -z If optional [extra space] is defined, the img file will be extended with the amount before looping NOTE that only the file gets truncated, no partitions Useful if you for example want to manually manage the partitions --f2fs Convert root filesystem on img from ext4 to f2fs Only works on new img file, not in combination with -U Will make backups of fstab & cmdline.txt to: fstab.shrink-backup.bak & cmdline.txt.shrink-backup.bak Then change ext4 to f2fs in both files and add discard to options on root partition in fstab --version Print version and exit -h --help Show this help snippet ######################################################################## Examples: sudo shrink-backup -a /path/to/backup.img (create img, resize2fs calcualtes size) sudo shrink-backup -e -y /path/to/backup.img 1024 (create img, ignore prompts, do not autoexpand, add 1024MiB extra space) sudo shrink-backup -Utl /path/to/backup.img (update img backup, use exclude.txt and write log to shrink-backup.log) sudo shrink-backup -U /path/to/backup.img 1024 (update img backup, expand img size/root partition with 1024MiB) sudo shrink-backup -Ua /path/to/backup.img (update img backup, resize2fs calculates and resizes img file if needed) sudo shrink-backup -Ua --fix /path/to/backup.img 1024 (update img backup, automatically resizes img file if needed, fix img free space) sudo shrink-backup -l --loop /path/to/backup.img 1024 (write to log file, expand IMG FILE (not partition) by 1024MiB and loop) -t (exclude.txt) The folder where the img file is created will ALWAYS be excluded in the backup. If -t option is selected, exclude.txt MUST exist (but can be empty) within the directory where the script is located or the script will exit with an error. Use one directory per line in exclude.txt. /directory/* = create directory but exclude content. /directory = exclude the directory completely. If -t is NOT selected the following folders will be excluded: /lost+found /proc/* /sys/* /dev/* /tmp/* /run/* /mnt/* /media/* /var/swap Please see info section further down. -l (Log file) Use -l to write debug info into shrink-backup.log file in the same directory as the script. -z (Zoom speed) The -z "zoom" option simply removes the one second sleep at each prompt to give the user time to read. By using the option, you save 15-25s when running the script. When used in combination with -y warnings will also be bypassed! PLEASE use with care! --fix (Broken pipe) Add --fix to your options if a backup fails during rsync with a "broken pipe" error. You can also manually add [extra space] instead of using -a to solve this. Example: sudo shrink-backup -Ua --fix /path/to/backup.img The reason it happens is because rsync normally deletes files during the backup, not creating a file-list > removing files from img before starting to copy. So if you have removed and added new data on the system you backup from, there is a risk rsync tries to copy the new data before deleting data from the img, hence completely filling the img. Using --fix makes rsync create a file-list and delete data before starting to transfer new data. This also means the backup takes a little longer. Having a "broken pipe" error during backup has in my experience never broken an img backup after either using --fix (can be used in combination with -a) or adding [extra space] while updating the backup with -U. --loop (Loop img file) Use --loop to loop an img file to your /dev. Example: sudo shrink-backup --loop /path/to/backup.img If used in combination with [extra space] the amount in MiB will be added to the IMG FILE NOT any partition. With this you can run for example run: sudo gparted /dev/loop0 (if you have a graphical interface) to manually manage the img partitions in a graphical interface with gparted. If you added [extra space] this will then show up as unpartitioned space at the end of the device where you can create partition(s) and manually copy data to by mounting the new loop partition that will become visible in lsblk. If you do this, don't forget to create or update the img with -e (disable autoexpansion) first. Autoexpansion will not work since the space will be occupied by your manually managed partition. Example: sudo shrink-backup --loop /path/to/backup.img 1024 This functionality works on any linux system, just use the script on any img file anywhere available to the computer. To remove the loop: sudo losetup -d /dev/loop0, change loop0 to the correct dev it got looped to. To remind yourself: lsblk /dev/loop* (if you forgot the location after using --mount) --f2fs (Convert ext4 into f2fs on img file) ONLY use this for CONVERTING filesystem into img file, if you already have f2fs on your root, do not use this option. The script will detect what filesystem is used on root and act accordingly. Only supported with new backups, not when using -U. Autoexpansion at boot is not supported for f2fs (there is no way of resizing a mounted f2fs filesystem, unlike with ext4) so resizing root partition have to be made manually after writing img to sd-card. Resize operations (when updating backup with -U) is not available for f2fs as of now. The script will make backups of fstab & cmdline.txt into fstab.shrink-backup.bak & cmdline.txt.shrink-backup.bak on the img. It will then change from ext4 to f2fs in fstab & cmdline.txt and add discard to the options on the root partition in fstab. Please read information about f2fs further down. Info Rsync WILL cross filesystem boundries, so make sure you exclude external drives unless you want them included in the backup. (separate /home for example) The script will ONLY create boot (if exits) and root partitions on the img file. The script will ONLY look at your root partition when calculating sizes. Not excluding other partitions will copy the data to the img root partition, not create more partitions so make sure to manually add [extra space] if you do this. Experimental btrfs is an exception to this, all subvolumes will be created. Applications used in the script: fdisk sfdisk dd parted e2fsck truncate mkfs.ext4 rsync gdisk (sgdisk is needed if the partition table is GPT, the script will inform you) ######################################################################## Image creation To create a backup img using recomended size, use the -a option and the path to the img file. Example: sudo shrink-backup -a /path/to/backup.img Theoretically the script should work on any device as long as root filesystem is ext4, f2fs or experimental btrfs. Since the script uses lsblk to crosscheck with /etc/fstab to figure out where the root resides it does not matter what device it is on. Even if you forget to disable autoexpansion on a non supported system, the backup will not fail. Order of operations - image creation Reads the block sizes of the partitions Uses dd to create the boot part of the system + a few megabytes to include the filesystem on root (this can be a partition) Removes and recreates the root partition, size depends on options used when starting the script Creates a new ext4 filesystem with the same UUID and LABEL as the system you are backing up from Uses rsync to sync both partitions (if more than one) Uses lsblk & /etc/fstab to figure out the correct disk device to back up. Reads the block sizes of the system's root (and boot if it exists) partition. Uses dd to create the boot part of the system + a few megabytes to include the filesystem on root. (this can be a partition) Uses df & resize2fs to calculate sizes by analyzing the system's root partition. (For btrfs: btrfs filesystem du + 192MiB is used instead of resize2fs) Uses truncate to resize img file. Loops the img file. Removes and recreates the root partition on the loop of the img file. Creates the root filesystem on loop of the img file with the same UUID and LABEL as the system you are backing up from. Creates a temp directory and mounts img file root partition from loop. Checks if boot partition exists, if true, checks fstab and creates directory on root and mounts accordingly from loop. Uses rsync to sync filesystems. Tries to create autoresize scripts if not disabled with -e. Unmounts and removes temp directory and file (file created for rsync log output). Added space is added on top of df reported “used space”, not the size of the partition. Added space is in MiB, so if you want to add 1GB, add 1024. The script can be instructed to set the img size by requesting recommended minimum size from e2fsck by using the -a option. This is not the absolute smallest size you can achieve bit is the “safest” way to create a “smallest possible” img file. If you do not increase the size of the filesystem you are backing up too much, you can most likely keep it updated with the update function (-U) of the script. By using -a in combination with -U the script will resize the img file if needed (not supported on f2fs). Using combination -Ua on an img that has become overfilled works, if not add --fix and retry. Please see --fix and image update sections for more information. Smallest possible image To get the absolute smallest img file possible, do NOT set -a option and set “extra space” to 0 Example: sudo shrink-backup /path/to/backup.img 0 This will instruct the script to get the used space from df and adding 128MB “wiggle room”. If you are like me, doing a lot of testing, rewriting the sd-card multiple times. The extra time it takes each time will add up pretty fast. Example: -rw-r--r-- 1 root root 3.7G Jul 22 21:27 test.img # file created with -a -rw-r--r-- 1 root root 3.3G Jul 22 22:37 test0.img # file created with 0 Disclaimer: Because of how filesystems work, df is never a true representation of what will actually fit on a created img file. Each file, no matter the size, will take up one block of the filesystem, so if you have a LOT of very small files (running docker f.ex) the “0 added space method” might fail during rsync. Increase the 0 a little bit and retry. This also means you have VERY little free space on the img file after creation. If the filesystem you back up from increases in size, an update (-U) of the img file might fail. By using -a in combination with -U the script will resize the img file if needed (not supported on f2fs). Using combination -Ua on an img that has become overfilled works, if not add --fix and retry. Please see --fix and Image update sections for more information. ######################################################################## Image update To update an existing img file simply use the -U option and the path to the img file. Example: sudo shrink-backup -U /path/to/backup.img Order or operations - image update Loops the img file. Probes the loop of the img file for information about partitions. If -a is selected, calculates sizes by comparing root sizes on system and img file by using fdisk & resize2fs. Expands filesystem on img file if needed or if manually added [extra space] is used. Creates temp directory and mounts root partition from loop. Checks if boot partition exists, if true, checks fstab and creates directory on root and mounts accordingly from loop. Uses rsync to sync filesystems. Shrinks filesystem on img file if -a was used and conditions were met in point 3. Tries to create autoresize scripts if not disabled with -e. Unmounts and removes temp directory and file (file created for rsync log output). Resizing img file when updating If -a is used in combination with -U, the script will compare the root partition on the img file to the size resize2fs recommends as minimum (or du calculations depending on filesystem). The img file root partition needs to be >=256MB smaller than resize2fs recommended minimum to be expanded. The img file root partition needs to be >=512MB bigger than resize2fs recommended minimum to be shrunk. This is to protect from unessesary resizing operations most likely not needed. If manually added [extra space] is used in combination with -U, the img file's root partition will be expanded by that amount. No checks are being performed to make sure the data you want to back up will actually fit. Only expansion is possible with this method. ######################################################################## f2fs The script will detect f2fs on root automatically and act accordingly. Do NOT USE --f2fs unless you are converting from a ext4 filesystem (on your system) into f2fs on the img file. Autoexpansion at boot is not possible with f2fs. User will have to manually expand img to cover entire storage media (f.ex sd-card) when restoring. Resizing of img root partition while updating img (-U) is not possible with f2fs as of now. User will have to create a new backup if img runs out of space. This is something I am planning to implement further down the line. btrfs ALL testing has been done on Manjaro-arm THIS IS NOT A CLONE, IT IS A BACKUP OF REQUIRED FILES FOR A BOOTABLE BTRFS SYSTEM! All options in the script should work just as on ext4. The script will detect btrfs and act accordingly. The script will treat snapshots as nested volumes, so make sure to exclude snapshots if you have any, or directories and nested volumes will be created on the img file. This can be done in exclude.txt, wildcards should work. When starting the script, the initial report window will tell you what volumes will be created. Make sure these are correct before pressing Y. As of now, top level subvolumes are checked for in /etc/fstab and mounted accordingly, mount options should be preseved (if you for example changed compression). Autoresize function works on Manjaro-arm. ---------------------------------------------------------------------------------------------------------------------------------------------------------- Thank you for using my software ❤️ A backup is not really a backup until you have restored from it.
 -

shrink-backup - a tool for backing up sbc:s
Geoffrey Schaller replied to bedna's topic in Software, Applications, Userspace
Hello, I am running into an issue with a Broken Pipe error on one of my two Orange Pi devices, even with the --fix option. The two Orange Pis (dns1 and dns2) are nearly identical, both are running PiHole. The only difference is dns1 has an extra package (Nebula, and its dependencies) to sync PiHole information over to dns2. When I run shrink-backup on dns2, and back it up to /mnt/backups/PhHole (an NFS mount back to my NAS), it works perfectly. When I run the same command on dns1, it terminates with a Broken Pipe error: root@dns1:/home/orangepi# /root/shrink-backup/shrink-backup --fix /mnt/backups/PiHole/dns1.img (Snip lots of unneeded output) var/lib/snapd/cache/ var/lib/snapd/cache/027a50a18054f65e1f36334c4246c44f5f2f7d037608419191b2c83a58e5afda831a4a1096e878f6b91e5cbb3d49d08b 4.03G 75% 10.82MB/s 0:05:55 (xfr#120880, to-chk=1043/148245) var/lib/snapd/cache/56bd390cd391c0d702651d6489bfa8b61ed4c096b604c14e5d10fd99020e3cdf8fb4467b6f9703aacf0609dcd55b26b0 4.11G 77% 10.92MB/s 0:05:58 (xfr#120881, to-chk=1041/148245) var/lib/snapd/cache/c1c16377ccf539e6292263cd0a579cdf04956110104909a72c492677c30b017542f1f4683a220fd895b68d600e14bceb 4.18G 78% 11.00MB/s 0:06:02 (xfr#120882, to-chk=1037/148245) var/lib/snapd/cache/f60dc4c9c0a8f6f7ddefb04334e5eb74d9bc31305a09911f71deee520569742e40edd137c876b8be67ddfe94afb97266 4.19G 78% 19.53MB/s 0:00:56 rsync: [receiver] write failed on "/tmp/backup-SbW/var/lib/snapd/cache/f60dc4c9c0a8f6f7ddefb04334e5eb74d9bc31305a09911f71deee520569742e40edd137c876b8be67ddfe94afb97266": No space left on device (28) rsync error: error in file IO (code 11) at receiver.c(381) [receiver=3.2.7] rsync: [sender] write error: Broken pipe (32) var/lib/snapd/assertions/asserts-v0/snap-revision/wcFjd8z1OeYpImPNClec3wSVYRAQSQmnLEkmd8MLAXVC8fRoOiIP2JW2jWAOFLzr/active 3.96G 74% 10.72MB/s 0:05:52 (xfr#120879, to-chk=1047/148245) var/lib/snapd/assertions/private-keys-v1/ var/lib/snapd/auto-import/ var/lib/snapd/cache/ var/lib/snapd/cache/027a50a18054f65e1f36334c4246c44f5f2f7d037608419191b2c83a58e5afda831a4a1096e878f6b91e5cbb3d49d08b 4.03G 75% 10.82MB/s 0:05:55 (xfr#120880, to-chk=1043/148245) var/lib/snapd/cache/56bd390cd391c0d702651d6489bfa8b61ed4c096b604c14e5d10fd99020e3cdf8fb4467b6f9703aacf0609dcd55b26b0 4.11G 77% 10.92MB/s 0:05:58 (xfr#120881, to-chk=1041/148245) var/lib/snapd/cache/c1c16377ccf539e6292263cd0a579cdf04956110104909a72c492677c30b017542f1f4683a220fd895b68d600e14bceb 4.18G 78% 11.00MB/s 0:06:02 (xfr#120882, to-chk=1037/148245) var/lib/snapd/cache/f60dc4c9c0a8f6f7ddefb04334e5eb74d9bc31305a09911f71deee520569742e40edd137c876b8be67ddfe94afb97266 4.19G 78% 19.53MB/s 0:00:56 rsync: [receiver] write failed on "/tmp/backup-SbW/var/lib/snapd/cache/f60dc4c9c0a8f6f7ddefb04334e5eb74d9bc31305a09911f71deee520569742e40edd137c876b8be67ddfe94afb97266": No space left on device (28) rsync error: error in file IO (code 11) at receiver.c(381) [receiver=3.2.7] rsync: [sender] write error: Broken pipe (32) !! RSYNC FAILED!!! !! Cleanup function called with non zero exit code, something went wrong!!! ## Exiting and cleaning up... ## Please stand by... ## Done. ## Elapsed time: 06.56 root@dns1:/home/orangepi# Are you able to help me troubleshoot / diagnose this issue, please? The SD card is 32 GB, there should be plenty of free space, and the NAS itself has plenty of space as well. Thank you! -
before rufus i did with usbimager and balena etcher and none of them worked out. I am thinking is going to be my reader or something. usbimager was giving the first weird screen but most of the time i tried flashing it wasn't giving any screen (like if i power up the orange pi zero 2w without any type of sd card) and balena etcher wasn't even flahing, it was always stuck at verification. I tried usbimager in linux and windows. I will let you know if I end up fixing, because I want that kernel because it comes with some wifi drivers out of the box. Thanks for your response
-
Hi everyone, I have wrong color in screen MPI3501 , when i test to output buffer to color red,green, blue, it seem like Red. —> blue Green —> red Blue. —> green Here is how i test (i need to stop lightdm service before this) (when boot the image should be orange not green) I am using display MPI3501 http://www.lcdwiki.com/3.5inch_RPi_Display which i heard that is a clone of waveshare 3,5 inch https://www.waveshare.com/3.5inch-RPi-LCD-C.htm I'm using Debian Bookworm. I know that it not the same as Armbian, but the config kinda the same. About driver for ili9486, here is the info To use this screen i create overlay-user. and and ili9486.dts. Here is the content of it and I add this overlay to /boot/orangepiEnv.txt Note that i think the field "bgr" and "init" not working, i try to change it to make bgr from 0x00 to 0x01, or send init different at 0x10000036 but nothing change. Also note that, i also try to cat raw data from /dev/fb0 and using ffmpeg --> It is true color Also here is the dmesg log Is anyone here familiar with this problem, or ever try to change bgr field of this ili9486 ? Best Regard !!


-
 I downloaded and wrote the image to the SD card. I can see the U-Boot messages at the very beginning, but after a few moments, nothing is displayed anymore. I believe the OS is still booting because the activity LED on the board keeps blinking. Any idea what might be happening ? Thanks in advance for any help !
 -
 Hi folks, Very new to this community, very new to flashing Android boxes.. But I wanted to give this a shot and make use of an old TX5 Pro that I had in a drawer. Pleased to say, boots from the SD card fine, managed to get logged in and set up... all is working, WiFi, Bluetooth etc... However, I am just not able to get this to boot from the eMMC. I got to the point where I bricked it and had to re-flash Android onto it.. just to find myself in the same loop. I'll provide as much info as I can here, but let me know if you need something more specific. I'm no expert here, so here goes. Booting from the SD starts like this: When booted, all is working totally fine. However, removing the SD results in the following, where it will stay for eternity util rebooting and inserting SD: ChatGPT led me to screw this up entirely, despite getting this far based on it's instructions, so I'm turning to you for help. I really need to have this booting from the internal storage and not from an SD card. Here's the copy attempt: root@aml-s9xx-box:~# ./install-aml.sh Start script create MBR and filesystem /dev/mmcblk1 Start backup u-boot default 4+0 records in 4+0 records out 4194304 bytes (4.2 MB, 4.0 MiB) copied, 0.149809 s, 28.0 MB/s Start create MBR and partittion Start restore u-boot 442+0 records in 442+0 records out 442 bytes copied, 0.0044687 s, 98.9 kB/s 8191+0 records in 8191+0 records out 4193792 bytes (4.2 MB, 4.0 MiB) copied, 0.524224 s, 8.0 MB/s Done Start copy system for eMMC. Formatting BOOT partition...mkfs.fat 4.2 (2021-01-31) done. mount: (hint) your fstab has been modified, but systemd still uses the old version; use 'systemctl daemon-reload' to reload. Copying BOOT...done. Edit init config...done. sed: can't read /ddbr/install/boot.ini: No such file or directory done. Formatting ROOT partition... /dev/mmcblk1p2 contains a ext4 file system labelled 'ROOT_EMMC' last mounted on /ddbr/install on Fri May 23 19:51:02 2025 e2fsck 1.47.0 (5-Feb-2023) ROOT_EMMC: clean, 11/855120 files, 80315/3419392 blocks done. Copying ROOTFS. mount: (hint) your fstab has been modified, but systemd still uses the old version; use 'systemctl daemon-reload' to reload. Copy BIN Create DEV Copy ETC Copy HOME Copy LIB Copy LIB64 tar: lib64: Cannot stat: No such file or directory tar: Exiting with failure status due to previous errors Create MEDIA Create MNT Copy OPT Create PROC Copy ROOT Create RUN Copy SBIN Copy SELINUX Copy SRV Create SYS Create TMP Copy USR Copy VAR Copy fstab rm: cannot remove '/ddbr/install/usr/bin/ddbr': No such file or directory ******************************************* Complete copy OS to eMMC ******************************************* Here's some info about the setup, again, let me know if you need something extra: _ _ _ _ _ /_\ _ _ _ __ | |__(_)__ _ _ _ __ ___ _ __ _ __ _ _ _ _ (_) |_ _ _ / _ \| '_| ' \| '_ \ / _` | ' \ / _/ _ \ ' \| ' \ || | ' \| | _| || | /_/ \_\_| |_|_|_|_.__/_\__,_|_||_|_\__\___/_|_|_|_|_|_\_,_|_||_|_|\__|\_, | |___| |__/ v25.5 rolling for aml-s9xx-box running Armbian Linux 6.12.28-current-meson64 Packages: Debian stable (bookworm) Updates: Kernel upgrade enabled and 76 packages available for upgrade Support: for advanced users (rolling release) IPv4: (LAN) 10.0.1.102 (WAN) X.XXX.XXX.XXX Performance: Load: 32% Up time: 1 min Memory usage: 21% of 1.87G CPU temp: 54°C Usage of /: 20% of 29G RX today: 64 MiB Commands: Configuration : armbian-config Upgrade : armbian-upgrade Monitoring : htop System and Boot Logs: https://paste.armbian.com/fiqikiliju PRETTY_NAME="Armbian_community 25.5.0-trunk.538 bookworm" NAME="Debian GNU/Linux" VERSION_ID="12" VERSION="12 (bookworm)" VERSION_CODENAME=bookworm ID=debian HOME_URL="https://www.armbian.com" SUPPORT_URL="https://forum.armbian.com" BUG_REPORT_URL="https://www.armbian.com/bugs" ARMBIAN_PRETTY_NAME="Armbian_community 25.5.0-trunk.538 bookworm" root=UUID=e969167d-e6a9-4203-896f-ced402105523 rootflags=data=writeback console=ttyAML0,115200n8 console=tty0 rw no_console_suspend consoleblank=0 fsck.fix=yes fsck.repair=yes net.ifnames=0 splash plymouth.ignore-serial-consoles NAME FSTYPE FSVER LABEL UUID FSAVAIL FSUSE% MOUNTPOINTS mmcblk0 ├─mmcblk0p1 vfat FAT32 armbi_boot 479F-151E 414M 19% /boot └─mmcblk0p2 ext4 1.0 armbi_root e969167d-e6a9-4203-896f-ced402105523 22.5G 19% /var/log.hdd / mmcblk1 ├─mmcblk1p1 vfat FAT16 BOOT_EMMC 75EA-4970 └─mmcblk1p2 ext4 1.0 ROOT_EMMC d0456959-1f46-4aad-b7f0-d784208d67a8 mmcblk1boot0 mmcblk1boot1 zram0 [SWAP] zram1 40.2M 7% /var/log zram2 label Armbian_community kernel /Image initrd /uInitrd fdt /dtb/amlogic/meson-gxl-s905x-p212.dtb append root=UUID=e969167d-e6a9-4203-896f-ced402105523 rootflags=data=writeback console=ttyAML0,115200n8 console=tty0 rw no_console_suspend consoleblank=0 fsck.fix=yes fsck.repair=yes net.ifnames=0 splash plymouth.ignore-serial-consoles Any assistance would be greatly appreciate.
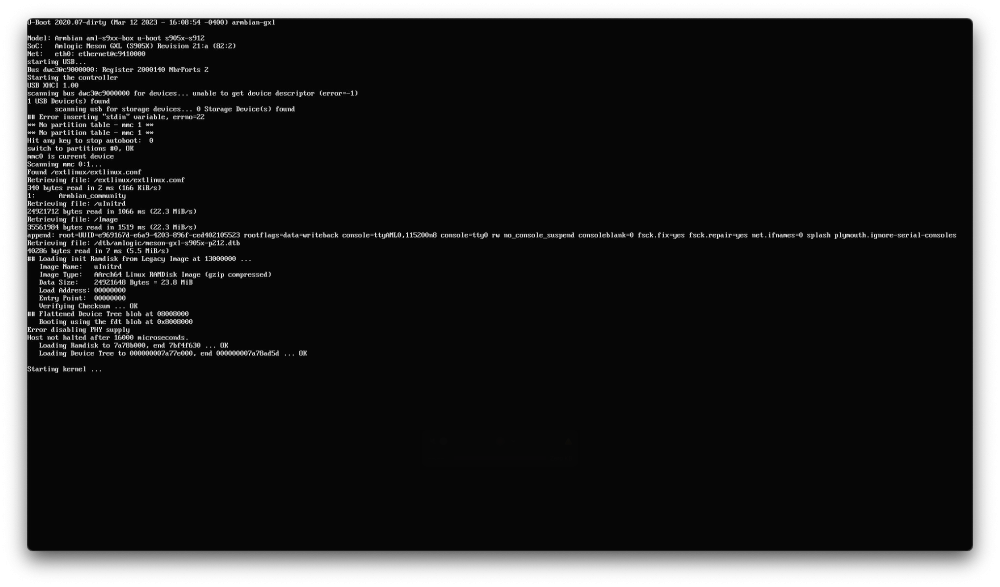

-
I am not able to boot from armbian. First I downloaded image from (https://www.armbian.com/orange-pi-zero-2w/) later on I flashed the image with usbimager, then since this didn't work I did with balena etcher, (all those in linux). Balena etcher crashes at verification so then I did with my windows machine, first with usbimager and since it wasn't working I decided to decompress the .xz and do it with "rufus" Here i attach the images and as you guys can see it says "failed to mount /dev/mtdblock4". That terminal is pretty much useless, I can't even do reboot or poweroff. I just need armbian because the official orange pi OS doesn't provide the headers. And I need the headers because if not I can't install drivers for my wifi card. Newer linux distros seems to have compiled on the kernel so that's why i wanted to update, also because I think armbian provides the headers too. Any ideas