-
Posts
689 -
Joined
-
Last visited
Content Type
Forums
Store
Crowdfunding
Applications
Events
Raffles
Community Map
Everything posted by Hqnicolas
-

Efforts to develop firmware for H96 MAX V56 RK3566 4G/32G
Hqnicolas replied to Hqnicolas's topic in Rockchip CPU Boxes
Working in a solution for GPT over EMMC. Since this solution makes 8gb images work on 4gb devices I will try: https://opensource.rock-chips.com/wiki_Partitions this is the 4gb 32gb image GPT: Command (? for help): i Partition number (1-4): 1 Partition GUID code: DE110000-0000-4051-8000-460A00003284 (Unknown) Partition unique GUID: F51C0000-0000-455E-8000-20DF000015D9 First sector: 16384 (at 8.0 MiB) Last sector: 24575 (at 12.0 MiB) Partition size: 8192 sectors (4.0 MiB) Attribute flags: 0000000000000000 Partition name: 'security' Command (? for help): i Partition number (1-4): 2 Partition GUID code: 57090000-0000-4C1B-8000-2CC300006C3E (Unknown) Partition unique GUID: DC7B0000-0000-400E-8000-1A30000064FB First sector: 24576 (at 12.0 MiB) Last sector: 32767 (at 16.0 MiB) Partition size: 8192 sectors (4.0 MiB) Attribute flags: 0000000000000000 Partition name: 'uboot' Command (? for help): i Partition number (1-4): 3 Partition GUID code: 9E010000-0000-491F-8000-2EDD00003399 (Unknown) Partition unique GUID: F6680000-0000-4F67-8000-11C500006AE2 First sector: 32768 (at 16.0 MiB) Last sector: 40959 (at 20.0 MiB) Partition size: 8192 sectors (4.0 MiB) Attribute flags: 0000000000000000 Partition name: 'trust' Command (? for help): i Partition number (1-4): 4 Partition GUID code: 7D0B0000-0000-4D02-8000-2621000044DE (Unknown) Partition unique GUID: 5FA600DD-BFC2-4260-A3DA-562CB9D13F00 First sector: 40960 (at 20.0 MiB) Last sector: 61071326 (at 29.1 GiB) Partition size: 61030367 sectors (29.1 GiB) Attribute flags: 0000000000000000 Partition name: 'root' -

Efforts to develop firmware for H96 MAX V56 RK3566 8G/64G
Hqnicolas replied to Hqnicolas's topic in Rockchip CPU Boxes
@hzdm i create an Server image Based on your instructions. but my device is an 4gb 32gb device how can you change the GPT LBA from this files? there is a source of this start.img file? the initial error: Trying to boot from MMC1 GPT: last_usable_lba incorrect: X > 747bfde part_get_info_efi: *** ERROR: Invalid GPT *** part_get_info_efi: *** Using Backup GPT *** on device to repair the initial error, when "sudo gdisk /dev/mmcblk1:" it reveals the GPT partition is 57gb Disk /dev/mmcblk1: 61071360 sectors, 29.1 GiB Sector size (logical/physical): 512/512 bytes Disk identifier (GUID): EC944974-E823-4B58-AEB7-A94651D008F8 Partition table holds up to 128 entries Main partition table begins at sector 2 and ends at sector 33 First usable sector is 34, last usable sector is 122142686 Partitions will be aligned on 2048-sector boundaries Total free space is 61407 sectors (30.0 MiB) Number Start (sector) End (sector) Size Code Name 1 61440 2158590 1024.0 MiB FFFF bootfs 2 2158592 122142686 57.2 GiB FFFF rootfs Command (? for help): i 2 Partition number (1-2): 2 Partition GUID code: 1124E418-9008-41F8-9E3D-8D872216C8A1 (Unknown) Partition unique GUID: 67AD7741-4638-47C6-A488-D396583E582A First sector: 2158592 (at 1.0 GiB) Last sector: 122142686 (at 58.2 GiB) Partition size: 119984095 sectors (57.2 GiB) Attribute flags: 0000000000000000 Partition name: 'rootfs' Command (? for help): i Partition number (1-2): 1 Partition GUID code: 8DCD1602-5214-43F9-FFEF-C49A4EE450B7 (Unknown) Partition unique GUID: 5A30833F-8C43-47B1-A41D-84D40883D0C6 First sector: 61440 (at 30.0 MiB) Last sector: 2158590 (at 1.0 GiB) Partition size: 2097151 sectors (1024.0 MiB) Attribute flags: 0000000000000000 Partition name: 'bootfs' How i fix this initial problem: boot from SD card..... and: root@station-m2:~# sudo gdisk /dev/mmcblk1 GPT fdisk (gdisk) version 1.0.8 Partition table scan: MBR: protective BSD: not present APM: not present GPT: present Found valid GPT with protective MBR; using GPT. Command (? for help): p Disk /dev/mmcblk1: 61071360 sectors, 29.1 GiB Sector size (logical/physical): 512/512 bytes Disk identifier (GUID): EC944974-E823-4B58-AEB7-A94651D008F8 Partition table holds up to 128 entries Main partition table begins at sector 2 and ends at sector 33 First usable sector is 34, last usable sector is 61071326 Partitions will be aligned on 2048-sector boundaries Total free space is 58974142 sectors (28.1 GiB) Number Start (sector) End (sector) Size Code Name 1 61440 2158590 1024.0 MiB FFFF bootfs Command (? for help): n Partition number (2-128, default 2): First sector (34-61071326, default = 2158592) or {+-}size{KMGTP}: Last sector (2158592-61071326, default = 61071326) or {+-}size{KMGTP}: Current type is 8300 (Linux filesystem) Hex code or GUID (L to show codes, Enter = 8300): 1124E418-9008-41F8-9E3D-8D872216C8A1 Changed type of partition to 'Unknown' Command (? for help): x Expert command (? for help): c Partition number (1-2): 2 Enter the partition's new unique GUID ('R' to randomize): 67AD7741-4638-47C6-A488-D396583E582A New GUID is 67AD7741-4638-47C6-A488-D396583E582A Expert command (? for help): w Final checks complete. About to write GPT data. THIS WILL OVERWRITE EXISTING PARTITIONS!! Do you want to proceed? (Y/N): y After solution: root@station-m2:~# sudo gdisk /dev/mmcblk1 GPT fdisk (gdisk) version 1.0.8 Partition table scan: MBR: protective BSD: not present APM: not present GPT: present Found valid GPT with protective MBR; using GPT. Command (? for help): p Disk /dev/mmcblk1: 61071360 sectors, 29.1 GiB Sector size (logical/physical): 512/512 bytes Disk identifier (GUID): EC944974-E823-4B58-AEB7-A94651D008F8 Partition table holds up to 128 entries Main partition table begins at sector 2 and ends at sector 33 First usable sector is 34, last usable sector is 61071326 Partitions will be aligned on 2048-sector boundaries Total free space is 61407 sectors (30.0 MiB) Number Start (sector) End (sector) Size Code Name 1 61440 2158590 1024.0 MiB FFFF bootfs 2 2158592 61071326 28.1 GiB FFFF Unknown I will try soon: https://opensource.rock-chips.com/wiki_Partitions it works! to flash your method over 4gb 32gb devices Just flash the gpt.img inside the start.img located on 0x00000000 GPT 4gb to use in 8gb HZDM images gpt.img -

Efforts to develop firmware for H96 MAX V56 RK3566 8G/64G
Hqnicolas replied to Hqnicolas's topic in Rockchip CPU Boxes
Combine a ROOT image with an UPDATE image and BOOM = v0.7 build firmware i will finish this step in a week or two.... if you have an 8gb device, use the @hzdm method UPDATE: H96 MAX V56 RK3566 4gb and 8gb Ram SD-Card images: Release Version v0.5DEBIAN12 BETA Release Version v0.5ARMBIAN23 BETA UPDATE: H96 MAX V56 RK3566 4gb and 8gb EMMC images: Release Version V0.7DEBIAN12 BETA Release Version V0.7ARMBIAN23 BETA -

Efforts to develop firmware for H96 MAX V56 RK3566 8G/64G
Hqnicolas replied to Hqnicolas's topic in Rockchip CPU Boxes
Take your debian SD card image and: now you have an ROOT v0.7 IMAGE MADE BY YOURSELF! -

Efforts to develop firmware for H96 MAX V56 RK3566 8G/64G
Hqnicolas replied to Hqnicolas's topic in Rockchip CPU Boxes
!!!!!!!NOW YOU HAVE AN SD CARD v0.5 image!!!!! -

Efforts to develop firmware for H96 MAX V56 RK3566 8G/64G
Hqnicolas replied to Hqnicolas's topic in Rockchip CPU Boxes
@hzdm Dear friend, Your MOD on USB2.0 doesnt boot with SERVER version of armbian!!!! for server images Please use the OLD DTB file without USB2.0 it solves the boot problem on Server images!!! @Sunil sankar i'm building updated versions from the SD-card images based on v0.5 All that you need to compile armbian: https://drive.google.com/file/d/1G5KBVq1oR-QrIKG3FoHmUTwh8OSAG018/view?usp=sharing H96MAX_DTB_DTS_WIFI_NOVEMBER_2023.zip -

Efforts to develop firmware for H96 MAX V56 RK3566 8G/64G
Hqnicolas replied to Hqnicolas's topic in Rockchip CPU Boxes
-

Efforts to develop firmware for H96 MAX V56 RK3566 8G/64G
Hqnicolas replied to Hqnicolas's topic in Rockchip CPU Boxes
Don't use it, I'm trying to rebuild it [emoji28] wait a week or two... -

Efforts to develop firmware for H96 MAX V56 RK3566 8G/64G
Hqnicolas replied to Hqnicolas's topic in Rockchip CPU Boxes
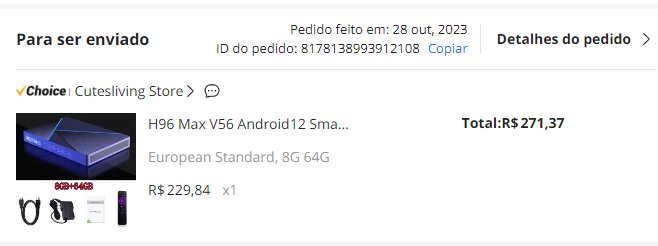
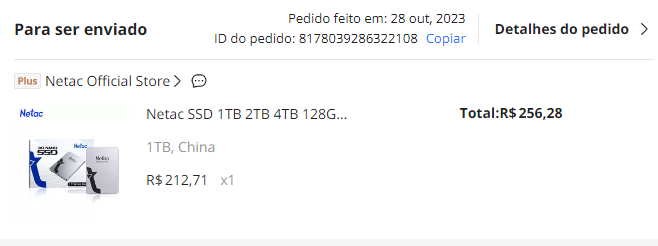
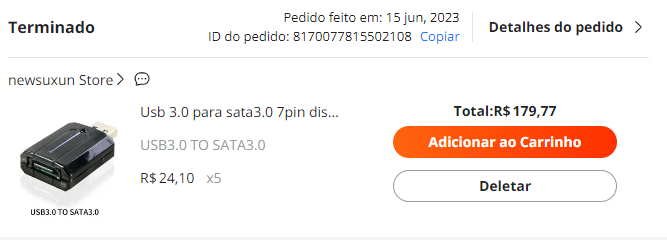
i will test the 4gb version too Please report your 8gb device by: armbianmonitor -u due to the high demand for 8gb devices I bought a unit to test the images here too, I'm going to put in a 1tb SSD with a sata adapter and create a bitcoin lightning node 1R$ = 0,20U$ 5R$ = 1U$ 54,12U$ = 271,37R$ with taxes 51,11U$ = 256,28R$ with taxes -

Efforts to develop firmware for H96 MAX V56 RK3566 8G/64G
Hqnicolas replied to Hqnicolas's topic in Rockchip CPU Boxes
@rossbcan dmesg | grep mmcblk0 cat /var/log/syslog | grep mmcblk0 armbianmonitor -u Result before SDcard insert: https://paste.armbian.com/qixunuqehi After Connect by insert SDcard: https://paste.armbian.com/rucaleyigi -

Efforts to develop firmware for H96 MAX V56 RK3566 8G/64G
Hqnicolas replied to Hqnicolas's topic in Rockchip CPU Boxes
Tested on 4gb / 32gb Old board version The factory can change layout without warning nobody. This is the bad side of TV boxes, and this is why Linux on this type of devices isn't supported by community -

Efforts to develop firmware for H96 MAX V56 RK3566 8G/64G
Hqnicolas replied to Hqnicolas's topic in Rockchip CPU Boxes
@Sunil sankar @hzdm @mvpwar Can you test this new 23.11 image? Please validade if it works -

Efforts to develop firmware for H96 MAX V56 RK3566 4G/32G
Hqnicolas replied to Hqnicolas's topic in Rockchip CPU Boxes
V0.5 = @armbian The Armbian SD card image "Compiled From Armbian Project" V0.8 = @hzdm Project with Mainline Bootloader "Boot the 64gb Emmc Armbian with Mainline Rockchip" V0.9 = @hzdm Mainline Bootloader "Boot the 32gb and 64gb Emmc Armbian with Mainline Rockchip" V1.0 = @hotnikq The Armbian SD card inside the Android Legacy Rockchip Image "Glued Image: Android boot for Linux" -

Efforts to develop firmware for H96 MAX V56 RK3566 4G/32G
Hqnicolas replied to Hqnicolas's topic in Rockchip CPU Boxes
based on @hzdm method i will make this image using Distro Boot with Boot.scr https://wiki.trenz-electronic.de/display/PD/Distro+Boot+with+Boot.scr mount the H96MAX update.img Files that will help 1. MiniLoaderAll.bin and U-boot are taken from Armbian image from Orange Pi 3B board. 2. The /boot directory was moved to a separate bootfs partition. 3. Rename file /boot/extlinux/extlinux.conf in extlinux.conf.bak 4. In /boot directory boot.cmd and boot.scr files were created with the following contents sudo apt-get update sudo apt install u-boot-tools This is the content of Boot.cmd and this is the content of boot.scr file too!! setenv docker_optimizations "on" setenv bootlogo "false" echo "Boot script loaded from ${devtype} ${devnum}" if test "${docker_optimizations}" = "on"; then setenv bootargs "${bootargs} cgroup_enable=cpuset cgroup_memory=1 cgroup_enable=memory swapaccount=1"; fi if test "${bootlogo}" = "true"; then setenv consoleargs "splash plymouth.ignore-serial-consoles ${consoleargs}" else setenv consoleargs "splash=verbose ${consoleargs}" fi part uuid mmc 1:2 partuuid setenv bootargs androidboot.console=ttyFIQ0 root=PARTUUID=${partuuid} rootwait rw rootfstype=ext4 ${consoleargs} no_console_suspend consoleblank=0 fsck.fix=yes fsck.repair=yes net.ifnames=0 splash p> load mmc 1:1 0x42000000 Image load mmc 1:1 0x44000000 dtb/rockchip/rk3566-firefly-roc-pc.dtb load mmc 1:1 0x46000000 uInitrd booti 0x42000000 0x46000000 0x44000000 # Recompile with: # mkimage -C none -A arm -T script -d /boot/boot.cmd /boot/boot.scr fdisk /dev/mmcblk1 N default default (lower this value to match the size of your root image) T 1 W create the boot disk drive content Create the root disk drive content Create the rootfs.img file Create the bootfs.img file -

Efforts to develop firmware for H96 MAX V56 RK3566 8G/64G
Hqnicolas replied to Hqnicolas's topic in Rockchip CPU Boxes
Attached, DTB and DTS Files that work with all USB ports Today I start the Recompile Session. Command: ./compile.sh build BOARD=station-m2 BRANCH=edge BUILD_DESKTOP=yes BUILD_MINIMAL=no DESKTOP_APPGROUPS_SELECTED='3dsupport browsers desktop_tools internet office programming remote_desktop' DESKTOP_ENVIRONMENT=cinnamon DESKTOP_ENVIRONMENT_CONFIG_NAME=config_base KERNEL_CONFIGURE=yes RELEASE=jammy Whats news? Detect USB 2.0 port ✔️ Works Wifi Broadcom ✔️ Updated Armbian 23.11 ✔️ runs kernel 6.2 DESKTOP ✔️ Boot on Linux Cinnamon Ambian✔️ display video HDMi ✔️ detect internal MMC ✔️ Detect SD-CARD ✔️ Detect USB 3.0 port ✔️ Please test this image and report it here. Use this tutorial to test this image use the same update.img and apply this new 23.11 rootfs insted of 23.08 also use the new 23.11 update image NEW ROOT FILE ARMBIAN 23.11 CINNAMON The changes are: Line 299 and Line 304 Amazing job @hzdm rk3566-firefly-roc-pc.dtb rk3566-firefly-roc-pc.dts -

Efforts to develop firmware for H96 MAX V56 RK3566 8G/64G
Hqnicolas replied to Hqnicolas's topic in Rockchip CPU Boxes
just disable and uninstall XFCE -

Efforts to develop firmware for H96 MAX V56 RK3566 4G/32G
Hqnicolas replied to Hqnicolas's topic in Rockchip CPU Boxes
Attached, DTB and DTS Files that work with all USB ports Today I start the Recompile Session. Command: ./compile.sh build BOARD=station-m2 BRANCH=edge BUILD_DESKTOP=yes BUILD_MINIMAL=no DESKTOP_APPGROUPS_SELECTED='3dsupport browsers desktop_tools internet office programming remote_desktop' DESKTOP_ENVIRONMENT=cinnamon DESKTOP_ENVIRONMENT_CONFIG_NAME=config_base KERNEL_CONFIGURE=yes RELEASE=jammy H96 Max RK3566 4gb and 8gb ✔️ boot from SD-CARD Soldered ✔️ runs kernel 6.2 DESKTOP ✔️ Boot on Linux XFCE Ambian✔️ display video HDMi ✔️ detect internal MMC ✔️ Detect SD-CARD ✔️ Detect USB 2.0 port ✔️ Detect USB 3.0 port ✔️ (nothing better than an usb hub) The changes are: Line 299 and Line 304 Amazing job @hzdm rk3566-firefly-roc-pc.dtb rk3566-firefly-roc-pc.dts -

Efforts to develop firmware for H96 MAX V56 RK3566 4G/32G
Hqnicolas replied to Hqnicolas's topic in Rockchip CPU Boxes
you will need to build it again, probably on 2024 I will have time for that. -

Efforts to develop firmware for H96 MAX V56 RK3566 4G/32G
Hqnicolas replied to Hqnicolas's topic in Rockchip CPU Boxes
this is Old! Your device is an 8gb RAM Please consider to use the HZDM 8GB version Follow the 8GB device topic This Topic is only for 4GB devices -

Efforts to develop firmware for H96 MAX V56 RK3566 8G/64G
Hqnicolas replied to Hqnicolas's topic in Rockchip CPU Boxes
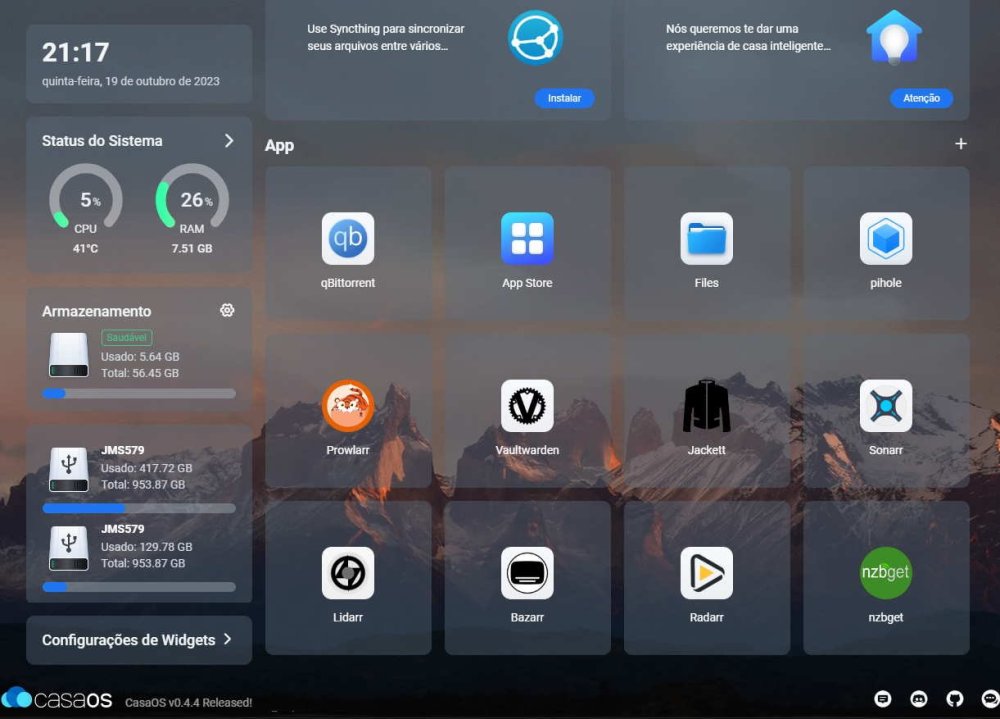
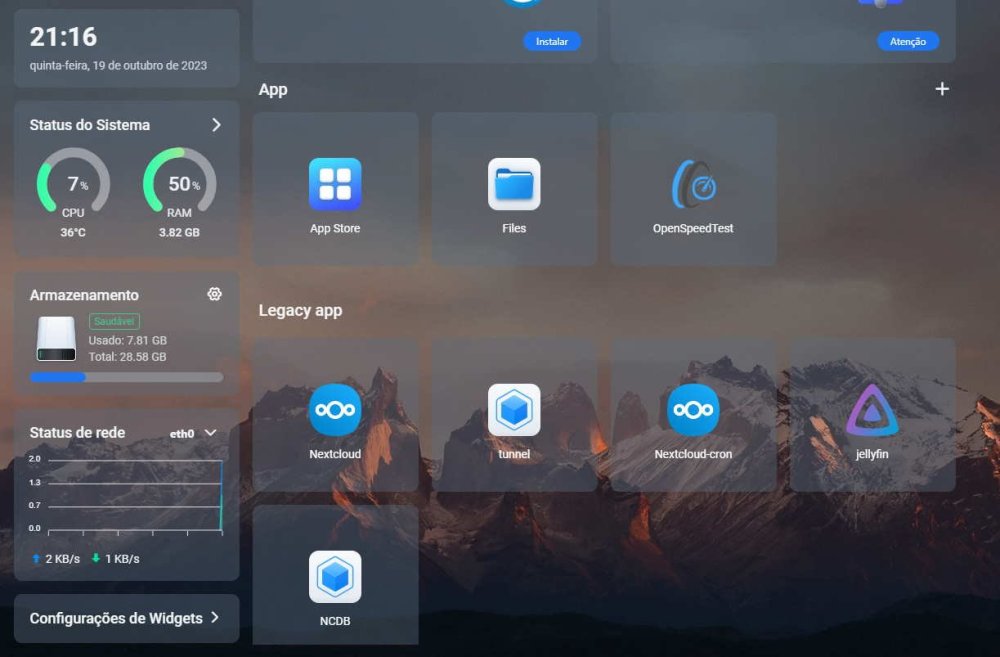
in only in a 4gb device rk3566 i was using 2x 1TB SATA SSD on USB3.0 Docker with CasaOS: Web tunnel over cloudflare to enable access to nextcloud with HTTPs. Web Nextcloud application dockered to share things with windows over samba to local network. on MacOS and Linux devices i used to share files from Local Lan over Cifis agaist baremetal. this device as a NAS work at gigabit speeds, all over the place with wifi6 -

Efforts to develop firmware for H96 MAX V56 RK3566 8G/64G
Hqnicolas replied to Hqnicolas's topic in Rockchip CPU Boxes
you can do it! I have a tip for you to do what you are imagining!!! Linux distros with ARC Manjaro architecture have GPU acceleration working perfectly on MALI GPU's. you can make a Manjaro ROOT compilation Based on Armbian, If you manage to compile it please come back here and share I start talking about it here and the conclusion is here my Rock 3a works fine as a media player device with Manjaro since 2022 -

Efforts to develop firmware for H96 MAX V56 RK3566 8G/64G
Hqnicolas replied to Hqnicolas's topic in Rockchip CPU Boxes
It's time to compile a version and call it alpha. I'm going to install Linux on my new FCBGA1744 interposer ddr4 In a few weeks I will publish an image for 4gb H96 max device with USB2 working -

Efforts to develop firmware for H96 MAX V56 RK3566 8G/64G
Hqnicolas replied to Hqnicolas's topic in Rockchip CPU Boxes
This is something about the EDID The process that initialize display on ARM devices isn't Plug and Play it need the EDID code to start with system. like it was part of the GPU driver. -

Efforts to develop firmware for H96 MAX V56 RK3566 8G/64G
Hqnicolas replied to Hqnicolas's topic in Rockchip CPU Boxes
it's kernel 4 it uses the DTB from android. android is an kernel 4 fork from google. we are here glue things on kernel 6. -

Efforts to develop firmware for H96 MAX V56 RK3566 8G/64G
Hqnicolas replied to Hqnicolas's topic in Rockchip CPU Boxes
if you want GPU Performance, please go to android! the Mali GPU from rockchip RK3566 is not Open source! so, linux GNU software wont work properly with closed source things. if you find some updates like this please bring to US.


