Search the Community
Showing results for tags 'tutorial'.
-
It seems that the actual install routine of Pihole doenst detect buster with kernel 5.8 correctly. At "my" normal install command "curl -sSL https://install.pi-hole.net | bash" I did get [✗] Unsupported OS detected: Armbian 20.08.0-trunk Buster https://docs.pi-hole.net/main/prerequesites/#supported-operating-systems e.g: If you are seeing this message on a fresh install, you can run: 'curl -sSL https://install.pi-hole.net | PIHOLE_SKIP_OS_CHECK=true sudo -E bash' If you are seeing this message after having run pihole -up: 'PIHOLE_SKIP_OS_CHECK=true sudo -E pihole -r' (In this case, your previous run of pihole -up will have already updated the local repository) but after giving (as written above) the install command with the option "to not check the OS" curl -sSL https://install.pi-hole.net | PIHOLE_SKIP_OS_CHECK=true sudo -E bash the installation went fine
-

Tutorial Enable Lima on headless devices
gamelaster posted a topic in Reviews, Tutorials, Hardware hacks
On some devices (mostly headless) like Pine A64 LTS and other SBCs with Allwinner SoCs is Lima blacklisted by default or not supported by distribution. For getting Lima work, you need to use distribution, which have already Mesa with Lima support (Mesa 20.1+) (or compile latest Mesa from sources, but this is not included in this tutorial). At the moment of writing, it's Ubuntu Focal and Debian Bullseye. I personally prefer Debian more, so in my case, download Debian Bullseye image for your SBC and burn it into the board. After booting into your board, find file named /etc/modprobe.d/blacklist-NAMEOFYOURSBC.conf (for me it's blacklist-pinea64-lts.conf), find line with: blacklist lima and comment it by adding # at begin of this line, so it will look like this: # blacklist lima Reboot the device and Lima should work finely. If you will have any questions or issues, let me know - gamiee -
Hi, I've been running Octoprint on armbian for several months with good results of a couple of printers with good performance no relevant problems. Installation process is not complex but I decided to build a simple a plug&play meta-distribution like OctoPi for Rpi boards but based on armbian so it can be used potentially in any of the supported boards. I started with the popular Opi Zero as it is really cheap and the four cores of the H2+ processor handle perfectly a 3d printer load and is 3 times cheaper than a typical RPI3B that octoPi requires. You can find it here: https://github.com/ludiazv/octocitrico Built-in features are: Core (installed and enabled): Optimized armbian Debian buster. Latest stable octoprint version. Selection of top octoprint plugins. HAProxy with self signed keys for ssl access. Avahi service: Bonjur addvertisement (this enable to acces with host-name.local via ssh or http/s) SSH console access. USB OTG console access (if available in the board) Enabled i2c-dev,spidev (if available on the board) 3D printer related software (installed but disabled): Klipper PlatformIo core for building 3D printer firmware. Marlin 1.1.x & Marlin 2.x.x firmware (bugfix versions) Extras (installed but disabled): MPGStreamer USB camera support (experimental) SMB shares to remote edit configuration files from a remote PC. Feedback and contributions are welcome. Thanks armbian guys for the awesome work you do.
-
I've used Zabbix professionally and at home to monitor servers, IoT, and IP devices. I've built scripts for the server and client to automate the install process including moving the MySQL database, so you can locate it to a NFS mount instead of serving the database from the slower SD card. The deb packages do not work for ARM, so you have to build it from source using my scripts. Install Zabbix
-
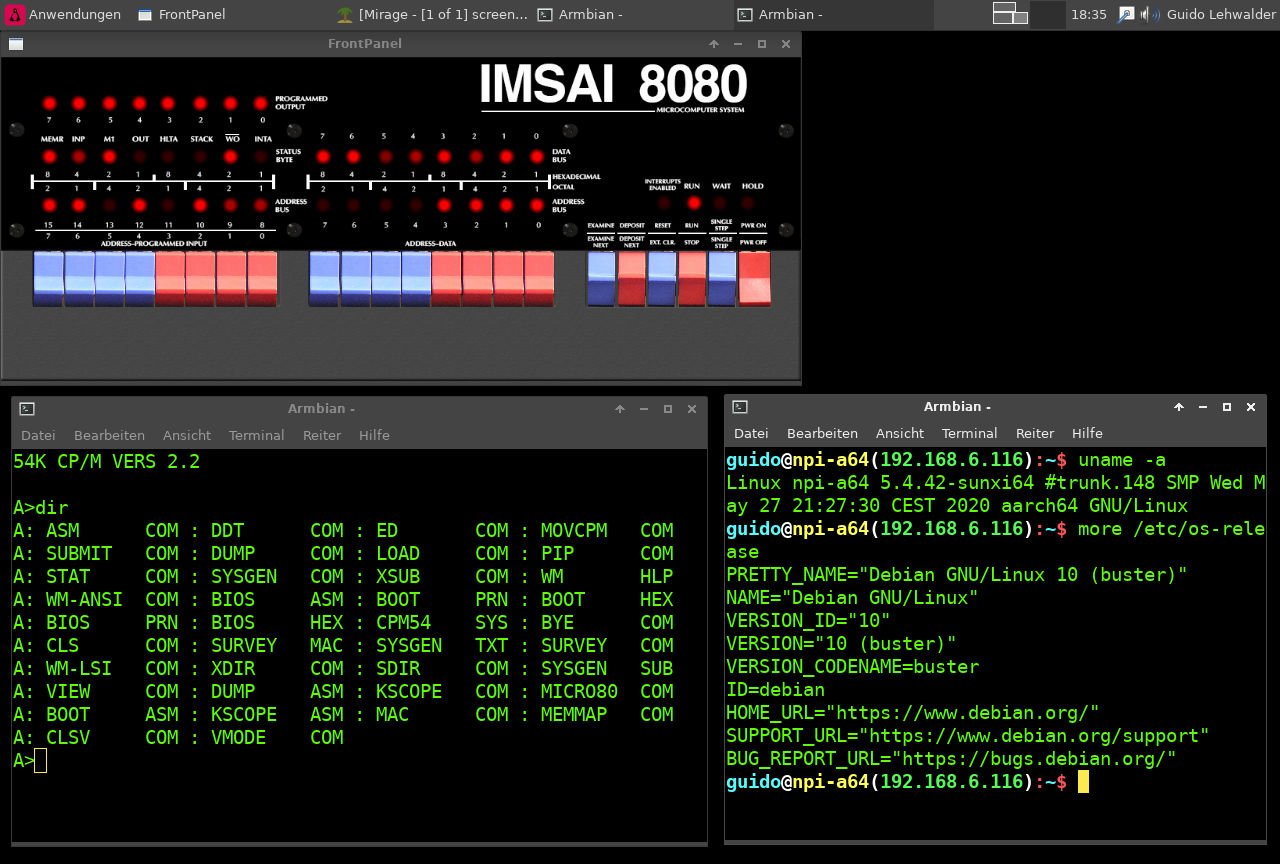
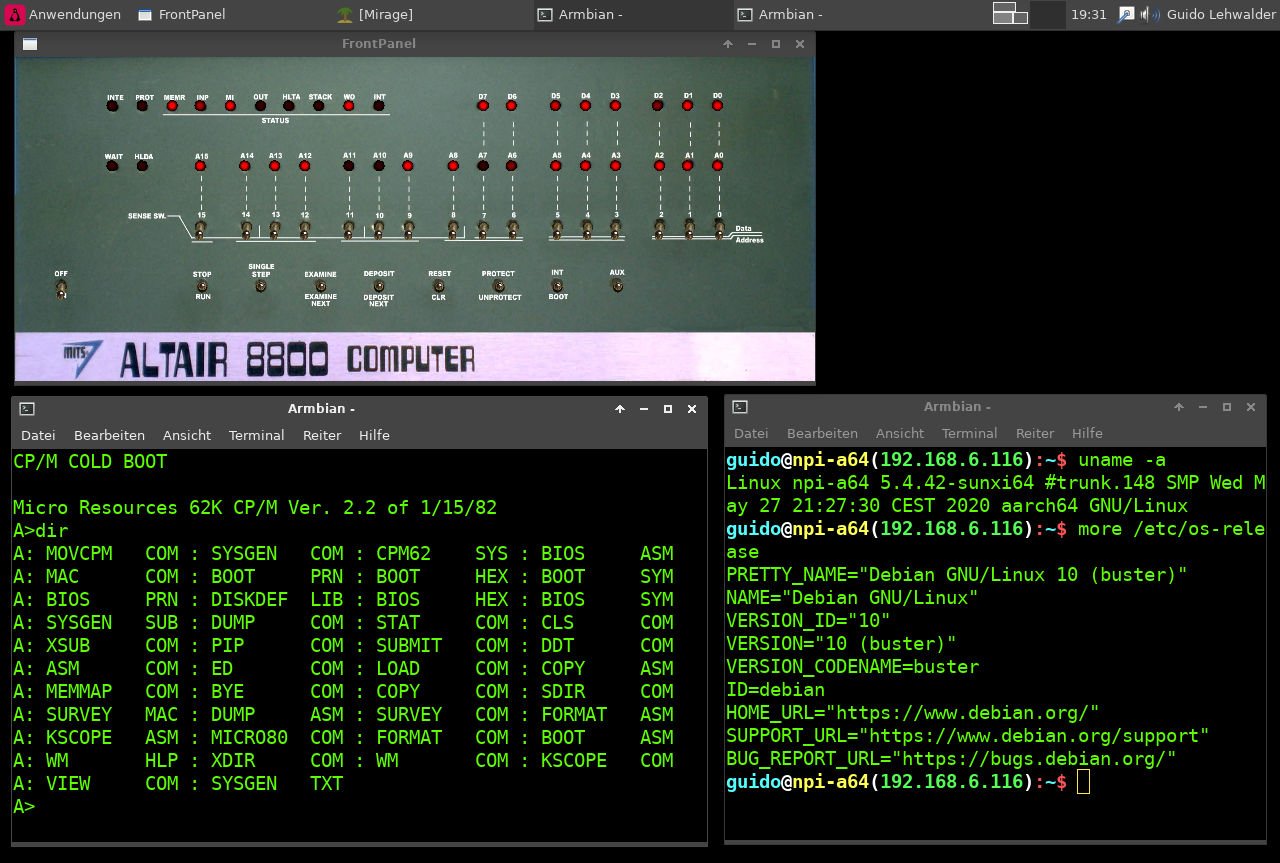
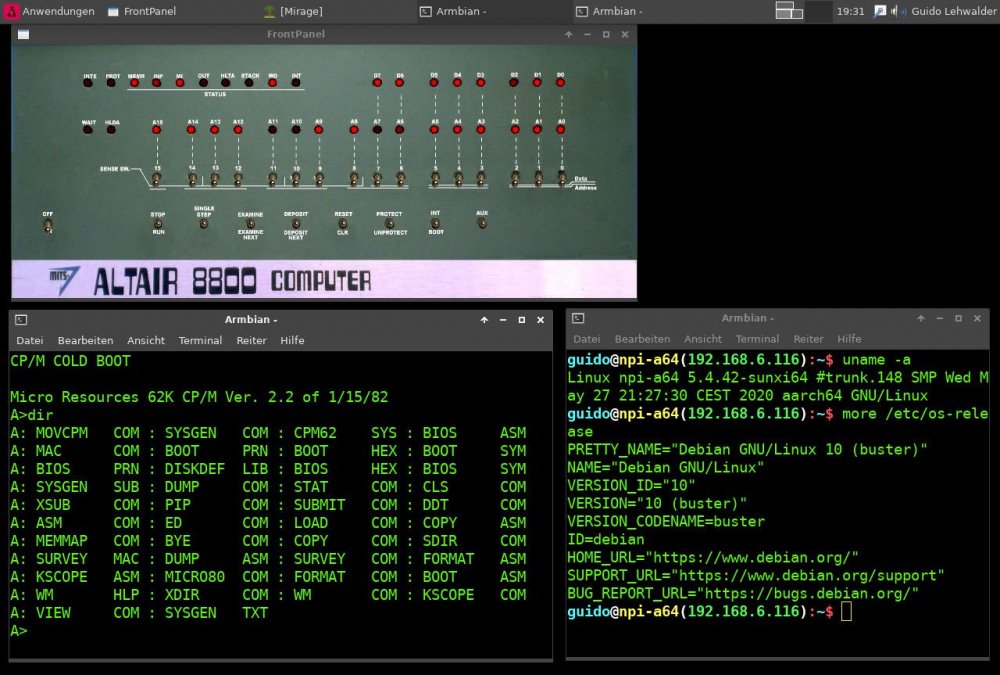
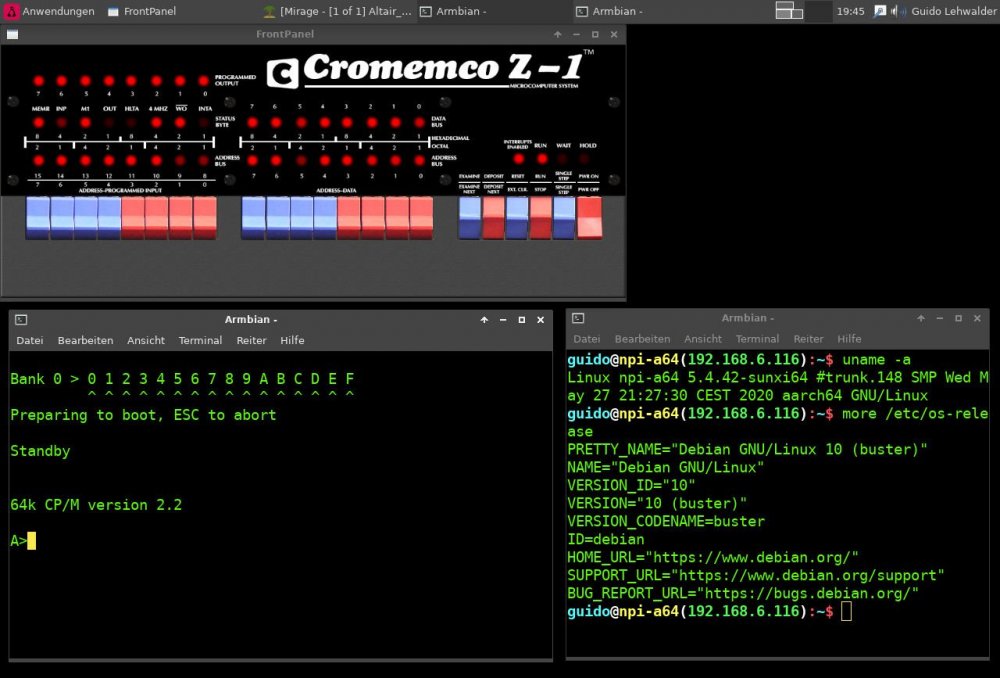
 If you know the movie "Wargames" then you may know the computer of "David Lightman" a IMSAI 8080 Udo Munk did create the software z80pack (last version from 2017 v1.36 at https://www.autometer.de/unix4fun/z80pack/ ) which does include - IMSAI 8080 - Altair - Cromemco Z1 and - cpmsim Emulation. Against the text based cpmsim emulation the other features a graphical frontpanel with "blinken lights" Yesterday I did try to compile/start my favourite IMSAI 8080. I did follow the instructions - which I collect and wrote for me - see attached to this message. But yesterdy I only got limited success (after many "bad" compiles with missing dependencies) in starting the IMSAI 8080 emulation. I did get the graphical frontend *yeah* - but after POWERON/RUN the computer I didnt get any terminal-output After MANY retries I did give up Today I did the same compile-session on a PC with Ubuntu MATE 20.04LTS and it did work in the first try At first I got no idea what wasnt working....but then I discovered that - when moving the graphical frontpanel - the terminal-output was written VERY SLOWLY to the terminal-screen *Aha* Because the garphical frontpanel seem to work perfectly (and did also compile very well) I searched inside the directorys of imsaisim and found in the "conf"-directory the file system.conf There in system.conf is a line where the FPS-rate of the frontpanel as default is configured to 60 FPS (Frames per second). While taking a look at htop the NanoPi A64 (where my armbian buster Desktop does run) the cpu-utilization is near 90% So my gut instinct did tell me thats to much and the NanoPi has to much work with the frontpanel than writing to the terminal. I changed the framerate in - for the IMSAI 8080: ~/z80pack-1.36/imsaisim/conf/systemconf - for the Altair: ~/z80pack-1.36/altairsim/conf/systemconf - for the Cromemco Z1: ~/z80pack-1.36/cromemcosim/conf/systemconf to # front panel framerate fp_fps 10 After that change all 3 emulators with graphical frontend did startup and give output on the terminal I contacted Udo Munk via email about this topic and he already knew it He wrote that he had implemented the FPS option, because some lower-spec systems had problems to achieve the power for producing a framerate of 60 FPS for the frontpanel. Here my write-up / documentation how I did compile / successfully start the IMSAI 8080 emulation: (many thanks to John Kennedy from the FB-Group Altair 8800 for double-checking my instructions!) ====================================================================== My normal evironment for compiling source: ====================================================================== apt install gcc libncurses5-dev liblua5.3-dev git make zip unzip -y ====================================================================== Getting z80pack-source: ====================================================================== cd ~ wget https://www.autometer.de/unix4fun/z80pack/ftp/z80pack-1.36.tgz tar -xvf z80pack-1.36.tgz cd ~/z80pack-1.36/ ====================================================================== Dependencies named by z80pack: ====================================================================== libjpeg X11 OpenGL c++ compiler (g++) libpthread ====================================================================== Packages for the z80pack-dpendencies: ------------------------------------- apt install libjpeg-dev x11-common libpthread-stubs0-dev libxmu-dev apt install mesa-common-dev z80asm libglu1-mesa-dev freeglut3-dev ====================================================================== ==> <== ==> I built all packages of z80pack in the following order: <== ==> <== ==> ATTENTION: for some commands you may have to use sudo <== ====================================================================== 1.) FRONTPANEL ====================================================================== cd ~/z80pack-1.36/frontpanel/ make -f Makefile.linux NOTE: Be sure to copy libfrontpanel.so to a shared library path! NOTE: cp ~/z80pack-1.36/frontpanel/libfrontpanel.so /usr/lib make -f Makefile.linux clean ====================================================================== 2.) CPMSIM ====================================================================== cd ~/z80pack-1.36/cpmsim/srcsim/ make -f Makefile.linux make -f Makefile.linux clean ====================================================================== 3.) CPMSIM-TOOLS ====================================================================== if you are user root: mkdir /root/bin if you are user pi: mkdir /home/pi/bin cd ~/z80pack-1.36/cpmsim/srctools make make install NOTE: (does install in /root/bin/) NOTE: Tools installed in /root/bin, make sure it is NOTE: included in the systems search PATH NOTE: export PATH=$PATH:/root/bin NOTE: or NOTE: export PATH=$PATH:/home/pi/bin make clean ====================================================================== 4.) ALTAIRSIM ====================================================================== cd ~/z80pack-1.36/altairsim/srcsim/ make -f Makefile.linux make -f Makefile.linux clean NOTE: change framerate to "fp_fps 10" in NOTE: ~/z80pack-1.36/altairsim/conf/system.conf ====================================================================== 5.) CROMEMCOSIM ====================================================================== cd ~/z80pack-1.36/cromemcosim/srcsim/ make -f Makefile.linux make -f Makefile.linux clean NOTE: change framerate to "fp_fps 10" in NOTE: ~/z80pack-1.36/cromemcosim/conf/system.conf ====================================================================== 6.) IMSAISIM ====================================================================== cd ~/z80pack-1.36/imsaisim/srcsim/ make -f Makefile.linux make -f Makefile.linux clean NOTE: change framerate to "fp_fps 10" in NOTE: ~/z80pack-1.36/imsaisim/conf/system.conf ====================================================================== PREPARE 1st start of imsaisim; ====================================================================== cp ~/z80pack-1.36/frontpanel/libfrontpanel.so /usr/lib cd ~/z80pack-1.36/imsaisim rm conf ln -s conf_2d conf export PATH=$PATH:/root/bin NOTE: maybe add the export-command to your ~/.bashrc ====================================================================== START of IMSAI 8080 CPM v2.2 from the x-terminal on the desktop (needs to be a "x-terminal) for connecting to the X-Server for creating the graphical frontpanel: ====================================================================== ./cpm22 NOTE: maybe root has to give access-rights: NOTE: chmod -R 666 ~/z80pack-1.36/imsaisim/disks NOTE: on the x-terminal root and the to the desktop logged in user can NOTE :start the application and connect to the X-server on a NOTE: SSH-terminal ONLY the to the desktop logged in user can start the NOTE: application and connect to the X-server to give root access to NOTE: the X-server from a SSH-terminal the he to the desktop logged NOTE: in user has to give root access via the xhost command: NOTE: xhost SI:localuser:root ====================================================================== POWER-UP the IMSAI 8080 in the graphical frontpanel ====================================================================== Press "POWER ON " upper part on the first switch on the right side (POWER ON / POWER OFF) Press "RUN" upper part of the third (red) switch (RUN/STOP) ====================================================================== Exit the IMSAI 8080 ====================================================================== Enter "bye" on the CP/M-commandline OR press "POWER OFF " lower part on the first switch on the right side (POWER ON / POWER OFF) OR close the graphical frontpanel with the close button X (Window-Manager-close) Pictures (screenshots are done with Mirage as you can see) of my "success"

-
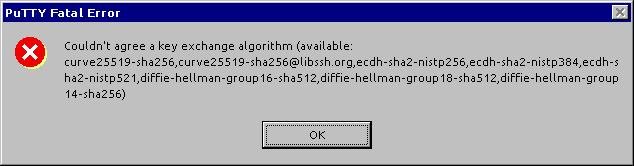
For "retro-reasons" I would like to SSH from my old Windows 98SE PC via putty 0.63 ( which is the last known to work under Windows98SE ) into armbian. This did work fine until armbian bullseye dev with kernel 5.6.8, because here we get the "new" openssh-serve 8.2p1: armbian bullseye kernel 5.6.8 openssh-server 1:8.2p1-4 arm64 secure shell (SSH) server, for secure access from remote machines before bullseye we had with armbian buster and so on the "older" open-ssh-server <=7.9p1 (where we didnt got this problem) armbian buster kernel 5.6.8 openssh-server 1:7.9p1-10+deb10u2 arm64 secure shell (SSH) server, for secure access from remote machines with open-ssh-server 8.2p1 there was a "little" change: https://www.openssh.com/releasenotes.html OpenSSH 8.2/8.2p1 (2020-02-14) Potentially-incompatible changes ================================ * ssh(1), sshd(8): this release removes diffie-hellman-group14-sha1 from the default key exchange proposal for both the client and server. So the old putty 0.63 ( which is the last known to work under Windows 98 ) does produce the error-message: couldn't agree a key exchange algorithm After comparing many many configs and commands (also ssh -Q kex) the solution "only" was nano /etc/ssh/sshd_config # put at the end of /etc/sshd_config KexAlgorithms +diffie-hellman-group14-sha1 /etc/init.d/ssh restart Maybe this will help someone also using a older putty or other SSH-Client. With a newer version of putty on newer Windows there was no problem with that
-
 Tested this on clearfog base, banana pi m64, banana pi m2+ ## Building and providing The elastic team doesn't provide deb packages for ARM devices. But together with docker, we're able to build the main executable for it. We will create a build directory which includes anything to install filebeat on a ARM device. So please stay inside the build directory the whole time you are using this tutorial. mkdir build && cd $_ ## Prepare source code First we will download, check and extract the source code of filebeat. Source: https://www.elastic.co/downloads/past-releases/filebeat-7-6-2 wget https://artifacts.elastic.co/downloads/beats/filebeat/filebeat-7.6.0-linux-x86.tar.gz wget https://artifacts.elastic.co/downloads/beats/filebeat/filebeat-7.6.0-linux-x86.tar.gz.sha512 sha512sum filebeat-7.6.0-linux-x86.tar.gz Extract and prepare tar xfz filebeat-7.6.0-linux-x86.tar.gz --transform 's/filebeat-7.6.0-linux-x86/filebeat-latest/' ## Using docker Install docker on any machine you want. We use a host with Debian Buster installed. ### Install docker on a Debian Buster x64 machine sudo apt install apt-transport-https ca-certificates curl gnupg2 software-properties-common wget -q -O - https://download.docker.com/linux/debian/gpg | sudo apt-key add - sudo add-apt-repository "deb [arch=amd64] https://download.docker.com/linux/debian stretch stable apt update sudo apt install docker-ce Instantiate a go container for cross-compilation (Debian Buster x64) Using latest docker go image docker run -it --rm -v `pwd`:/build golang:1.14 /bin/bash Inside the "go" docker container create filebeat for arm modules.listand arm64 go get github.com/elastic/beats cd /go/src/github.com/elastic/beats/filebeat/ git checkout v7.6.0 GOARCH=arm go build cp filebeat /build/filebeat-arm GOARCH=arm64 go build cp filebeat /build/filebeat-arm64 exit You can find the filebeat executeable inside your build directory. Leave it there for the moment. ## Download installation scripts I wrote an install script and collected a few files from other filebeat installations and uploaded them to github.com. You can find any information on the github repository itself. So we will clone the repository to the build directory. git clone https://github.com/rothirschtec/RT-Blog-elastic.git ## Filebeat configuration Now you have to copy the filebeat.yml so that that the install.sh we'll use later on can move it to the right place. cp filebeat-latest/filebeat.yml my-filebeat.yml and change it to your needs vi my-filebeat.yml ## Other configurations There are other configurations that might interests you. cp filebeat-latest/modules.d/YOUR_MODULE.yml.disabled my-YOUR_MODULE.yml Change this files too vi my-YOUR_MODULE.yml The install script will loop through all .yml files starting with my- and will copy them to the right direction ## Ready for installation The build directory is ready to use. You are able to upload the build directory to a ARM server of your choice and execute the install.sh there. rsync -av --exclude={".git","*.tar.gz","*.tar.gz.sha512"} ../build/ server-of-your-choice:/opt/build/ ssh server-of-your-choice cd /opt/build/ bash /opt/build/RT-Blog-elastic/install.sh rm -rf /opt/build/ ## Modules You're able to enable modules with the installation script. Create a file called modules.list inside the build directory and write the modules separated by whitespaces like iptables system apache
 -
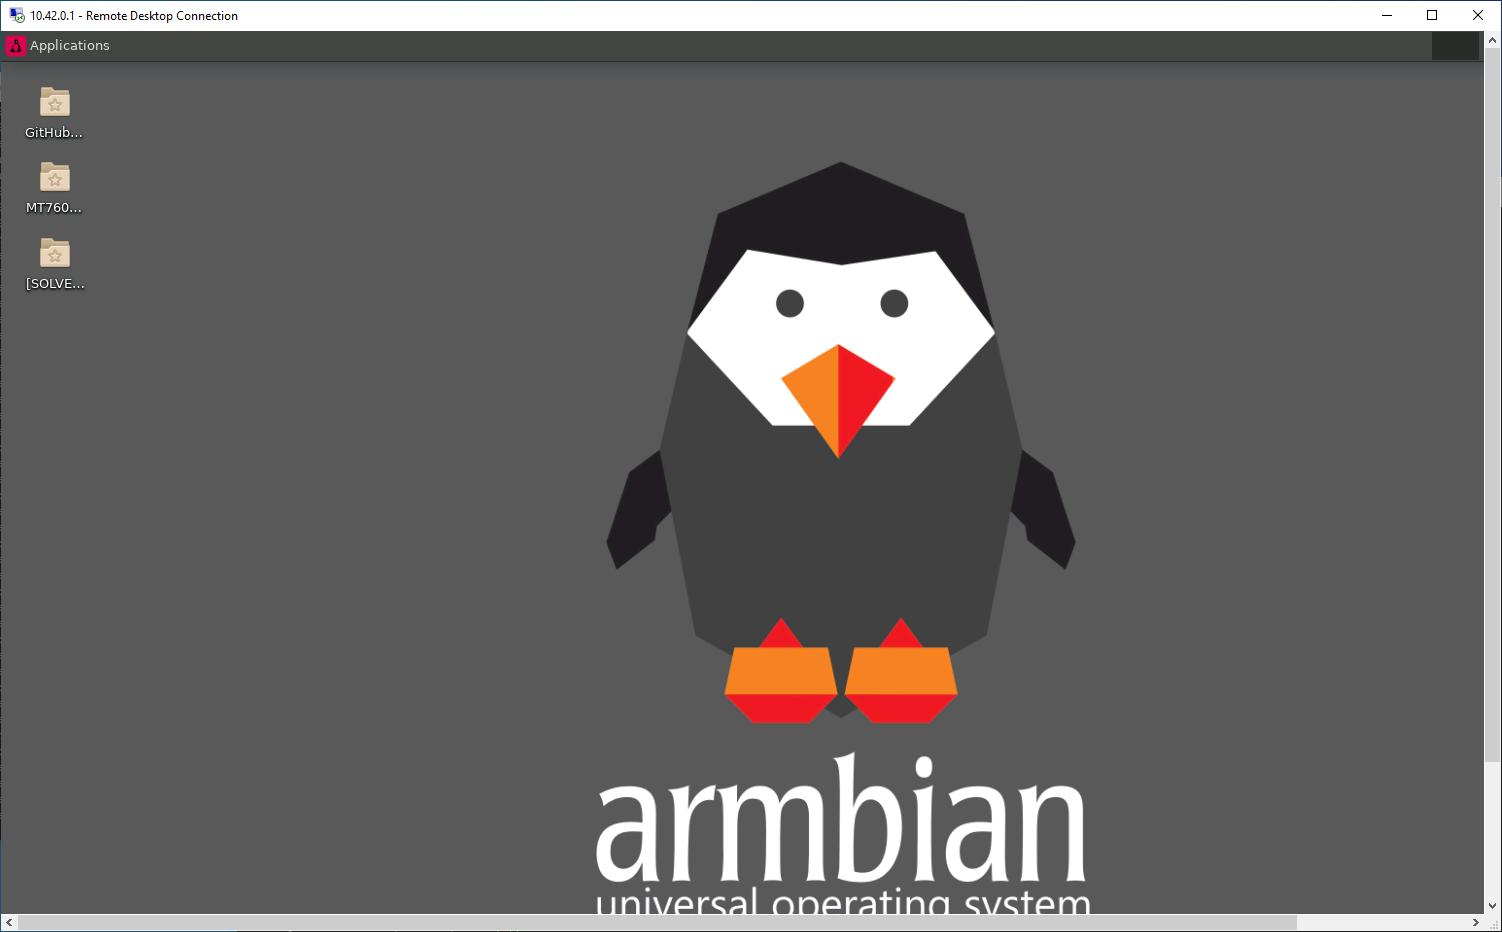
 Hi, There's been a few guides around on how to get RDP working with Armbian so you can login from your Windows or other PC. Some solutions mentioned in various threads here were: Install tightvncserver instead + x2go bloat (i.e. use VNC) Only login as root - didn't seem to make any difference for me Change some permissions of a log file in your home directory. Well, this is what I did on my Orange PI PC running Buster desktop with Kernel 5.4, as of April 2020. sudo apt install xrdp xorgxrdp sudo systemctl enable xrdp sudo reboot ... and that was it. The missing piece of the puzzel appeared to be the install of xorgxrdp, this isn't installed automatically by 'xrdp' package, and it's useless without it. Update June 2020: Also works with RetroOrangePi 4.3 super quickly (given this is based on Armbian Bionic 18.04). Can RDP in and use Armbian Desktop whilst Kodi plays a 4k movie on the TV from the same device... Awesome!

-
Maybe someone does know the old/historical SAM (Software Automatic Mouth) speech synthesizer for the Commodore 64? Today I did found the github-page with the source-code and compiled it on my Orange Pi R1 - using armbian For compiling the default SDL-version I had to install the 2 additional packages with apt - libsdl1.2-dev - libsdl1.2debian before SAM did compile on armbian. I also did try libsdl2-2.0.0 (and -dev), but this didnt worked well while compiling The souce-code could be found at: https://github.com/s-macke/SAM Hear here, how this OLD speech synthesizer sounds https://www.youtube.com/watch?v=Rm4ZCGgzeeU Test him ONLINE: https://simulationcorner.net/index.php?page=sam Or read about him in the Wikipedia: https://en.wikipedia.org/wiki/Software_Automatic_Mouth
-
 Hi all. I wrote a small guide on enabling pps-gpio by modifying the device tree. With a PPS signal it's possible to setup your board as a Stratum 1 time server for your local network or the NTP pool. I used this method on a Rock64 but it should be applicable on most board. PPS-GPIO on Rock64 with Armbian legacy (4.4.X) kernel Cheers.
 -
So this guy made a simple yet brilliant inquiry into his thoughts on how to hack the at&t restrictions. I hope theres a status update soon cause, Id love to know how his progress has gone so far. https://ltehacks.com/viewtopic.php?f=31&t=783
-
I've posted in the Armbian forums in the past about Kerberos.io video surveillance software. For some reasons it was (at the time) not always that easy or impossible to compile or get it up and running. But: Times have changed (for the good this time!) and I've tried it again on a H3 1GB memory OrangePi plus with kernel 5.4 using a *FRESH and CLEAN* Ubuntu Bionic Server image. I was able to get the Kerberos software 2.8.0 up and running straight away, just by *EXACT* following the instructions on the website of Kerberos.io (Generic installation Instructions page). It takes some time to compile ffmpeg and the machinery module, but it is certainly worth the effort! Go grab a drink, or do something else that's useful. Performance is ok, even though I think the hardware acceleration is not working. Just lower the FPS and/or resolution a bit. Performance is still great for everyday video surveillance with this excellent piece of software. I've tested successfully two different Logitech USB cams and two el-cheapo Chinese IP cameras using the RTSP stream. Other information can also be found on the Kerberos.io website to get the software up and running. Please take care of defining exact camera type and resolution!
-
 Lately, I started writing a few articles on the OrangePi Zero, as I am trying to use it as part of a conference recording tool and to reference what I know about this board on the OrangePi Community docs website. Of course, I have to show my command lines, and their results. I used to post my commands on gist, then use Carbon to generate an image with the commands and their outputs… But that’s quite a lot of boring work… I then discovered asciinema and the recording that can be transformed into a GIF file thanks to asciicast2gif. It worked pretty well under Ubuntu for my previous projects, but it was not really practical to launch it, issue an ssh command, and then exit twice before having the recording… and modifying it to get rid of the SSH command. Furthermore, GIF are not usable for visually impaired people, so using something like SVG where they could copy and paste would be better in my opinion… Unfortunately, SVG is not handled by medium, so it will have to be used on other media, like my Ghost instance (not available yet). Enters termtosvg. That’s a wonderful tool aimed at producing animated SVG after recording terminal sessions. It compiled like a breeze (well, a strong, smelly and cold breeze) on the Zero, so I used it quite intensively (before discovering it could not be used on Medium). I then searched for tools able to transform an animated SVG to GIF, so that I would not have to redo all my terminal recordings… and was not able to do so. There is one library called librsvg that could be used by ffmpeg, but I have not been able to compile it on the Zero, and it’s just an hypothesis, there is no guarantee at all that it could be used to produce GIF files from animated SVG files. termtosvg can produce files than can be used by asciinema and then asciicast2gif to produce gif files, but the process is cumbersome and does not work on the Zero. I had to use a X86 Linux machine to do it. Anyway, with this post, you won’t be able to produce GIF images starting from a terminal recording if you’re using exclusively a Zero, but beautiful animated SVG that you will be able to use on your blog, or anywhere else where animated SVG is supported. If you’re brave enough to also use an X86 machine, go to the end of this post, and take time to get old before getting your first GIF file. TermToSVG installation TL;DR git config --global http.proxy http://proxy-machine:proxy-port sudo fallocate -l 1G /swapfile sudo chmod 600 /swapfile sudo mkswap /swapfile sudo swapon /swapfile sudo nano /etc/fstab git clone https://github.com/nbedos/termtosvg.git sudo apt-get install python3-setuptools libxml2-dev libxslt-dev python3-dev python3-pip cd termtosvg echo "Let's modify the Makefile so that we use python3 and pip3 as I can't get rid of Python2.7.x on this machine..." echo "See at https://gist.github.com/gounthar/b1870915710a0437b4e4eb8690e93553#file-makefile-patch" make build pip3 install dist/termtosvg-0.9.0-py3-none-any.whl The real installation process Let’s try to install termtosvg on the Zero. First of all, let’s configure the proxy if needed and then get the source code: poddingue@orangepizero:~$ git clone https://github.com/nbedos/termtosvg.git Cloning into 'termtosvg'... remote: Enumerating objects: 99, done. remote: Counting objects: 100% (99/99), done. remote: Compressing objects: 100% (59/59), done. remote: Total 1592 (delta 59), reused 68 (delta 40), pack-reused 1493 Receiving objects: 100% (1592/1592), 1.37 MiB | 2.08 MiB/s, done. Resolving deltas: 100% (930/930), done. poddingue@orangepizero:~$ cd termtosvg/ poddingue@orangepizero:~/termtosvg$ make build rm -rf dist && \ python setup.py sdist bdist_wheel usage: setup.py [global_opts] cmd1 [cmd1_opts] [cmd2 [cmd2_opts] ...] or: setup.py --help [cmd1 cmd2 ...] or: setup.py --help-commands or: setup.py cmd --help error: invalid command 'bdist_wheel' make: *** [Makefile:31: build] Error 1 Of course, the setuptools module can’t be found. I have not installed/configured Python2 setup tools. But as I had already done if for Python3, I modified the Makefile so that python is now python3, and pip is now pip3: PIP=pip3 PYTHON=python3 If I had not done it yet, it would have looked that way: poddingue@orangepizero:~/termtosvg$ sudo apt-get install python3-setuptools Reading package lists... Done Building dependency tree Reading state information... Done Suggested packages: python-setuptools-doc The following NEW packages will be installed: python3-setuptools 0 upgraded, 1 newly installed, 0 to remove and 0 not upgraded. Need to get 306 kB of archives. After this operation, 1,353 kB of additional disk space will be used. Get:1 http://httpredir.debian.org/debian buster/main armhf python3-setuptools all 40.8.0-1 [306 kB] Fetched 306 kB in 0s (1,225 kB/s) Selecting previously unselected package python3-setuptools. (Reading database ... 66711 files and directories currently installed.) Preparing to unpack .../python3-setuptools_40.8.0-1_all.deb ... Unpacking python3-setuptools (40.8.0-1) ... Setting up python3-setuptools (40.8.0-1) ... Now that Python setup tools are installed, let’s try it again: poddingue@orangepizero:~/termtosvg$ make build rm -rf dist && \ python3 setup.py sdist bdist_wheel usage: setup.py [global_opts] cmd1 [cmd1_opts] [cmd2 [cmd2_opts] ...] or: setup.py --help [cmd1 cmd2 ...] or: setup.py --help-commands or: setup.py cmd --help error: invalid command 'bdist_wheel' make: *** [Makefile:31: build] Error 1 Ok, fair enough, I’ll install wheel thanks to pip. pip3 install wheel Collecting wheel Using cached https://files.pythonhosted.org/packages/00/83/b4a77d044e78ad1a45610eb88f745be2fd2c6d658f9798a15e384b7d57c9/wheel-0.33.6-py2.py3-none-any.whl Installing collected packages: wheel The script wheel is installed in '/home/poddingue/.local/bin' which is not on PATH. Consider adding this directory to PATH or, if you prefer to suppress this warning, use --no-warn-script-location. Successfully installed wheel-0.33.6 And then, as gently suggested by pip3: export PATH=/home/poddingue/.local/bin:$PATH Ok, let’s try it again: poddingue@orangepizero:~/termtosvg$ make build rm -rf dist && \ python3 setup.py sdist bdist_wheel running sdist running egg_info creating termtosvg.egg-info writing termtosvg.egg-info/PKG-INFO writing dependency_links to termtosvg.egg-info/dependency_links.txt writing requirements to termtosvg.egg-info/requires.txt writing top-level names to termtosvg.egg-info/top_level.txt writing manifest file 'termtosvg.egg-info/SOURCES.txt' reading manifest file 'termtosvg.egg-info/SOURCES.txt' reading manifest template 'MANIFEST.in' warning: no previously-included files matching '__pycache__' found anywhere in distribution warning: no previously-included files matching '*.pyc' found anywhere in distribution warning: no files found matching 'man/*.man.?' writing manifest file 'termtosvg.egg-info/SOURCES.txt' running check [...] Creating tar archive removing 'termtosvg-1.0.0' (and everything under it) [...] running build_scripts [...] installing to build/bdist.linux-armv7l/wheel running install running install_lib [...] Copying termtosvg.egg-info to build/bdist.linux-armv7l/wheel/termtosvg-1.0.0-py3.7.egg-info [...] adding 'termtosvg-1.0.0.dist-info/RECORD' removing build/bdist.linux-armv7l/wheel Happy? Not really… poddingue@orangepizero:~/termtosvg$ pip3 install dist/termtosvg-1.0.0-py3-none-any.whl Processing ./dist/termtosvg-1.0.0-py3-none-any.whl Collecting pyte (from termtosvg==1.0.0) Downloading https://files.pythonhosted.org/packages/66/37/6fed89b484c8012a0343117f085c92df8447a18af4966d25599861cd5aa0/pyte-0.8.0.tar.gz (50kB) 100% |████████████████████████████████| 51kB 768kB/s Collecting lxml (from termtosvg==1.0.0) Downloading https://files.pythonhosted.org/packages/e4/19/8dfeef50623892577dc05245093e090bb2bab4c8aed5cad5b03208959563/lxml-4.4.2.tar.gz (2.6MB) 100% |████████████████████████████████| 2.6MB 74kB/s Collecting wcwidth (from termtosvg==1.0.0) Downloading https://files.pythonhosted.org/packages/58/b4/4850a0ccc6f567cc0ebe7060d20ffd4258b8210efadc259da62dc6ed9c65/wcwidth-0.1.8-py2.py3-none-any.whl Building wheels for collected packages: pyte, lxml Running setup.py bdist_wheel for pyte ... done Stored in directory: /home/poddingue/.cache/pip/wheels/c0/dd/4a/d0ec26b9d07a3b48e25ba3456dc9bcab875686af6da9e23fcd Running setup.py bdist_wheel for lxml ... error Complete output from command /usr/bin/python3 -u -c "import setuptools, tokenize;__file__='/tmp/pip-install-4whala87/lxml/setup.py';f=getattr(tokenize, 'open', open)(__file__);code=f.read().replace('\r\n', '\n');f.close();exec(compile(code, __file__, 'exec'))" bdist_wheel -d /tmp/pip-wheel-w27wrikj --python-tag cp37: Building lxml version 4.4.2. Building without Cython. ERROR: b'/bin/sh: 1: xslt-config: not found\n' ** make sure the development packages of libxml2 and libxslt are installed ** Using build configuration of libxslt running bdist_wheel running build running build_py [...] arm-linux-gnueabihf-gcc -pthread -DNDEBUG -g -fwrapv -O2 -Wall -g -fstack-protector-strong -Wformat -Werror=format-security -Wdate-time -D_FORTIFY_SOURCE=2 -fPIC -DCYTHON_CLINE_IN_TRACEBACK=0 -Isrc -Isrc/lxml/includes -I/usr/include/python3.7m -c src/lxml/etree.c -o build/temp.linux-armv7l-3.7/src/lxml/etree.o -w In file included from src/lxml/etree.c:692: src/lxml/includes/etree_defs.h:14:10: fatal error: libxml/xmlversion.h: No such file or directory #include "libxml/xmlversion.h" ^~~~~~~~~~~~~~~~~~~~~ compilation terminated. Compile failed: command 'arm-linux-gnueabihf-gcc' failed with exit status 1 creating tmp cc -I/usr/include/libxml2 -c /tmp/xmlXPathInitp1a2wq_x.c -o tmp/xmlXPathInitp1a2wq_x.o /tmp/xmlXPathInitp1a2wq_x.c:1:10: fatal error: libxml/xpath.h: No such file or directory #include "libxml/xpath.h" ^~~~~~~~~~~~~~~~ compilation terminated. ********************************************************************************* Could not find function xmlCheckVersion in library libxml2. Is libxml2 installed? ********************************************************************************* error: command 'arm-linux-gnueabihf-gcc' failed with exit status 1 [...] Command "/usr/bin/python3 -u -c "import setuptools, tokenize;__file__='/tmp/pip-install-4whala87/lxml/setup.py';f=getattr(tokenize, 'open', open)(__file__);code=f.read().replace('\r\n', '\n');f.close();exec(compile(code, __file__, 'exec'))" install --record /tmp/pip-record-5dypr5tk/install-record.txt --single-version-externally-managed --compile --user --prefix=" failed with error code 1 in /tmp/pip-install-4whala87/lxml/ Damn! poddingue@orangepizero:~/termtosvg$ sudo apt install libxml2-dev libxslt-dev python3-dev Reading package lists... Done Building dependency tree Reading state information... Done Note, selecting 'libxslt1-dev' instead of 'libxslt-dev' python3-dev is already the newest version (3.7.3-1). The following additional packages will be installed: icu-devtools libicu-dev libxslt1.1 Suggested packages: icu-doc The following NEW packages will be installed: icu-devtools libicu-dev libxml2-dev libxslt1-dev libxslt1.1 0 upgraded, 5 newly installed, 0 to remove and 0 not upgraded. Need to get 10.5 MB of archives. After this operation, 44.6 MB of additional disk space will be used. Do you want to continue? [Y/n] Get:1 http://httpredir.debian.org/debian buster/main armhf icu-devtools armhf 63.1-6 [168 kB] Get:2 http://httpredir.debian.org/debian buster/main armhf libicu-dev armhf 63.1-6 [8,934 kB] Get:3 http://httpredir.debian.org/debian buster/main armhf libxml2-dev armhf 2.9.4+dfsg1-7+b3 [718 kB] Get:4 http://httpredir.debian.org/debian buster/main armhf libxslt1.1 armhf 1.1.32-2.2~deb10u1 [217 kB] Get:5 http://httpredir.debian.org/debian buster/main armhf libxslt1-dev armhf 1.1.32-2.2~deb10u1 [507 kB] Fetched 10.5 MB in 5s (2,318 kB/s) Selecting previously unselected package icu-devtools. (Reading database ... 66802 files and directories currently installed.) Preparing to unpack .../icu-devtools_63.1-6_armhf.deb ... Unpacking icu-devtools (63.1-6) ... Selecting previously unselected package libicu-dev:armhf. Preparing to unpack .../libicu-dev_63.1-6_armhf.deb ... Unpacking libicu-dev:armhf (63.1-6) ... Selecting previously unselected package libxml2-dev:armhf. Preparing to unpack .../libxml2-dev_2.9.4+dfsg1-7+b3_armhf.deb ... Unpacking libxml2-dev:armhf (2.9.4+dfsg1-7+b3) ... Selecting previously unselected package libxslt1.1:armhf. Preparing to unpack .../libxslt1.1_1.1.32-2.2~deb10u1_armhf.deb ... Unpacking libxslt1.1:armhf (1.1.32-2.2~deb10u1) ... Selecting previously unselected package libxslt1-dev:armhf. Preparing to unpack .../libxslt1-dev_1.1.32-2.2~deb10u1_armhf.deb ... Unpacking libxslt1-dev:armhf (1.1.32-2.2~deb10u1) ... Setting up icu-devtools (63.1-6) ... Setting up libxslt1.1:armhf (1.1.32-2.2~deb10u1) ... Setting up libicu-dev:armhf (63.1-6) ... Setting up libxml2-dev:armhf (2.9.4+dfsg1-7+b3) ... Setting up libxslt1-dev:armhf (1.1.32-2.2~deb10u1) ... Processing triggers for man-db (2.8.5-2) ... Processing triggers for libc-bin (2.28-10) ... All set? Not so sure… Command "/usr/bin/python3 -u -c "import setuptools, tokenize;__file__='/tmp/pip-install-9lgddbtt/lxml/setup.py';f=getattr(tokenize, 'open', open)(__file__);code=f.read().replace('\r\n', '\n');f.close();exec(compile(code, __file__, 'exec'))" install --record /tmp/pip-record-ghyj96g8/install-record.txt --single-version-externally-managed --compile --user --prefix=" failed with error code 1 in /tmp/pip-install-9lgddbtt/lxml/ The error may have happened because of low memory. Let’s this machine breathe a little better by giving it more swap: sudo fallocate -l 1G /swapfile sudo chmod 600 /swapfile sudo mkswap /swapfile sudo swapon /swapfile sudo nano /etc/fstab Now, let’s add this line in /etc/fstab. /swapfile swap swap defaults 0 0 Let’s try to install it once again. Go and have a coffee, or go for a walk… You could maybe even take time to marry and start a family before the build finishes. Anyway, after some time, you’ll have your beautiful termtosvg package ready to rock! pip3 install dist/termtosvg-1.0.0-py3-none-any.whl Processing ./dist/termtosvg-1.0.0-py3-none-any.whl Collecting lxml (from termtosvg==1.0.0) Using cached https://files.pythonhosted.org/packages/e4/19/8dfeef50623892577dc05245093e090bb2bab4c8aed5cad5b03208959563/lxml Requirement already satisfied: pyte in /home/poddingue/.local/lib/python3.7/site-packages (from termtosvg==1.0.0) (0.8.0) Requirement already satisfied: wcwidth in /home/poddingue/.local/lib/python3.7/site-packages (from termtosvg==1.0.0) (0.1.8) Building wheels for collected packages: lxml Running setup.py bdist_wheel for lxml ... - done Stored in directory: /home/poddingue/.cache/pip/wheels/73/52/7c/5cd696851d3e5e31a05023dd402b04659a6ec695ecc566c9d3 Successfully built lxml Installing collected packages: lxml, termtosvg Successfully installed lxml-4.4.2 termtosvg-1.0.0 This time, it looks like our installation has been successful. Let’s try it for real now. Testing Just enter termtosvg, do your stuff, and then do exit. You will have a message that will tell you where your newly created file lies. That’s cool, but can we do any better? The man page tells us we can record a terminal session with a specific screen geometry: termtosvg -g 80x24 animation.svg Recording started, enter "exit" command or Control-D to end poddingue@orangepizero:~$ echo "Hello, World!" Hello, World! poddingue@orangepizero:~$ exit Rendering ended, SVG animation is animation.svg Pretty handy! I am recording my casts with a 200x60 geometry, exporting them in the SVG format. The first step is to record them: termtosvg record -g 200x60 whatever-name-I-choose.cast I then ask termtosvg to render the cast as SVG, so that I can use them in websites that can handle them: termtosvg render whatever-name-I-choose.cast whatever-name-I-choose.svg Rendering started Rendering ended, SVG animation is whatever-name-I-choose.svg Want more? You’re GIF hungry? Ok I resign myself to give you my process, which is not pretty, and requires an X86 machine. As we have seen before, we can record a terminal session in asciicast v2 format. The cast file we have produced during the previous step to generate SVG, can then be used by asciinema (using phantomjs in the background) to produce a GIF file. docker pull asciinema/asciicast2gif alias asciicast2gif='docker run --rm -v $PWD:/data asciinema/asciicast2gif' asciicast2gif -s 2 -t solarized-dark whatever-name-I-choose.cast demo.gif And here is the final result (see attachment or here). And in GIF for the CMS that can’t display properly SVG. whatever-name-I-choose[1].svg
 -
https://www.openhab.org/docs/installation/armbian.html
-
Had a bit of a success with HDMI audio and also video acceleration on OrangePi 3. What was needed was to apply some patches from LibreELEC, namely ones from projects/Allwinner/patches/linux/ . For HDMI audio to work you need 0004-sun4i-i2s-improvements.patch , which contains support for I2S on H6. When done right you should see in dmesg: asoc-simple-card sound: i2s-hifi <-> 5091000.i2s mapping ok Also what helped was an IRC chat that Jernej had with mirko some time ago: https://irclog.whitequark.org/linux-sunxi/2018-03-14 For video acceleration you need 0005-cedrus-improvements.patch and compile Cedrus driver. When done right you should see in dmesg: cedrus 1c0e000.video-codec: Device registered as /dev/video0 For a good measure I applied other patches in that directory as well, some needed modifications to apply to 5.5 kernel (LibreELEC uses 5.4) . Then FFMPEG needs to be compiled with v4l2_request to actually do the acceleration To get Kodi GUI acceleration working you need to compile mesa 20.0.0-devel from Mesa GIT. Kodi then needs to be compiled as GBM version. I also applied patches that LibreELEC has for Kodi into my Kodi tree. @jernej sounds the above about right?
-
For now there's one downloadable Armbian Buster image for the M4V2 from pask. Also the patch needed to prepare your own image : https://drive.google.com/open?id=1LaJIywiZnZUkLDZ9HkWrRtc0PyfiYGOL Yon build or download any other M4 image and apply the patch from pask For wifi use this patch from MartinAyotte Download both files https://forum.armbian.com/applications/core/interface/file/attachment.php?id=5386 https://forum.armbian.com/applications/core/interface/file/attachment.php?id=5387 Copy these to /lib/firmware/brcm/ Reboot. That's it. Official Armbian for M4V2 comming soon.
-
Over a year (or two?) I used a PS1-line in my ~/-bashrc with many cryptic ANSI-Escape-codes which were hard to read and edit export PS1='\[\033[1;36m\]\u\[\033[1;37m\]@\[\033[1;33m\]\h\[\033[1;37m\](\[\033[1;32m\]$THEIP\[\033[1;37m\])\[\033[1;31m\]:\[\033[1;36m\]\w\[\033[1;31m\]\$\[\033[0m\] ' Today I did installed Linux Lite 4.6 on a PC (a former Chromebox) and did see the nice Powerline prompt and did try to use that on a nanoPi Neo2. I installed the packages fonts-powerline & powerline and copied the powerline-script /usr/share/powerline/bindings/bash/powerline.sh from the pc to the NanoPi Neo2. It did work after I used UTF8 translation in pUTTY, but it wasnt very perfomant So I decided to cleanup my PS1 line for better reading, I had to define some variables and then I did put these in my PS1 export line in ~/.bashrc: export THEIP="$(/sbin/ifconfig | grep "inet " | grep -v 127.0.0. | awk '{print $2}')" BRed='\[\033[31;1m\]' BGreen='\[\033[32;1m\]' BYellow='\[\033[33;1m\]' BCyan='\[\033[36;1m\]' BWhite='\[\033[37;1m\]' Reset='\[\033[0m\]' UserPromptPS1='\$' export PS1="${BCyan}\u${BWhite}@${BYellow}\h${BWhite}(${BGreen}${THEIP}${BWhite})${BRed}:${BCyan}\w${BRed}${UserPromptPS1}${Reset} " # \u = User # @ = @ # \h = Host # \w = working directory # \$ = # for root (uid=0) or $ for user That worked well and did give me the same result as my old but bad readable PS1-line Now its - for me - much more easy to edit As Information some more useable color-definition (B before the color is for Bright and colors starting with On are for the Background): Black='\[\033[30m\]' Red='\[\033[31m\]' Green='\[\033[32m\]' Yellow='\[\033[33m\]' Blue='\[\033[34m\]' Magenta='\[\033[35m\]' Cyan='\[\033[36m\]' White='\[\033[37m\]' BBlack='\[\033[30;1m\]' BRed='\[\033[31;1m\]' BGreen='\[\033[32;1m\]' BYellow='\[\033[33;1m\]' BBlue='\[\033[34;1m\]' BMagenta='\[\033[35;1m\]' BCyan='\[\033[36;1m\]' BWhite='\[\033[37;1m\]' OnBlack='\[\033[40m\]' OnRed='\[\033[41m\]' OnGreen='\[\033[42m\]' OnYellow='\[\033[43m\]' OnBlue='\[\033[44m\]' OnMagenta='\[\033[45m\]' OnCyan='\[\033[46m\]' OnWhite='\[\033[47m\]' OnBBlack='\[\033[40;1m\]' OnBRed='\[\033[41;1m\]' OnBGreen='\[\033[42;1m\]' OnBYellow='\[\033[43;1m\]' OnBBlue='\[\033[44;1m\]' OnBMagenta='\[\033[45;1m\]' OnBCyan='\[\033[46;1m\]' OnBWhite='\[\033[47;1m\]' Reset='\[\033[0m\]'


-
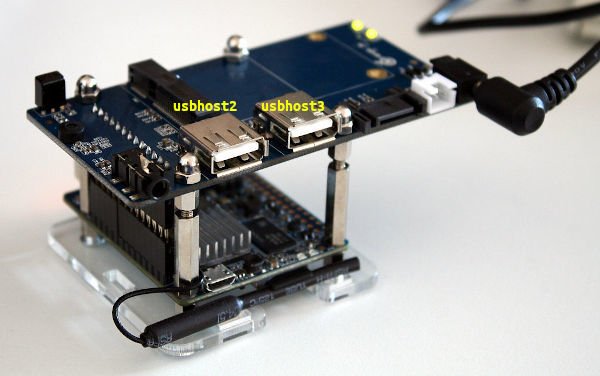
On newer armbian-build it seems that the codec-analog is disabled by default I activated analog-codec in armbian-config ==> System ==> Hardware like in older builds. aplay -l did show the device, but could play. So I did decompile the .dtb with: dtc -I dtb -O dts /boot/dtb/sun8i-h2-plus-orangepi-r1.dtb -o /boot/dtb/sun8i-h2-plus-orangepi-r1.dts Edited the allwinner,sun8i-h3-codec status from disabled to okay: codec@1c22c00 { #sound-dai-cells = < 0x00 >; compatible = "allwinner,sun8i-h3-codec"; reg = < 0x1c22c00 0x400 >; interrupts = < 0x00 0x1d 0x04 >; clocks = < 0x03 0x34 0x03 0x6d >; clock-names = "apb\0codec"; resets = < 0x03 0x28 >; dmas = < 0x14 0x0f 0x14 0x0f >; dma-names = "rx\0tx"; allwinner,codec-analog-controls = < 0x19 >; status = "okay"; phandle = < 0x58 >; }; Then I compiled the .dts back to .dtb: dtc -I dts -O dtb /boot/dtb/sun8i-h2-plus-orangepi-r1.dts -o /boot/dtb/sun8i-h2-plus-orangepi-r1.dtb In armbian-config ==> System ==> Hardware I enabled also usbhost2 & usbhost3 (because no USB-device was recognized at the USB-ports of the NAS-board) and I disabled cir and spi-jedec-nor which I had enabled for a test. After a reboot the soundcard Debian Buster with Armbian Linux 5.3.7-sunxi package bsp-kernel[5.98.191026] u-boot[5.98] dtb[5.98.191026] firmware[5.98] config[5.98] root@opi-r1(192.168.6.101):~# aplay -l **** List of PLAYBACK Hardware Devices **** card 0: Codec [H3 Audio Codec], device 0: CDC PCM Codec-0 [CDC PCM Codec-0] Subdevices: 0/1 Subdevice #0: subdevice #0 is working again like in older builds The 2nd Ethernet Port Bus 003 Device 002: ID 0bda:8152 Realtek Semiconductor Corp. RTL8152 Fast Ethernet Adapter is also connected via USB, but is allways in the lsusb-list - even when usbhost0-usbhost3 is disabled.
-
A while ago I did create a armbian-package-information for at the motd of the login: Now the line for the kernel does show 2 versions because there are "Version:" and "Config -Version:" root@npi-neo2-24(192.168.6.24):~# dpkg -s linux-image-$BRANCH-$LINUXFAMILY|grep Version Version: 5.96 Config-Version: 5.96 root@npi-neo2-24(192.168.6.24):~# dpkg -s linux-image-$BRANCH-$LINUXFAMILY|grep Version|cut -f 2 -d ' ' 5.96 5.96 So I had to find another way/command to get the information once I did go back from "dpkg -s" to "dpkg -l" and greped there the version-info: root@npi-neo2-24(192.168.6.24):~# dpkg -l | awk -v env_var="linux-image-$BRANCH-$LINUXFAMILY" '$2==env_var { print $3 }' 5.96 # end-part of /etc/update-motd.d/10-armbian-header # NEW version # =============================================================================================================== ARMBIAN_bsp=$(more /etc/armbian-release|grep VERSION|cut -f 2 -d '=') ARMBIAN_kernel=$(dpkg -l | awk -v env_var="linux-image-$BRANCH-$LINUXFAMILY" '$2==env_var { print $3 }') ARMBIAN_uboot=$(dpkg -l | awk -v env_var="linux-u-boot-$BOARD-$BRANCH" '$2==env_var { print $3 }') ARMBIAN_dtb=$(dpkg -l | awk -v env_var="linux-dtb-$BRANCH-$LINUXFAMILY" '$2==env_var { print $3 }') ARMBIAN_firmware=$(dpkg -l | awk -v env_var="armbian-firmware" '$2==env_var { print $3 }') ARMBIAN_config=$(dpkg -l | awk -v env_var="armbian-config" '$2==env_var { print $3 }') printf 'package bsp-kernel[\e[0;91m%s\x1B[0m] u-boot[\e[0;91m%s\x1B[0m] dtb[\e[0;91m%s\x1B[0m] firmware[\e[0;91m%s\x1B[0m] config[\e[0;91m%s\x1B[0m]\n' "$ARMBIAN_kernel" "$ARMBIAN_uboot" "$ARMBIAN_dtb" "$ARMBIAN_firmware" "$ARMBIAN_config" printf '\n' # =============================================================================================================== After successfully getting the kernel-version only once- I edited the other commands to the "dpkg -l" version - and the result is clear as before _ _ ____ _ _ _ ____ | \ | | _ \(_) | \ | | ___ ___ |___ \ | \| | |_) | | | \| |/ _ \/ _ \ __) | | |\ | __/| | | |\ | __/ (_) | / __/ |_| \_|_| |_| |_| \_|\___|\___/ |_____| Welcome to Debian Buster with Armbian Linux 5.3.3-sunxi64 package bsp-kernel[5.98.191003] u-boot[5.96] dtb[5.98.191003] firmware[5.96] config[5.96] The only drawback is, when you use a dev-kernel/-dtb on a next-installation (using other kernel via armbian-config) then $BRANCH is next and your kernel is dev root@npi-neo2-24(192.168.6.24):~# dpkg -l|grep image ii linux-image-dev-sunxi64 5.98.191003 arm64 Linux kernel, version 5.3.3-sunxi64 rc linux-image-next-sunxi64 5.96 arm64 Linux kernel, version 4.19.71-sunxi64 root@npi-neo2-24(192.168.6.24):~# dpkg -l|grep dtb ii linux-dtb-dev-sunxi64 5.98.191003 arm64 Linux DTB, version 5.3.3-sunxi64 # ARMBIAN_kernel=$(dpkg -l | awk -v env_var="linux-image-$BRANCH-$LINUXFAMILY" '$2==env_var { print $3 }') ARMBIAN_kernel=$(dpkg -l | awk -v env_var="linux-image-dev-$LINUXFAMILY" '$2==env_var { print $3 }') # ARMBIAN_dtb=$(dpkg -l | awk -v env_var="linux-dtb-$BRANCH-$LINUXFAMILY" '$2==env_var { print $3 }') ARMBIAN_dtb=$(dpkg -l | awk -v env_var="linux-dtb-dev-$LINUXFAMILY" '$2==env_var { print $3 }') PS: I also did try - before this - the package apt-show-versions (lists available package versions with distribution) but this takes much too long to resolve and needs this additionally package

-
 Hi all. I've made a new video on how to share your mouse and keyboard between multiple SBCs with Armbian. This is the source website where I've gotten my info. There is a lot more info to be found on it then I show in the video. https://itsfoss.com/keyboard-mouse-sharing-between-computers/ Here is my video. Install Barrier sudo apt install snap snapd sudo snap install --edge barrier Run Barrier /snap/bin/barrier Greetings, NicoD
 -
Hereby a tutorial to connect an MCP2515 based CAN bus interface to an OrangePi 3 running successfull with Buster minimal nightly with 5.3 kernel. It uses the attached user overlay only and doesn’t need any other overlay. Connections CAN module OPi3 26 pin header Raspberry CAN interface 40 pin header Vcc 3.3 CON12-P01 1 Gnd CON12-P06 6 MOSI CON12-P19 19 MISO CON12-P21 21 CLK CON12-P23 23 CS CON12-P24 24 INT CON12-P26 22 Optional 5V for Transceiver on cheap Chinese modules CON12-P02 Not used when equiped with a 3.3V transceiver Add the attached overlay with the command: sudo armbian-add-overlay spi-h6-mcp2515.dts The file /boot/armbianEnv.txt now contains a line: user_overlays=spi-h6-mcp2515 Reboot the OrangePi 3 Check if the MCP2515 is recognized: pi@orangepi3:~$ dmesg | grep mcp If properly connected it should return a line containing: mcp251x spi1.0 can0: MCP2515 successfully initialized. As stated a can0 interface should be generated check it with: pi@orangepi3:~$ sudo ifconfig -a Bring up the network: sudo ip link set can0 up type can bitrate 250000 Check if the interrupt is hooked: cat /proc/interrupts should return a line like this 46: 1 0 0 0 sunxi_pio_edge 8 Edge mcp251x Check for traffic on the CAN bus with candump from can-utils (sudo apt-get install can-utils) candump can0 spi-h6-mcp2515.dts
-
Hi all. For a new video I've made a list with my most used/useful terminal commands. Please let me know what I've missed, or which commands you use most. Useful Linux commands for Ubuntu/Debian --------------------------------------- Update/Install -------------- sudo apt update Update repolists sudo apt upgrade Upgrade system/programs sudo apt autoremove Remove obsolete programs sudo apt install programName Install program sudo apt remove programName Remove program sudo aptitude install When having issue's with apt, aptitude can help to solve this sudo apt update && sudo apt upgrade Update and upgrade together/You can run multiple commands with && sudo dpkg -i packageName.deb Install .deb file Root user --------- sudo passwd Change root password su Super User/Enter root user Debug/Monitor ------------- dmesg Shows debug messages uname -a Shows basic system information env Shows the environment information htop Hardware monitor Switch terminal --------------- ctrl + ALT + F4 (F1 - F6) Open new terminal 4 ctrl + ALT + F1 Go back to terminal 1 ctrl + ALT + F7 Go back to desktop Reboot/Shutdown --------------- sudo reboot Reboot sudo shutdown now Shutdown CPU Tools --------- cpufreq-set -g performance Set governor to performance cpufreq-set -u 2Ghz Set max frequency for all cores cpufreq-set -c 0-1 -u 1.8Ghz Set max frequency for specific cores lscpu | grep MHz Show cpu frequency taskset -c 3 programName Use a specific core for an application Files/Directories ----------------- nano /home/fileToRemove.txt Create a txt file with Nano. You could use any other texteditor. touch filename Create an empty file, no matter what kind cat /home/fileToRemove.txt Shows the content of a file cp /home/fileToRemove.txt /home/copy.txt Copy file find /home/ -iname "*.txt" Search files that end with .txt comm /home/fileToRemove.txt /home/copy.txt Compare files rm /home/fileToRemove.txt Remove file mv /home/copy.txt ~/Documents/ Move file mkdir /home/directoryToGoTo/ Create directory cd /home/directoryToGoTo/ Go to directory ls List directory ls -l Gives more information about every file/directory ls -l filename.txt Gives file information pwd Show current working directory cd .. Go to the above directory rmdir /home/directoryToGoTo/ Remove directory wget http://www.website.com/file.txt Download file Zip/Tar/GunZip -------------- zip myzip file1 file2 file3 Create zip file unzip myzip.zip Unzip file tar xvf filename.tar gunzip filename_tar.gz Mount drives/USB Devices ------------ lsusb List USB devices lsblb List attached drives mount /mount/mountedDisk /dev/sda2 Mount drive sudo chmod -R 777 /mount/mountedDisk Give user read/write permissions df -a List all filesystems Swap file/ZRam -------------- sudo apt install zram-config Install zram script sudo fallocate -l 8G /swapfile Allocate 8GB for swapfile sudo chmod 600 /swapfile Give the correct rights for the swapfile sudo mkswap /swapfile Make it a swapfile sudo swapon /swapfile Turn on the swapfile sudo nano /etc/fstab Open fstab and add the line ... |_ /swapfile swap swap defaults 0 0 Wifi ---- sudo nano /etc/network/interfaces and write: auto wlan0 iface wlan0 inet dhcp wpa-ssid {ssid} wpa-psk {password} OR nmcli device wifi rescan Scan for available wifi networks nmcli device wifi list Show available wifi networks nmcli device wifi connect SSID-Name password wireless-password Connect wifi ip a Show ip ifconfig iwconfig Change Keyboard Layout ---------------------- sudo dpkg-reconfigure keyboard-configuration Set keyboard layout Add display resolution ---------------------- cvt 2560 1440 60 Select the display resolution you want # 2560x1440 59.96 Hz (CVT 3.69M9) hsync: 89.52 kHz; pclk: 312.25 MHz Modeline "2560x1440_60.00" 312.25 2560 2752 3024 3488 1440 1443 1448 1493 -hsync +vsync xrandr --newmode "2560x1440_60.00" 312.25 2560 2752 3024 3488 1440 1443 1448 1493 -hsync +vsync Add resolution, everything after Modeline from cvt is copied after newmode xrandr --addmode HDMI-1 2560x1440_60.00 Add the new resolution to your display xrandr --newmode "2560x1440_60.00" 312.25 2560 2752 3024 3488 1440 1443 1448 1493 -hsync +vsync && xrandr --addmode HDMI-1 2560x1440_60.00 Others ------ reset Clear terminal shift + page up Scroll up shift + page down Scroll down tab Autocomplete ctrl + c Quit for many programs date Show date/time cal Show calender Funny commands -------------- sl First need to install "sudo apt install sl", then try it out. It's great :) sl -alF cmatrix fortune/fortune-mod cowsay figlet toilet ponysay inxi cat /dev/urandom :(){ :|:& };: Endless loop (useful to test CPU maximized temperatures) Armbian ------- sudo armbianmonitor -m sudo armbian-config change cpu settings sudo nano /etc/default/cpufrequtils Made by NicoD
-
 If you use a SIP Voip client on your phone or computer, you can use the sip protocol and scripting to monitor your Armbian board. I'm using Ubuntu Xenial, but other versions should work as well. I have the Linphone client on my phone and I use the free Linphone SIP service. Linphone.org hosts a free SIP service that allows users to make audio or video calls using SIP addresses via the domain sip.linphone.org. You can also send text messages. SIP requires an internet data connection, and my phone is connected via WIFI most of the time except when I'm commuting, so I set up my monitoring chron jobs on the Armbian device to run at times when I'm connected. Set up a SIP account for yourself if you don't yet have one, and set up an account for your device. You can set up free accounts at https://www.linphone.org/freesip/home The example accounts used in this tutorial are: sip:armdevice@linphone.org and sip:youraccount@linphone.org Replace these with your own accounts. I suggest that you get your Voip service running and tested on your phone and another device or PC before you try and set up SIP scripting on your Armbian device. Install the Linphone console client on your Armbian device (Orange Pi Zero Plus in my case). sudo apt-get install linphone-nogtk When it has installed start the client linphonec You may get a bunch of warnings about unconfigured sound cards and etc. Unless you want to use voice or video, you can ignore these. ........ eventually you will get a linphonec prompt Warning: video is disabled in linphonec, use -V or -C or -D to enable. linphonec> If you type help, you will get a list of commands: linphonec> help Commands are: --------------------------- help Print commands help. call Call a SIP uri or number calls Show all the current calls with their id and status. chat Chat with a SIP uri terminate Terminate a call answer Answer a call pause pause a call resume resume a call transfer Transfer a call to a specified destination. conference Create and manage an audio conference. mute Mute microphone and suspend voice transmission. camera Send camera output for current call. unmute Unmute microphone and resume voice transmission. playbackga Adjust playback gain. duration Print duration in seconds of the last call. autoanswer Show/set auto-answer mode proxy Manage proxies soundcard Manage soundcards webcam Manage webcams ipv6 Use IPV6 nat Set nat address stun Set stun server address firewall Set firewall policy call-logs Calls history friend Manage friends play play a wav file record record to a wav file quit Exit linphonec --------------------------- Now you need to configure your SIP proxy. "help proxy" gives you the relevant commands linphonec> help proxy 'proxy list' : list all proxy setups. 'proxy add' : add a new proxy setup. 'proxy remove <index>' : remove proxy setup with number index. 'proxy use <index>' : use proxy with number index as default proxy. 'proxy unuse' : don't use a default proxy. 'proxy show <index>' : show configuration and status of the proxy numbered by index. 'proxy show default' : show configuration and status of the default proxy. We must use "proxy add". It will start an interactive session. Note the format of the proxy sip address enclosed with < and > linphonec> proxy add Adding new proxy setup. Hit ^D to abort. Enter proxy sip address: <sip:sip.linphone.org;transport=tls> Your identity for this proxy: sip:armdevice@sip.linphone.org Do you want to register on this proxy (yes/no): yes Specify register expiration time in seconds (default is 600): Expiration: 0 seconds Specify route if needed: No route specified. -------------------------------------------- sip address: <sip:sip.linphone.org;transport=tls> route: identity: sip:armdevice@sip.linphone.org register: yes expires: 0 registered: no -------------------------------------------- Accept the above proxy configuration (yes/no) ?: yes Proxy added. linphonec> Password for armdevice on "sip.linphone.org": Y0uR-pa$$word linphonec> Unregistration on <sip:sip.linphone.org;transport=tls> done. That's it you are now configured. (not sure what "unregistration" means, perhaps it's a typo and should say registration) Send yourself a test text and quit out of linphonec. Once again "help" is useful: linphonec> linphonec> help chat chat <sip-url> "message"' : send a chat message "message" to the specified destination. linphonec> chat <sip:youraccount@sip.linphone.org> "Testing sip messaging" linphonec> terminate No active calls linphonec> quit Terminating... How can you easily send messages from a script? Create a wrapper script using expect (uses tls not bash) If you don't have expect installed then sudo apt-get install expect Create a wrapper expect script called "send-sip.sh" #!/usr/bin/expect -f # send-sip.sh "this is a message" set message [lindex $argv 0]; spawn linphonec expect "<sip:sip.linphone.org;transport=tls> done." send "chat <sip:youraccount@sip.linphone.org> \"$message\"\r" expect "linphonec>" sleep 10 send "terminate\r" expect "linphonec>" send "quit\r" expect "Terminating..." exit Set execute permission on the file. I placed mine in /usr/local/bin chmod +x /path/to/file # e.g. chmod +x /usr/local/bin/send-sip.sh Now you can execute your wrapper from a script like this and it will send the message to your sip address. Change the path to the location of your wrapper script. /usr/local/bin/send-sip.sh "this is a sip message"
 -
Maybe someone here knows the 8-Bit Guy and the project of his Dream-Computer - the Commander X16 You could see the actual state of the real hardware at YT-Video from the 8-Bit Guy: (Building my Dream Computer - Part 2) https://www.youtube.com/watch?v=sg-6Cjzzg8s Since the hardware isnt ready/completed yet there is a Emulator which uses SDL2 and can be compiled now (since r30) also on Linux ARM Github-page of the emulator: https://github.com/commanderx16/x16-emulator https://github.com/commanderx16/x16-emulator/releases Source: https://github.com/commanderx16/x16-emulator/archive/r30.zip or https://github.com/commanderx16/x16-emulator/archive/r30.tar.gz Linux-Binary for PC including the 2 ROMs: https://github.com/commanderx16/x16-emulator/releases/download/r30/x16emu_linux-r30.zip libsdl2-dev hasnt to be compiled from source for armbian, because we have already a installable package and the runtime libsdl2-2.0-0 is already installed in the desktop image. For compiling the Emulator I used on my NanoPi K1 Plus a fresh compiled (with armbian-build-system) dev-image: Armbian_5.97_Nanopik1plus_Debian_buster_dev_5.3.0-rc8_desktop For to have all programs for compiling the application I did use sudo apt install gcc git make libsdl2-dev zip unzip -y Then we do create a directory and download the source and extract it: mkdir x16 cd x16 wget https://github.com/commanderx16/x16-emulator/archive/r30.tar.gz tar -xvf r30.tar.gz Now we change in the newly created directory and do compile with make: cd x16-emulator-r30/ make For running the emulator we do need the 2 ROMs chargen.bin and rom.bin out of the archive https://github.com/commanderx16/x16-emulator/releases/download/r30/x16emu_linux-r30.zip in the same directory as the compile x16emu binary. Now we can run the emulator (here with german keymap): ./x16emu -keymap de Unfortunately the emulator doesnt run very fast, do use only one CPU-core and hasnt idle-support - so the CPU will get really fast very hot (70 Degree). A AMD Phenom II X4 with 4x3GHz max. is about 2 times more faster (100%+200%=300%) than the X16 on the NanoPi K1 Plus X16_r30_ROMs.zip
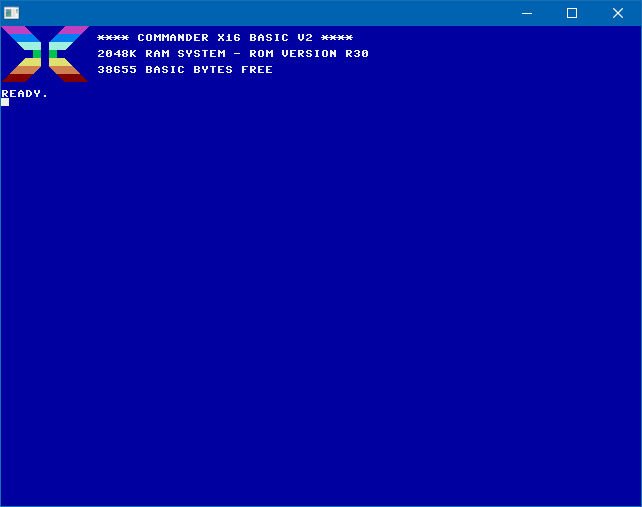
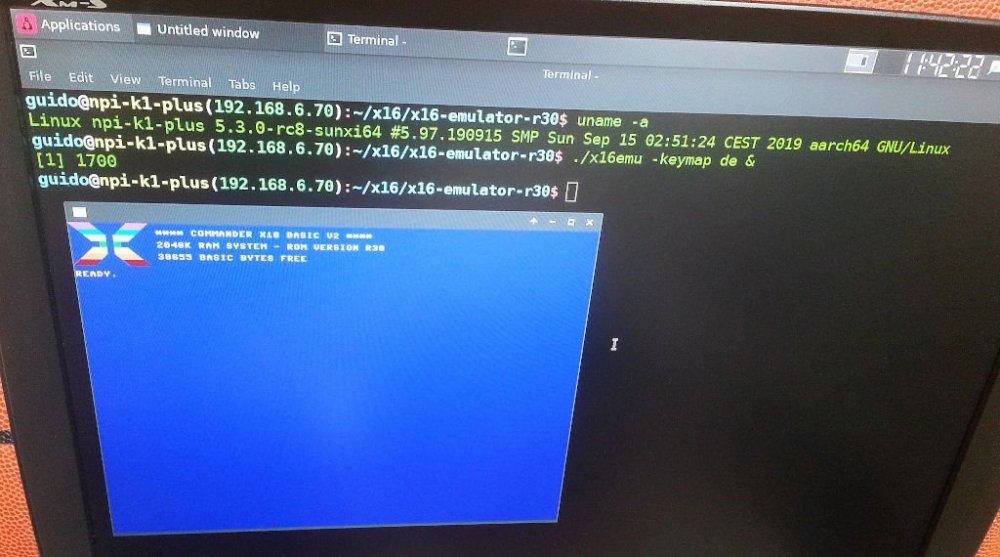
-
 For those who like to monitor temperature. Connect SDA & SCL to pins 3 and 5, connect 3.3V and GND. Connect all address wires of the DS1621 to ground. # sudo apt install i2c-tools # echo ds1621 0x48 >/sys/class/i2c-adapter/i2c-1/new_device# cat /sys/devices/platform/ff140000.i2c/i2c-1/1-0048/hwmon/hwmon0/temp1_input Optional, use lm-sensors: # sudo apt install lm-sensors # sensors Optional, temperature logging: Create a file logtemp.sh with the following contents: #!/bin/bash echo "`date +%Y-%m-%dT%R`;`cat /sys/devices/platform/ff140000.i2c/i2c-1/1-0048/hwmon/hwmon0/temp1_input`" >>/home/USER/temp Add an entry to /etc/crontab: 0 * * * * USER /home/USER/logtemp.sh And restart cron or your box for logging every hour. Thanks to https://www.electronicsfaq.com/2013/08/ds1621-with-raspberry-piarchlinuxarm.html Hope it's useful for someone!