Active threads
Showing topics posted in for the last 365 days.
- Past hour
-
Some NVMe's just don't play nice with some units. I have one such NVMe, which is why I rarely try to use it. Also u-boot is not set up to look for an infinite amount of $devnum. Currently it is hard coded to look for nvme 0:1. So I suggest moving the NVMe to the first available. According to the boot log you have more than one PCIE link up [ 1.438] PCIE-0: Link up (Gen2-x2, Bus0) <-- Thats where you want to attach the NVMe [ 1.600] PCIE-2: Link up (Gen2-x2, Bus2) Honestly though. It looks like the NVMe you are trying to use isn't compat.
- Today
-

NPU not working in OrangePi5Plus Vendor Kernel
Ravi Terala replied to Ravi Terala's topic in Orange Pi 5 Plus
@Werner here is the URL: https://paste.armbian.com/yoyimafolu -

Rupa X88 Pro 13 - RK3528 board with images
fedes_gl replied to fedes_gl's topic in Rockchip CPU Boxes
Let us know @johlnx -
I did more of a dance with AI and eventually got it working. This was the real repo: https://github.com/radxa-pkg/aic8800 Got the AI to write a summary of the dance. Phase 1: Resolving the Tooling and Environment Dependencies We started with a clean, lightweight system image missing common Linux development tools. We methodically installed the software compilation and packaging toolchain required to handle vendor drivers: Kernel Headers: Replaced the generic linux-headers-$(uname -r) command with the specific architecture branch package (linux-headers-current-arm64) to give the driver access to the Linux kernel API blueprints. Line Ending Conversions: Installed dos2unix to fix internal cross-platform formatting issues within the raw source files. Packaging Toolchain: Installed devscripts, debhelper, and fakeroot to fulfill the minimum environment demands of the dpkg-buildpackage engine. DKMS Engine Helpers: Installed dh-dkms to handle the missing modern virtual package mapping (dh-sequence-dkms). Phase 2: Resolving Kernel Version API Incompatibilities Because the hardware driver code was originally written for older Linux builds, trying to compile it directly against a modern 6.18 kernel threw standard compilation crashes. We bypassed the rigid Debian patch architecture and fixed the source code directly: Signature Alignment: Modified the function argument signature for .get_tx_power in rwnx_main.c to support the newer 5-parameter layout required by the upstream kernel (struct wiphy *wiphy, struct wireless_dev *wdev, int bss_idx, unsigned int link_id, int *mbm). Variable Alignment: Updated the interior variable name pointer within that function definition from dbm to mbm to match modern wireless power unit metrics used in current Linux network subsystems. Phase 3: Bypassing Packaging & Direct Kernel Compilation Rather than battling failing packaging lint tests or restrictive file verification scripts, we pivoted to an elegant, direct implementation: Dropped straight into the target interface folder (src/USB/driver_fw/drivers/aic8800/). Ran a direct raw build command targeting the standalone USB interface module flag: make CONFIG_AIC8800_USB=m. Manually pushed the generated binaries directly into the system kernel storage directory tree using sudo make install and synchronized the dependency layout using depmod -a. Phase 4: Correcting Firmware Pathing & Module Sequence The driver successfully built and registered with the kernel, but the physical USB bus threw initialization timeouts (bus is not up=0). We fixed the underlying hardware communication pipeline: Firmware Relocation: Traced the location of the compiled firmware folder hidden within the repository's package blueprints, and copied the raw firmware files directly into the absolute hardware search path at /lib/firmware/aic8800D80/. Sequential Probing: Cleared out the broken module states and forced the hardware interface modules to load in their structural order—giving the hardware bus loader helper (aic_load_fw) a 2-second sleep window to awaken the USB links before initializing the operational wireless adapter engine (aic8800_fdrv).
-
You will have to make a choice which bootloader firmware you use. And then also which boot method and/or bootmanager. Armbian images for Rockchip SBC's are as simple as possible, so only 1 OS, no ad-hoc kernel selection. That means 1 partition for rootfs, no others. Different methods have different advantages and disadvantages. If you want other boot method and/or bootmanager, you will need to add a boot partition yourself, usually FAT formatted and type 0xEF00 (called ESP). The Armbian rockchip64 supports it all, no problem. Especially the Rock5B, which is more or less the blue-print of high-end ARM64 SBC. But all this own custom action also make it not Armbian anymore, but just a generic UEFI ARM64 computer. Where you could also boot from a CD-ROM .iso image and run a traditional Linux distro installer like used on x86 PC's.
-
You made me curious, so I rebooted for the first time after my previous report to activate my current versions. I' m now at kernel 7.0.0-0.rc1.15.fc45.aarch64 and U-Boot 2026.07-rc1 (May 22 2026 - 00:00:00 +0000). No regressions can be observed and it works as fast as before.
-
 Orange Pi 5 Ultra HDMI RX no video when connecting Walksnail VTX Ascent. When I connect Walksnail Ascent VRX, the picture is fine, but when I connect VTX Ascent to VRX, the system doesn't see the HDMI RX. Specifically, it sees the source but can't lock it. The settings are set to 1080p60. I've tried different kernel and OS builds, but the result remains the same. What are the ways to solve this problem at the software level, since I specifically chose the Orange Pi 5 Ultra because of its built-in HDMI IN. [ 41.859256] fdee0000.hdmirx-controller: Vertical Sync threshold reached interrupt 0x2 [ 42.371741] rk_hdmirx fdee0000.hdmirx-controller: hdmirx_delayed_work_audio: enable audio [ 43.358027] fdee0000.hdmirx-controller: hdmirx_wait_lock_and_get_timing signal not lock, tmds_clk_ratio:0 [ 43.358032] fdee0000.hdmirx-controller: hdmirx_wait_lock_and_get_timing mu_st:0x2, scdc_st:0x1, dma_st10:0x10 [ 47.623748] fdee0000.hdmirx-controller: Vertical Sync threshold reached interrupt 0x2 [ 48.131739] rk_hdmirx fdee0000.hdmirx-controller: hdmirx_delayed_work_audio: enable audio [ 49.106851] fdee0000.hdmirx-controller: hdmirx_wait_lock_and_get_timing signal not lock, tmds_clk_ratio:0 [ 49.106858] fdee0000.hdmirx-controller: hdmirx_wait_lock_and_get_timing mu_st:0x2, scdc_st:0x1, dma_st10:0x10 [ 53.409063] fdee0000.hdmirx-controller: Vertical Sync threshold reached interrupt 0x2 [ 53.921736] rk_hdmirx fdee0000.hdmirx-controller: hdmirx_delayed_work_audio: enable audio [ 54.876109] fdee0000.hdmirx-controller: hdmirx_wait_lock_and_get_timing signal not lock, tmds_clk_ratio:0 [ 54.876117] fdee0000.hdmirx-controller: hdmirx_wait_lock_and_get_timing mu_st:0x2, scdc_st:0x1, dma_st10:0x10 [ 59.155931] fdee0000.hdmirx-controller: Vertical Sync threshold reached interrupt 0x2 [ 59.678402] rk_hdmirx fdee0000.hdmirx-controller: hdmirx_delayed_work_audio: enable audio [ 60.623901] fdee0000.hdmirx-controller: hdmirx_wait_lock_and_get_timing signal not lock, tmds_clk_ratio:0 [ 60.623907] fdee0000.hdmirx-controller: hdmirx_wait_lock_and_get_timing mu_st:0x2, scdc_st:0x1, dma_st10:0x10 [ 64.892299] fdee0000.hdmirx-controller: Vertical Sync threshold reached interrupt 0x2 [ 65.411737] rk_hdmirx fdee0000.hdmirx-controller: hdmirx_delayed_work_audio: enable audio [ 66.391898] fdee0000.hdmirx-controller: hdmirx_wait_lock_and_get_timing signal not lock, tmds_clk_ratio:0 [ 66.391904] fdee0000.hdmirx-controller: hdmirx_wait_lock_and_get_timing mu_st:0x2, scdc_st:0x1, dma_st10:0x10 [ 70.706000] fdee0000.hdmirx-controller: Vertical Sync threshold reached interrupt 0x2 [ 71.225068] rk_hdmirx fdee0000.hdmirx-controller: hdmirx_delayed_work_audio: enable audio [ 72.155904] fdee0000.hdmirx-controller: hdmirx_wait_lock_and_get_timing signal not lock, tmds_clk_ratio:0 [ 72.155910] fdee0000.hdmirx-controller: hdmirx_wait_lock_and_get_timing mu_st:0x2, scdc_st:0x1, dma_st10:0x10 That's just when the Walksnail VRX ascension begins on orangepi@orangepi5-ultra:~$ v4l2-ctl -d "$DEV" --get-dv-timings Video timings: Active width: 1280 Active height: 720 Total width: 1650 Total height: 750 Frame format: progressive Polarity: +vsync +hsync Pixel frequency: 74250000 Hz (60.00 frames per second) Horizontal front panel: 110 Horizontal synchronization: 40 Horizontal rear panel: 220 Vertical front panel: 5 Vertical synchronization: 5 Vertical screen: 20 Standards: CTA-861 CTA-861 VIC: 4 Flags: frame rate can be reduced by 1/1.001, CE-video, has CTA-861 VIC Here is an example of how you can connect Walksnail VTX Ascent to VRX Ascent - HDMI in Orange Pi 5 Ultra orangepi@orangepi5-ultra:~$ v4l2-ctl -d "$DEV" --query-dv-timings VIDIOC_QUERY_DV_TIMINGS: error: Locking not available Active width: 0 Active height: 0 Total width: 0 Total height: 0 Frame format: Progressive
 - Yesterday
-
We're releasing Armbian Imager 2.0. We rebuilt the whole thing, the interface and the flashing engine underneath it. The part you'll notice first: your board boots already set up. Username, password, Wi-Fi, timezone, language. You tell Imager once, it writes that into the image, and the board comes up configured on first boot. No monitor, no keyboard, none of that blind first login. Set it up once. It configures itself.This is the big change in 2.0. You build a profile in settings: username and password, an SSH key, your Wi-Fi network and country code, timezone, locale, shell. Imager writes it straight into the image's filesystem while it flashes. Power on the board, it reads the profile and brings itself up. Qualcomm boards over QDL get the same treatment. It's the difference between "flash, hook up a screen and keyboard, sit through the setup" and "flash, slot the card, switch on." I didn't expect to care this much about it, and now I can't flash without it. Pick everything on one screenThe old pop-up windows are gone. In their place is a single animated flow: manufacturer, board, OS, device, all on one page that moves with you. You page through the board and vendor grids, the distro logos are drawn by hand, and the app glides instead of slamming between screens. Settings got the same redesign. So did the cache manager, which now shows where your gigabytes actually went, by category, and clears them in a tap. Know what you're writing before you write itEvery image tells you what it is up front: build date, badges for the desktop and the kernel branch, a label when it ships with something preinstalled like the SDK build, openHAB, or Kali. Anything you've already downloaded carries a small check, so you don't pull it twice. If you want the trunk rolling releases, there's a filter for them, with a plain warning before you commit. And images that can't be written to a card, like the VM disk formats, simply aren't in the list. Every write, checked byte for byteThe download is verified against its SHA256. After writing, the app reads the card back and compares it to the source, byte for byte. While that runs, your board floats over a warm glow that follows the progress, with one line telling you the stage instead of a wall of numbers. When the check turns green, it's because the data on the card matches. Not because we're optimistic. Bring your own images, online or offlineHave an image of your own? Drop it in. We handle img, iso, xz, gz, bz2, and zst, and decompress before writing. Lose your connection partway through the day and Imager still works: the offline mode was reworked so your cache and your own files stay one click away. The same app on Mac, Linux, and WindowsSame look and behavior on all three. On Mac it's a single universal build for Intel and Apple Silicon. Pick a light theme, a dark one, or let it follow the system. Eighteen languages, chosen automatically from your locale. Free and open source, the way it started. Get itArmbian Imager 2.0 is available now, free, on Mac, Linux, and Windows. It does the same job it always has, writing a good image to a card. The new part is what happens after: you power the board on, and it's already yours. Download Armbian Imager 2.0 View the full article
-
SoC:ik316-h board: IK316Q-EMCP_V4.1 i belive it's apart of the h6 familly, correct me if i'm wrong. Well, i'm trying to boot from a sd card, but it doesn't work, i tried the toothpick methof but it still don't work. I tried with the sd and without the sd card, but it doesn't enter into android recovery mode, the only way i can get into fastboot is by using adb, however if i try to enter the bootloader by selecting it on the andorid recovery or fastboot menu it just crashes. Do you guys know any way of how can i proceed? Will be better if i change the firmware? Should i just buy ice cream and cry in the shower? I need help, the img i'm using is Armbian_community_26.2.0-trunk.886_X96q_trixie_current_6.18.28_minimal.img, because i believe it's the most compatible to my board. Feel free to ask any questions.
-
I was running armbian on emmc on an X96Air 4GB/64GB 1GBit S905X3 box a while ago and then after a power down it bricked. No boot screen, no android (obviously) - it sent a HDMI signal, but nothing. Managed to recover it and get Android flashed on it again then Armbian again on SD then emmc. Just done "apt upgrade" to get things up to date. All went well, then a reboot, and..... bricked again. Nothing obvious, no issues. I'll go through the process again - Android -> armbian sd -> armbian emmc But is there a known issue with any boxes that just brick themselves? Any ways to avoid it? This box is particularly useful because of the USB3 port with Gbit ethernet and I want to make use of it. Previously when I'd been testing it it had been rock solid for a few months with good uptime and no issues - until the brick.
-
@alexc Had to take a couple days break while we wait for a ordered Oscilloscope and CH341 to arrive. Current focus is SPI-NOR which is the most dangerous part of this EDK2 port due to the vendor of the board not releasing it to the public. That doesn't stop us tinkerers from from physically pulling it from the on-board SPI-NOR, so holding back such a valuable piece of the puzzle serves what purpose? They released it for the Rockchip SoC so who knows. After the SPI-NOR is conquered I hope to get some runtime pixels on the screen. I say around that time the EDK2 will be more of a usable boot loader to start on the alpha release (compiled public release). Right now I can boot to a generic Ubuntu 26.04 with working ssh and uart so things are looking good. Working with Opus 4.8 has been surprisingly very productive. These models have got so much better, I find myself getting more sleep by using Openclaw HEARTBEAT.md to nudge Opus 4.8 every 30 minutes to autonomously work on the port in my absence My good guy has a full report of his work done and ready to review by lunchtime
-
 Hey Community, I've been running a few services on Armbian devices and recently reviewed options for handling automated email notifications. Using an SMTP Service Provider like iDealSMTP for server alerts, backup reports, and application notifications seems like a practical approach when reliable email delivery is important. For small ARM-based servers, having proper SMTP authentication, delivery tracking, and support for transactional emails can simplify administration without requiring a fully self-hosted mail server. Sharing this as a discussion topic for anyone using email notifications on their Armbian systems.
 - Last week
-
Another option is to wipe the U-Boot from the SD-card and just use the SD-card only, no USB-adaptor needed. Then the only U-Boot in the system is the one in SPI-flash. I have done that once on an SBC with no SPI-flash but eMMC where the bootloader is stored. And that also involves GPT partitions and so on, not independent like SPI-flash. But as Werner says, backup is easy. For old 32-bit Armbians, I made some function in my unattended backup scripting to do that, so that after a year(s) or so, I can restore to get exactly the same system (when SD-card gets bad/broken for example).
-
 Thanks for the guide - got my X96 Air back up and running after it died after running fine
 -
Sorry, forgot about that. Here are logs from a boot of Debian minimal with GNOME and updated packages: https://paste.armbian.com/eyaxadazow
-

HDMI audio and analog audio do not work on Opi5Plus
JFL replied to ずっと一人's topic in Orange Pi 5 Plus
Just an update. Both kernel-7.0.11-edge-rockchip64-26.8.0-trunk.94 and 6.18.34-current-rockchip64-26.8.0-trunk.94 both still NO analog audio output on Headphone Jack on Orange Pi 5-Plus Kernel-6.18.10-current-rockchip64-6.2.1 and 6.19.5-edge-rockchip64 both support analog audio output on Headphone Jack. By the way kernel-6.1.115-vendor-rk35xx also NO analog audio output. kernel-6.1.75-vendor-rk35xx support analog audio output. -
# Orange Pi Zero 3 (1.5GB) Random Crashes — Root Cause Found & Fixed (No Recompilation Required) **Board:** Orange Pi Zero 3 — 1.5GB LPDDR4 variant **SoC:** Allwinner H618 **OS:** Armbian Trixie **Kernels tested:** 6.6.75-legacy, 6.18.33-current, 6.16.8-edge **Status:** ✅ SOLVED — 72+ hours stable uptime confirmed --- ## The Problem My Orange Pi Zero 3 (1.5GB model) was randomly crashing every few hours under all three Armbian kernel branches. The symptoms were: - System freezes with no response (SSH drops, ping still works briefly) - Kernel oops logged: `kswapd0 → ext4_es_scan → paging request fault` - Random segfaults on normal binaries (`sudo`, `curl`, `apt`) - Corrupted library names in memory (e.g. `libGap-Jg.sK.0` instead of `libcrypto.so.3`) - `memtester` passed clean (2 loops, 1GB) - `badblocks` found zero bad blocks - `fsck` found no filesystem errors - Crashes happened even at full idle, with only ~200MB RAM in use The crashes occurred on **all three kernel branches** — legacy, current, and edge — ruling out a kernel-specific bug as the root cause. --- ## Investigation ### What we ruled out (in order) | Suspect | Test | Result | |---|---|---| | SD card physical failure | `badblocks -sv` | 0 bad blocks | | Filesystem corruption | `fsck -f` | Clean | | RAM hardware failure | `memtester 1G x2` | No errors | | eth-optimize.sh (ring buffer 1024, txqueuelen 10000) | Removed from crontab | Extended stability but didn't fix | | Kernel version | Tested 6.6.75, 6.18.33, 6.16.8 | All crashed | | DRAM size detection bug | `dmesg \| grep Memory:` | Consistently showed 1572864K (correct 1.5GB) | ### The kernel oops — the real clue ``` kernel: Unable to handle kernel paging request at virtual address 14ae620800000018 kernel: CPU: 0 PID: 56 Comm: kswapd0 kernel: Call trace: kernel: __es_tree_search.isra.0+0x20/0xa4 kernel: es_reclaim_extents+0x58/0xf0 kernel: ext4_es_scan+0xf0/0x29c kernel: do_shrink_slab+0x174/0x298 kernel: shrink_slab+0xb4/0x2f0 kernel: kswapd+0x18c/0x3b8 ``` The address `14ae620800000018` is in "address between user and kernel address ranges" — a classic corrupted/invalid pointer. This happens when the kernel accesses memory that physically doesn't exist or wraps around. ### DRAM address wraparound — the root cause The H618 1.5GB LPDDR4 variant has a known DRAM address wraparound issue, documented in the linux-sunxi community (notably by **ag123** in Armbian forums and **Jernej Skrabec's** u-boot size scan patches): > *"It is quite possible the addresses wrap around in the 1.5GB LPDDR4 DRAM chips and the 'test' for memory there returns a false positive."* In this specific case, the **size** is correctly detected as 1.5GB — but the **upper address region** (above 1GB physical) exhibits wraparound behavior. When the kernel accesses the upper ~512MB region (via page cache, kswapd reclaim, or slab allocation), writes to those addresses silently corrupt data in the lower region — because the addresses "wrap" back. This explains why: - `memtester` passes (it tests sequentially in a contiguous region, doesn't trigger wraparound patterns) - Size appears correct (1572864K = 1.5GB every boot) - Crashes are random in timing (depends on when page cache/kswapd reaches the upper region) - ALL kernels are affected (this is a u-boot/hardware level issue, not kernel-specific) --- ## The Fix ### Standard approach (requires u-boot recompilation) The proper fix is `CONFIG_DRAM_SUN50I_H616_TRIM_SIZE=y` in u-boot, or Jernej Skrabec's adjusted size scan procedure (columns-first scanning). This correctly detects and excludes the wraparound region, allowing full 1.5GB usage. ### Our approach — kernel `mem=` parameter (no recompilation needed) Since the wraparound occurs in the **upper address region**, we can simply tell the kernel to only use the safe lower 1GB: Edit `/boot/armbianEnv.txt` and add `mem=1024M` to `extraargs`: ```bash sudo nano /boot/armbianEnv.txt ``` Change: ``` extraargs=... existing params ... ``` To: ``` extraargs=mem=1024M ... existing params ... ``` Reboot and verify: ```bash cat /proc/cmdline | grep -o "mem=1024M" cat /proc/iomem | grep "System RAM" free -h ``` Expected output: ``` mem=1024M 40080000-7fffffff : System RAM total used free Mem: 974Mi ... ``` The `iomem` map confirms the kernel's physical RAM range is **exactly** `0x40080000–0x7fffffff` — stopping at the 1GB boundary. The upper wraparound region (`0x80000000` and above) is completely excluded from the kernel's memory map. ### Why this works The wraparound region begins at or above `0x80000000` (1GB physical offset). With `mem=1024M`: - Kernel allocator, page cache, slab, and all processes stay within `0x40000000–0x80000000` - `kswapd` never reclaims pages from the problematic upper region - The corrupted-pointer crash path is never triggered ### Tradeoffs vs. u-boot fix | | mem=1024M | u-boot TRIM fix | |---|---|---| | Requires recompilation | ❌ No | ✅ Yes | | RAM available | ~974MB | ~1.4GB | | Works on all kernels | ✅ Yes | ✅ Yes | | Fixes root cause | Workaround | Proper fix | For SDR servers, home automation, and similar light workloads where ~974MB is more than sufficient (our system uses ~130–200MB), this is a perfectly viable permanent solution. --- ## Results | Metric | Before fix | After fix | |---|---|---| | Uptime | 1–8 hours max | **72+ hours** (and counting) | | Kernel oops | Multiple per session | **Zero** | | Segfaults | Random, on any binary | **Zero** | | `sudo apt update` | Crashed frequently | Runs perfectly | | Memory corruption | Frequent bit-flips | **None observed** | System configuration at time of testing: - **Kernel:** 6.16.8-edge-sunxi64 - **Kernel param:** `mem=1024M` - **CPU governor:** ondemand - **Workload:** OpenWebRX+, SpyServer, RTL-TCP (x2), radiosonde_auto_rx, Xray proxy --- ## How to apply ```bash # Backup first sudo cp /boot/armbianEnv.txt /boot/armbianEnv.txt.bak # Add mem=1024M to extraargs sudo sed -i 's/^extraargs=/extraargs=mem=1024M /' /boot/armbianEnv.txt # Verify grep extraargs /boot/armbianEnv.txt # Reboot sudo reboot ``` After reboot, confirm: ```bash # Should show mem=1024M cat /proc/cmdline | grep -o "mem=1024M" # Should show ~974Mi total free -h # Should show System RAM ending at 0x7fffffff cat /proc/iomem | grep "System RAM" ``` --- ## References - ag123's analysis of 1.5GB wraparound: Armbian Community Forums - Jernej Skrabec's u-boot DRAM size scan fix: [linux-sunxi mailing list](https://www.mail-archive.com/u-boot@lists.denx.de/msg516769.html) - H618 LPDDR4 support patch: [u-boot mailing list](https://lore.kernel.org/all/20231111091000.26744-2-iuncuim@gmail.com/T/) - ag88's 1.5GB u-boot fix (alternative approach): GitHub --- ## Notes This fix was developed and tested on a **1.5GB LPDDR4** Orange Pi Zero 3. The 1GB, 2GB, and 4GB variants use different DRAM configurations and may not be affected by this specific issue. If you have a 1.5GB board and experience similar random crashes, try `mem=1024M` before spending time on kernel debugging or hardware replacement. It may save you days of investigation. **Tested and confirmed working by:** Özgür Çetinoğlu **Location:** Athens, Greece **Setup:** 24/7 SDR server (OpenWebRX+, radiosonde tracking) **Date:** June 2026
-

Teclast T60 AI rooting + armbian possibility Allwinner A733
Nick A replied to Taz's topic in Allwinner CPU Boxes
@Taz the sources for that repository is a clone of my build. It’s a very basic attempt to build a 6.19 kernel. You are better off using my build. If you got 6.6 booting then 6.18 should work as well. -
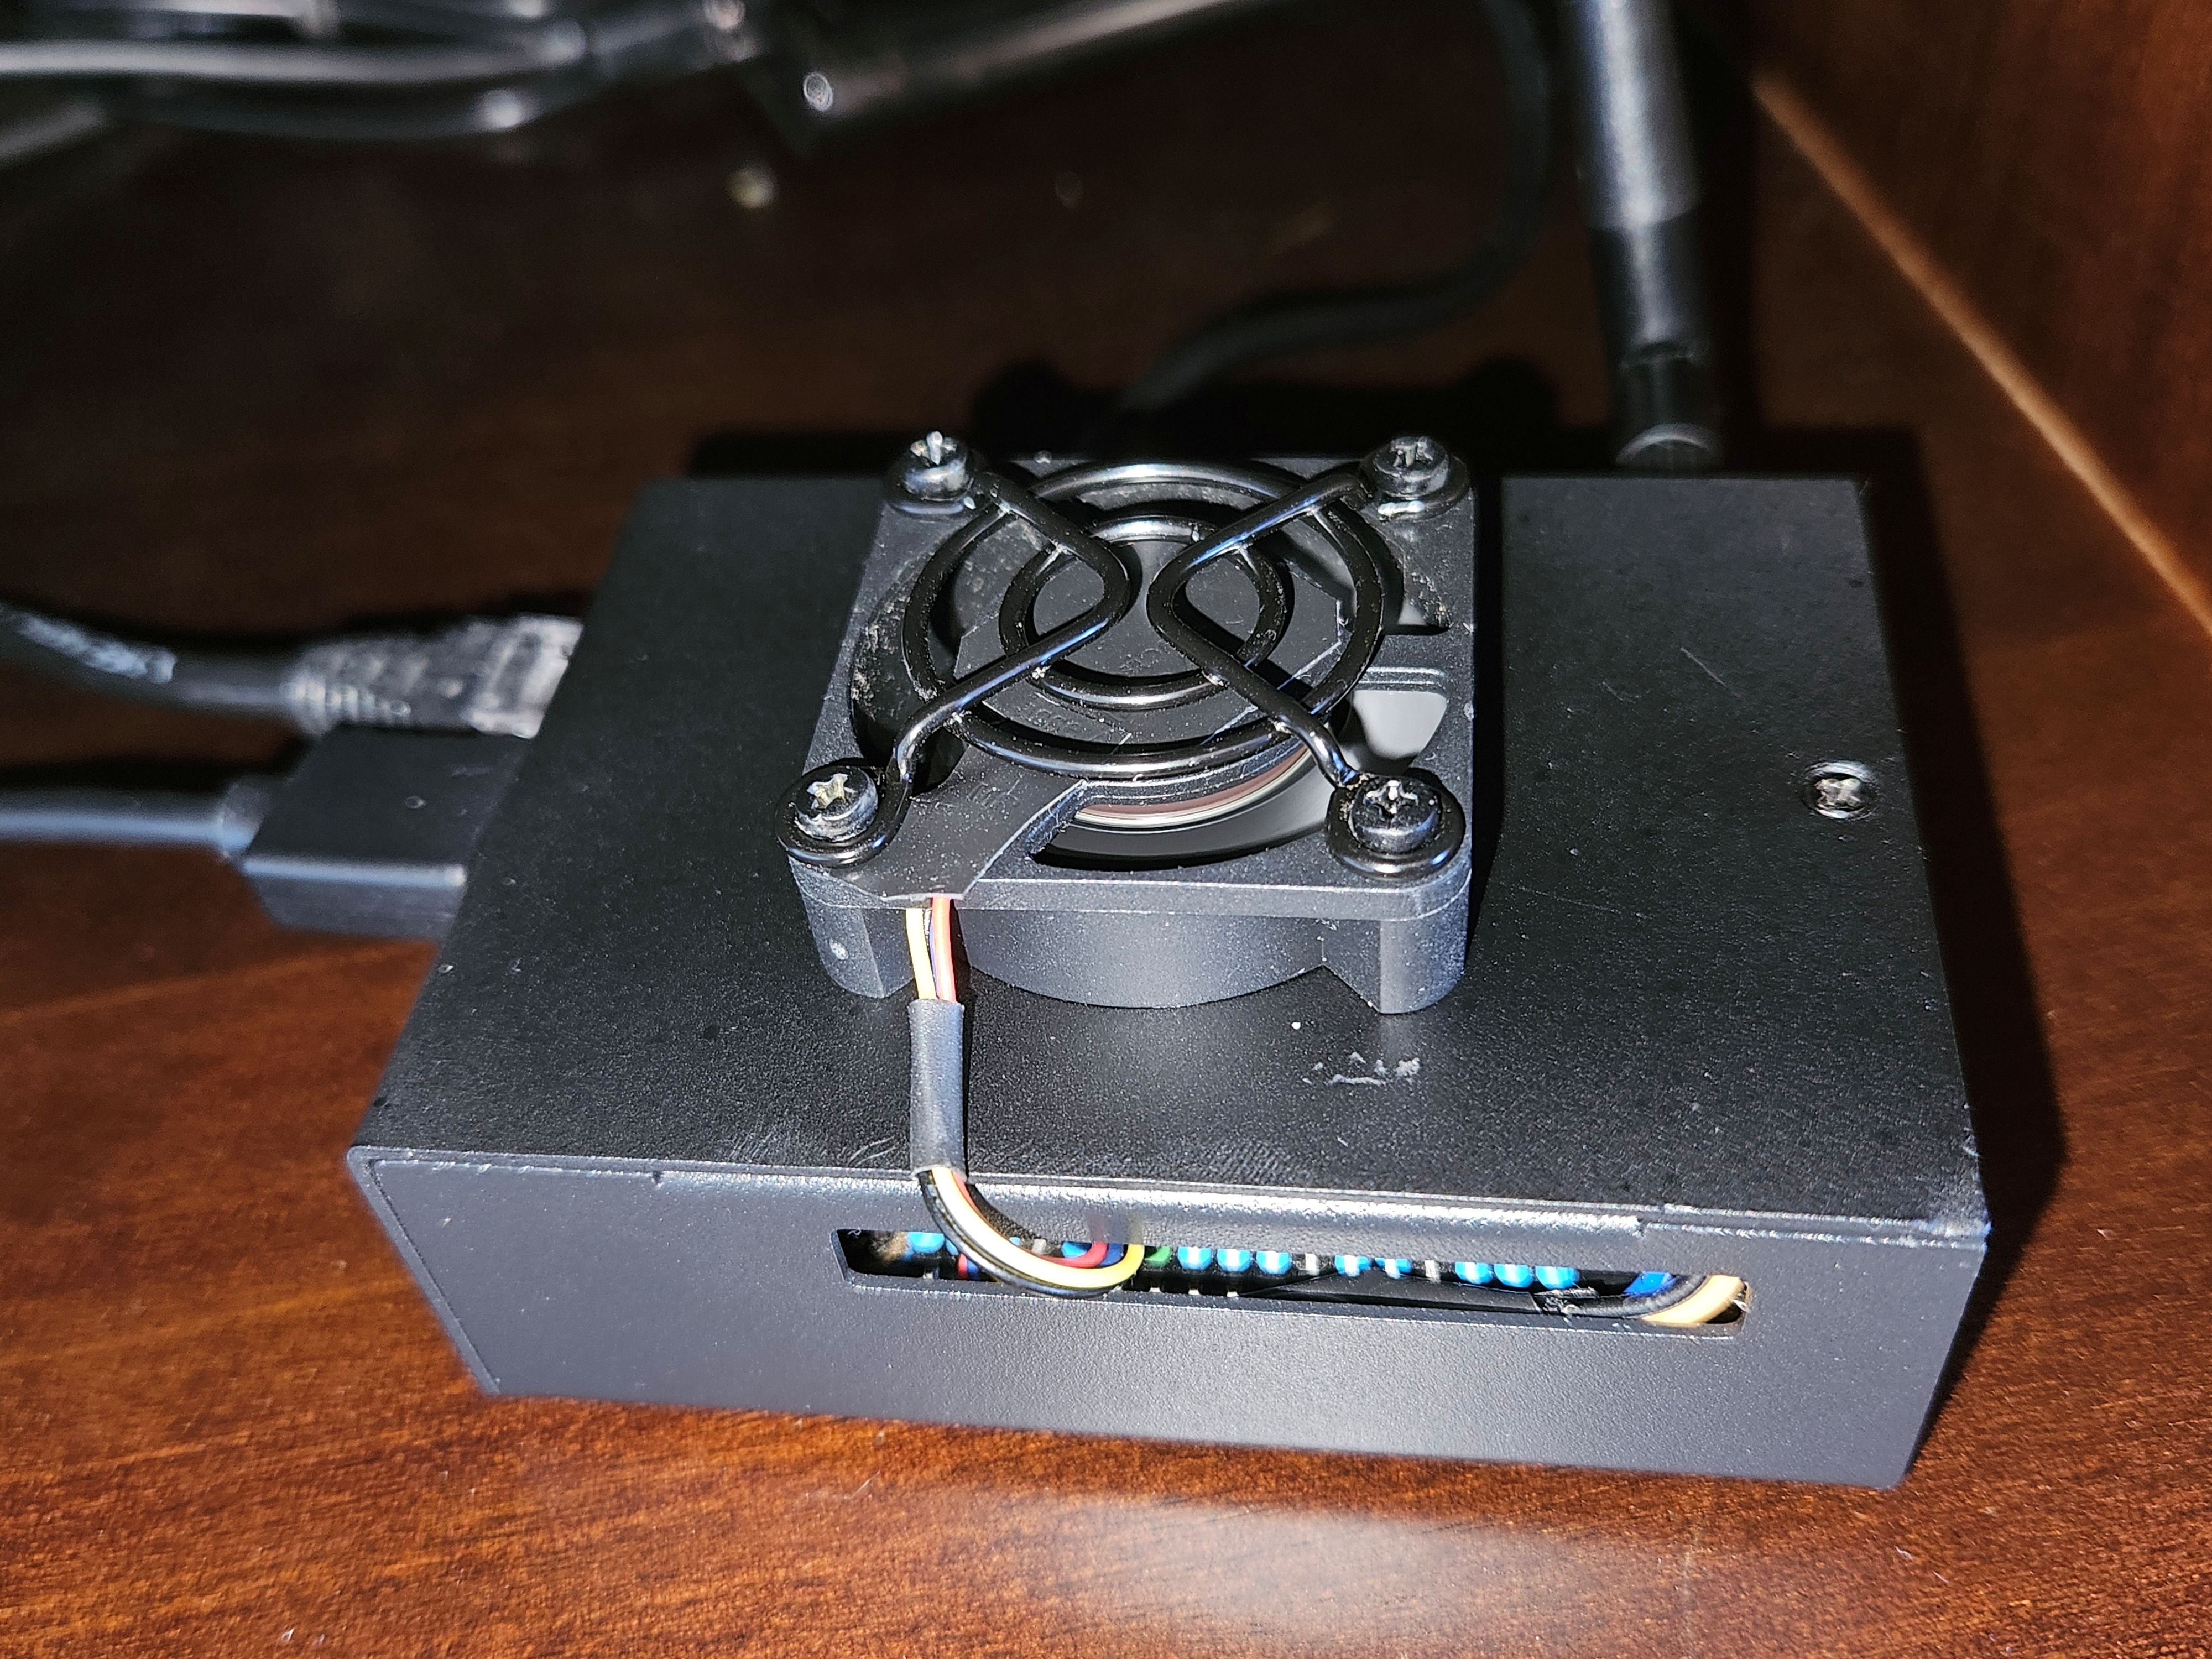
 This article describes how I successfully configured a PWM fan on an Orange Pi 5 Max running Armbian Debian Trixie Minimal vendor 6.1.115, using the opifancontrol utility. Special thanks to Jamie Sinclair for creating and sharing the opifancontrol project with the community. I have an Orange Pi 5 Max installed in a metal case and running several Docker containers, including Frigate, Immich, Samba, and others. The case originally came with a internal 30x30x10 mm fan, which was not able to provide sufficient cooling. Under load, CPU temperatures were reaching nearly 70°C. To improve cooling, I installed an external 40x40x10 mm PWM fan that was originally used on an Odroid HC4. The fan was mounted using screws, which required drilling holes in the case cover. I also added several ventilation holes, in the case cover above the CPU area to improve airflow. After these modifications, the CPU temperature now stays around 48°C. 1. Install wiringOP Follow the instructions from the wiringOP project: Download wiringOP $ apt-get update $ apt-get install -y git $ git clone https://github.com/orangepi-xunlong/wiringOP.git Build wiringOP $ cd wiringOP $ ./build clean $ ./build Verify the installation: $ gpio readall This command should display the Orange Pi 5 Max GPIO pin map. 2. Configure GPIO Pin 7 as a PWM Output In Armbian, configure GPIO Pin 7 (PWM3_IR_M3) as a PWM output. $ sudo armbian-config Navigate to: System └─ Kernel └─ Overlays Select: rk3588-pwm3-m3 Press the space bar to enable it, save the configuration, and reboot the system. 3. Install opifancontrol: https://github.com/jamsinclair/opifancontrol $ su $ cd /usr/local/bin/ $ wget https://github.com/jamsinclair/opifancontrol/blob/main/opifancontrol.sh $ chmod +x /usr/local/bin/opifancontrol.sh $ curl -sSL https://raw.githubusercontent.com/jamsinclair/opifancontrol/main/install.sh | bash Enable the service to start automatically at boot: $ systemctl enable opifancontrol.service Start the service: $ systemctl start opifancontrol.service Check the service status: $ systemctl status opifancontrol.service 4. PWM Fan Wiring I used a 5V, 4-wire, 4,000 RPM fan from an Odroid HC4. Connection details: Fan Wire Function GPIO Pin Red +5V Power Pin 4 Black GND Pin 6 Blue PWM Speed Control Pin 7 Yellow TACH (RPM Sensor) Not Connected 5. Adjust the Fan Control Configuration Edit the configuration file: $ sudo nano /etc/opifancontrol.conf My settings are: TEMP_LOW=45 FAN_LOW=60 TEMP_MED=60 FAN_MED=75 TEMP_HIGH=70 FAN_HIGH=100 RAMP_UP_DELAY_SECONDS=30 RAMP_DOWN_DELAY_SECONDS=60 After saving the configuration file, restart the service: $ sudo systemctl stop opifancontrol.service $ sudo systemctl start opifancontrol.service With these settings and the hardware modifications described above, my Orange Pi 5 Max now operates significantly cooler, maintaining temperatures around 48°C while running multiple Docker services
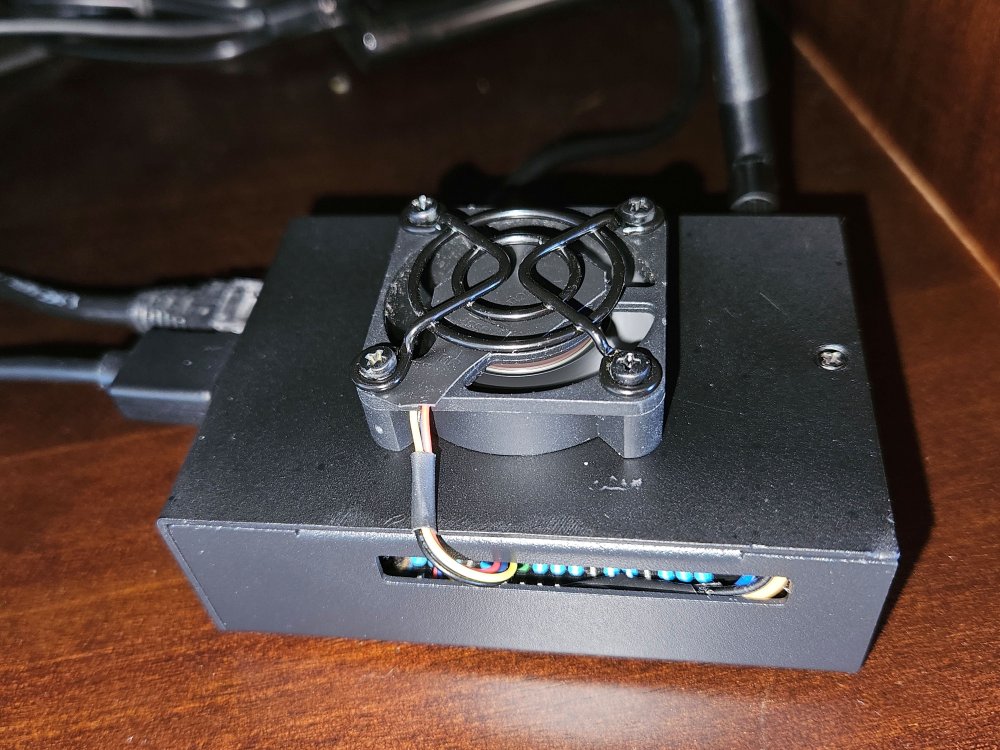
-

Armbian for RK3128 TVBox board
Chiều Nhạt Nắng replied to Chiều Nhạt Nắng's topic in Rockchip CPU Boxes
@hmoob What part do you need clarify? I can help you but I need more information. -
Has anyone successfully set up a MIPI screen with their LCD ribbon connectors on Armbian? Any wisdom from someone who has done this would be appreciated.
-
That sounds like a Klipper message, not from the armbian OS. If there is new functionality in Klipper it will show this error, but you don't always need to reflash the MCU depending on if you use those functions. You can post in a more detailed error and versions in a Klipper forum for advice.
-

BTT Pi - ethernet not working after upgrade from 6.12.68 to 6.18.33
mattjm replied to ilmarietto's topic in BIGTREETECH CB1
I ran into this as well. Downgrade to kernel 6.12.58 fixed the physical interface. My board that initially had Trixie required the NetworkManager fix to get wifi working even after reverting. Something about the upgrade and/or downgrade broke netplan. -
As a data point, I had a CB1 with Trixie that was working fine with netplan until I did an apt upgrade to 26.2.1 and kernel 6.18.xx. The upgrade made my physical interface disappear, which required a kernel downgrade (to 6.12.58) to get back. But even after the downgrade my wireless interfaces still wouldn't connect. The ultimate fix was to switch this board to NetworkManager like I did with my other CB1 that was running bookworm and required the NetworkManager fix from day one.