Search the Community
Showing results for tags 'helios64'.
-
In both Buster and Focal 20.11.1 on helios64 commands directed to a disk increment fields in /proc/diskstats This is incorrect and does not occur in the x86 version of xubuntu Focal. Specifically (see https://www.kernel.org/doc/Documentation/iostats.txt for field descriptions.): Check Power Mode increments "number of reads completed" Smart Return Status, Smart Read Data, and Smart Read Log increment "number of reads completed" and "number of sectors read" The smartd disk monitor uses these commands which makes the disk appear to be active to programs like hd-idle. I hope this is the correct place to report this bug. Thanks, Jeff
-
I have the Helios with two 10T disks mounted as a BTRFS raid 1 array. This setup is stable, although I have not stressed it a lot, except for when I do a btrfs scrub. It is using the 20.11.1 Buster image on SDcard. The disks have about 900GB of files. A btrfs scrub causes a crash with the following kernel output. Is this a known bug?
-
Hi What is the appropriate method to upgrade to a new release (20.11) without reimaging the SD card? I have not attempted this before as I have mainly used Ubuntu which provides sudo do-release-upgrade Note I am not using a VM or Docker. Can I upgrade the kernel using the downloaded Helios64 image? sudo apt install ./linux-image-<flavour> Is there a way to do it using armbian-config (like there is for raspi-config) Or do I need to download the armbian source and then compile ./compile.sh
-
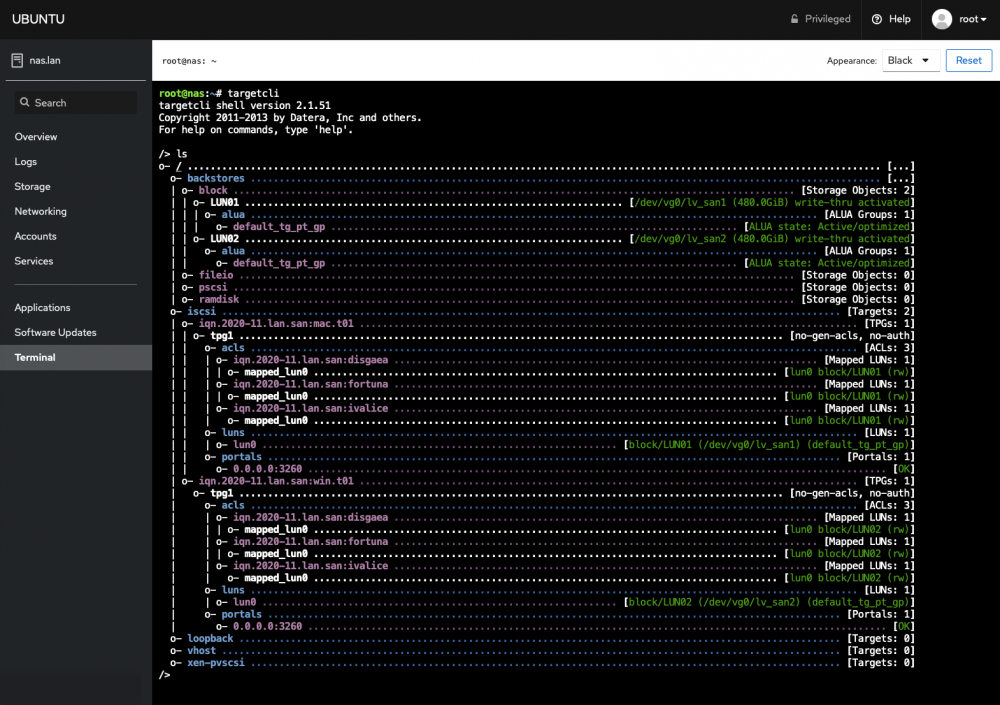
For anyone looking to build an iSCSI target on their new Helios64, I can confirm that it's working correctly under the test builds for Armbian 20.11. Thanks to @aprayoga for his comment on the pull request, the kernels modules related to LinuxIO have been added to all boards in the Armbian project.
-
hi, i have only one fan that spin, i have set the systemctl stop fancontrol and checked the pwm1 the value is 255, and only one who spin i can turn off the only fan spinning with value 0, but i can't control the seconds fan at all, i have verified the connectique on the board and everything is fine, when i opened it and checked without disk , and i saw that both fan was spinning, so i thought it was fine, when i closed the board and disk's are on, i again have the same issue, i can control only 1 fan, it's always the same one. any idea how to fix this issue? is it a software related?
-
Hello, I received my Helios NAS last week, I installed armbian on eMMC with no issues. But I have a issue with my ssd and hdd. When I plug in my 5 HDD + my SSD, I only see 4 HDD ... But when I remove my SSD I can see the 5 HDDs ... So my question is stupid but it's "normal" ? I have a doubt, there is not a limitation with the GPT?
-
I've been trying to get OMV setup on the Helios prior to adding my hard drives and I keep getting errors and communication failures when I try to do pretty much anything. I like OMV for it's GUI, but honestly, I've never been a fan of it functionally. Is there anything comparable to it that works with the Helios64? Anyone have any suggestions how to fix it? I have logs but I don't see a place to attach them.
-
Just getting around to trying to setup my Helios 64 and I am unable to get it to appear under either Windows or OSX. I have removed the back panel and ensured the USB cable and micro SD are fully seated. Nothing appears so I can't flash the image to the internal eMMC. I tried MaskRom mode but RKDevTools fails. It does the following steps: Download Boot Start Download Boot Success Wait for Maskrom Start Wait for Maskrom Success Test Device Start Test Device Fail Not sure where to go now as I can't get anything to work on it. Your help would be greatly appreciated.
-
Hi all, Something to share for those who use the USB-C serial console from another Linux host. Install and use 'tio' to connect to the serial console instead of minicom. This supports both 1500k baud and also can be easily used inside GNU screen (minicom gets a meta key conflict per default; CTRL-A is default meta key for both GNU screen and minicom). Minicom resulted in regular errors posted in syslog by the ftdi_sio kernel module. Did not run any strace to find out what syscall is causing it, but in short, tio appears to not treat the tty as a modem: no errors are popping up in syslog. Hopefully the serial consoles will remain up now. One caveat: I did not find a way to send a BREAK over serial using tio. This is something that is handy in case kernel freezes up, as sometimes you will still have opportunity to do a magic sysrq triggered reboot (BREAK + b = initiate a reboot of the kernel, also see magic sysrq & REISUB). Groetjes,
-
hello, while i am copy files on my server and start 1 or 2 torrent i see that my memory gett less. Yes thats only buffer and caches but he eat faster then he get free so that he starts swapping (what cost cpu and speed) a litte search and i see that cat > /proc/sys/vm/swappiness is 100 and look on my other systems it is set to 60 now woth change this value he dont start swapping and free up faster the memory. can someone explane me why this here is set to 100? thank you
-
Hello, good morning from Spain. My sincere congratulations to the Kobol and Helios64 team. A really good and well designed product. I have a question about the compatibility of a hard drive with the Helios64 NAS. My hard drive is ---> https://www.senetic.es/product/0F38459 <--- ( Wd Ultrastar 18TB) With a capacity of 18TB, my question is: Is that hard drive (18TB) compatible with the Nas Helios64? I think that in the Nas Helios64 technical description, it only accepts a maximum capacity of 16 Tb hard drives Thank you very much for the information and help.
-
I'm on the Ubuntu focal release for the Helios64: Kernel: 5.8.14-rockchip64 If I try transferring between the 2.5Gbps port and my computer, either linked at 2.5Gbps or 1Gbps, will unlink. I tried with a StarTech USB 3.0 port, linking at 1Gbps, and the same issue occurs, leading me to believe it's a software issue with the USB driver. lsusb -t, with the startech plugged in: root@helios64:/helios# lsusb -t /: Bus 06.Port 1: Dev 1, Class=root_hub, Driver=ohci-platform/1p, 12M /: Bus 05.Port 1: Dev 1, Class=root_hub, Driver=ehci-platform/1p, 480M /: Bus 04.Port 1: Dev 1, Class=root_hub, Driver=xhci-hcd/1p, 5000M /: Bus 03.Port 1: Dev 1, Class=root_hub, Driver=xhci-hcd/1p, 480M /: Bus 02.Port 1: Dev 1, Class=root_hub, Driver=xhci-hcd/1p, 5000M |__ Port 1: Dev 2, If 0, Class=Hub, Driver=hub/4p, 5000M |__ Port 1: Dev 5, If 0, Class=Vendor Specific Class, Driver=ax88179_178a, 5000M |__ Port 2: Dev 4, If 0, Class=Mass Storage, Driver=uas, 5000M |__ Port 4: Dev 3, If 0, Class=Vendor Specific Class, Driver=r8152, 5000M /: Bus 01.Port 1: Dev 1, Class=root_hub, Driver=xhci-hcd/1p, 480M |__ Port 1: Dev 2, If 0, Class=Hub, Driver=hub/4p, 480M root@helios64:/helios# [0] 0:bash- 1:bash* What I see with iperf: │Accepted connection from 192.168.1.20, port 56104 iperf Done. │[ 5] local 192.168.1.10 port 5201 connected to 192.168.1.20 port 56106 justin@justin-3900x:~$ iperf3 -c 192.168.1.10 │[ ID] Interval Transfer Bitrate Connecting to host 192.168.1.10, port 5201 │[ 5] 0.00-1.00 sec 251 MBytes 2.10 Gbits/sec [ 5] local 192.168.1.20 port 56106 connected to 192.168.1.10 port 5201 │[ 5] 1.00-2.00 sec 281 MBytes 2.36 Gbits/sec [ ID] Interval Transfer Bitrate Retr Cwnd │[ 5] 2.00-3.00 sec 276 MBytes 2.32 Gbits/sec [ 5] 0.00-1.00 sec 258 MBytes 2.16 Gbits/sec 0 1.48 MBytes │[ 5] 3.00-4.00 sec 275 MBytes 2.30 Gbits/sec [ 5] 1.00-2.00 sec 278 MBytes 2.33 Gbits/sec 0 1.48 MBytes │[ 5] 4.00-5.00 sec 281 MBytes 2.36 Gbits/sec [ 5] 2.00-3.00 sec 276 MBytes 2.32 Gbits/sec 0 1.48 MBytes │[ 5] 5.00-6.00 sec 281 MBytes 2.35 Gbits/sec [ 5] 3.00-4.00 sec 278 MBytes 2.33 Gbits/sec 0 1.48 MBytes │[ 5] 6.00-7.00 sec 281 MBytes 2.35 Gbits/sec [ 5] 4.00-5.00 sec 278 MBytes 2.33 Gbits/sec 0 1.48 MBytes │[ 5] 7.00-8.00 sec 281 MBytes 2.35 Gbits/sec [ 5] 5.00-6.00 sec 281 MBytes 2.36 Gbits/sec 0 1.48 MBytes │[ 5] 8.00-9.00 sec 276 MBytes 2.31 Gbits/sec [ 5] 6.00-7.00 sec 280 MBytes 2.35 Gbits/sec 0 1.48 MBytes │[ 5] 9.00-10.00 sec 268 MBytes 2.25 Gbits/sec [ 5] 7.00-8.00 sec 281 MBytes 2.36 Gbits/sec 0 1.48 MBytes │[ 5] 10.00-10.00 sec 395 KBytes 2.40 Gbits/sec [ 5] 8.00-9.00 sec 279 MBytes 2.34 Gbits/sec 0 1.48 MBytes │- - - - - - - - - - - - - - - - - - - - - - - - - [ 5] 9.00-10.00 sec 265 MBytes 2.22 Gbits/sec 0 1.48 MBytes │[ ID] Interval Transfer Bitrate - - - - - - - - - - - - - - - - - - - - - - - - - │[ 5] 0.00-10.00 sec 2.69 GBytes 2.31 Gbits/sec receiver [ ID] Interval Transfer Bitrate Retr │----------------------------------------------------------- [ 5] 0.00-10.00 sec 2.69 GBytes 2.31 Gbits/sec 0 sender │Server listening on 5201 [ 5] 0.00-10.00 sec 2.69 GBytes 2.31 Gbits/sec receiver │----------------------------------------------------------- │Accepted connection from 192.168.1.20, port 56110 iperf Done. │[ 5] local 192.168.1.10 port 5201 connected to 192.168.1.20 port 56112 justin@justin-3900x:~$ iperf3 -c 192.168.1.10 -R │[ ID] Interval Transfer Bitrate Retr Cwnd Connecting to host 192.168.1.10, port 5201 │[ 5] 0.00-1.00 sec 153 MBytes 1.29 Gbits/sec 0 1.41 KBytes Reverse mode, remote host 192.168.1.10 is sending │[ 5] 1.00-2.00 sec 0.00 Bytes 0.00 bits/sec 0 1.41 KBytes [ 5] local 192.168.1.20 port 56112 connected to 192.168.1.10 port 5201 │[ 5] 2.00-3.00 sec 0.00 Bytes 0.00 bits/sec 0 1.41 KBytes [ ID] Interval Transfer Bitrate │[ 5] 3.00-4.00 sec 0.00 Bytes 0.00 bits/sec 0 1.41 KBytes [ 5] 0.00-1.00 sec 150 MBytes 1.26 Gbits/sec │[ 5] 4.00-5.00 sec 0.00 Bytes 0.00 bits/sec 0 1.41 KBytes [ 5] 1.00-2.00 sec 0.00 Bytes 0.00 bits/sec │[ 5] 5.00-6.00 sec 0.00 Bytes 0.00 bits/sec 0 1.41 KBytes [ 5] 2.00-3.00 sec 0.00 Bytes 0.00 bits/sec │[ 5] 6.00-7.00 sec 0.00 Bytes 0.00 bits/sec 0 1.41 KBytes [ 5] 3.00-4.00 sec 0.00 Bytes 0.00 bits/sec │[ 5] 7.00-8.00 sec 0.00 Bytes 0.00 bits/sec 0 1.41 KBytes [ 5] 4.00-5.00 sec 0.00 Bytes 0.00 bits/sec │[ 5] 8.00-9.00 sec 0.00 Bytes 0.00 bits/sec 0 1.41 KBytes [ 5] 5.00-6.00 sec 0.00 Bytes 0.00 bits/sec │[ 5] 9.00-10.00 sec 0.00 Bytes 0.00 bits/sec 0 1.41 KBytes [ 5] 6.00-7.00 sec 0.00 Bytes 0.00 bits/sec │- - - - - - - - - - - - - - - - - - - - - - - - - [ 5] 7.00-8.00 sec 0.00 Bytes 0.00 bits/sec │[ ID] Interval Transfer Bitrate Retr [ 5] 8.00-9.00 sec 0.00 Bytes 0.00 bits/sec │[ 5] 0.00-10.00 sec 153 MBytes 129 Mbits/sec 0 sender │ sudo ethtool -K eth1 tx off - this does lower the speed as expected, but it will still unlink after some time. I've also had times where iperf3 works fine, but then doing a smb share, it lasts for just a few seconds before the link dies. Any idea? If it's happening to both the startech and the internal realtek usb, I'm not sure where the software issue is... armbianmonitor -u http://ix.io/2Etm
-
 Hi, Not sure if anyone has seen the same as I have been seen on my box; the HDD status LEDs are cycling in brightness, from 0% to 100% and back to 0% continuously. It's a smooth transition, no flashy circus. I might have triggered this myself, but no idea how? Is this is a new feature? I tried to make some video of it, but it is quite difficult to see. Groetjes,
 -
Hi, I’m using the Helios64 with Armbian 20.11 Buster ( 5.9.10-rockchip64) On every reboot the SMART counter for “Unexpected_Power_Loss (174)” / “POR_Recovery_Count (235)” incresses by one. I’ve seen this unexpected behaviour on Samsung, WD and Crusical SSDs … Rebooting the box with sync && echo 1 > /sys/block/sdX/device/delete && reboot turns the disk friendly off, but shouldn’t this be done in systemd/kernel?
-
I need help with two items. 1. When directly connect to my windows 10 pro pc i get the following in device manager. ft230x. Where can I download the drivers so i can use putty to connect to the helios64. 2. One of the fans is always spinning even when i shutdown with sudo shutdown -t now. Thanks
-
If you want the fans of your Helios64 to start spinning earlier, look no further. This will allow the fans to spin at a constant speed from the earliest stage of initrd until fancontrol is started by the system. My use-case is for full disk encryption and recovery in initramfs, sometimes I can have the machine powered on for quite a while before fancontrol starts. Or, if the boot process encounters an error the fans may never start, this prevents that. Step 1: Tell initramfs to include the pwm-fan module echo pwm-fan | sudo tee -a /etc/initramfs-tools/modules Step 2: Create a new file at /etc/initramfs-tools/scripts/init-top/fan with the following contents: #!/bin/sh PREREQ="" prereqs() { echo "$PREREQ" } case $1 in prereqs) prereqs exit 0 ;; esac . /scripts/functions modprobe pwm-fan for pwm in /sys/devices/platform/p*-fan/hwmon/hwmon*/pwm1; do echo 150 >$pwm done exit 0 Feel free to change the value 150 anywhere between 1-255, it decides how fast the fans will spin. Step 3: Enable the fan script for inclusion in initramfs and update the initramfs image: sudo chmod +x /etc/initramfs-tools/scripts/init-top/fan sudo update-initramfs -u -k all Step 4: Reboot and ejoy the cool breeze.
-
After the official release of Armbian 20.11 today I would like to collect feedback if and how the firmware runs on the Helios64. Is it possible to upgrade already or should we Helios64 owners wait? apt-get lists these already... armbian-config/buster,buster 20.11 all [upgradable from: 20.08.22] armbian-firmware/buster,buster 20.11 all [upgradable from: 20.08.22] libgssapi-krb5-2/stable,stable 1.17-3+deb10u1 arm64 [upgradable from: 1.17-3] libk5crypto3/stable,stable 1.17-3+deb10u1 arm64 [upgradable from: 1.17-3] libkrb5-3/stable,stable 1.17-3+deb10u1 arm64 [upgradable from: 1.17-3] libkrb5support0/stable,stable 1.17-3+deb10u1 arm64 [upgradable from: 1.17-3] libldap-2.4-2/stable,stable 2.4.47+dfsg-3+deb10u4 arm64 [upgradable from: 2.4.47+dfsg-3+deb10u3] libldap-common/stable,stable,stable,stable 2.4.47+dfsg-3+deb10u4 all [upgradable from: 2.4.47+dfsg-3+deb10u3] linux-buster-root-current-helios64/buster 20.11 arm64 [upgradable from: 20.08.21] linux-dtb-current-rockchip64/buster 20.11 arm64 [upgradable from: 20.08.21] linux-image-current-rockchip64/buster 20.11 arm64 [upgradable from: 20.08.21] linux-u-boot-helios64-current/buster 20.11 arm64 [upgradable from: 20.08.21] openmediavault/usul,usul,usul,usul 5.5.17-3 all [upgradable from: 5.5.16-1] The changelog is here... https://www.armbian.com/newsflash/armbian-20-11-tamandua/
-
Hi, I wanted to convert my root filesystem to btrfs. This allows me to use snapper to take regular snapshops. I also use btrbk to send my snapshots to my secondary storage (also a btrfs array). My root filesystems is installed to eMMC, but there isn't any reason you couldn't do this with an sd card. These instructions are done with a laptop running Linux. I'm using Debian in this case, although any distro with a recent kernel and btrfs tools installed should work. CAVEATS: The current u-boot image (2020.08.21) doesn't support booting natively to btrfs. u-boot *does* support btrfs though. Hopefully a future build of u-boot will add btrfs support. To work around this, we have to create an ext4 /boot partition, and then a btrfs root partition. 1. To start, I booted the helios64 via sd card to the USB mass storage image (https://wiki.kobol.io/helios64/install/emmc/). I then connected a laptop to the helios64 via the USB-C cable, and the emmc appeared as /dev/sdb. The rest of these instructions will assume the eMMC is /dev/sdb, so please adjust accordingly for your system. 2. Mount the eMMC root filesystem on the host: # mkdir /mnt/nasrootext4 # mount /dev/sdb1 -o ro /mnt/nasrootext4 3. Back up the contents of the root filesystem: # tar -C /mnt/nasrootext4 --acls --xattrs -cf root_backup.tar . 4. Make a backup of the partition layout (in case you decide to revert this modification): # fdisk -l /dev/sdb | tee nas_fdisk.txt 5. Unmount the filesystem, and run fdisk on it. Make note of the start sector. It should be 32768. # umount /dev/sdb1 # fdisk /dev/sdb Command (m for help): p Disk /dev/sdb: 14.6 GiB, 15634268160 bytes, 30535680 sectors Disk model: UMS disk 0 Units: sectors of 1 * 512 = 512 bytes Sector size (logical/physical): 512 bytes / 512 bytes I/O size (minimum/optimal): 512 bytes / 512 bytes Disklabel type: dos Disk identifier: 0x794023b5 Device Boot Start End Sectors Size Id Type /dev/sdb1 32768 30230303 30197536 14.4G 83 Linux 6. Delete the existing partition ('d') 7. Create a new partition ('n') 8. Select 'primary' partition type 9. Select partition number 1 10. Select first sector: 32768 (This is very important to get right, and should match the start sector of the partition that was just deleted) 11. Select last sector: +512M (this create a 512MB /boot partition) 12. You will see a message "Partition #1 contains a ext4 signature.". This is okay. I selected 'n' (don't remove signature) but it doesn't matter. You should probably remove the signature since we're going to create a new ext4 filesystem anyway. 13. Create new partition ('n') 14. Select 'primary' partition type 15. Select partition number 2 16. First sector: 1081344 (this is one more than the end sector of the other partition) 17. Last sector: (leave the default as the full drive, 30535679 in my case) 18. Print the layout to confirm: Disk /dev/sdb: 14.6 GiB, 15634268160 bytes, 30535680 sectors Disk model: UMS disk 0 Units: sectors of 1 * 512 = 512 bytes Sector size (logical/physical): 512 bytes / 512 bytes I/O size (minimum/optimal): 512 bytes / 512 bytes Disklabel type: dos Disk identifier: 0x794023b5 Device Boot Start End Sectors Size Id Type /dev/sdb1 32768 1081343 1048576 512M 83 Linux /dev/sdb2 1081344 30535679 29454336 14G 83 Linux 19. Write the partition table to disk and exit ('w') 20. Create a new ext4 filesystem on the first partition: 'mkfs.ext4 /dev/sdb1' (you may need to add -F if it complains about an existing ext4 signature) 21. Create a new btrfs filesystem on the second partition: 'mkfs.btrfs /dev/sdb2' 22. Mount the new root filesystem: # mkdir /mnt/nasrootbtrfs # sudo mount -o compress=zstd /dev/sdb2 /mnt/nasrootbtrfs 23. Make some initial subvolumes (note that '@' will be the root subvolume, as this is preferred by 'snapper'): # cd /mnt/nasrootbtrfs # btrfs subvol create @ # btrfs subvol create @home # btrfs subvol create @var_log 24. Mount the boot partition, and the @home and @var_log subvolumes # cd @ # mkdir boot # mount /dev/sdb1 boot/ # mkdir home # mount /dev/sdb2 -o noatime,compress=zstd,subvol=/@home home # mkdir -p var/log # mount /dev/sdb2 -o noatime,compress=zstd,subvol=/@var_log var/log # mount | grep sdb /dev/sdb2 on /mnt/nasrootbtrfs type btrfs (rw,relatime,compress=zstd,space_cache,subvolid=5,subvol=/) /dev/sdb1 on /mnt/nasrootbtrfs/@/boot type ext4 (rw,relatime) /dev/sdb2 on /mnt/nasrootbtrfs/@/home type btrfs (rw,noatime,compress=zstd,space_cache,subvolid=258,subvol=/@home) /dev/sdb2 on /mnt/nasrootbtrfs/@/var/log type btrfs (rw,noatime,compress=zstd,space_cache,subvolid=260,subvol=/@var_log) 25. Note that our current directory is '/mnt/nasrootbtrfs/@' 26. Untar the old root filesystem into the new root directory. Since boot, home, and var/log are mounted, tar will extract the relevant data into these mounted filesystems. # tar -xvf /root/helios64_root.tar --acls --xattrs --numeric-owner |@ tee /root/extract_log.txt This is the only spot where things did not go as expected. I received a handful of errors about "No space left on device" while untarring. These seem to be transient btrfs errors. I use btrfs pretty extensively at work, and I've seen cases in the past on older kernels where btrfs would falsely report ENOSPC when the filesystem was under heavy load. I'm not sure if that is what is happening here, but I would guess it's a bug. It could be a bug in the kernel on my laptop, or it could be a bug in the usb-c mass storage export on the helios64. To recover from this, I ran the tar command a couple of times. I continued to receive these errors on different files. I did this three or four times. I also tried removing --acls and --xattrs, but it didn't seem to make much of a difference. On my last attempt to untar, all of the files that failed happened to be from usr/lib/python3, so I untarred just that directory: 'tar -xvf /root/helios64_root.tar --numeric-owner ./usr/lib/python3'. That extracted without error. I was satisfied that everything made it back on disk. Perhaps if you only extracted one top-level directory at a time, it would not produce any errors. Maybe there is some way to slow down the 'tar' to avoid these ENOSPC errors. 27. After extracting the root filesystem, I made a snapshot of it: 'btrfs subvol snap -r . root_post_copy' 28. Update /mnt/nasrootbtrfs/@/etc/fstab. This was my old fstab: Old version: UUID=dabb3dbf-8631-4051-a032-c0b97eb285bd / ext4 defaults,noatime,nodiratime,commit=600,errors=remount-ro 0 1 tmpfs /tmp tmpfs defaults,nosuid 0 0 # >>> [openmediavault] /dev/disk/by-label/helios64_btrfs_raid1 /srv/dev-disk-by-label-helios64_btrfs_raid1 btrfs defaults,nofail,noatime,nodiratime,compress=zstd 0 2 # <<< [openmediavault] Look up the new UUID for /dev/sdb2. I did this by running 'ls -l /dev/disk/by-uuid'). Updated /etc/fstab: UUID=240bab7d-1b6c-48f4-898d-ba12abcecb3f / btrfs defaults,noatime,compress=zstd,ssd,subvol=@ 0 0 UUID=240bab7d-1b6c-48f4-898d-ba12abcecb3f /home btrfs defaults,noatime,compress=zstd,ssd,subvol=@home 0 0 UUID=240bab7d-1b6c-48f4-898d-ba12abcecb3f /var/log/ btrfs defaults,noatime,compress=zstd,ssd,subvol=@var_log 0 0 UUID=fd5b620c-57e2-4031-b56c-3c64ce7c7d5f /boot ext4 defaults,noatime 0 2 tmpfs /tmp tmpfs defaults,nosuid 0 0 # >>> [openmediavault] /dev/disk/by-label/helios64_btrfs_raid1 /srv/dev-disk-by-label-helios64_btrfs_raid1 btrfs defaults,nofail,noatime,nodiratime,compress=zstd 0 2 # <<< [openmediavault] 29. Modify /mnt/nasrootbtrfs/@/boot/armbianEnv.txt. In particular modify rootdev, rootfstype, and add 'extraargs'. Old version: verbosity=1 bootlogo=false overlay_prefix=rockchip rootdev=UUID=dabb3dbf-8631-4051-a032-c0b97eb285bd rootfstype=ext4 usbstoragequirks=0x2537:0x1066:u,0x2537:0x1068:u New version: verbosity=1 bootlogo=false overlay_prefix=rockchip rootdev=UUID=240bab7d-1b6c-48f4-898d-ba12abcecb3f rootfstype=btrfs usbstoragequirks=0x2537:0x1066:u,0x2537:0x1068:u extraargs=rootflags=subvol=@ 30. Make a 'boot' symlink. I'm not sure if this is necessary, but u-boot expects the boot files to be in the '/boot' directory on the root filesystem, but they are now in the root directory of the boot partition. This symlink makes sure that if u-boot tries to access /boot/foo, it will actually access /foo. # cd /mnt/nasrootbtrfs/@/boot # ln -s . boot 31. Unmount everything: # umount /mnt/nasrootbtrfs/@/var/log # umount /mnt/nasrootbtrfs/@/home # umount /mnt/nasrootbtrfs/@/boot # umount /mnt/nasrootbtrfs/ 32. Power off helios64 33. Remove sd card 34. Start picocom on your laptop ('picocom -b 1500000 /dev/ttyUSB0') 35. Turn on helios 64 and look for startup. TROUBLESHOOTING: Of course this did not work on the first attempt for me. After rebooting the helios64, it never successfully booted into Linux. I didn't see any errors from u-boot. To troubleshoot, I wrote the original helios64 debian buster image to sd card and booted the helios64 to that. I mounted /dev/mmcblk1p1 to /mnt, and changed the 'verbosity' to 7 in armbianEnv.txt. I eventually discovered that I had the UUID wrong in /boot/armbianEnv.txt. Correcting that value fixed the issue, and the helios64 booted successfully from eMMC. SETTING UP AUTOMATED SNAPSHOTS AND BACKUPS: Enabling 'snapper' for automated root snapshots was very easy: 1. sudo apt install snapper 2. sudo snapper -c root create-config / The debian snapper automatically take snapshots before and after apt upgrades. However since /boot is a separate filesystem, this is not included in these snapshots. As a workaround, I added an apt hook which rsyncs /boot to /.bootbackup before the snapshots are made. Note that the 'snapper' hook is /etc/apt/apt.conf.d/80snapper, so I created /etc/apt/apt.conf.d/79-snapper-boot-backup: # /etc/apt/apt.conf.d/79-snapper-boot-backup DPkg::Pre-Invoke { "if mountpoint -q /boot && [ -e /.bootbackup ] ; then rsync -a --delete /boot /.bootbackup || true ; fi"; }; DPkg::Post-Invoke { "if mountpoint -q /boot && [ -e /.bootbackup ] ; then rsync -a --delete /boot /.bootbackup || true ; fi"; }; This takes care of automated snapshots. I still want snapshots stored on another drive (or another system) for redundancy. I'm using 'btrbk' to do this. btrbk wants the btrfs top-level subvolume mounted somewhere. To do so, I created the directory /mnt/btr_pool, and added the following line to /etc/fstab: UUID=240bab7d-1b6c-48f4-898d-ba12abcecb3f /mnt/btr_pool/ btrfs defaults,noatime,compress=zstd,ssd,subvolid=5 0 0 My spinning drive array on the helios64 is a btrfs filesystem, and I have it mounted on /srv/dev-disk-by-label-helios64_btrfs_raid1. I created a '/srv/.../backups/helios64/btrfs/volumes' directory. I then created the following three files: /srv/dev-disk-by-label-helios64_btrfs_raid1/backups/helios64/btrfs/btrbk.conf: timestamp_format long volume /mnt/btr_pool snapshot_dir btrbk snapshot_preserve 30d snapshot_preserve_min latest target_preserve 7d 8w 6m target_preserve_min latest target send-receive /srv/dev-disk-by-label-helios64_btrfs_raid1/backups/helios64/btrfs/volumes subvolume @ subvolume @home subvolume @var_log /srv/dev-disk-by-label-helios64_btrfs_raid1/backups/helios64/btrfs/rsync_boot.sh: #!/bin/sh set -e -x mountpoint /boot [ -e /.bootbackup ] rsync -a --delete /boot /.bootbackup /srv/dev-disk-by-label-helios64_btrfs_raid1/backups/helios64/btrfs/run.sh #!/bin/bash set -e -x CDIR=$( dirname ${BASH_SOURCE[0]} ) ${CDIR}/rsync_boot.sh btrbk -c ${CDIR}/btrbk.conf run I then added a daily cron job which runs the 'run.sh' script. Well, that was a longer post than I had imagined. I hope someone finds it helpful.
-
 ❯ sudo iperf3 -s ----------------------------------------------------------- Server listening on 5201 ----------------------------------------------------------- Accepted connection from 192.167.0.1, port 23497 [ 5] local 192.167.0.2 port 5201 connected to 192.167.0.1 port 23498 [ ID] Interval Transfer Bitrate [ 5] 0.00-1.00 sec 163 MBytes 1.37 Gbits/sec [ 5] 1.00-2.00 sec 149 MBytes 1.25 Gbits/sec [ 5] 2.00-3.00 sec 104 MBytes 868 Mbits/sec [ 5] 3.00-4.00 sec 141 MBytes 1.19 Gbits/sec [ 5] 4.00-5.00 sec 174 MBytes 1.46 Gbits/sec [ 5] 5.00-6.00 sec 125 MBytes 1.05 Gbits/sec [ 5] 6.00-7.00 sec 106 MBytes 891 Mbits/sec [ 5] 7.00-8.00 sec 177 MBytes 1.48 Gbits/sec [ 5] 8.00-9.00 sec 164 MBytes 1.37 Gbits/sec [ 5] 9.00-10.00 sec 106 MBytes 892 Mbits/sec [ 5] 10.00-10.00 sec 272 KBytes 838 Mbits/sec - - - - - - - - - - - - - - - - - - - - - - - - - [ ID] Interval Transfer Bitrate [ 5] 0.00-10.00 sec 1.38 GBytes 1.18 Gbits/sec receiver ----------------------------------------------------------- Server listening on 5201 ----------------------------------------------------------- I think i have tx offloading disabled on both ends of this adapter. (Both on windows and on linux.) I haven't seen any actual instructions on how to disable it, and I'm running everything through NetworkManager. ❯ sudo route Kernel IP routing table Destination Gateway Genmask Flags Metric Ref Use Iface default _gateway 0.0.0.0 UG 101 0 0 eth0 link-local 0.0.0.0 255.255.0.0 U 1000 0 0 eth1 192.167.0.0 0.0.0.0 255.255.0.0 U 100 0 0 eth1 192.168.1.0 0.0.0.0 255.255.255.0 U 101 0 0 eth0 ❯ sudo nmcli con show 8277ed12-04f7-4c82-bfeb-de24ec2df104 |grep tx ethtool.feature-tx: off Thanks for the assistance.
 -
Some of you may be interested to not only store your data on Helios64 but to also run other services on it - such as home automation. One of the popular platforms for home automation in Europe - and in Germany in particular - is "Homematic". They opened up their ecosystem some time ago and allow others to implement their own components (some excellent examples from Jérôme are here). As of yesterday - with the latest commit - it is possible to run a virtualised "ccu3" base station for that platform, called pivccu, with support for a detached antenna module (RPI-RF-MOD) coupled to Helios64 (and Armbian 20.11 kernel 5.9.10) through a tcp/ip network using a dedicated circuit board developed by Alex Reinert (HB-RF-ETH). All of these projects are in the open domain. Actually not only Helios64 but also most of the SBCs running Armbian and a recent mainline kernel should now also be supported. There is a logic layer built into the pivccu system, but actions can also easily be automated using i.e. Node-Red or OpenHab2. Just to let you know: If you don't want to build stuff yourself, components could be purchased in Germany from i.e. elv and smartkram.
-
Hi folks, I got my helios64, assembled it during the weekend and can’t seem to actually install it. Here are some of the things I tried (I'm on windows 10 btw, I don’t have hdd drives yet, I assume this would not be an issue): · 2 sd cards (one of which is a Samsung as recommended in the wiki), two computers (with correct com ports as visible in the device manager, driver is installed), tried both on usb2 and usb3 · USB cable has been trimmed to fit the case properly - also tried with the back panel off and directly connected to the board · the devices starts up as soon as I plug in the power cord - I then use the power button to shut if off, then open the console and start it up (I did use the 4 seconds to shut it off and make sure the leds are not on) · (when I plug it in, the system light turns on red for just a millisecond, and then off, and all other light blue) After start-up: - No light on the system led, not even blinking. - Power and hdd leds are all blue (constant on). Anything I should be trying next? Thanks for reading. PS. Not really much an expert on linux, last time I used it was years ago when I was tweaking my prior nas.
-
Still experiencing random kernel panic with latest build. Sometimes it boots, sometimes it doesn't , when operating from a remote location this is very frustrating.
-
So I got my Helios64 today, built it with 2 drives, a Adata SSD on the M.2 and 2 Seagates on SATA 1 and 2. But whenever I want to boot it up, the internal blue system LED lights up + System Rail power (UPS installed) with all activity LEDs and HDD error 3 instantly with no delay. There is no Console output and nothing is to be heard spinning up. When building I noticed the cable harness having the same length for connectors 2 and 3 where 3 is too short for zip tie-ing. Help is greatly appreciated.
-
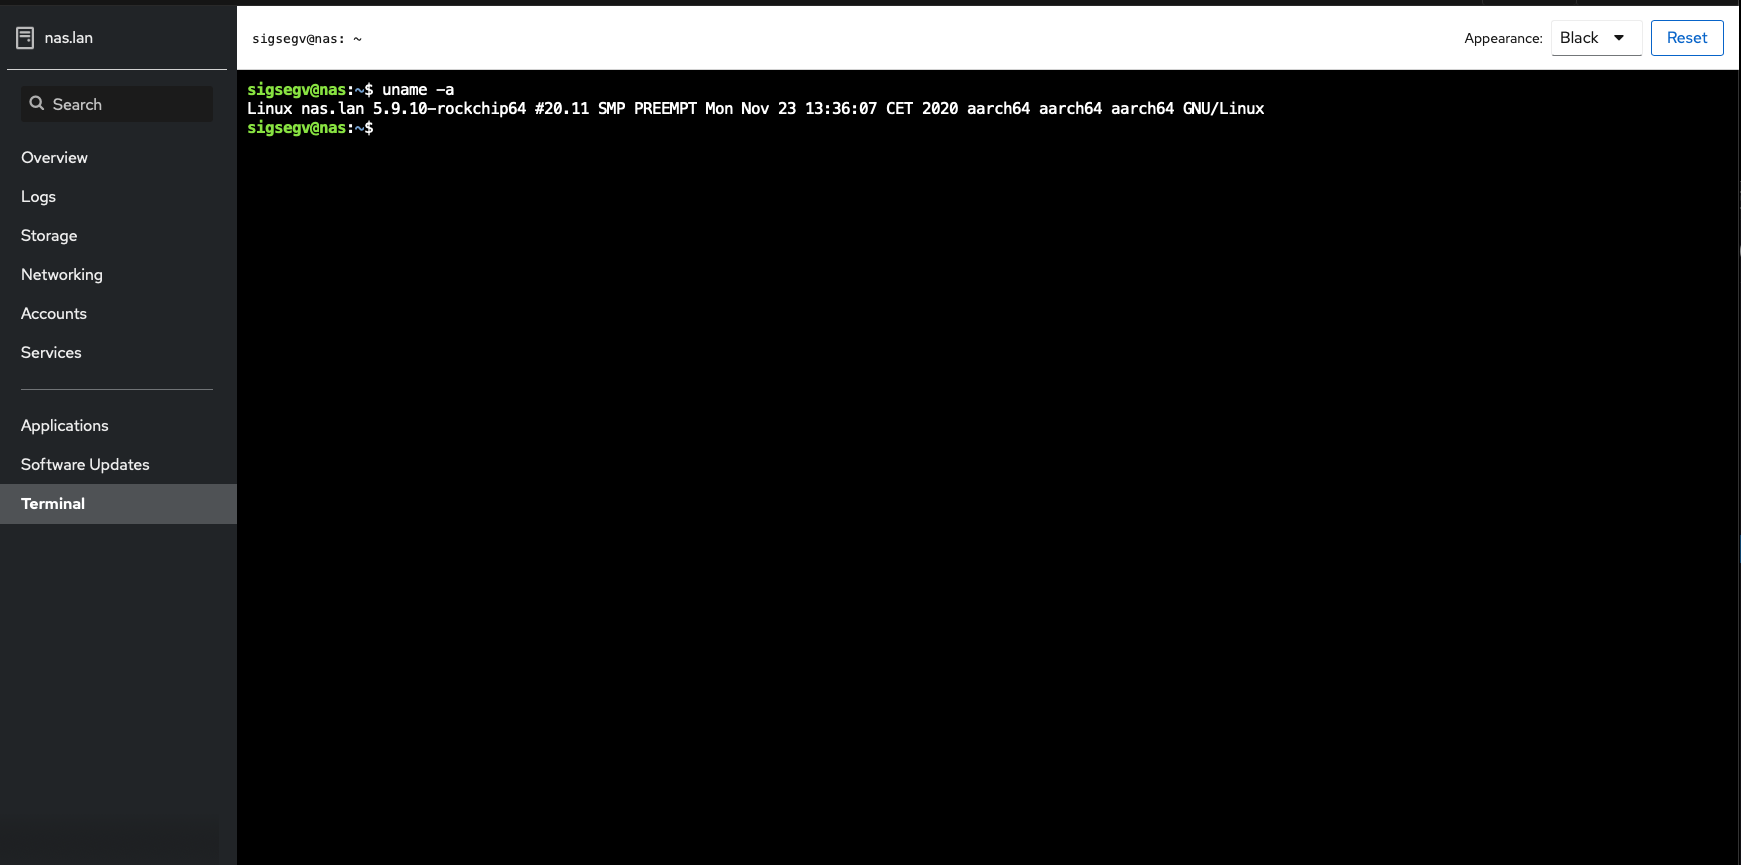
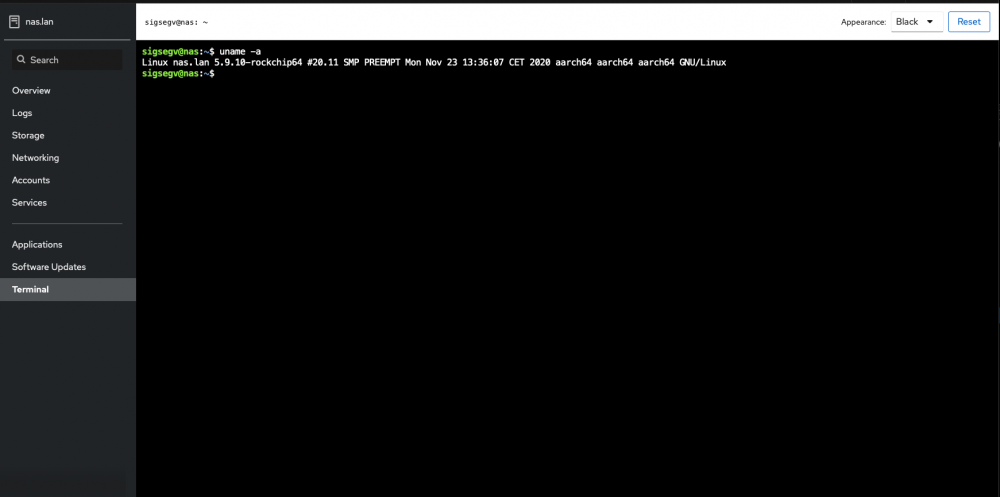
Just got the notification to update After the reboot all seems good - iSCSI is now supported out of the box. Will wait for the official images to be pushed to the downloads page to try and setup a clean install + overlay FS to document my customizations.
-
Continuing the discussion from here On a clean install of 20.08.21 im able to crash the box within a few hours of it being under load. It appears as if the optimisations are being applied root@helios64:~# cat /proc/sys/net/core/rps_sock_flow_entries 32768 The suggestion @ShadowDance made to switch to the performance governor hasn't helped. Anecdotally, I think I remember the crashes always mentioning page faults, and early on there was some discussion about memory timing. Is it possible this continues to be that issue?