All Activity
- Past hour
- Today
-

Amlogic S905X -- Cannot install Armbian to internal eMMC
Werner replied to pochopsp's topic in Amlogic CPU Boxes
moved -

Gaming experience with Orange Pi 5 (RK3588) on Armbian
KhanhDTP replied to KhanhDTP's topic in Orange Pi 5
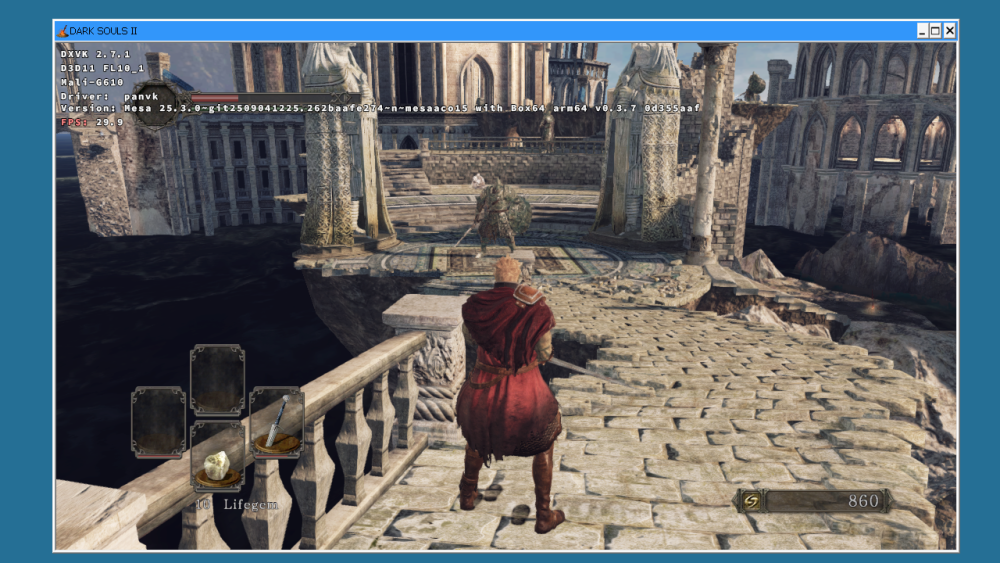
Armbian 25.8.1 Noble XFCE (mainline Kernel: 6.16.6-edge-rockchip64) + PanVk - mesa 23.0 (https://launchpad.net/~ernstp/+archive/ubuntu/mesaaco) + box64 3.7 (https://ryanfortner.github.io/box64-debs/) + wine-10.15-staging-tkg-ntsync-amd64-wow64 (https://github.com/Kron4ek/Wine-Builds/releases/tag/10.15) + DXVK-stripped v2.7.1 ~30fps@720p Dark Souls 2 - SotFS -
I've just been through this process myself. Those instructions are not close to working, and I'm not sure they ever worked. I have documented how I got the LCD display working on the T3-Mini here:
-
This was originally meant as a reply to a user having problems enabling openVFD on a Tannix T3-Mini, a device I happen to own. I have recently been through this journey myself, and having searched the forums, I cannot find a recent topic on how to build this for Armbian, so have decided to make a new post that may be of use to some. Hold on to your hat, because this is going to be long. Caveats These instructions are, specifically, for the Tannix TX3-Mini. However, with a bit of fiddling, the general approach should work for any supported TV Box. I have added notes where you will need to look to edit a different file for your specific device There are many, many variants of the TX3-Mini out there. What works for me, may not work for you. Do not expect any help or support from me, I am just posting this as a courtesy for how I got this working... your mileage may vary. I am not going to troubleshoot anyone's issues These instructions are quite verbose, as they may also help users of other TV Boxes to get their displays working. It also may not. Like I say, I am not here to be tech support, but we can all agree not having a display stuck on "boot" is a nice thing to have As this is a kernel module it will most likely stop working after each kernel update. You will probably want to create a DKMS to rebuild the module whenever you download a new kernel. This is outside of scope here. Use Google. At the end of this, if all goes well, you will have a display showing the current time. If you want to do more with the display then this is outside of scope and you will need to look elsewhere. However, this link is useful for how to trigger the icons: https://github.com/arthur-liberman/linux_openvfd/blob/master/led_control.txt (note: only items 1 to 6 are valid for the tx3-mini) A lot of this can be done in a chroot, but the actual building of the kernel module itself must be done on the target device. To simplify things all of these instructions are to be executed on the device itself. If you want to do this in a chroot, then knock yourself out, but you are on your own. My setup At the time of writing, these instructions are confirmed working for the 7 Segment display and all icons on: Tannix T3-Mini S905w with 2GB RAM Armbian 25.11 Kernel 6.12.48-current-meson64 Debian stable (trixie) (13) Instructions Note: Every code block here is meant to be pasted and executed in one go, even the multi-line blocks We will work from the home folder to keep things simple. Don't worry, there will be no clutter as we will remove files we no longer require as we go cd ~ Device Tree Blob The first thing we are going to want to do is enable kernel support for openvfd in our DTB. Normally I'd do this with an overlay, but this does not appear to be enabled on the aml-s9xx-box image, so we will edit the DTB directly: Install the device tree compiler: sudo apt install -y device-tree-compiler --no-install-recommends Back up the existing DTB (if anything goes wrong you can always just restore the backed up DTB): Note: If your device is not a Tanix T3-Mini, then you will want to amend the following to point to the actual DTB you are using (you can find this in '/boot/extlinux/extlinux.conf') sudo cp /boot/dtb/amlogic/meson-gxl-s905w-tx3-mini.dtb /boot/dtb/amlogic/meson-gxl-s905w-tx3-mini.dtb.orig Decompile the existing DTB to something we can work with. Ignore the warnings that are generated. This is normal: Note: If your device is not a Tanix T3-Mini, then you will want to amend the following to point to the actual DTB you are using sudo dtc -I dtb -O dts -o device_tree.dts /boot/dtb/amlogic/meson-gxl-s905w-tx3-mini.dtb We need to edit the DTS file we created and insert the reference to the kernel module. Open the file with: sudo nano device_tree.dts insert the following under the root node. At the time of writing (for the T3-Mini) this will be just after "model = "Oranth Tanix TX3 Mini"; and just before "aliases {": openvfd { compatible = "open,vfd"; dev_name = "openvfd"; status = "okay"; }; The beginning of my file looks like this, yours should be similar: Compile the amended DTS file back to a DTB. This may generate a massive amount of scary looking warnings. Ignore them all. This is normal Note: If your device is not a Tanix T3-Mini, then you will want to amend the following to point to the actual DTB you are using sudo dtc -I dts -O dtb -o /boot/dtb/amlogic/meson-gxl-s905w-tx3-mini.dtb device_tree.dts Remove our temporary DTS file sudo rm device_tree.dts Reboot so when we load the module later, our device knows what to do with it sudo reboot now Once your device has been rebooted, you can confirm that your change has been applied correctly with the following command: dtc -I fs -O dts /proc/device-tree | grep -A3 openvfd Again, this will generate a lot of warnings! This is normal. At the end of the warnings you should see the openvfd entry that you added to your DTS in the earlier step. If you do not, then you have not edited the file correctly, and you should go back and try again. OpenVFD Config file We need to create a configuration file which tells the OpenVFD module which GPIO pins are connected to the LCD display. We put this in the /etc folder as this is where we should be storing system configuration files for *deb based systems The contents of this file were extracted from https://github.com/arthur-liberman/vfd-configurations so if you are using a different device, you must replace the following config with the relevant one from the link. If you are having issues with your config not working, direct them to the repo owner, not me. I do not know your device or what may be wrong. Note: I remove the final functions='usb colon eth wifi' line as whilst the driver works fine with it included, it generates errors/warnings, which I would rather not see, and it appears to serve no purpose for Armbian Execute the following to generate the config for the TX3-Mini Note: If your device is not a Tanix T3-Mini do not execute the following. Instead, find your config at https://github.com/arthur-liberman/vfd-configurations and save it as /etc/openvfd.conf sudo bash -c "cat << 'EOF' > /etc/openvfd.conf vfd_gpio_clk='0,76,0' vfd_gpio_dat='0,75,0' vfd_gpio_stb='1,4,0' vfd_chars='4,3,2,1,0' vfd_dot_bits='0,1,3,2,4,5,6' vfd_display_type='0x01,0x00,0x00,0x00' EOF" Build the Kernel Module Now for the nitty gritty, we need to build the kernel module. The first thing we need is the kernel headers. Note: the headers version must match your installed kernel version exactly. Do not try installing the headers for a different kernel version. You will run into issues If you are on a standard image, or your kernel has been upgraded since you built your image, this is straightforward: sudo apt install linux-headers-$(uname -r) However, if you have built the image yourself, and you have not upgraded your kernel, then most likely the version available from the apt repository will not be compatible and your build may fail or the driver may not work at all. In these instances, you will need to go back to your build system and add the following switch to your ./compile.sh command: INSTALL_HEADERS=yes Install the required build tools sudo apt install -y git build-essential --no-install-recommends Clone the openvfd repo. At the time of writing the openvfd repo is not compatible with later Linux kernels. I have raised a PR against the repo to enable support, however it has not yet been accepted. If/when it is accepted I will be deleting my fork of the repo, but in the meantime, you can clone my fork with: git clone https://github.com/torzdf/linux_openvfd.git ~/linux_openvfd If the above does not work, it is because I have deleted my fork as the changes have been merged, and I am unable to come back and edit this post. If this is the case then run the following: Note: DO NOT run the next line, if the above git clone worked git clone https://github.com/arthur-liberman/linux_openvfd.git ~/linux_openvfd Enter the driver folder of the cloned repo cd ~/linux_openvfd/driver Create a Makefile. The provided Makefile will not work, so we need to replace it with our own: cat << 'EOF' > ./Makefile ifeq ($(KERNELRELEASE),) PWD = $(shell pwd) KERNELDIR = /lib/modules/`uname -r`/build modules: $(MAKE) -C $(KERNELDIR) M=$(PWD) modules modules_install: $(MAKE) -C $(KERNELDIR) M=$(PWD) modules_install clean: rm -rf *.o *.ko .tmp_versions *.mod.c modules.order Module.symvers ssd253x-ts.* else obj-m := openvfd.o openvfd-objs += protocols/i2c_sw.o openvfd-objs += protocols/i2c_hw.o openvfd-objs += protocols/spi_sw.o openvfd-objs += controllers/dummy.o openvfd-objs += controllers/seg7_ctrl.o openvfd-objs += controllers/fd628.o openvfd-objs += controllers/fd650.o openvfd-objs += controllers/hd44780.o openvfd-objs += controllers/gfx_mono_ctrl.o openvfd-objs += controllers/ssd1306.o openvfd-objs += controllers/pcd8544.o openvfd-objs += controllers/il3829.o openvfd-objs += openvfd_drv.o endif EOF Compile the kernel module: make -j$(nproc) Install the kernel module: sudo make modules_install Update the kernel modules: sudo depmod -a Create the helper service Next we need to compile and install the helper service Enter the folder that contains the source code for the helper service: cd ~/linux_openvfd Build the helper service: make OpenVFDService Make the helper service executable: chmod +x OpenVFDService Install the helper service: sudo cp OpenVFDService /usr/bin/ Clean up We have built everything we need from the OpenVFD repo, so we can get rid of the source code Go back to our home folder and delete the source code cd ~ && sudo rm -r linux_openvfd systemd Service file The final step. We need to create a service file that will load the kernel module, and launch the helper service, and enable it on boot Create the systemd service file: note: If you prefer a 12 hour clock rather than a 24 hour clock, edit the 'Environment="OPTS=-24h"' line to 'Environment="OPTS=-12h"' sudo bash -c 'cat << '\''EOF'\'' > /etc/systemd/system/openvfd.service [Unit] Description=openvfd Wants=network-online.target [Service] Type=simple Environment="OPTS=-24h" ExecStartPre=/usr/bin/sh -c ". /etc/openvfd.conf; /usr/sbin/modprobe openvfd vfd_gpio_clk=$vfd_gpio_clk vfd_gpio_dat=$vfd_gpio_dat vfd_gpio_stb=$vfd_gpio_stb vfd_chars=$vfd_chars vfd_dot_bits=$vfd_dot_bits vfd_display_type=$vfd_display_type;" ExecStart=/usr/bin/OpenVFDService $OPTS & ExecStop=/usr/bin/killall OpenVFDService ExecStopPost=-/usr/sbin/rmmod openvfd [Install] WantedBy=multi-user.target EOF' Reload the systemd daemon: sudo systemctl daemon-reload Start the openvfd service: sudo systemctl start openvfd.service At this point your LCD should now be showing the time. If it is not, you can check for errors with: sudo systemctl status openvfd.service Enable the service at boot: sudo systemctl enable openvfd.service And that's it. If all has gone well, you now have a working LCD Display for your TV Box running a recent Armbian build
-
1
-
I face the same problem, Armbian only reports 4GB on my VisionFive2 board with 8GB of RAM. I also noticed that the system is very unstable and constantly hanging after some minutes of usage, especially when I install Debian packages with Apt. I haven't tested the official Debian image yet. I hope it fixes both the reported RAM and that instability. Here is the page for the official VisionFive2 Debian: https://rvspace.org/en/project/VisionFive2_Debian_Wiki_202409_Release Links can be found there: https://debian.starfivetech.com/
- Yesterday
-
My brief experience in trying out a USB-C display wasn't great. I was never able to get any video at all until / unless I was fully booted into an OS, and even then it was shotty. Both USB-C connectors on the Orange PI 5 Plus (on mine anyway) are poorly made and intermittently lose connection if moved around at all. I recently read that's a real problem with SBCs in general that get their power over USB-C... clearly a very poor design. I also read somewhere that a similar board required proprietary drivers for USB-C display output to function. My experience indicates at least something like that likely applies here as well. Dysfunctional hardware design.
-

Amlogic S905X -- Cannot install Armbian to internal eMMC
SteeMan replied to pochopsp's topic in Amlogic CPU Boxes
The issue is that your u-boot can't read the emmc. The linux kernel can since when it was run from your sd card you can access the emmc. But after you have copied the install to emmc and then boot, the uboot is reporting it can't read the emmc. There are instruction in /boot/build-u-boot for building the various uboots. I would suggest you try building with a newer version of uboot. What is currently shipped (the u-boot-s905x-s912 was built from uboot 2020-07 sources) so trying with newer uboot 2025-xx might provide better support for your specific emmc. -
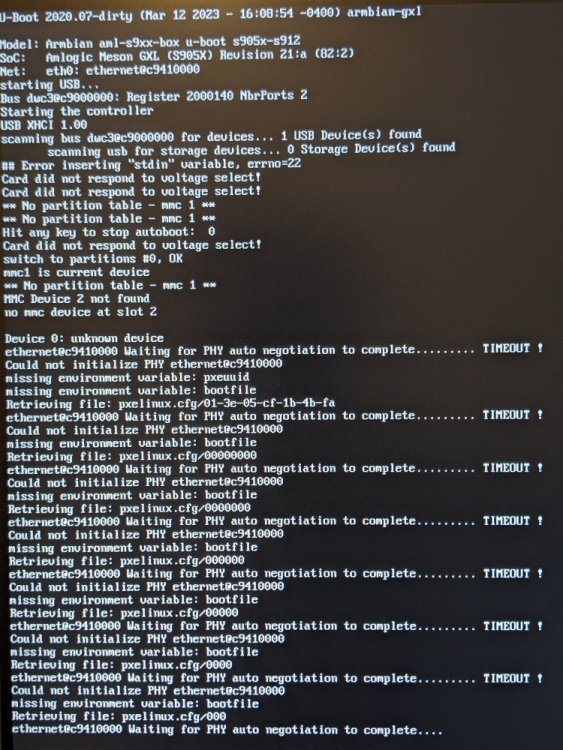
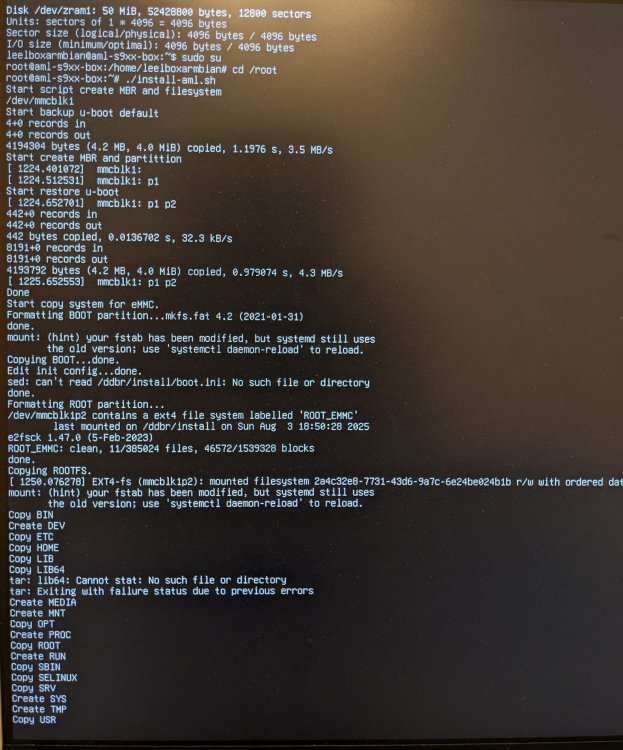
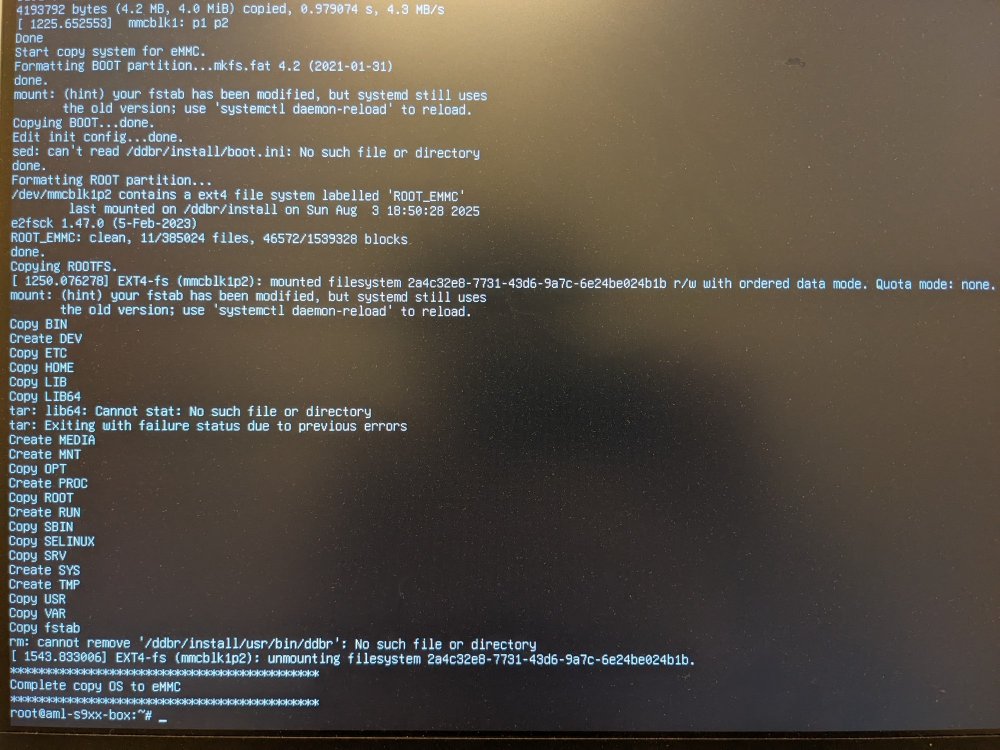
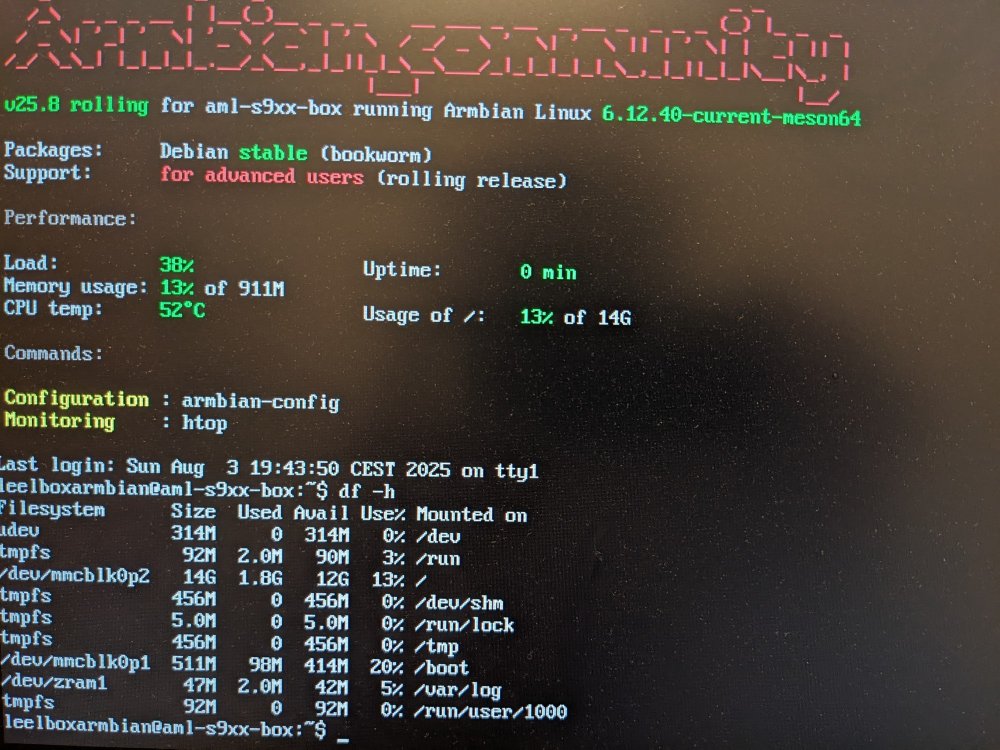
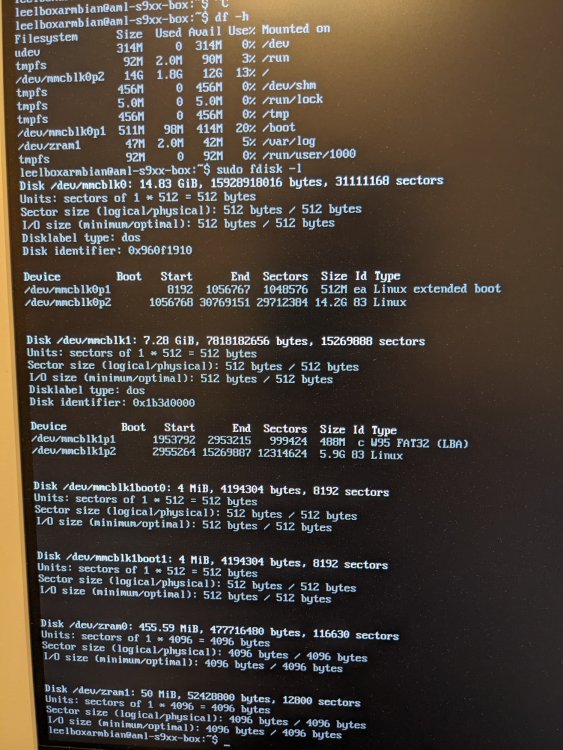
Hello everyone, I own this android box and I followed this tutorial https://ragone.dev/post/install-linux-on-android-tv-box which is based on tutorials on armbian website, I tried to install Armbian 25.8 server with Debian. Everything went fine until the step "5. Flash Armbian to the internal eMMC", despite me running the install-aml.sh script and getting a complete message in the end (see following images for script execution output), when I reboot it just always starts from the sd (see the following screenshot showing that the mounted storage is 16 GB, but my box internal storage is 8 GB). fdisk -l output to also show the internal mmc (in the screen /dev/mmcblk1) If I remove the sd and then turn it on, it is just stuck in a loop, having the following errors: Can you please help me in solving this problem? I already tried looking on the web and found these two topics: https://github.com/ophub/amlogic-s9xxx-armbian/issues/3032 But they didn't help me. Kind regards
-

Getting error installing Octoprint via armbian-config on Orange Pi Zero
seamoce replied to seamoce's topic in Allwinner sunxi
@Werner https://paste.armbian.com/izobaqaguk here the link So do you think docker cannot run well on this device? -
Make sure that the octoprint project still supports 32 bit CPUs For low ram sbc's, I suggest doing a classic installation, instead of Docker You can skip the webcam portion installation, and give you no problems. I had my opiz LTS (512MB) running octoprint last year, and the webcam function works well... but I only used octoprint-Docker when I had 2GB of RAM server.
-

Getting error installing Octoprint via armbian-config on Orange Pi Zero
Werner replied to seamoce's topic in Allwinner sunxi
moved Providing logs with armbianmonitor -u helps with troubleshooting and significantly raises chances that issue gets addressed. -
Hi, I installed on my Orange Pi Zero (not plus) armbian and using armbian-config I am trying to install Octoprint to control my 3d printer. I got an error: docker: Error response from daemon: error gathering device information while adding custom device "/dev/video0": no such file or directory I have no webcam attached and I am not planning to use it for now, Can I disable this check?
-
Hello everyone! I have a TVBox Tanix V2 with Debian Trixie installed. I'd like to know if I can use /dev/ttyS0 to connect a zigbee coordinator? He doesn't seem to be doing anything. tvbox:/#lsof -n | grep /dev/ttyS0 lsof: no pwd entry for UID 1883 [ 0.000899] printk: legacy console [tty0] enabled [ 0.257827] fe07a000.serial: ttyS0 at MMIO 0xfe07a000 (irq = 14, base_baud = 1500000) is a meson_uart This is what is available from the console. Thanks in advance!
-
the issue is as follows: 1. When using the Type-C interface to connect to an external monitor, the display works normally if the monitor is connected after the development board has started. 2. If the monitor is disconnected and then reconnected after approximately several hours (possibly more than 6 hours), the display fails to show any image. I used the `armbianmonitor -u` command, and it output the following URL. https://paste.armbian.com/foyecusoju If the Type-C interface is functioning normally, the latest output from `dmesg -w` would show the following: [ 1155.922647] xhci-hcd xhci-hcd.15.auto: xHCI Host Controller [ 1155.922692] xhci-hcd xhci-hcd.15.auto: new USB bus registered, assigned bus number 7 [ 1155.922885] xhci-hcd xhci-hcd.15.auto: hcc params 0x0220fe64 hci version 0x110 quirks 0x0002008002010010 [ 1155.922937] xhci-hcd xhci-hcd.15.auto: irq 116, io mem 0xfc000000 [ 1155.923133] xhci-hcd xhci-hcd.15.auto: xHCI Host Controller [ 1155.923152] xhci-hcd xhci-hcd.15.auto: new USB bus registered, assigned bus number 8 [ 1155.923173] xhci-hcd xhci-hcd.15.auto: Host supports USB 3.0 SuperSpeed [ 1155.923455] usb usb7: New USB device found, idVendor=1d6b, idProduct=0002, bcdDevice= 6.01 [ 1155.923476] usb usb7: New USB device strings: Mfr=3, Product=2, SerialNumber=1 [ 1155.923491] usb usb7: Product: xHCI Host Controller [ 1155.923502] usb usb7: Manufacturer: Linux 6.1.115-vendor-rk35xx xhci-hcd [ 1155.923515] usb usb7: SerialNumber: xhci-hcd.15.auto [ 1155.924750] hub 7-0:1.0: USB hub found [ 1155.924811] hub 7-0:1.0: 1 port detected [ 1155.925434] usb usb8: We don't know the algorithms for LPM for this host, disabling LPM. [ 1155.925607] usb usb8: New USB device found, idVendor=1d6b, idProduct=0003, bcdDevice= 6.01 [ 1155.925625] usb usb8: New USB device strings: Mfr=3, Product=2, SerialNumber=1 [ 1155.925638] usb usb8: Product: xHCI Host Controller [ 1155.925649] usb usb8: Manufacturer: Linux 6.1.115-vendor-rk35xx xhci-hcd [ 1155.925660] usb usb8: SerialNumber: xhci-hcd.15.auto [ 1155.928950] hub 8-0:1.0: USB hub found [ 1155.929019] hub 8-0:1.0: 1 port detected [ 1156.590377] rockchip-vop2 fdd90000.vop: [drm:vop2_crtc_atomic_enable] Update mode to 3840x2160p60, type: 10(if:DP0, flag:0x0) for vp2 dclk: 533120000 [ 1156.590574] rockchip-vop2 fdd90000.vop: [drm:vop2_crtc_atomic_enable] dclk_out2 div: 2 dclk_core2 div: 2 [ 1156.590639] rockchip-vop2 fdd90000.vop: [drm:vop2_crtc_atomic_enable] set dclk_vop2 to 533120000, get 533119995 [ 1156.621808] dw-dp fde50000.dp: full-training link: 4 lanes at 5400 MHz [ 1156.635430] dw-dp fde50000.dp: clock recovery succeeded [ 1156.644918] dw-dp fde50000.dp: channel equalization succeeded [ 1156.657348] rockchip-vop2 fdd90000.vop: [drm] vop enable intf:200 [ 1157.337766] dw-dp fde50000.dp: test_type0 is not support [ 1157.339516] dw-dp fde50000.dp: test_type0 is not support [ 1159.801886] usb 7-1: new high-speed USB device number 2 using xhci-hcd [ 1159.942247] usb 7-1: New USB device found, idVendor=1a40, idProduct=0101, bcdDevice= 1.11 [ 1159.942271] usb 7-1: New USB device strings: Mfr=0, Product=1, SerialNumber=0 [ 1159.942278] usb 7-1: Product: USB 2.0 Hub [ 1159.978762] hub 7-1:1.0: USB hub found [ 1159.978833] hub 7-1:1.0: 4 ports detected [ 1160.375255] usb 7-1.3: new full-speed USB device number 3 using xhci-hcd [ 1160.583425] usb 7-1.3: New USB device found, idVendor=222a, idProduct=0001, bcdDevice= 0.02 [ 1160.583438] usb 7-1.3: New USB device strings: Mfr=1, Product=2, SerialNumber=0 [ 1160.583441] usb 7-1.3: Product: ILITEK-TP [ 1160.583443] usb 7-1.3: Manufacturer: ILITEK [ 1160.653326] input: ILITEK ILITEK-TP as /devices/platform/usbdrd3_0/fc000000.usb/xhci-hcd.15.auto/usb7/7-1/7-1.3/7-1.3:1.0/0003:222A:0001.0005/input/input26 [ 1160.708695] input: ILITEK ILITEK-TP Mouse as /devices/platform/usbdrd3_0/fc000000.usb/xhci-hcd.15.auto/usb7/7-1/7-1.3/7-1.3:1.0/0003:222A:0001.0005/input/input28 [ 1160.709353] hid-multitouch 0003:222A:0001.0005: input,hiddev97,hidraw2: USB HID v1.10 Mouse [ILITEK ILITEK-TP] on usb-xhci-hcd.15.auto-1.3/input0 If it is not functioning normally, it will not output any content.
-
Hello everyone, I'm trying to get an ST7735S LCD display working with my Orange Pi Zero 2 (H616). This setup was working correctly with older Armbian kernels, but after a recent update, I can no longer get the SPI device to appear. I have already tried a couple of different configuration methods without success. System Information: Board: Orange Pi Zero 2 (H616) Display: ST7735S (SPI) Kernel Version: Linux orangepizero2 6.12.43-current-sunxi64 #2 SMP Wed Aug 20 16:30:58 UTC 2025 aarch64 GNU/Linux I have recently updated armbian-config by running the update from the script itself. Attempt 1: Using armbianEnv.txt My first attempt was to edit /boot/armbianEnv.txt and add the required overlays. Here is my configuration: verbosity=1 bootlogo=false console=both disp_mode=1920x1080p60 rootdev=UUID=aef396b8-ac79-477c-b797-466fc4d881a6 rootfstype=ext4 overlays=sun50ih616spidev1_0 sun50ih616spidev1_1 sun50ih616spispidev sun50ih616tft35_spi usbstoragequirks=0x2537:0x1066:u,0x2537:0x1068:u After rebooting with this configuration, the device nodes are not created. The output of ls /dev/spidev* is empty. Attempt 2: Using a custom user overlay Next, I tried creating a custom Device Tree Overlay. I created the file /boot/overlay-user/sp1-spidev.dts with the following content: /dts-v1/; /plugin/; / { compatible = "allwinner,sun50i-h616"; fragment@0 { target = <&spi1>; __overlay__ { status = "okay"; pinctrl-names = "default"; #address-cells = <1>; #size-cells = <0>; spidev@0 { compatible = "spidev"; reg = <0>; spi-max-frequency = <50000000>; }; }; }; }; I then added sp1-spidev to the overlays line in armbianEnv.txt. This method seems to be partially working. After a reboot, I can see the SPI master controller: $ ls /sys/class/spi_master/ spi0 spi1 However, the spidev device is still missing. ls /dev/spidev* is still empty. Diagnostic Information Here is the output of dmesg filtered for "spi". It seems to refer to spi0, not spi1 which I am trying to configure, but I'm including it for completeness. $ dmesg | grep -i spi [ 2.821043] spi-nor spi0.0: supply vdd not found, using dummy regulator My Question I don't understand why the /dev/spidev* device is not being created, even when the spi1 master appears to be correctly enabled via the overlay. It seems like the spidev driver is not binding to the device. Since this worked on older kernels, has the method for enabling SPI devices changed? What is the correct procedure now? Is there something I'm missing in my overlay file or configuration? Thank you for your help
-

armbian nanopi m4v2 rk3399 mali t864 not working
Giuseppe93 replied to Giuseppe93's topic in NanoPi R4S
@laibsch thank you for reaching out. I apologize for the delay in responding. I want to inform you that I am actively seeking assistance from the community and am willing to contribute by developing code to address the issues I've observed on this board. However, despite my efforts to engage with the community, I have not received any responses and am not sufficiently experienced to thoroughly troubleshoot and resolve these problems on my own. Although I have some knowledge of programming languages, I am not well-versed in Linux. For example, this morning, I suggested a potential solution to the Bluetooth issue on the IRC channel but received no feedback. For the GPU, it appears that acceleration is now present, as the CPU is no longer at 100%. However, I am unable to set the resolution to 4K without encountering screen artifacts, and I can only achieve Full HD resolution. -
Next week, Collabora will be taking part in the 2025 edition X.Org Developer's Conference! Taking place in Vienna, our engineers will be presenting 6 talks and a workshop to help local students discover the embedded graphics stack! Join us! View the full article
-
Kernel packages comes from the same (main) repository. This won't cause you problems, if you upgrade from bookworm to trixie, but we can't guarantee for packages that comes from Debian. You might try this way: https://docs.armbian.com/User-Guide_Armbian-Config/System/#stable-distro-upgrade Note that you might need to download updated Armbian key: wget -qO - https://apt.armbian.com/armbian.key | gpg --dearmor | \ sudo tee /usr/share/keyrings/armbian.gpg > /dev/null cat << EOF | sudo tee /etc/apt/sources.list.d/armbian-config.sources > /dev/null Types: deb URIs: https://github.armbian.com/configng Suites: stable Components: main Signed-By: /usr/share/keyrings/armbian.gpg EOF
-
About a year ago, I installed the OpenMediaVault image for CM3588-NAS from here: https://www.armbian.com/nanopc-cm3588-nas/ The image is debian-bookworm, which has since become oldstable, while trixie is the new stable. Is it possible to upgrade the distribution and move to trixie packages, even though there are no trixie images for CM3588-NAS? In theory this seems completely feasible as my apt configurations seem completely standard with something like deb http://deb.debian.org/debian bookworm main contrib non-free non-free-firmware and deb [signed-by=/usr/share/keyrings/armbian.gpg] http://apt.armbian.com bookworm main bookworm-utils bookworm-desktop If I attempt the upgrade, will I run into problems with some packages (like armbian-bsp-cli-cm3588-nas-vendor or linux-image-vendor-rk35xx) not actually existing for the target release and platform and just end up bricking my system?
-
Hard to tell without any logs whatsoever In general it works on x86 since a few month ago I used it to move the OS from an old NUC-like pc from sd to built-in emmc which was flawless (besides I had to get rid of Ventoy since it messes up Armbian boot).
- Last week
-

USB error after kernel update on ODROID-HC4
fxkl47BF replied to Sergius's topic in Software, Applications, Userspace
has any progress been made toward fixing this -

Efforts to develop firmware for H96 MAX M9 RK3576 TV Box 8G/128G
RealAn replied to Hqnicolas's topic in Rockchip CPU Boxes
here is my dts for android rkr7.1 sdk 6.1.141 with everything working usb2 host usb3 otg/host hdmi ethernet 3.5mm spdif IR + wakeup wifi BT collect info for adding your remote to dts echo 1 > /sys/module/rk_pwm_remotectl/parameters/code_print m9.dts

