Search the Community
Showing results for 'realtime kernel'.
-
@Stephen Graf I successfully compiled using armbian build. But not sure if i successfully integrated the patches. and also don't know if I used all the correct patches. Could you review and advise please: Here are my steps: sudo apt-get -y -qq install git mkdir ~/src cd ~/src ======================= git hdmi audio patches ======================= git clone https://github.com/warpme/minimyth2.git git clone --depth=1 --branch=main https://github.com/armbian/build mkdir -p ~/src/build/userpatches/kernel/sunxi-current cp ~/src/minimyth2/script/kernel/linux-6.6/files/0600-drivers-h616-wip-add-usb-emac2-support.patch ~/src/build/userpatches/kernel/sunxi-current/ cp ~/src/minimyth2/script/kernel/linux-6.6/files/0601-drivers-thermal-allwinner-add-h616-ths-support.patch ~/src/build/userpatches/kernel/sunxi-current/ cp ~/src/minimyth2/script/kernel/linux-6.6/files/0602-media-cedrus-add-H616-variant.patch ~/src/build/userpatches/kernel/sunxi-current/ cp ~/src/minimyth2/script/kernel/linux-6.6/files/0603-soc-sunxi-sram-Add-SRAM-C1-H616-handling.patch ~/src/build/userpatches/kernel/sunxi-current/ cp ~/src/minimyth2/script/kernel/linux-6.6/files/0606-dma-sun6i-dma-add-h616-support.patch ~/src/build/userpatches/kernel/sunxi-current/ cp ~/src/minimyth2/script/kernel/linux-6.6/files/0607-drivers-drm-wip-add-h616-hdmi-jernejsk-24102023.patch ~/src/build/userpatches/kernel/sunxi-current/ cp ~/src/minimyth2/script/kernel/linux-6.6/files/0608-sound-soc-sunxi-add-codec-driver-for-h616.patch ~/src/build/userpatches/kernel/sunxi-current/ cp ~/src/minimyth2/script/kernel/linux-6.6/files/0609-sound-soc-add-sunxi_v2-for-h616-ahub.patch ~/src/build/userpatches/kernel/sunxi-current/ cp ~/src/minimyth2/script/kernel/linux-6.6/files/0615-drivers-iommu-sun50i-iommu-fix-iommu-on-h616.patch ~/src/build/userpatches/kernel/sunxi-current/ cp ~/src/minimyth2/script/kernel/linux-6.6/files/0630-arm64-dts-allwinner-h616.dtsi-add-ths-audio-hdmi.patch ~/src/build/userpatches/kernel/sunxi-current/ cp ~/src/minimyth2/script/kernel/linux-6.6/files/0631-arm64-dts-allwinner-h616-OrangePI-Zero23-enable-ths-hdmi-audio.patch ~/src/build/userpatches/kernel/sunxi-current/ cp ~/src/minimyth2/script/kernel/linux-6.6/files/0639-arm64-dts-allwinner-h616.dtsi-add-spdif.patch ~/src/build/userpatches/kernel/sunxi-current/ cp ~/src/minimyth2/script/kernel/linux-6.6/files/0640-arm64-dts-allwinner-h618-enable-spdif-opi23-tanix-tx6s.patch ~/src/build/userpatches/kernel/sunxi-current/ ls ~/src/build/userpatches/kernel/sunxi-current ========================= armbian build =========================== cd ~/src/build ./compile.sh
-
A stable Armbian Bookworm configuration for your Helios64 is provided here (solved). ************************************************************************* Recently a new Armbian 23.08.1 Bookworm image with linux-6.1.50 was made available for Helios64 on its download page (see here) - which is as such great 😀. Everything starts up nicely, but unlike the previous Bookworm 23.05 image, the current one has an issue with accessing USB devices. In the boot process the following error occurs: # cat /var/log/syslog | grep error 2023-09-07T12:31:05.671598+02:00 helios64 kernel: [ 2.537009] dwc3 fe900000.usb: error -ETIMEDOUT: failed to initialize core 2023-09-07T12:31:05.671602+02:00 helios64 kernel: [ 2.537107] dwc3: probe of fe900000.usb failed with error -110 No USB device could be accessed. As this seems to be related to the realtek driver r8152, I compiled and installed the current version of that driver (see below) and after that the USB devices were accessible. # compile and install the current realtek driver git clone https://github.com/wget/realtek-r8152-linux.git cd realtek-r8152-linux... make sudo make install
-

Helios64 - Armbian 23.08 Bookworm issues (solved)
BipBip1981 replied to ebin-dev's topic in Rockchip
Hi, i use on my own build from scratch with framework official Armbian 24.05 with kernel 6.6.30 and DTB file send by ebin-dev here with 408-1800mhz ondemand governor and for the first time since I have it, it is stable and usable with my case of uses and it pass my pattern stability test ! Many thanks to ebin-dev for the great work. -
@sasa Many thanks for pointing out that analog sound just has to be enabled! I just tested and it works. I was dreading trying to debug kernel code when I should have been looking at the fundamental "is it turned on?" I will try the patch to remove the other sound error. As to automatic detection, yes on my orangepizero3 with H618 Allwinner SOC, HDMI detects the monitor and sets the proper resolution.
-
Hi, I think these messages are not related to analog audio, at least on my custom board with t507 processor, analog audio works with this error. You can simply disable them as it was in the linux kernel 6.1 The sound works for me if I turn it on in the mixer It’s strange, but I have another problem - the sound does not work through HDMI and there is also a problem with reading EDID through the DDC interface. I would be grateful if you could tell me whether automatic detection of monitor or TV resolution via HDMI works for you.
-
 I have an OrangePi PC with armbian installed on it. Today, probably because of my stupidity, the board couldn't boot after upgrading a bunch of stuff. When I opened the sd card on my pc, I found that there were no kernel files in /boot and there were broken symlinks. I tried to replace these with the files from the current minimal image armbian is available for the board, but encountered a UUID mismatch. I then used files from a september 2021 backup, which did allow me to boot into a functional system. It had Linux 5.10.43-sunxi. But before my attempts to fix the issue, my system had Linux 6.1.11-sunxi installed, so I am concerned about this mismatch and would like to safely remove the old kernel files and bring it back to 6.1.11, after which I would like to proceed updating the system to Bookworm (the system still says it's Armbian Buster). How do I reinstall the linux kernel and initrd files in /boot and remove the files of other kernels in /boot? I really want to keep this system going because I don't want to reconfigure and setup again everything that's running on it. Soon I'm getting a new Pi board which would be a proper replacement and for which I am willing to set up all the stuff again, to start clean.
 -
Enable bcachefs filesystem support in rk3588 kernel config (copied from armbian rockpro64 edge config). Description This adds support for the bcachefs filesystem in the rk3588 edge kernel config. Bcachefs is a new and exciting filesystem that is similar to btrfs / zfs, but simpler to use. The relevant kernel options were already in other configs, such as the rockpro64 edge config, but not in the rk3588 edge one. This needs kernel version 6.7+. How Has This Been Tested? custom kernel build Checklist: Please delete options that are not relevant. [ ] My code follows the style guidelines of this project [ ] I have performed a self-review of my own code [ ] I have commented my code, particularly in hard-to-understand areas [ ] My changes generate no new warnings [ ] Any dependent changes have been merged and published in downstream modules View the full article
-
DISCLAIMERS (PLEASE READ): Everything you can find in this thread (binaries, texts, code snippets, etc...) are provided AS-IS and are not part of official Armbian project. For this reason not people from Armbian project nor myself are responsible for misuse or loss of functionality of hardware. THIS POST explains very well the troubles with TV Boxes and why they are not suitable for everyone Please don't ask about support or assistance in other non-community forums nor in the official Armbian github repository, instead post your questions in this thread, in the TV Boxes forum section (hardware related) or in the Peer-to-peer support section (general linux/software related). Following the recent thread on LibreElec forum about an unofficial image for rk3229 devices, I would like to make public the work made by me and @fabiobassa about bringing rk322x support to armbian. The project is now in -> mainline Armbian <- development fork -> here <- This first page and the last 3 or 4 pages of the thread are enough to get up to date with recent developments. Many useful experiences are scattered through the thread, but the most important things are collected here in the first page, so please read it carefully! Mainline kernel is fully supported and will receive most support in the future. Legacy kernel 4.4 is deprecated, but is kept around only for special purposes. What works: Should boot and work flawlessy on all boards with RK3228a, RK3228b and RK3229, with either DDR2 and DDR3 memories. Mainline u-boot Proprietary OPTEE provided as Trusted Execution Environment (needed for DRAM frequency scaling) All 4 cores are working Ethernet Serial UART (configured at 115200 bps, not 1.5Mbps!) Thermals, CPU and DRAM frequency scaling OTG USB 2.0 port (also as boot device!) EHCI/OHCI USB 2.0 ports MMC subsystem (including eMMC, SD and sdio devices) Hardware video acceleration NAND is available only on legacy kernel. To fully boot from NAND, use the Multitool and its steP-nand installation (instructions are below) Various WIFI over SDIO are supported (SSV6051P, SSV6256P, ESP8089, Realtek chips, etc...), ssv6256p driver is available only on legacy kernel Full GPU acceleration U-boot boot order priority: first the sdcard, then the USB OTG port and eventually the internal eMMC; you can install u-boot (and the whole system) in the internal eMMC and u-boot will always check for images on external sdcard/USB first. Unbrick: Technically, rockchip devices cannot be bricked. If the internal flash does not contain a bootable system, they will always boot from the sdcard. If, for a reason, the bootable system on the internal flash is corrupted or is unable to boot correctly, you can always force the maskrom mode shorting the eMMC clock pin on the PCB. Here there is the procedure, but you can also google around if you get stuck on a faulty bootloader, the technique is pretty simple and requires a simple screwdriver. There are however some unfortunate cases (expecially newer boards) where shorting the eMMC clock pin is difficult or impossibile, like eMMC or eMCP BGA chips with no exposed pins. In those cases pay double attention when burning something on the internal eMMC/eMCP and always test first the image from the sdcard to be sure it works before burning anything on eMMC/eMCP. Some useful links with pins, pads or procedures for some boards: Generic procedure for boards with non-BGA eMMC MXQPRO_V71 - eMCP H20 - eMCP ZQ01 - eMCP NAND vs eMMC vs eMCP difference: RK3228 and RK3229 tv boxes comes with three different flash memory chips: eMMC, NAND and eMCP. It does not depend upon the market name of the tv box and neither the internal board; manufacturers put whatever they find cheaper when they buy the components. NAND chip is just the non-volatile memory eMMC chip contains both the non-volatile memory plus a controller. eMCP chip contains the non-volatile memory, a controller for the non-volatile memory (like eMMC), but also contains a bank of DDR SDRAM memory on the same physical chip. The difference is very important, because eMMC and eMCP are far easier to support at various levels: the controller deals with the physical characteristics of the non-volatile memory, so the software has no to deal with. NAND chips instead are harder to support, because the software is required to deal with the physical characteristics and non-standard things that depends upon the NAND manufacturer. If you have a NAND chips you're unlucky because mainline kernel currently cannot access it, but also because you need special care and instructions explained later. You can discover if you have a NAND, eMMC or eMCP chip looking on the board are reading the signature on the flash memory chip. The Multitool (see later) also can detect which chip you have onboard: the program will warn you at startup if you have a NAND chip. NAND bootloader upgrade: IMPORTANT: don't do this is you have an eMMC or eMCP; skip this paragraph if you are unsure too! For very expert people who are having issues when (re)booting images, there is the chance to upgrade the bootloader on NAND. The NAND bootloader is nothing else than a regular idbloader (see official rockchip documentation) but contains some bits to correctly access the data on your flash memory. Upgrading requires to erase the existing flash content, in the worst case will require you to follow the Unbrick procedure above or restore an older but more compatible bootloader. If you are not mentally ready to overcome possible further issues, don't do this! The detailed instructions and the binaries are available at this post Multimedia: Mainline kernel: 3D acceleration is provided by Lima driver and is already enabled. Hardware video decoding: https://forum.armbian.com/topic/19258-testing-hardware-video-decoding-rockchip-allwinner/ Deprecated legacy kernel: multimedia features, like OpenGL/OpenGL ES acceleration, hardware accelerated Kodi, ffmpeg and mpv you can take a look to this post An effective tutorial from @Hai Nguyen on how to configure a box as a hi-quality music player using an USB audio card, and controlling it via remote control is available in this post Brief explanation about kernel naming: current kernel is the mainline LTS kernel version, most maintained and tested. This is the suggested version for production devices. If you don't know what to pick, pick this. legacy kernel (version 4.4) is provided by manufacturer; it is deprecated, unmaintained and not suggested. edge kernel is the development mainline kernel version, with experimental features and drivers; usually stable but perhaps suitable for production devices. You can switch from one kernel flavour to another using armbian-config or manually via apt. Installation (via SD card): Building: You can build your own image follow the common steps to build armbian for other tv boxes devices: when you are in the moment to choose the target board, switch to CSC/TVB/EOL boards and select "rk322x-box" from the list. Download prebuilt images from the following links: Archive builds (GPG-signed) - https://imola.armbian.com/dl/rk322x-box/archive/ SUGGESTED - Nightly built from trunk each week by Armbian servers (GPG-signed) - https://github.com/armbian/community Old images provided by me (unsigned and outdated) - https://users.armbian.com/jock/rk322x/armbian/stable Archived/older images: https://armbian.hosthatch.com/archive/rk322x-box/archive/ Multitool: The Multitool is a small but powerful tool to do quick backup/restore of internal flash, but also burn images and general system rescue and maintenance via terminal or SSH. Compressed images will be uncompressed on fly. Multitool - A small but powerful image for RK322x TV Box maintenance (instructions to access via network here) Quick installation instructions on eMMC: Build or download your preferred Armbian image and a copy of the Multitool; Burn the Multitool on an SD card; once done, place the Armbian image in images folder of the SD card NTFS partition; Plug the SD card in the TV box and plug in the power cord. After some seconds the blue led starts blinking and the Multitool appears; OPTIONAL: you can do a backup of the existing firmware with "Backup flash" menu option; Choose "Burn image to flash" from the menu, then select the destination device (usually mmcblk2) and the image to burn; Wait for the process to complete, then choose "Shutdown" from main menu; Unplug the power cord and the SD card, then replug the power cord; Wait for 10 seconds, then the led should start blinking and HDMI will turn on. The first time the boot process will take a couple of minutes or more because the filesystem is going to be resized, so be patient and wait for the login prompt. On first boot you will be asked for entering a password for root user of your choice and the name and password for a regular user Run sudo rk322x-config and select your board characteristics to enable leds, wifi chips, high-speed eMMC, etc... Run sudo armbian-config to configure timezone, locales and other personal options Congratulations, Armbian is now installed and configured! Despite the procedure above is simple and reliable, I always recommend to first test that your device boots Armbian images from SD Card. Due to the really large hardware variety, there is the rare chance that the images proposed here may not boot. If a bad image is burned in eMMC, the box may not boot anymore forcing you to follow the unbrick section at the top of this post. Quick installation instructions on NAND: Build or download your preferred Armbian image and a copy of the Multitool; Burn the Multitool on an SD card; once done, place the Armbian legacy kernel image in images folder of the SD card NTFS partition; Plug the SD card in the TV box and plug in the power cord. After some seconds the blue led starts blinking and the Multitool appears; OPTIONAL: you can do a backup of the existing firmware with "Backup flash" menu option; Choose "Burn Armbian image via steP-nand" from the menu, then select the destination device (usually rknand0) and the image to burn; Wait for the process to complete, then choose "Shutdown" from main menu; Unplug the power cord and the SD card, then replug the power cord; Wait for 10 seconds, then the led should start blinking and HDMI will turn on. The first time the boot process will take a couple of minutes or more because the filesystem is going to be resized, so be patient and wait for the login prompt. On first boot you will be asked for entering a password for root user of your choice and the name and password for a regular user Run sudo rk322x-config and select your board characteristics to enable leds, wifi chips, etc... Run armbian-config to configure timezone, locales and other personal options Congratulations, Armbian is now installed! Alternative: you can install the bootloader in NAND and let it boot from SD Card or USB: Download a copy of the Multitool and burn it on an SD card; Plug the SD card in the TV box and plug in the power cord. After some seconds the blue led starts blinking and the Multitool appears; RECOMMENDED: make a backup of the existing firmware with "Backup flash" menu option; Choose "Install Jump Start for Armbian" menu option: the Jump Start uses the internal NAND to boot from external SD Card or external USB Stick; Follow the general instructions to boot from SD Card below, skip the first erase eMMC step. Quick installation instructions to boot from SD Card: If you are already running Armbian from eMMC, skip to the next step. Instead if you are running the original firmware you need to first erase the internal eMMC; to do so download the Multitool, burn it on an SD Card, plug the SD Card and power the TV Box. Use "Backup flash" if you want to do a backup of the existing firmware, then choose "Erase flash" menu option. Build or download your preferred Armbian image; Uncompress and burn the Armbian image on the SD Card; Plug the SD Card in the TV Box and power it on; Wait for 10 seconds, then the led should start blinking and HDMI will turn on. The first time the boot process will take a couple of minutes or more because the filesystem is going to be resized, so be patient and wait for the login prompt; On first boot you will be asked for entering a password for root user of your choice and the name and password for a regular user Run sudo rk322x-config and select your board characteristics to enable leds, wifi chips, high-speed eMMC or NAND, etc... Run armbian-config to configure timezone, locales and other personal options, or also to transfer the SD Card installation to internal eMMC; Congratulations, Armbian is running from SD Card! A note about boot device order: With Armbian also comes mainline U-boot. If you install Armbian or just the bootloader in the eMMC or the Jump Start on internal NAND, the bootloader will look for valid bootable images in this order: External SD Card External USB Stick in OTG Port Internal eMMC Installation (without SD card, board with eMMC) If you have no sd card slot and your board has an eMMC, you can burn the armbian image directly on the internal eMMC using rkdeveloptool and a male-to-male USB cable: Download your preferred Armbian image from Armbian download page and decompress it. Download the rk322x bootloader: rk322x_loader_v1.10.238_256.bin Download a copy of rkdeveloptool: a compiled binary is available in the official rockchip-linux rkbin github repository. Unplug the power cord from the tv box Plug an end of an USB Male-to-male cable into the OTG port (normally it is the lone USB port on the same side of the Ethernet, HDMI, analog AV connectors) while pressing the reset microbutton with a toothpick. You can find the reset microbutton in a hole in the back of the box, but sometimes it is hidden into the AV analog jack Plug the other end of the USB Male-to-male cable into an USB port of your computer If everything went well, run lsusb: you should see a device with ID 2207:320b Run sudo rkdeveloptool rd 3 (if this fails don't worry and proceed to next step) Run sudo rkdeveloptool db rk322x_loader_v1.10.238_256.bin Run sudo rkdeveloptool wl 0x0 image.img (change image.img this with the real Armbian image filename) Unplug the power cord Done! Installation (without SD card, board with NAND) If you are in the unfortunate case you can't use an SD card for installation and your board has a NAND chip, you still have an option to use the quick Multitool installation steps via USB. Obtain a copy of rkdeveloptool: a compiled binary is available in the official rockchip-linux rkbin github repository. Unplug the power cord from the tv box Plug an end of an USB Male-to-male cable into the OTG port (normally it is the lone USB port on the same side of the Ethernet, HDMI, analog AV connectors) while pressing the reset microbutton with a toothpick. You can find the reset microbutton in a hole in the back of the box, but sometimes it is hidden into the AV analog jack Plug the other end of the USB Male-to-male cable into an USB port of your computer If everyting went well, using lsusb you should see a device with ID 2207:320b Run sudo rkdeveloptool wl 0x4000 u-boot-main.img (download u-boot-main.img.xz , don't forget to decompress it!) Unplug the power cord Now you can follow the instructions on how to install on eMMC/NAND via SD card, just use instead an USB stick to do all the operations and plug it into the USB OTG port. Once you reboot, USB OTG port will be used as a boot device. NOTE: NAND users without SD slot may be unhappy to know that it will be difficult to do extra maintenance with Multitool in case something breaks in the installed Armbian system: installing u-boot-main.img makes the installed system unbootable because it is missing the NAND driver. Alternative backup, restore and erase flash for EXPERTS: These backup, restore and erase flash procedures are for experts only. They are kept here mostly for reference, since the Multitool is perfectly able to do same from a very comfy interface and is the suggested way to do maintenance. Backup: Obtain a copy of rkdeveloptool: a compiled binary is available in the official rockchip-linux rkbin github repository. If you prefer, you can compile it yourself from the sources available at official rockchip repository Unplug the power cord from the tv box Plug an end of an USB Male-to-male cable into the OTG port (normally it is the lone USB port on the same side of the Ethernet, HDMI, analog AV connectors) while pressing the reset microbutton with a toothpick. You can find the reset microbutton in a hole in the back of the box, but sometimes it is hidden into the AV analog jack Plug the other end of the USB Male-to-male cable into an USB port of your computer If everyting went well, using lsusb you should see a device with ID 2207:320b change directory and move into rkbin/tools directory, run ./rkdeveloptool rfi then take note of the FLASH SIZE megabytes (my eMMC is 8Gb, rkdeveloptool reports 7393 megabytes) run ./rkdeveloptool rl 0x0 $((FLASH_SIZE * 2048)) backup.data (change FLASH_SIZE with the value you obtained the step before) once done, the internal eMMC is backed up to backup.data file Restore: first we have to restore the original bootloader, then restore the original firmware. Running rkdeveloptool with these switches will accomplish both the jobs: ./rkdeveloptool db rk322x_loader_v1.10.238_256.bin Downloading bootloader succeeded. ./rkdeveloptool ul rk322x_loader_v1.10.238_256.bin Upgrading loader succeeded. ./rkdeveloptool wl 0x0 backup.data Write LBA from file (100%) Download here: Erase the flash memory: clearing the internal eMMC/NAND memory makes the SoC look for external SD Card as first boot option. If there isn't any suitable SD Card, the SoC enters maskrom mode, which can then be used for full eMMC/NAND access using rkdeveloptool. This is perfectly fine if your box has an eMMC flash memory. NOTE: In case you have a NAND flash memory this option is however discouraged. The original bootloader contains some special parameters to correctly access the data. Clearing the flash memory will probably garbage the NAND data and restoring the bootloader may require some special instructions. Obtain a copy of rkdeveloptool: a compiled binary is available in the official rockchip-linux rkbin github repository. If you prefer, you can compile it yourself from the sources available at official rockchip repository Unplug the power cord from the board Plug an end of an USB Male-to-male cable into the OTG port (normally it is the lone USB port on the same side of the Ethernet, HDMI, analog AV connectors) while pressing the reset microbutton with a toothpick. You can find the reset microbutton in a hole in the back of the box, but sometimes it is hidden into the AV analog jack Plug the other end of the USB Male-to-male cable into an USB port of your computer If everyting went well, using lsusb you should see a device with ID 2207:320b run ./rkdeveloptool ef and wait a few seconds once done, the internal eMMC is erased and the device will boot from the sdcard from now on Partecipation and debugging: If you want to partecipate or need help debugging issues, do not hesitate to share your experience with the installation procedure of the boxes. In case of issues and missed support, provide as many as possible of these things is very useful to try and bring support for an unsupported board: some photos of both sides of the board. Details of the eMMC, DDR and Wifi chips are very useful! upload the device tree binary (dtb) of your device. We can understand a lot of things of the hardware from that small piece of data; and alternative is a link to the original firmware (you can do a full backup with the Multitool); dmesg and other logs (use armbianmonitor -u that automatically collects and uploads the logs online) attach a serial converter to the device and provide the output of the serial port; Critics, suggestions and contributions are welcome! Credits: @fabiobassa for his ideas, inspiration, great generosity in giving the boards for development and testing. The project of bringing rk322x into armbian would not have begun without his support! Justin Swartz, for his work and research to bring mainline linux on rk3229 (repository here) @knaerzche for his great contribution to libreelec support and mainline patches @Alex83 for his patience in testing the NAND bootloader upgrade procedure on his board @Jason Duhamell for his generous donation that allowed researching eMCP boards and esp8089 wifi chip
-
@SUPAThere is a lot more to building a system than just the kernel. That is what Armbian tries to do for you. I recommend that you use the Armbian build system. You should be able to build the system that you want. The audio patches do include analog audio, but to date there is still a problem and it does not start up. The armbian-config procedure has options to load kernel headers and also source.
-
Hello, Has anyone solved compiling kernel > 6 for Radxa CM3?
-
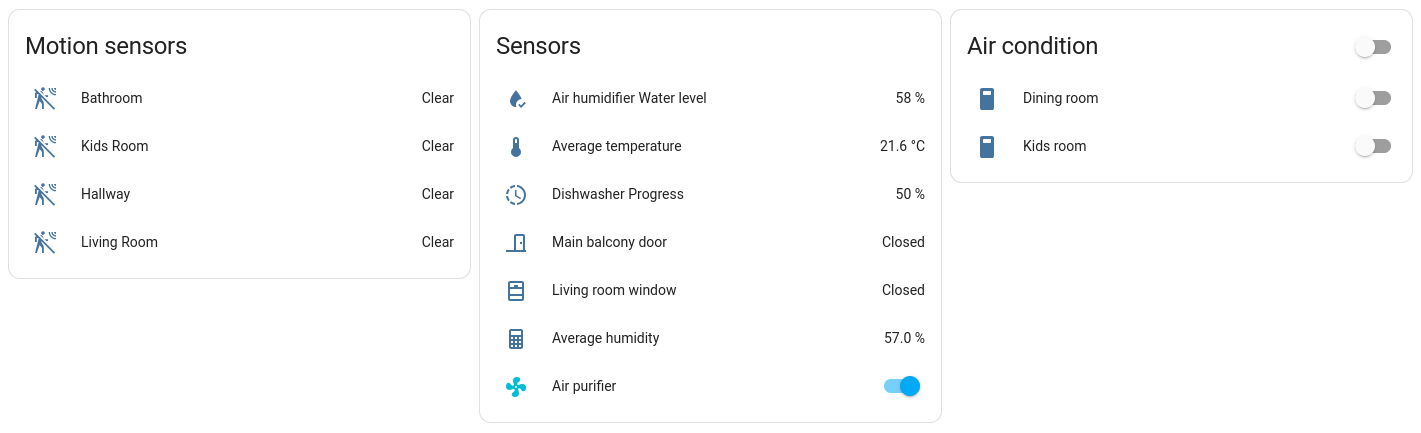
 Download Armbian with HA Then boot the image, wait few minutes and login via http://ip_address_of_armbian_running_ha:8123 (official onboarding manual) Home Assistant Supervised is, more or less, a full blown Home assistant. Main difference between HA OS and Armbian with HA is that underlying OS here is clean Armbian Debian Bookworm and there is custom dedicated buildroot OS that is provided for a few single board computers, primarily for Raspberry Pi. We provide HA on a small selection of single board computers, but in theory, its possible to run this on (almost) all that are possible to build. I am running HA on Odroid N2+ and it works without any problems. I have z-wave network with sensors and switches, air humidifier, Android TV, Android phones, dishwasher, ... Things works flawlessly, much better then few years back when I started with home automation for a first time, with OpenHab. This time it was setup from scratch and in a matter of days, most of devices are in function, playing with automation. Tested on: Odroid N2/N2+ Odroid M1 Nanopi R4S Rock 5B Uefi-x86 Khadas VIM1S Khadas VIM4 (Amlogic vendor kernel trouble, failing / need inspection) Bananapi M2 Pro Provided for but untested (images you find on board downloads locations, seek them here https://www.armbian.com/download/😞 DIY Contribute Support: single board computer hardware https://www.armbian.com/bugs home assistant functions https://community.home-assistant.io/
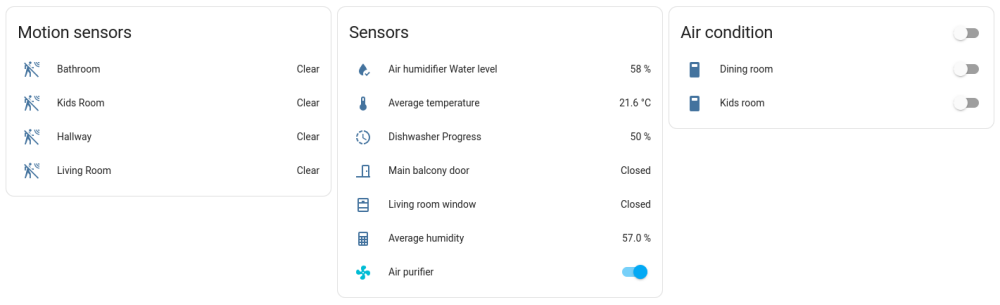

-
Bigtreetech CB2 and Pi 2 released somewhat recently (April 20th). They use RK3566 and have a lot of nice features. The board and module are intended for 3d printer use but can be used just like any other pi. There is an official linux image on bigtreetech github, and it seems it's a slightly customized armbian. I propose copying that configuration and adding it as a supported board. This is a bit of a personal tangent, but I was also thinking of how I can submit the device tree files to the mainline linux kernel, would that be a good idea? I'm planning to use or at least try Alpine on the board and it would be nice to have the needed files in the linux package already.
-
@Stephen Graf i see that if i use the original kernel source i want to build patched linux-image and linux-header for armbian jammy 6.6.26. It seems to include support for analog audio. I compile and install these using . **************** i have already tested all my components on jammy 6.6.26 thats why I would prefer using it ========================= Here are my cheat sheets: wget https://cdn.kernel.org/pub/linux/kernel/v6.x/linux-6.6.26.tar.xz tar -xvf linux-6.6.26.tar.xz cd ~/src/kernel-source/linux-6.6.26 copy all patches into ~/src/kernel-source/linux-6.6.26 cp /boot/config-$(uname -r) .config patch -p1 < 0606-dma-sun6i-dma-add-h616-support.patch patch -p1 < 0608-sound-soc-sunxi-add-codec-driver-for-h616.patch patch -p1 < 0609-sound-soc-add-sunxi_v2-for-h616-ahub.patch patch -p1 < 0630-arm64-dts-allwinner-h616.dtsi-add-ths-audio-hdmi.patch patch -p1 < 0631-arm64-dts-allwinner-h616-OrangePI-Zero23-enable-ths-hdmi-audio.patch patch -p1 < 0639-arm64-dts-allwinner-h616.dtsi-add-spdif.patch yes "y" | make oldconfig sudo make prepare sudo make clean cd ~/src/kernel-source/linux-6.6.26 sudo make -j$(nproc) bindeb-pkg LOCALVERSION=-custom cd ~/src/kernel-source/ sudo dpkg -i linux-image-6.6.26-custom_6.6.26-gbbc005ee4185-6_arm64.deb sudo dpkg -i linux-headers-6.6.26-custom_6.6.26-gbbc005ee4185-6_arm64.deb sudo dpkg -i linux-libc-dev_6.6.26-gbbc005ee4185-6_arm64.deb ls -l /boot/Image ls -l /boot/uInitrd ln -sf /boot/vmlinuz-6.6.26-custom /boot/Image ln -sf /boot/initrd.img-6.6.26-custom /boot/uInitrd cd ~/src/kernel-source/linux-6.6.26 make dtbs sudo mkdir /boot/dtb-6.6.26-custom/allwinner sudo cp /root/src/kernel-source/linux-6.6.26/arch/arm64/boot/dts/allwinner/*.dtb /boot/dtb-6.6.26-custom/allwinner/ sudo ln -sfn /boot/dtb-6.6.26-custom /boot/dtb sudo reboot now however my board doesnt boot. Do you have any suggestions? maybe u-boot? I have created the needed symlink which I though would be enough for u-boot. Maybe my approach is completely wrong
-
Ver 20240503 kernel 5.10.198 , 6.2 and 6.8 add wifi
-
 Description Update the kernel to use the preset configurations so that you don't need an external keyboard to access the desktop Jira reference number [AR-9999] How Has This Been Tested? Please describe the tests that you ran to verify your changes. Please also note any relevant details for your test configuration. [x] Flash and directly boot to the desktop Checklist: Please delete options that are not relevant. [x] My code follows the style guidelines of this project [x] I have performed a self-review of my own code [x] I have commented my code, particularly in hard-to-understand areas [x] My changes generate no new warnings [x] Any dependent changes have been merged and published in downstream modules View the full article
 -
 Never heard of a service like this. If you want persistent iptables rules install code { font-family: Consolas,"courier new"; color: crimson; background-color: rgba(0, 0, 0, 0.2); padding: 2px; font-size: 105%; } iptables-persistent package via apt. iptables is active already once the kernel module is loaded which most likely is by default.
 -
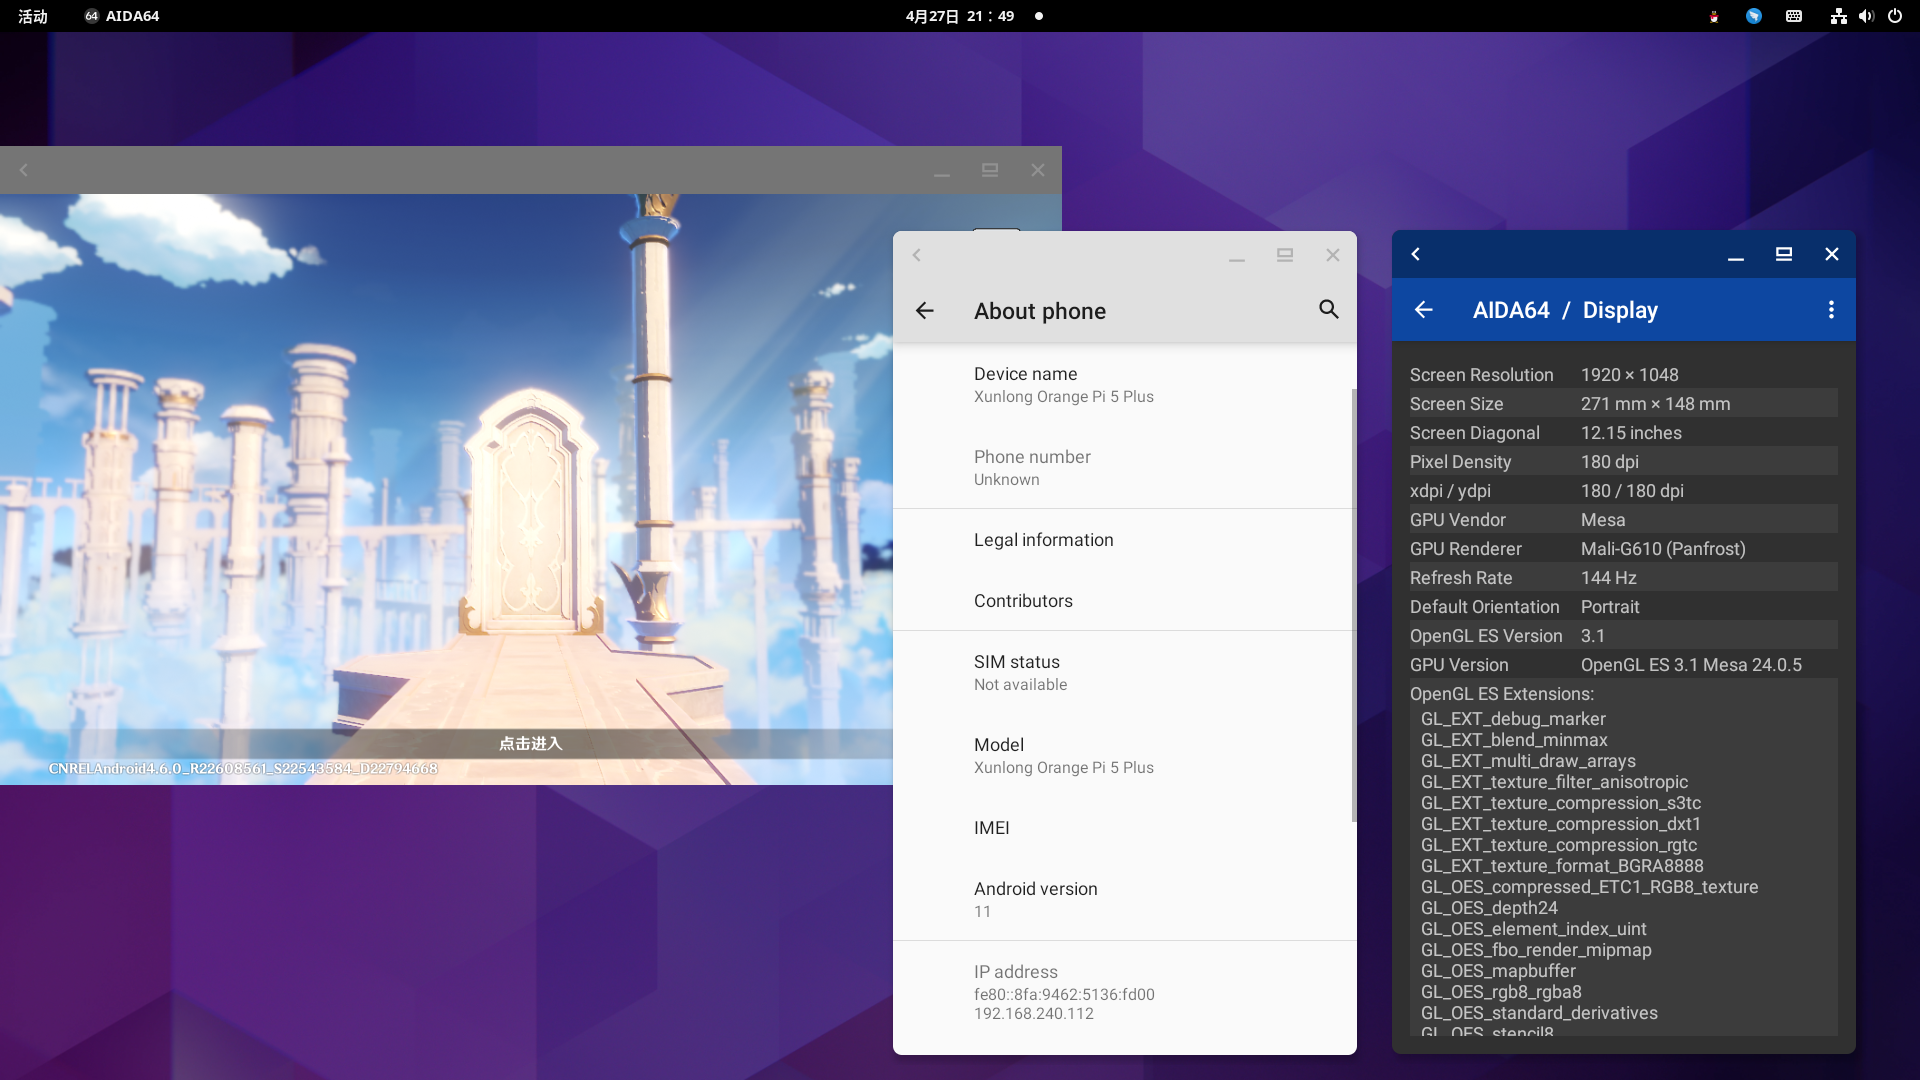
 Updated: The Armbian vendor kernel version now includes Panthor, and will soon be able to run it as well. Waydroid images: https://github.com/WillzenZou/armbian_fork_build/releases/download/willzen-armbian-24.5.0/2.waydroid-panthorv10-240416-v1.img.tar.gz Note: Waydroid needs to be run in the Wayland desktop environment. (Such as Gnome wayland, KDE wayland session) What's work: OpenGL ES is ok, I have tested some game: Mincecrat, gameSHINE, Monument Valley 2 What's not work: Vulkan. Video hardware decode and encode. How to use Waydroid 1. To install Waydroid, refer to the tutorial : https://docs.waydro.id/faq/using-custom-waydroid-images https://docs.waydro.id/usage/waydroid-command-line-options sudo apt install curl ca-certificates -y curl https://repo.waydro.id | sudo bash sudo apt install waydroid 2. Extract Waydroid system image waydroid-panthorv10-240416-v1.img.tar.gz to /usr/share/waydroid-extra/images and initialize it, there are system.img and vendor.img in it sudo waydroid init -f -i /usr/share/waydroid-extra/images 3. Other more useful parameters that need to be operated after waydroid session start Enable/disable multi-window: waydroid prop set persist.waydroid.multi_windows true waydroid prop set persist.waydroid.multi_windows false Install and start the app (also visible in the app menu after installation): waydroid app install com.app.apk waydroid app launch com.app List of apps: waydroid app list source code(needs morre work): https://github.com/WillzenZou/android_external_mesa3d

-
You are using a lot of our work also if you use images for Orangepi 5 with different name, from different DJs and / or even official ones. Official Debian and Ubuntu images are shameless copy of Armbian, assembled with old tools and slightly different - some features will work better, some not. As they are never upgraded, they never breaks. We work together with Joshua-Riek on kernel and other things. Images should behave more or less the same, but as they were not released at the same time, diff exists. If your problem is fixed in our images, nobody will check this for you because this is not a commercial product and you are not a customer - there are daily automated builds at the download page. Try them. We can't spoil you with writing fancy manual and make better support as we will gain nothing. Competitors (Orangepi and copycats) are not copy pasting code we made (remember this is open source world), they also copy pasting instructions we make. Ask Orangepi to cover those costs (they will ofc not) or you cover them. Problem is that for 99% of projects costs we have to find elsewhere (most people have jobs somewhere) or do it for free (slave work when abuse is used. And this exists in large scale). Donations only cover 0.5% ... Asking for more, from end user perspective, is rude. Mitigating your debt first? Every donation counts. Complex software without active maintaining will start to fall apart, but people that made money with you will be long gone by then. Regressions will happen and again we will be the one behind ...
-
Hey @jock I need to install the kernel headers on Armbian. So I've tried to build the legacy kernel with flag "INSTALL_HEADERS=yes" I builded it like this: cd /opt git clone -b history-rk322x-family https://github.com/paolosabatino/armbian-build.git build cd build ./compile.sh docker-shell ./compile.sh BOARD=rk322x-box BRANCH=legacy RELEASE=focal BUILD_MINIMAL=yes BUILD_DESKTOP=no KERNEL_CONFIGURE=yes INSTALL_HEADERS=yes KERNEL_KEEP_CONFIG=yes But the results were these: |🔨] Get:30 http://ports.ubuntu.com focal-updates/multiverse Translation-en [7,880 B] [🐳|🔨] Get:31 http://ports.ubuntu.com focal-backports/main armhf Packages [45.3 kB] [🐳|🔨] Get:32 http://ports.ubuntu.com focal-backports/main Translation-en [16.3 kB] [🐳|🔨] Get:33 http://ports.ubuntu.com focal-backports/universe armhf Packages [24.2 kB] [🐳|🔨] Get:34 http://ports.ubuntu.com focal-backports/universe Translation-en [16.3 kB] [🐳|🔨] Reading package lists... [🐳|🔨] E: The repository 'http://apt.armbian.com focal Release' does not have a Release file. [🐳|🚸] Command failed, retrying in 5s [ chroot_sdcard_apt_get_update ] [🐳|🔨] Hit:2 http://ports.ubuntu.com focal InRelease [🐳|🔨] Hit:3 http://ports.ubuntu.com focal-security InRelease [🐳|🔨] Hit:4 http://ports.ubuntu.com focal-updates InRelease [🐳|🔨] Ign:1 http://armbian.tnahosting.net/apt focal InRelease [🐳|🔨] Hit:6 http://ports.ubuntu.com focal-backports InRelease [🐳|🔨] Err:5 http://xogium.performanceservers.nl/apt focal Release [🐳|🔨] 404 Not Found [IP: 198.140.141.60 80] [🐳|🔨] Reading package lists... [🐳|🔨] E: The repository 'http://apt.armbian.com focal Release' does not have a Release file. [🐳|🚸] Command failed, retrying in 5s [ chroot_sdcard_apt_get_update ] [🐳|🔨] Hit:2 http://ports.ubuntu.com focal InRelease [🐳|🔨] Hit:3 http://ports.ubuntu.com focal-security InRelease [🐳|🔨] Hit:4 http://ports.ubuntu.com focal-updates InRelease [🐳|🔨] Ign:1 http://armbian.tnahosting.net/apt focal InRelease [🐳|🔨] Hit:5 http://ports.ubuntu.com focal-backports InRelease [🐳|🔨] Err:6 http://mirrors.jevincanders.net/armbian/apt focal Release [🐳|🔨] 404 Not Found [IP: 172.93.158.60 80] [🐳|🔨] Reading package lists... [🐳|🔨] E: The repository 'http://apt.armbian.com focal Release' does not have a Release file. [🐳|🚸] Command failed, retrying in 5s [ chroot_sdcard_apt_get_update ] [🐳|🚸] Command failed 3 times, giving up [ chroot_sdcard_apt_get_update ] [🐳|💥] Error 1 occurred in main shell [ at /armbian/lib/functions/rootfs/rootfs-create.sh:164 create_new_rootfs_cache_via_debootstrap() --> lib/functions/rootfs/rootfs-create.sh:164 create_new_rootfs_cache() --> lib/functions/rootfs/create-cache.sh:69 do_with_logging() --> lib/functions/logging/section-logging.sh:81 artifact_rootfs_build_from_sources() --> lib/functions/artifacts/artifact-rootfs.sh:80 artifact_build_from_sources() --> lib/functions/artifacts/artifacts-obtain.sh:34 obtain_complete_artifact() --> lib/functions/artifacts/artifacts-obtain.sh:280 build_artifact_for_image() --> lib/functions/artifacts/artifacts-obtain.sh:392 get_or_create_rootfs_cache_chroot_sdcard() --> lib/functions/rootfs/create-cache.sh:83 build_rootfs_and_image() --> lib/functions/main/rootfs-image.sh:14 full_build_packages_rootfs_and_image() --> lib/functions/main/default-build.sh:36 do_with_default_build() --> lib/functions/main/default-build.sh:42 cli_standard_build_run() --> lib/functions/cli/cli-build.sh:25 armbian_cli_run_command() --> lib/functions/cli/utils-cli.sh:136 cli_entrypoint() --> lib/functions/cli/entrypoint.sh:176 main() --> ./compile.sh:50 ] [🐳|💥] Cleaning up [ please wait for cleanups to finish ] [🐳|🌿] Unmounting recursively [ SDCARD - be patient ] [🐳|🌱] Unmounted OK after 2 attempt(s) [ SDCARD ] [🐳|🌿] Unmounting recursively [ MOUNT - be patient ] [🐳|🌿] ANSI log file built; inspect it by running: [ less -RS output/logs/log-build-f4961847-8e5a-40a8-a7cd-ecb4e58220c3.log.ans ] [🐳|🌿] Share log manually (or SHARE_LOG=yes): [ curl] Am I doing something wrong?
-
 Hello, I have a bunch of boards (rpi4b, rpi5, orangepi5, orangepi5-plus, nanopct6, rock3a, rock5b, vim4) in a Kubernetes cluster using Cilium. Cilium requires CONF_SCHEDSTATS=y in the kernel, which is dependent on CONFIG_DEBUG_KERNEL=y but... in build/lib/functions/compilation/armbian-kernel.sh we have # DONE: Disable: debug option kernel_config_set_n DEBUG_KERNEL # Armbian doesn't know how to package a debug kernel. Which invalidates the option I enabled during ./compile.sh BOARD=... BRANCH=... kernel-config Except for the VIM4, with DEBUG_KERNEL enabled in build/config/sources/families/meson-s4t7.conf Is there a way to enable DEBUG_KERNEL for the rest of the boards? Thank you! Stefanita Vilcu
 -
Hi @Stephen Graf, thank you so much for these images. you are correct. Having audio even on HDMI is extremely useful. Do you perhaps have the kernel headers for this image? https://drive.google.com/file/d/1jIMTIqKc6y_uuG7lRyXXhIWQ_fvo0XgI/view?usp=drive_link Also, Could you create an image for armbian jammy, or provide steps so that i can do it. Armbian_community_24.5.0-trunk.93_Orangepizero3_jammy_current_6.6.18_gnome_desktop.img
-
Description There is no official SDK released for rk3576 so we have to use kernel and uboot from rockchip's internal (beta I guess) repo. I wish this rk3576 family can get deleted when rockchip release new SDK for all rk35xx socs in the future. I created kernel config based on rk35xx-vendor and enabled rk3576 soc support on top of it. How Has This Been Tested? Please describe the tests that you ran to verify your changes. Please also note any relevant details for your test configuration. [x] ./compile.sh BOARD=armsom-sige5 BRANCH=vendor BUILD_DESKTOP=no BUILD_MINIMAL=no DEB_COMPRESS=xz KERNEL_CONFIGURE=no RELEASE=bookworm KERNEL_GIT=shallow [ ] board booting is not yet tested, I will check it later Checklist: Please delete options that are not relevant. [x] My code follows the style guidelines of this project [x] I have performed a self-review of my own code [ ] I have commented my code, particularly in hard-to-understand areas [x] My changes generate no new warnings [ ] Any dependent changes have been merged and published in downstream modules View the full article
-
Hello everyone Now I have finished compiling armbian once and want to check and change the device tree of uboot, but I don't know where to download it, only see the kernel source code in cache/source, so I want to ask
-
I follow the documentation tutorial step by step, the compilation will sometimes download the kernel and uboot source code, sometimes not download, is there any directive to download all the source code
-
Im running Armbian 24.2.1 jammy on odroidm1 with additional zfs volumes. On update, sometimes I had to reinstall the zfs kernel module, but now I have the problem, that the system does not recognize the kernel headers: sudo apt-get --reinstall install zfs-dkms Reading package lists... Done Building dependency tree... Done Reading state information... Done 0 upgraded, 0 newly installed, 1 reinstalled, 0 to remove and 0 not upgraded. Need to get 2,397 kB of archives. After this operation, 0 B of additional disk space will be used. Get:1 http://mirrors.dotsrc.org/armbian-apt jammy/jammy-utils arm64 zfs-dkms all 2.2.3-1 [2,397 kB] Fetched 2,397 kB in 1s (3,567 kB/s) Preconfiguring packages ... (Reading database ... 72929 files and directories currently installed.) Preparing to unpack .../zfs-dkms_2.2.3-1_all.deb ... Deleting module zfs-2.2.3 completely from the DKMS tree. Unpacking zfs-dkms (2.2.3-1) over (2.2.3-1) ... Setting up zfs-dkms (2.2.3-1) ... Loading new zfs-2.2.3 DKMS files... Building for 6.1.12-rk3568-odroid Module build for kernel 6.1.12-rk3568-odroid was skipped since the kernel headers for this kernel does not seem to be installed. Processing triggers for initramfs-tools (0.140ubuntu13.4) ... update-initramfs: Generating /boot/initrd.img-6.1.12-rk3568-odroid W: Possible missing firmware /lib/firmware/nvidia/tegra194/xusb.bin for built-in driver xhci_tegra W: Possible missing firmware /lib/firmware/nvidia/tegra186/xusb.bin for built-in driver xhci_tegra W: Possible missing firmware /lib/firmware/nvidia/tegra210/xusb.bin for built-in driver xhci_tegra W: Possible missing firmware /lib/firmware/nvidia/tegra124/xusb.bin for built-in driver xhci_tegra update-initramfs: Armbian: Converting to u-boot format: /boot/uInitrd-6.1.12-rk3568-odroid Image Name: uInitrd Created: Thu Apr 25 11:27:48 2024 Image Type: AArch64 Linux RAMDisk Image (gzip compressed) Data Size: 27753116 Bytes = 27102.65 KiB = 26.47 MiB Load Address: 00000000 Entry Point: 00000000 update-initramfs: Armbian: Symlinking /boot/uInitrd-6.1.12-rk3568-odroid to /boot/uInitrd '/boot/uInitrd' -> 'uInitrd-6.1.12-rk3568-odroid' update-initramfs: Armbian: done. I already removed and reinstalled the headers via armbian-config > Headers_remove, Headers_install but without change. apt-get list --installed |grep header linux-headers-edge-rockchip64/jammy,now 24.2.1 arm64 [installed] do I need to create some magic symlinks or parameters for apt-get to get the headers resolved since the kernel version is missing in the package?