Active threads
Showing topics posted in for the last 365 days.
- Today
-
Feel free to test and send a pr with a patch backporting this to 6.18
- Yesterday
-

BTT Pi - ethernet not working after upgrade from 6.12.68 to 6.18.33
txxxxx replied to ilmarietto's topic in BIGTREETECH CB1
i got the same problem my ethernet is gone. how does one downgrade i cant figurer it out at all -

Hardware video acceleration with recent armbian/mainline kernel (Kodi)
robertoj replied to XXXBold's topic in Orange Pi 5
More likely: friendlyelec is maintaining a separate patch (source code additions to the official ffmpeg), that allows it to do it. The code should be available in the friendlyelec github, to be shared with the public. "No v4l2request"... that means that they implemented another protocol and/or another kernel module to work with the video decoder. -
 Thank you for your reply. My H96 Max M9 is running Android 14 with the original stock firmware. I have not installed Armbian or any Linux-based operating system. Therefore, I don't think I can run sudo armbianmonitor -u on the TV box. Is there an equivalent way to collect and share the Android system logs, for example using ADB and adb logcat or dmesg? The problem appears when Android's system file picker/Storage Access Framework is used by applications such as PPSSPP and Dolphin Emulator.
 -
That's the advantage when you use a device that doesn't have a PMIC and only goes into deep sleep mode for Off Mode. This is only supported by the proprietary, closed-source manufacturer firmware, for which of course no publicly available API description exists. Mainline support will therefore most likely not become available. So it basically just leaves reverse engineering and an out-of-tree implementation. Good luck.
-
moved to tvboxes
-
The board should have RT8821CU as wifi chip. Since Linux 6.17 there is no out of tree driver necessary anymore, mainline i used. So perhaps this is a an issue or regression upstream. You can try to switch to edge kernel, perhaps this has been addressed but not back-ported.
- Last week
-
Hello, I believe @m1zfs's work on the DKMS modules is available here: https://github.com/vitalijborissow/rk3568-npu-ODROID-M1 I have spent many hours trying to get the NPU working on my ODROID-M1 (8 GB) running Armbian 26.5.1 with current kernel 6.18.x as well as edge kernels 6.19 and 7.1. I also tried building the latest Armbian image from source (July 19 build including U-Boot 2026.07), but so far I have not been able to get the device tree / overlay and DKMS modules from the repository working on any of these combinations. The system always fails to boot. Fortunately, I can capture the boot process through the serial console and see where it fails. The log shows a kernel exception related to enabling the RK3568 NPU power domain: rockchip-pm-domain fdd90000.power-management:power-controller: failed to get ack on domain 'npu', val=0x1ee platform fde40000.npu: Adding to iommu group 3 Internal error: synchronous external abort ... Workqueue: pm genpd_power_off_work_fn ... rockchip_pd_power From the log it appears that the crash occurs before rknpu.ko is loaded. This makes me believe the issue is more likely related to the device tree, overlay, power-domain, regulator, or clock configuration rather than to the DKMS module itself. Has anyone seen a similar issue on recent Armbian kernels, or can suggest a direction for further troubleshooting? I am still willing to spend some time investigating this and would appreciate any ideas or hints.
-
OK great that you got it working now! 2GB RAM works fine for HA, at least when running Supervised. I am not sure if Armbian can improve more when Supervised, as this is not supported anymore from the providers/developers of Home Assistant. I think a reason people go from SBC to Intel NUC is because there are things like VMware that IT pros might know from their profession/company. And RPL very long by default had/advised to use 32-bit also on more capable devices like RPi4 with 2GB RAM or even more. And also running from SD-card, and those wear out under high load and many writes. The whole problem with 'traditional RPi' is that it is unusual 32-bit ARMv6 build and not the standard 32-bit ARMv7 which is the minimum for support from Debian and most other distros. And in addition, 32-bit builds do not support the standard Linux Kernel Virtual Machine HW, standard in all 64-bit capable CPU's. Intel/AMD CPU's have support for HW virtualization also for 32-bit and much more known and commercial (also closed-source) hypervisors like VMware are pushed a lot more then the standard Linux build-in QEMU/libvirtd/KVM. So with 64-bit Linux, especially also on ARM, you get it by 'apt install virt-manager' and then you can run other OSses/images at full HW speed and is separated from the host OS, e.g. Armbian. Because images, many files or bigger databases are a burden for simple SD-card. Also because multiple OSses at the same time, it easily needs more RAM than the usual 1GB on SBC's like RPI3. Via virt-manager GUI and also CLI tool virsh, you can then run the generic UEFI bootable HAOS. For long-term and decent 24/7 operation, you will need SSD for storage. RPi's don't have that, you need adapters and HATs etc. But many other SBC's do have, so if you have an unused NVME for example, it fits perfectly in RK388 boards like ROCK5B for example. It is 4-lane PCI-E v3, so similar speed as Intel miniPC's. And most important, lower power consumption for similar total system price, at least before the RAM+storage prices went sky high. I measured my NanoPi-R6C with Samsung 970 NVME and Armbian Trixie (6.1.115 kernel) and is about 1.5 Watt when idle or doing some light tasks like running simple initial HAOS as Virtual Machine. See also:
-

Rupa X88 Pro 13 - RK3528 board with images
Joao Cordeiro replied to fedes_gl's topic in Rockchip CPU Boxes
You are not the 1st to do this: Let me explain the problem first. The CPU itself, without any storage attached, has a built-in U-Boot. However, this U-Boot does not initialize video output, so you won't be able to see it on an HDMI screen. (The good news is that it usually initializes the serial port.) This U-Boot reads environmental data from a data blob on the MMC (usually within the first 10 MB of the disk). This environmental data tells the U-Boot the sequence of commands needed for the MMC/USB U-Boot to boot. Once the MMC/USB U-Boot boots, you get video output. The problem is that you deleted the data blob containing the environmental data from the MMC, so the CPU's U-Boot does nothing. It just loops, saying that it found no device to boot. If you have a serial adapter, it is possible to interact with this CPU U-Boot. Pressing Ctrl+C (in a terminal that does not intercept Ctrl+C—my advice is to use PuTTY, even on Linux) should stop whatever it is doing. By interacting with this CPU U-Boot, you can instruct it how to boot your MMC or USB U-Boot. However, you will have to do this manually every time you boot. To fix the issue, you need to restore that data blob containing the properties to its specific location on the MMC. I don't know where it starts or what format it uses, so I was unable to recreate one from scratch. My way of fixing this was to find a backup of the original MMC and restore the first GB. So, did you make a backup? If yes, you can restore it with some serial magic. If you did not make a backup, you can search for one or ask someone who has one. (check that this thread for the other guy's solution) -
Yes. commit 6df6d0d607abfd59169a0ef2fddbed5fcd5b58f9 Author: EvilOlaf <werner@armbian.com> Date: Thu Feb 26 18:09:38 2026 +0000 rockchip64: 7.0: Rebase on top of main diff --git a/patch/kernel/archive/rockchip64-6.19/0000.patching_config.yaml b/patch/kernel/archive/rockchip64-7.0/0000.patching_config.yaml similarity index 100% rename from patch/kernel/archive/rockchip64-6.19/0000.patching_config.yaml rename to patch/kernel/archive/rockchip64-7.0/0000.patching_config.yaml diff --git a/patch/kernel/archive/rockchip64-6.19/add-board-helios64.patch b/patch/kernel/archive/rockchip64-7.0/add-board-helios64.patch similarity index 100% rename from patch/kernel/archive/rockchip64-6.19/add-board-helios64.patch rename to patch/kernel/archive/rockchip64-7.0/add-board-helios64.patch :
-

RADXA Cubie A5E 1GB RAM Armbian CLI stucks while uboot via sdcard
Guation replied to chapeaufer's topic in Allwinner sunxi
Hi domillo, If the green light has started flashing, it may indicate that the system has been started, but at this point, we cannot determine the IP address of the Cubie a5e. Once you have a UART adapter, please try to capture the DRAM parameters of the Cubie a5e according to this document: radxa-cubie-a5e-u-boot/README.md Guation -
WOL might work on a newer 6.18 release of the kernel. Btw do I have it right that you're using Armbian without OMV?
-
Small update: the patch series on GitHub is now up to date with what I actually run on the board. It went from 106 to 129 patches, all on vanilla 6.18.38. https://github.com/ut-slayer/orangepi-4a-mainline What's new since the last drop: The GPU was running at the wrong frequencies (and now it isn't). This is the interesting one. The A523 GPU clock is not a linear divider — it's a cycle-masking one: rate = source * (16 - M) / 16. Everyone modelled it as linear, including the vendor BSP. The practical effect: what the kernel labelled "150/200/300/400/600 MHz" was really running at 487/648/560/750/599 MHz. So the GPU was faster than advertised, and thermal throttling to "400 MHz" actually raised the clock to 750. To be clear: nothing was ever unsafe. It ran like that for weeks, stable, at 920 mV, with temperatures in the normal range — the chip simply tolerates it. But the labels were wrong, throttling did the opposite of what it should, and you cannot tune power/performance on numbers that aren't real. Now the five operating points measure 149/199/300/399/597 MHz with the Mali cycle counter, from the intended parents. Credit where it's due: Chen-Yu Tsai spotted the fractional divider while reviewing a patch I sent upstream. That review also produced a Reviewed-by for the generic clk fix, which is now on the lists. PCIe / M.2. The controller and the Innosilicon combo PHY now probe, link training runs and the root port enumerates. I want to be honest about the limit of that statement: I don't own an NVMe drive, so I have only tested it with an empty slot. The bus comes up and behaves; whether a real drive negotiates, enumerates and performs is something I genuinely cannot confirm. If anyone here has an M.2 NVMe in this board, that report would be very welcome — including a failure report, which is just as useful. (Kernel side comes from Marvin Wewer's Armbian series, authorship preserved, plus a 1-lane fix from the BSP and the device-tree wiring for this board.) Hardware video decode works for H.264/H.265. With the cedar-ve shim in this tree plus the Allwinner userspace (libcedarc + gstreamer1.0-omx), YouTube plays smoothly in a WebKit browser (I use Cog). VP8/VP9 do not — that engine never raises its interrupt — so those codecs are capped and YouTube negotiates H.264 instead. Note the userspace half is not in the patch series and not in the published images yet. Also in: a display fix for a frame that could get stuck after direct-scanout transitions, and JOYDEV/UINPUT enabled (analog sticks were dead in software that opens /dev/input/jsN first). Images: the published v0.2 images are now well behind this. Refreshed Debian images (Desktop and CLI) built on this kernel are in preparation. No date promised — they go up when they're tested. Thanks again to everyone testing and reporting here; the eMMC and 4 GB confirmations came from this thread, and the PCIe work started because someone took the trouble to diagnose why NVMe didn't show up.
-
It'll have kernel 6.18 on edge soon with working fans.
-
This week's updates center on new hardware enablement, a broad U-Boot v2026.07 modernization, and build system hardening for toolchain and infrastructure changes. Board support expanded across multiple SoC families, including the X88 PRO RK3566 TV box, Avnet MaaXBoard 8ULP (i.MX8ULP), EASY EAI Nano (RV1126), and the AYN Odin3. The Youyeetoo R1 v3 was promoted to standard support with named audio outputs, while the Radxa Dragon Q8B gained an edge kernel (7.1) target. Rockchip work included RK3588 CAN support for kernels 6.18/7.1/7.2, HDMI-RX fixes on the OrangePi 5 Ultra, and Mixtile Blade3 refinements on the 7.2 bleeding edge. A coordinated U-Boot bump to v2026.07 landed across Helios4, Odroid HC4/M1, Turing RK1, Radxa E52C, Qidi X6, Mekotronics R58X-Pro, and the Espressobin/Macchiatobin (paired with TF-A 2.14.0). This surfaced toolchain issues on Trixie, addressed through SWIG 4.3 pylibfdt compatibility, demotion of gcc 14 int-conversion and implicit-declaration errors to warnings, and related pin cleanups. Infrastructure work strengthened build reliability and CI. The rootfs stage gained DNS fallback and apt retry hardening for chroot operations, armbian-firstlogin received power-loss recovery with atomic writes, and armbian-install now reports bootloader write failures explicitly. Docker framework updates enable native riscv64 image generation on trixie and noble runners, while new extensions introduce sysrq serial trigger, kernel-debug tiers, ram-boot via rkusbboot, and generic SATA park-on-shutdown enabled by default on the Odroid HC4. #Armbian #EmbeddedLinux #UBoot #Rockchip #RISCV ChangesAdd support for X88 PRO RK3566 TV box. by @Ovaday in armbian/linux-rockchip#500Add AI-driven README updater (central, cross-repo). by @igorpecovnik in armbian/armbian.github.io#359Add Avnet MaaXBoard 8ULP (i.MX8ULP) support. by @govindsi in armbian/build#9991Add AYN Odin3 firmware. by @kasimling in armbian/firmware#136Add ayn-odin3 board image. by @kasimling in armbian/armbian.github.io#358Add board: EASY EAI Nano RV1126. by @hqnicolas in armbian/build#10154Add minimal SWT6621S firmware support for KICKPI K3B. by @retro98boy in armbian/firmware#134armbian-firstlogin: power-loss recovery and atomic writes. by @mingzhangqun in armbian/build#9954armbian-install: report bootloader write failures instead of "Done.". by @iav in armbian/build#10204artifact-rootfs: surface git-log failure when computing configng hash. by @igorpecovnik in armbian/build#9849board: aml-c400-plus: Fix eMMC boot format and partition layout. by @jomadeto in armbian/build#9911boards/easy-eai-nano: enable usb and brcm wifi. by @hqnicolas in armbian/build#10177brcm: add brcmfmac firmware aliases for easy-eai nano (rv1126). by @igorpecovnik in armbian/firmware#133bsp: generic SATA park-on-shutdown (HDD_PARK_ON_SHUTDOWN), enable on Odroid HC4. by @igorpecovnik in armbian/build#10191bsp: use kernel version argument in ABL postinst scripts (fixes #10108). by @rorystandley in armbian/build#10109can: rockchip: add RK3588 CAN support (for kernel v6.18 / v7.1 / v7.2). by @lch08 in armbian/build#10184ci(board-assets): don't check out fork head under pull_request_target. by @igorpecovnik in armbian/build#10194cix-acpi: bump edge to 7.1.y. by @EvilOlaf in armbian/build#10167Cleanup patches. by @EvilOlaf in armbian/build#10174csc board: NORCO EMB-3531: Do not reset LTE moden. by @retro98boy in armbian/build#10222docker/framework: build riscv64 images on native runners (trixie, noble). by @igorpecovnik in armbian/docker-armbian-build#34docker/framework: generate riscv64 images (trixie, noble, resolute). by @igorpecovnik in armbian/docker-armbian-build#33docker/riscv64: fix cross-compiler availability for generate-dockerfile. by @igorpecovnik in armbian/build#9589docker: allow overriding host_arch for foreign-arch Dockerfile generation. by @igorpecovnik in armbian/build#10211docs: refresh README (AI-assisted). by @igorpecovnik in armbian/ci#29Enable memory compaction and RK630 PHY on Rockchip vendor kernels . by @lukaszsobala in armbian/build#10175Enable pwm gpio. by @frank-f in armbian/build#10238extensions/nvidia: per-distro version detection + runtime auto-disable on no-GPU hosts. by @igorpecovnik in armbian/build#9845extensions/radxa-aic8800: use local dir as download cache. by @rpardini in armbian/build#10156extensions/rkusbboot: easy ramboot mainline u-boot on Rockchip devices. by @rpardini in armbian/build#10158feat(extensions): sysrq-serial-trigger + kernel-debug-tiers (on-device kernel debugging via serial console). by @iav in armbian/build#9776feat(flash): keep the success screen when verification is cancelled. by @SuperKali in armbian/imager#166Fix build for Linux 7.1. by @EvilOlaf in armbian/bcmdhd-dkms#7fix hdmi rx on orangepi5 ultra by adding hpd-gpios. by @pdapandapda in armbian/build#10172fix Radxa U-Boot ITB dependency. by @yisding in armbian/build#10196Fix sata2 target-supply for Orange Pi 3B and Station M2. by @dust-7 in armbian/build#10137fix the hdmirx HPD patch against kernel6.18 & kernel 7.1. by @pdapandapda in armbian/build#10180fix(offline): honor OFFLINE_WORK in git-ref2info and memoize TTL. by @iav in armbian/build#9797gha: disable build cronjobs (moved to armbian/ci). by @igorpecovnik in armbian/os#482git: match safe.directory literally, not as a regex. by @igorpecovnik in armbian/build#10223git: silence spurious SUBSHELL error annotation from safe.directory check. by @igorpecovnik in armbian/build#10225helios4: bump u-boot to v2026.07. by @iav in armbian/build#10183helios4: drop stale u-boot patch dir v2025.10/board_helios4. by @iav in armbian/build#10189input: remotectl: rockchip-pwm: prefer dedicated channel-3 IRQ. by @rpardini in armbian/linux-rockchip#503k3: sk-am62-lp: shrink R5 SPL to fit SRAM + silence k3 cp noise. by @igorpecovnik in armbian/build#10230luckfox-lyra-ultra-w: Add spidev overlay with 2 CS. by @vidplace7 in armbian/linux-rockchip#505mainline: bump bleedingedge to v7.2-rc3. by @EvilOlaf in armbian/build#10181mekotronics-r58x-pro: u-boot: bump to v2026.07. by @rpardini in armbian/build#10232mixtile-blade3: edge: u-boot: fancy it up (lwIP, mbedTLS, efi, btrfs, etc). by @rpardini in armbian/build#10234mvebu64: modernize EspressoBin/MacchiatoBin firmware (u-boot 2026.07 + TF-A 2.14.0 + A3720 fixes). by @igorpecovnik in armbian/build#10213odroidhc4: u-boot: bump to v2026.07, drop upstreamed patch. by @rpardini in armbian/build#10233odroidm1: bump u-boot to v2026.07. by @iav in armbian/build#10201Qidi X6: update to u-boot 2026.07. by @Shadowrom2020 in armbian/build#10228radxa-dragon-q8b: add edge kernel (7.1) target. by @SuperKali in armbian/build#10215radxa-e52c: bump uboot to v2026.07. by @okrc in armbian/build#10135Rk3588 es8388 codec silence log. by @CT1IQI in armbian/build#10198rockchip64-6.18: rework rk3588-0010-fix-clk-divisions to avoid patching include/linux/math.h. by @rpardini in armbian/build#10207rockchip64-7.2: bleedingedge: enable REALTEK_PHY_HWMON. by @rpardini in armbian/build#10206rockchip64-7.2: rk3588-mixtile-blade3, many fixes and additions. by @rpardini in armbian/build#10203rootfs-image: move pre_install_distribution_specific inside install_distribution_specific(). by @rpardini in armbian/build#10157rootfs: DNS fallback for build-time chroot resolv.conf. by @igorpecovnik in armbian/build#10205rootfs: harden chroot apt against transient fetch failures (retries + fail-fast update). by @igorpecovnik in armbian/build#10202rootfs: pin tar for resolute kernel deb install (all families). by @igorpecovnik in armbian/build#10187rootfs: revert resolute tar pin (#10187) — fixed upstream. by @igorpecovnik in armbian/build#10209runner-clean: drop stale amlogic FIP source caches. by @igorpecovnik in armbian/actions#28runner-clean: ensure tree is installed on the host. by @igorpecovnik in armbian/actions#27runner-clean: register qemu binfmt handlers on the host. by @igorpecovnik in armbian/actions#26sc8280xp: fix wrong LINUXCONFIG name for the sc8280xp branch. by @igorpecovnik in armbian/build#10227SpacemiT: Defconfig: Enable CONFIG_PWM_PXA. by @fkpwolf in armbian/build#10182sun55iw3-syterkit: skip TF-A build (SyterKit is self-contained). by @igorpecovnik in armbian/build#10214targets: drop resolute from riscv64 userspace builds (RVA23 vs RV64GC). by @igorpecovnik in armbian/ci#27turing-rk1: bump u-boot v2024.04 → v2026.07 (fix SWIG 4.3 build break on trixie). by @igorpecovnik in armbian/build#10216u-boot: bump 2026.07-rc4/rc5 pins to final v2026.07. by @igorpecovnik in armbian/build#10186u-boot: don't error on implicit declarations (gcc ≥ 14 / trixie). by @igorpecovnik in armbian/build#10221u-boot: fix old pylibfdt build against SWIG ≥ 4.3 (trixie). by @igorpecovnik in armbian/build#10217u-boot: sync btrfs zstd short-extent fix into shadowed board/pool copies. by @iav in armbian/build#10208uboot: demote int-conversion & incompatible-pointer-types to warnings (gcc 14). by @igorpecovnik in armbian/build#10224Up rtw8822b to v30.20.0. by @farwayer in armbian/firmware#135update Helios4 BSP postinst. by @leggewie in armbian/build#9065workflows: add Delete Old Releases (copied from os). by @igorpecovnik in armbian/ci#26workflows: enable build cronjobs (taking over from armbian/os). by @igorpecovnik in armbian/ci#25youyeetoo-r1-v3: bump mainline u-boot to v2026.04. by @SuperKali in armbian/build#10219youyeetoo-r1-v3: promote to standard support and name audio outputs. by @SuperKali in armbian/build#10220View the full article
-
 @himigs stupid question, but I'm a total noob in hardware tinkering. On the 4th pic, you have the attached header with pins to UART. Please, tell me, was it necessary to solder it or there are means to connect it without soldering.
 -
hate to bump this thread, but anyone have any luck with hardware decoding in latest Armbian? Tried with 26.5.1 vendor kernel with both gnome and kde. None of the guides seem to work with hardware decoding. Tried the above posted fork as well, but seems 26.6.1 doesn't ship with g610-g24p0-wayland-gbm. Installing it from here just gave me a black screen at boot. Not sure what else to try, I had moonlight working with hardware decoding in 24.8.1 a couple years ago here.
-

Helios64 - Armbian Trixie with linux 6.18 (incl. opp-microvolt patch)
BipBip1981 replied to ebin-dev's topic in Rockchip
Hello, I make two away with both kernel version. With officiel 6.18.35 and a build by me 6.18.37 with armbian build framework. see here: For the moment, i freeze to version kernel 6.18.10 and DTB file patch and all is Okok. Have a good day. -
Looks like I accidentally erased most of my u-boot from SPI flash since I don't have much experience with it. Are there any ways to restore it and what soft- and hardware do I need, apart from having a Linux PC and UART?
-
Updating U-Boot was the solution, kernel is now up to date!!! Thanks everyone for the tips, learned a few new things and the UART cable is really usefull!
-
Much to my chagrin I have had to do a similar dance today after running updates./. I tried sudo dpkg-reconfigure aic8800-usb-dkms but no joy. This time was easier and it was just a matter of getting the firmware and usb module directly from radxa's repo. ```wget https://github.com/radxa-pkg/aic8800/releases/download/5.0%2Bgit20260123.5f7be68d-6/aic8800-firmware_5.0+git20260123.5f7be68d-6_all.deb wget https://github.com/radxa-pkg/aic8800/releases/download/5.0%2Bgit20260123.5f7be68d-6/aic8800-usb-dkms_5.0+git20260123.5f7be68d-6_all.deb``` Then install both of them ```sudo dpkg -i aic8800-firmware_*.deb aic8800-usb-dkms_*.deb``` and then remapping the hardware and restarting ```sudo depmod -a sudo reboot``` Leaving this there... for next time I do an update
-
 I want to compile a matching build for: https://armbian.com/boards/odroidhc4 Debian 13trixie Minimal (CLI)—current6.18.33 https://dl.armbian.com/odroidhc4/Trixie_current_minimal Matching the img is fine (rather than the img.xz). I haven't compiled a matching build yet. I am doing this to debug my issue with the stock builds. Running: ./compile.sh BOARD=odroidhc4 BRANCH=current RELEASE=trixie BUILD_MINIMAL=yes BUILD_DESKTOP=no KERNEL_CONFIGURE=no Logs forthcoming.
 -
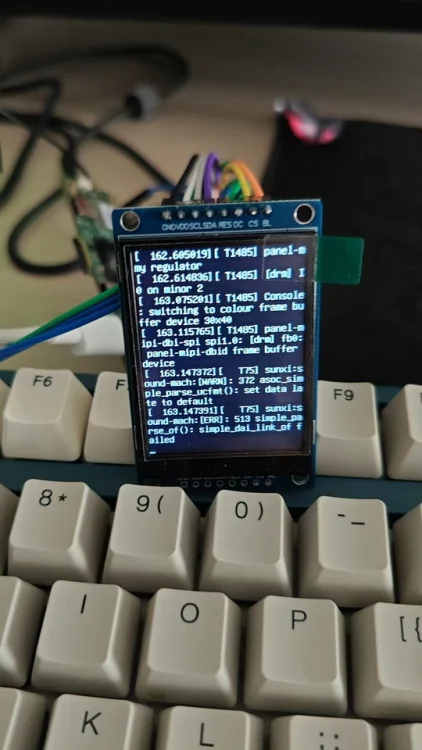
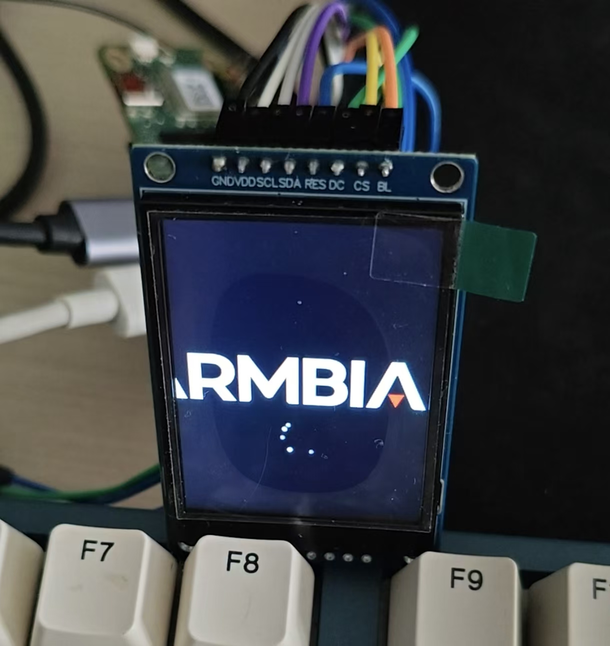
Thanks for the great work Nick. I recently bought a SPI screen and managed to drive it with panel-mipi-dbi in the newer kernel (apparently this module didn't exist in Radxa's official image with kernel 5.15). The panel was a ST7789V 240*320 TFT LCD and I have a A7Z, with the `Radxa-cubie-A7a-a7z-v0.6.4` server image installed. And I have put the work on [Github](https://github.com/parker-int64/sun60i-a733-dtoverlays). During the experiment, I discovered that the PWM (used for display backlight) in the allwinner BSP seems to have a bug. The Allwinner Sunxi PWM driver may incorrectly reverts the PWM pin to GPIO input immediately after switching the pinctrl state. Thus I can control the PWM with the file nodes but can't attached it to related pins. For example, I'm using the `sun60i-a733-pwm1-7.dtso` overlay, which is supposed to enable the PJ25. After enabling the overlay, I noticed that the PWM nodes were created and I can controll these nodes. But the pinctrl suggest that it was unclamied: $ cat /sys/kernel/debug/pinctrl/2000000.pinctrl/pinmux- pins | grep PJ25 pin 313 (PJ25): UNCLAIMED Later on, AI found out that the `devm_pinctrl_put(pctl);` in bsp/drivers/pwm/pwm-sunxi.c may have been incorrectly called on the clean stage of the `sunxi_pwm_pin_set_state`: 520 static int sunxi_pwm_pin_set_state(struct device *dev, char *name) 521 { 522 struct pinctrl *pctl; 523 struct pinctrl_state *state = NULL; 524 int err; 525 526 pctl = devm_pinctrl_get(dev); 527 if (IS_ERR(pctl)) { 528 sunxi_err(dev, "pinctrl_get failed\n"); 529 err = PTR_ERR(pctl); 530 return err; 531 } 532 533 state = pinctrl_lookup_state(pctl, name); 534 if (IS_ERR(state)) { 535 sunxi_err(dev, "pinctrl_lookup_state(%s) failed\n", name); 536 err = PTR_ERR(state); 537 goto exit; 538 } 539 540 err = pinctrl_select_state(pctl, state); 541 if (err) { 542 sunxi_err(dev, "pinctrl_select_state(%s) failed\n", name); 543 goto exit; 544 } 545 546 exit: 547 /* 548 * devm_pinctrl_put() releases the last pinctrl reference, 549 * causing pinmux_disable_setting() to restore the pin to 550 * its default GPIO function. The devres framework will 551 * release this resource automatically when the device is 552 * destroyed. 553 */ 554 devm_pinctrl_put(pctl); 555 return err; 556 557 } Also it gives me a workaround `sunxi-pwm-child-pinctrl.c`, introduces an additional pinctrl reference, preventing `devm_pinctrl_put()` from reducing the reference count to zero. Both the patch file and the workaround source is available on Github. However I only tried the workaround since I have some trouble compile the full kernel at the moment, will try some time later and update more details on Github. And at last the pwm-backlight worked as expected and my LCD light up.