Search the Community
Showing results for 'usb power'.
-
DISCLAIMER (PLEASE READ): everything you can find in this thread (binaries, texts, code snippets, etc...) are provided AS-IS and are not part of official Armbian project. For this reason not people from Armbian project nor myself are responsible for misuse or loss of functionality of hardware. Please don't ask about support or assistance in other non-community forums nor in the official Armbian github repository, instead post your questions in this thread, in the TV Boxes forum section (hardware related) or in the Peer-to-peer support section (general linux/software related). Thank you! This thread is to give stable and mature long-term range support to rk3318/rk3328 found in many tv boxes in Armbian project as Community Supported Configuration (CSC). The current work is mainlined into Armbian project, but your mileage may vary; most recent developments live on my personal fork on github -> here <- Important notes: is just a personal opinion, but apparently widely supported, that rk3318 chip is not an official rockchip part. They probably are scrap rk3328 parts which have not passed conformance tests but are sold anyway to tv boxes manufacturers. They don’t reach the same operating frequency of the rk3328, have much higher leakage currents (and thus higher temperatures) and often the boards they are installed on are low quality with low quality components, in fact a very very common issue is the eMMC failure due to bad parts and bad soldering. So said, I personally suggest not to buy any rk3318 tv box, but instead find a properly supported SBC (Single Board Computer) if you need a reliable product. In the unfortunate case you already have such product, this thread may help you have some fun with them. What works: • Works on RK3318 and RK3328 TV boxes with DDR3 memories • Mainline u-boot • Mainline ATF provided as Trusted Execution Environment • All 4 cores are working • Ethernet • Serial UART (configured at stock 1.5Mbps) • Thermals and frequency scaling • OTG USB 2.0 port (also as boot device!) • EHCI/OHCI USB 2.0 ports and XHCI USB 3.0 ports • MMC subsystem (including , SD and sdio devices) • Hardware video acceleration (fully supported via RKMPP on legacy kernel, support via hantro and rkvdec kernel driver on mainline) • Various WIFI over SDIO are supported • Full acceleration on legacy kernel and mainline kernel • U-boot boot order priority: first the sdcard, then the USB OTG port and eventually the internal ; you can install u-boot (and the whole system) in the internal and u-boot will always check for images on external sdcard/USB first. Unbrick: Technically, rockchip devices cannot be bricked. If the internal flash does not contain a bootable system, they will always boot from the sdcard. If, for a reason, the bootable system on the internal flash is corrupted or is unable to boot correctly, you can always force the maskrom mode shorting the clock pin on the PCB. The procedure is explained here for rk322x, but for rk3318/28 is the same. In most of the rk3318/28 boards, shorting the clock pin is difficult or impossible because eMMC are BGA chips with no exposed pins. Pay double attention when burning something on the internal flash memory and always test first the image booting from the sdcard to be sure it works before burning anything in internal flash. This is a list of posts where forum users have been able to spot the eMMC clock pin to trigger the maskrom mode: H96 Max+ (board signature: RK3318_V1.4) by @Gausus X88 PRO 10 (board signature: X88_PRO_B) by @mathgaming Ninkbox N1 Max RK3318 by @enigmasphinx Partecipation and debugging: If you want to partecipate or need help debugging issues, do not hesitate to share your experience with the installation procedure of the boxes. In case of issues and missed support, provide as many as possible of these things is very useful to try and bring support for an unsupported board: some photos of both sides of the board. Details of the eMMC, DDR and Wifi chips are very useful! upload the device tree binary (dtb) of your device. We can understand a lot of things of the hardware from that small piece of data; and alternative is a link to the original firmware (you can do a full backup with the Multitool); dmesg and other logs (use armbianmonitor -u that automatically collects and uploads the logs online) attach a serial converter to the device and provide the output of the serial port; Multimedia: Mainline kernel: 3D acceleration is provided by Lima driver and is already enabled. Hardware video decoding: https://forum.armbian.com/topic/19258-testing-hardware-video-decoding-rockchip-allwinner/ Legacy kernel: If you need multimedia features, like OpenGL/OpenGL ES acceleration, hardware accelerated Kodi, ffmpeg and mpv you can take a look to this post Installation (via SD card): Building: You can build your own image follow the common steps to build armbian for other tv boxes devices: when you are in the moment to choose the target board, switch to /TVB/ boards and select "rk3318-box" from the list. Prebuilt images: Archived images - built by Armbian servers and GPG-signed: https://imola.armbian.com/dl/rk3318-box/archive/ Nightly stables - built from trunk by Armbian servers and GPG-signed: https://github.com/armbian/community Stables provided by me (unsigned): https://users.armbian.com/jock/rk3318/ Multitool: Multitool - A small but powerful image for RK3318/RK3328 TV Box maintenance. Download it from here Quick installation instructions on eMMC: Build or download your preferred Armbian image and a copy of the Multitool; Burn the Multitool on an SD card; once done, place the Armbian image in images folder of the SD card NTFS partition; Plug the SD card in the TV box and plug in the power cord. After some seconds the blue led starts blinking and the Multitool appears; OPTIONAL: you can do a backup of the existing firmware with "Backup flash" menu option; Choose "Burn image to flash" from the menu, then select the destination device (usually mmcblk2) and the image to burn; Wait for the process to complete, then choose "Shutdown" from main menu; Unplug the power cord and the SD card, then replug the power cord; Wait for 10 seconds, then the led should start blinking and HDMI will turn on. The first time the boot process will take a couple of minutes or more because the filesystem is going to be resized, so be patient and wait for the login prompt. On first boot you will be asked for entering a password for root user of your choice and the name and password for a regular user Run rk3318-config to configure the board specific options Run armbian-config to configure timezone, locales and other personal options Congratulations, Armbian is now installed! Despite the procedure above is simple and reliable, I always recommend to first test that your device boots Armbian images from SD Card. Due to the really large hardware variety, there is the rare chance that the images proposed here may not boot. If a bad image is burned in , the box may not boot anymore forcing you to follow the unbrick section at the top of this post. Quick installation instructions to boot from SD Card: If you are already running Armbian from eMMC, skip to the next step. Instead if you are running the original firmware you need to first erase the internal flash; to do so download the Multitool, burn it on an SD Card, plug the SD Card and power the TV Box. Use "Backup flash" if you want to do a backup of the existing firmware, then choose "Erase flash" menu option. Build or download your preferred Armbian image; Uncompress and burn the Armbian image on the SD Card; Plug the SD Card in the TV Box and power it on; Wait for 10 seconds, then the led should start blinking and HDMI will turn on. The first time the boot process will take a couple of minutes or more because the filesystem is going to be resized, so be patient and wait for the login prompt; On first boot you will be asked for entering a password for root user of your choice and the name and password for a regular user Run rk3318-config to configure the board specific options Run armbian-config to configure timezone, locales and other personal options, or also to transfer the SD Card installation to internal ; Congratulations, Armbian is running from SD Card! Tutorial - How to install Armbian on your TV Box (by @awawa) : https://www.hyperhdr.eu/2022/01/tv-box-mania-i-part-x88-pro-10.html A note about boot device order: With Armbian also comes mainline U-boot. If you install Armbian, the bootloader will look for valid bootable images in this order: External SD Card External USB Stick in OTG Port Internal The Multitool does not boot / How to burn image directly on eMMC: Some boards have the sdcard attached to an auxiliary (called also sdmmc_ext or external) controller which is not the common one. Forum findings declare that those boards are not able to boot from sdcard with stock firmware and they neither do in maskrom mode: the stock firmware always boots even if you put the multitool on sdcard. In such case, burning images directly on eMMC is the only way to have a working Armbian installation. You can follow these instructions by @fabiobassa to burn images directly on eMMC: https://forum.armbian.com/topic/17597-csc-armbian-for-rk3318rk3328-tv-box-boards/?do=findComment&comment=130453 Notes and special hardware: Script to change DDR memory frequency here Wireless chip AP2734, SP2734, HY2734C and similars: they are clones of AmPAK AP6334 which is combo wifi + bluetooth of broadcom BCM4334/B0 chips. You may need a special nvram file, instructions by @paradigman are here Critics, suggestions and contributions are welcome! Credits: @fabiobassa for his ideas, inspiration, great generosity in giving the boards for development and testing. The project of bringing rk3318 into armbian would not have begun without his support! @hexdump for his precious support in early testing, ideas and suggestions @MX10.AC2Nfor his patience in testing mxq-rk3328-d4 board support All the rockhip64 maintainers at Armbian project who have done and do most of the work to support the platform
-
DISCLAIMERS (PLEASE READ): Everything you can find in this thread (binaries, texts, code snippets, etc...) are provided AS-IS and are not part of official Armbian project. For this reason not people from Armbian project nor myself are responsible for misuse or loss of functionality of hardware. THIS POST explains very well the troubles with TV Boxes and why they are not suitable for everyone Please don't ask about support or assistance in other non-community forums nor in the official Armbian github repository, instead post your questions in this thread, in the TV Boxes forum section (hardware related) or in the Peer-to-peer support section (general linux/software related). Following the recent thread on LibreElec forum about an unofficial image for rk3229 devices, I would like to make public the work made by me and @fabiobassa about bringing rk322x support to armbian. The project is now in -> mainline Armbian <- development fork -> here <- This first page and the last 3 or 4 pages of the thread are enough to get up to date with recent developments. Many useful experiences are scattered through the thread, but the most important things are collected here in the first page, so please read it carefully! Mainline kernel is fully supported and will receive most support in the future. Legacy kernel 4.4 is deprecated, but is kept around only for special purposes. What works: Should boot and work flawlessy on all boards with RK3228a, RK3228b and RK3229, with either DDR2 and DDR3 memories. Mainline u-boot Proprietary OPTEE provided as Trusted Execution Environment (needed for DRAM frequency scaling) All 4 cores are working Ethernet Serial UART (configured at 115200 bps, not 1.5Mbps!) Thermals, CPU and DRAM frequency scaling OTG USB 2.0 port (also as boot device!) EHCI/OHCI USB 2.0 ports MMC subsystem (including eMMC, SD and sdio devices) Hardware video acceleration NAND is available only on legacy kernel. To fully boot from NAND, use the Multitool and its steP-nand installation (instructions are below) Various WIFI over SDIO are supported (SSV6051P, SSV6256P, ESP8089, Realtek chips, etc...), ssv6256p driver is available only on legacy kernel Full GPU acceleration U-boot boot order priority: first the sdcard, then the USB OTG port and eventually the internal eMMC; you can install u-boot (and the whole system) in the internal eMMC and u-boot will always check for images on external sdcard/USB first. Unbrick: Technically, rockchip devices cannot be bricked. If the internal flash does not contain a bootable system, they will always boot from the sdcard. If, for a reason, the bootable system on the internal flash is corrupted or is unable to boot correctly, you can always force the maskrom mode shorting the eMMC clock pin on the PCB. Here there is the procedure, but you can also google around if you get stuck on a faulty bootloader, the technique is pretty simple and requires a simple screwdriver. There are however some unfortunate cases (expecially newer boards) where shorting the eMMC clock pin is difficult or impossibile, like eMMC or eMCP BGA chips with no exposed pins. In those cases pay double attention when burning something on the internal eMMC/eMCP and always test first the image from the sdcard to be sure it works before burning anything on eMMC/eMCP. Some useful links with pins, pads or procedures for some boards: Generic procedure for boards with non-BGA eMMC MXQPRO_V71 - eMCP H20 - eMCP ZQ01 - eMCP NAND vs eMMC vs eMCP difference: RK3228 and RK3229 tv boxes comes with three different flash memory chips: eMMC, NAND and eMCP. It does not depend upon the market name of the tv box and neither the internal board; manufacturers put whatever they find cheaper when they buy the components. NAND chip is just the non-volatile memory eMMC chip contains both the non-volatile memory plus a controller. eMCP chip contains the non-volatile memory, a controller for the non-volatile memory (like eMMC), but also contains a bank of DDR SDRAM memory on the same physical chip. The difference is very important, because eMMC and eMCP are far easier to support at various levels: the controller deals with the physical characteristics of the non-volatile memory, so the software has no to deal with. NAND chips instead are harder to support, because the software is required to deal with the physical characteristics and non-standard things that depends upon the NAND manufacturer. If you have a NAND chips you're unlucky because mainline kernel currently cannot access it, but also because you need special care and instructions explained later. You can discover if you have a NAND, eMMC or eMCP chip looking on the board are reading the signature on the flash memory chip. The Multitool (see later) also can detect which chip you have onboard: the program will warn you at startup if you have a NAND chip. NAND bootloader upgrade: IMPORTANT: don't do this is you have an eMMC or eMCP; skip this paragraph if you are unsure too! For very expert people who are having issues when (re)booting images, there is the chance to upgrade the bootloader on NAND. The NAND bootloader is nothing else than a regular idbloader (see official rockchip documentation) but contains some bits to correctly access the data on your flash memory. Upgrading requires to erase the existing flash content, in the worst case will require you to follow the Unbrick procedure above or restore an older but more compatible bootloader. If you are not mentally ready to overcome possible further issues, don't do this! The detailed instructions and the binaries are available at this post Multimedia: Mainline kernel: 3D acceleration is provided by Lima driver and is already enabled. Hardware video decoding: https://forum.armbian.com/topic/19258-testing-hardware-video-decoding-rockchip-allwinner/ Deprecated legacy kernel: multimedia features, like OpenGL/OpenGL ES acceleration, hardware accelerated Kodi, ffmpeg and mpv you can take a look to this post An effective tutorial from @Hai Nguyen on how to configure a box as a hi-quality music player using an USB audio card, and controlling it via remote control is available in this post Brief explanation about kernel naming: current kernel is the mainline LTS kernel version, most maintained and tested. This is the suggested version for production devices. If you don't know what to pick, pick this. legacy kernel (version 4.4) is provided by manufacturer; it is deprecated, unmaintained and not suggested. edge kernel is the development mainline kernel version, with experimental features and drivers; usually stable but perhaps suitable for production devices. You can switch from one kernel flavour to another using armbian-config or manually via apt. Installation (via SD card): Building: You can build your own image follow the common steps to build armbian for other tv boxes devices: when you are in the moment to choose the target board, switch to CSC/TVB/EOL boards and select "rk322x-box" from the list. Download prebuilt images from the following links: Archive builds (GPG-signed) - https://imola.armbian.com/dl/rk322x-box/archive/ SUGGESTED - Nightly built from trunk each week by Armbian servers (GPG-signed) - https://github.com/armbian/community Old images provided by me (unsigned and outdated) - https://users.armbian.com/jock/rk322x/armbian/stable Archived/older images: https://armbian.hosthatch.com/archive/rk322x-box/archive/ Multitool: The Multitool is a small but powerful tool to do quick backup/restore of internal flash, but also burn images and general system rescue and maintenance via terminal or SSH. Compressed images will be uncompressed on fly. Multitool - A small but powerful image for RK322x TV Box maintenance (instructions to access via network here) Quick installation instructions on eMMC: Build or download your preferred Armbian image and a copy of the Multitool; Burn the Multitool on an SD card; once done, place the Armbian image in images folder of the SD card NTFS partition; Plug the SD card in the TV box and plug in the power cord. After some seconds the blue led starts blinking and the Multitool appears; OPTIONAL: you can do a backup of the existing firmware with "Backup flash" menu option; Choose "Burn image to flash" from the menu, then select the destination device (usually mmcblk2) and the image to burn; Wait for the process to complete, then choose "Shutdown" from main menu; Unplug the power cord and the SD card, then replug the power cord; Wait for 10 seconds, then the led should start blinking and HDMI will turn on. The first time the boot process will take a couple of minutes or more because the filesystem is going to be resized, so be patient and wait for the login prompt. On first boot you will be asked for entering a password for root user of your choice and the name and password for a regular user Run sudo rk322x-config and select your board characteristics to enable leds, wifi chips, high-speed eMMC, etc... Run sudo armbian-config to configure timezone, locales and other personal options Congratulations, Armbian is now installed and configured! Despite the procedure above is simple and reliable, I always recommend to first test that your device boots Armbian images from SD Card. Due to the really large hardware variety, there is the rare chance that the images proposed here may not boot. If a bad image is burned in eMMC, the box may not boot anymore forcing you to follow the unbrick section at the top of this post. Quick installation instructions on NAND: Build or download your preferred Armbian image and a copy of the Multitool; Burn the Multitool on an SD card; once done, place the Armbian legacy kernel image in images folder of the SD card NTFS partition; Plug the SD card in the TV box and plug in the power cord. After some seconds the blue led starts blinking and the Multitool appears; OPTIONAL: you can do a backup of the existing firmware with "Backup flash" menu option; Choose "Burn Armbian image via steP-nand" from the menu, then select the destination device (usually rknand0) and the image to burn; Wait for the process to complete, then choose "Shutdown" from main menu; Unplug the power cord and the SD card, then replug the power cord; Wait for 10 seconds, then the led should start blinking and HDMI will turn on. The first time the boot process will take a couple of minutes or more because the filesystem is going to be resized, so be patient and wait for the login prompt. On first boot you will be asked for entering a password for root user of your choice and the name and password for a regular user Run sudo rk322x-config and select your board characteristics to enable leds, wifi chips, etc... Run armbian-config to configure timezone, locales and other personal options Congratulations, Armbian is now installed! Alternative: you can install the bootloader in NAND and let it boot from SD Card or USB: Download a copy of the Multitool and burn it on an SD card; Plug the SD card in the TV box and plug in the power cord. After some seconds the blue led starts blinking and the Multitool appears; RECOMMENDED: make a backup of the existing firmware with "Backup flash" menu option; Choose "Install Jump Start for Armbian" menu option: the Jump Start uses the internal NAND to boot from external SD Card or external USB Stick; Follow the general instructions to boot from SD Card below, skip the first erase eMMC step. Quick installation instructions to boot from SD Card: If you are already running Armbian from eMMC, skip to the next step. Instead if you are running the original firmware you need to first erase the internal eMMC; to do so download the Multitool, burn it on an SD Card, plug the SD Card and power the TV Box. Use "Backup flash" if you want to do a backup of the existing firmware, then choose "Erase flash" menu option. Build or download your preferred Armbian image; Uncompress and burn the Armbian image on the SD Card; Plug the SD Card in the TV Box and power it on; Wait for 10 seconds, then the led should start blinking and HDMI will turn on. The first time the boot process will take a couple of minutes or more because the filesystem is going to be resized, so be patient and wait for the login prompt; On first boot you will be asked for entering a password for root user of your choice and the name and password for a regular user Run sudo rk322x-config and select your board characteristics to enable leds, wifi chips, high-speed eMMC or NAND, etc... Run armbian-config to configure timezone, locales and other personal options, or also to transfer the SD Card installation to internal eMMC; Congratulations, Armbian is running from SD Card! A note about boot device order: With Armbian also comes mainline U-boot. If you install Armbian or just the bootloader in the eMMC or the Jump Start on internal NAND, the bootloader will look for valid bootable images in this order: External SD Card External USB Stick in OTG Port Internal eMMC Installation (without SD card, board with eMMC) If you have no sd card slot and your board has an eMMC, you can burn the armbian image directly on the internal eMMC using rkdeveloptool and a male-to-male USB cable: Download your preferred Armbian image from Armbian download page and decompress it. Download the rk322x bootloader: rk322x_loader_v1.10.238_256.bin Download a copy of rkdeveloptool: a compiled binary is available in the official rockchip-linux rkbin github repository. Unplug the power cord from the tv box Plug an end of an USB Male-to-male cable into the OTG port (normally it is the lone USB port on the same side of the Ethernet, HDMI, analog AV connectors) while pressing the reset microbutton with a toothpick. You can find the reset microbutton in a hole in the back of the box, but sometimes it is hidden into the AV analog jack Plug the other end of the USB Male-to-male cable into an USB port of your computer If everything went well, run lsusb: you should see a device with ID 2207:320b Run sudo rkdeveloptool rd 3 (if this fails don't worry and proceed to next step) Run sudo rkdeveloptool db rk322x_loader_v1.10.238_256.bin Run sudo rkdeveloptool wl 0x0 image.img (change image.img this with the real Armbian image filename) Unplug the power cord Done! Installation (without SD card, board with NAND) If you are in the unfortunate case you can't use an SD card for installation and your board has a NAND chip, you still have an option to use the quick Multitool installation steps via USB. Obtain a copy of rkdeveloptool: a compiled binary is available in the official rockchip-linux rkbin github repository. Unplug the power cord from the tv box Plug an end of an USB Male-to-male cable into the OTG port (normally it is the lone USB port on the same side of the Ethernet, HDMI, analog AV connectors) while pressing the reset microbutton with a toothpick. You can find the reset microbutton in a hole in the back of the box, but sometimes it is hidden into the AV analog jack Plug the other end of the USB Male-to-male cable into an USB port of your computer If everyting went well, using lsusb you should see a device with ID 2207:320b Run sudo rkdeveloptool wl 0x4000 u-boot-main.img (download u-boot-main.img.xz , don't forget to decompress it!) Unplug the power cord Now you can follow the instructions on how to install on eMMC/NAND via SD card, just use instead an USB stick to do all the operations and plug it into the USB OTG port. Once you reboot, USB OTG port will be used as a boot device. NOTE: NAND users without SD slot may be unhappy to know that it will be difficult to do extra maintenance with Multitool in case something breaks in the installed Armbian system: installing u-boot-main.img makes the installed system unbootable because it is missing the NAND driver. Alternative backup, restore and erase flash for EXPERTS: These backup, restore and erase flash procedures are for experts only. They are kept here mostly for reference, since the Multitool is perfectly able to do same from a very comfy interface and is the suggested way to do maintenance. Backup: Obtain a copy of rkdeveloptool: a compiled binary is available in the official rockchip-linux rkbin github repository. If you prefer, you can compile it yourself from the sources available at official rockchip repository Unplug the power cord from the tv box Plug an end of an USB Male-to-male cable into the OTG port (normally it is the lone USB port on the same side of the Ethernet, HDMI, analog AV connectors) while pressing the reset microbutton with a toothpick. You can find the reset microbutton in a hole in the back of the box, but sometimes it is hidden into the AV analog jack Plug the other end of the USB Male-to-male cable into an USB port of your computer If everyting went well, using lsusb you should see a device with ID 2207:320b change directory and move into rkbin/tools directory, run ./rkdeveloptool rfi then take note of the FLASH SIZE megabytes (my eMMC is 8Gb, rkdeveloptool reports 7393 megabytes) run ./rkdeveloptool rl 0x0 $((FLASH_SIZE * 2048)) backup.data (change FLASH_SIZE with the value you obtained the step before) once done, the internal eMMC is backed up to backup.data file Restore: first we have to restore the original bootloader, then restore the original firmware. Running rkdeveloptool with these switches will accomplish both the jobs: ./rkdeveloptool db rk322x_loader_v1.10.238_256.bin Downloading bootloader succeeded. ./rkdeveloptool ul rk322x_loader_v1.10.238_256.bin Upgrading loader succeeded. ./rkdeveloptool wl 0x0 backup.data Write LBA from file (100%) Download here: Erase the flash memory: clearing the internal eMMC/NAND memory makes the SoC look for external SD Card as first boot option. If there isn't any suitable SD Card, the SoC enters maskrom mode, which can then be used for full eMMC/NAND access using rkdeveloptool. This is perfectly fine if your box has an eMMC flash memory. NOTE: In case you have a NAND flash memory this option is however discouraged. The original bootloader contains some special parameters to correctly access the data. Clearing the flash memory will probably garbage the NAND data and restoring the bootloader may require some special instructions. Obtain a copy of rkdeveloptool: a compiled binary is available in the official rockchip-linux rkbin github repository. If you prefer, you can compile it yourself from the sources available at official rockchip repository Unplug the power cord from the board Plug an end of an USB Male-to-male cable into the OTG port (normally it is the lone USB port on the same side of the Ethernet, HDMI, analog AV connectors) while pressing the reset microbutton with a toothpick. You can find the reset microbutton in a hole in the back of the box, but sometimes it is hidden into the AV analog jack Plug the other end of the USB Male-to-male cable into an USB port of your computer If everyting went well, using lsusb you should see a device with ID 2207:320b run ./rkdeveloptool ef and wait a few seconds once done, the internal eMMC is erased and the device will boot from the sdcard from now on Partecipation and debugging: If you want to partecipate or need help debugging issues, do not hesitate to share your experience with the installation procedure of the boxes. In case of issues and missed support, provide as many as possible of these things is very useful to try and bring support for an unsupported board: some photos of both sides of the board. Details of the eMMC, DDR and Wifi chips are very useful! upload the device tree binary (dtb) of your device. We can understand a lot of things of the hardware from that small piece of data; and alternative is a link to the original firmware (you can do a full backup with the Multitool); dmesg and other logs (use armbianmonitor -u that automatically collects and uploads the logs online) attach a serial converter to the device and provide the output of the serial port; Critics, suggestions and contributions are welcome! Credits: @fabiobassa for his ideas, inspiration, great generosity in giving the boards for development and testing. The project of bringing rk322x into armbian would not have begun without his support! Justin Swartz, for his work and research to bring mainline linux on rk3229 (repository here) @knaerzche for his great contribution to libreelec support and mainline patches @Alex83 for his patience in testing the NAND bootloader upgrade procedure on his board @Jason Duhamell for his generous donation that allowed researching eMCP boards and esp8089 wifi chip
-
Hello, I'm trying to get My Mxq pro 4k Box going. It will start to a screen that say's "android". I think the problem had something to do with a power outage. How can I boot from a Usb thumb drive or Sd card I'v tried just copying a uncompressed copy of multitool and writing a copy with Usbimager am I missing something ? Is there a way to replace the factory image with a whole new on ? Armbian ? Is there a Image with test tool's for these things Media Box's ? Thank you
-
 Banana Pi BPI-M6 is an upcoming credit-card single board computer based on SenaryTech SN3680 SoC comprised of a quad-core Arm Cortex-A73 processor, a Cortex-M3 real-time core, an Imagination GE9920 GPU, and an NPU delivering up to 6 .75 TOPS. The board will ship with 4GB LPDDR4 RAM and 16GB eMMC flash. Its layout is fairly similar to the one of the Raspberry Pi 4 with four USB ports, Gigabit Ethernet, a 40-pin GPIO header, a USB Type-C port for power, and two micro HDMI ports. However, only one of those is for HDMI output, as the second is for HDMI input, and there’s also an M.2 socket for expansion. Banana Pi BPI-M6 specifications: SoC – SenaryTech SN3680 with CPU – Quad-core Arm Cortex-A73 processor up to 2.1GHz MCU – Arm Cortex-M3 real-time security core @ 250MHz GPU – Imagination PowerVR Series9XE GE9920 GPU VPU – 4Kp60 H265, H264, VP9, VP8, [...] The post Banana Pi BPI-M6 SBC features SenaryTech SN3680 quad-core Cortex-A73 AI processor appeared first on CNX Software - Embedded Systems News. View the full article
 -
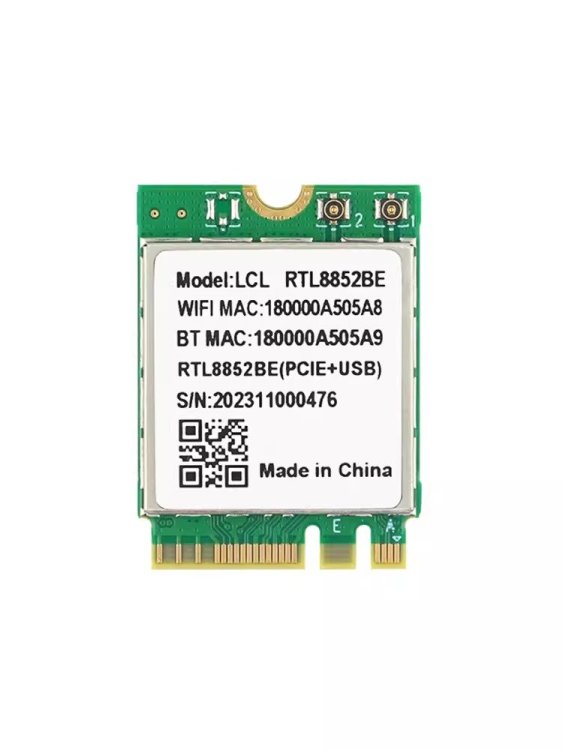
I purchased the wifi + bt module. It is RTL8852BE. my armbian: Linux orangepi5-plus 5.10.160-legacy-rk35xx #1 SMP Fri Feb 2 07:51:33 UTC 2024 aarch64 aarch64 aarch64 GNU/Linux My Bluetooth never works. It cannot be listed under hciconfig: vnc@orangepi5-plus:~$ hciconfig -a vnc@orangepi5-plus:~$ rfkill ID TYPE DEVICE SOFT HARD 0 bluetooth bt_default blocked unblocked 1 wlan phy0 unblocked unblocked vnc@orangepi5-plus:/$ sudo cat /var/log/dmesg | grep "\(luetooth\|RFKILL\)" [sudo] password for vnc: [ 4.299662] kernel: Bluetooth: Core ver 2.22 [ 4.299678] kernel: Bluetooth: HCI device and connection manager initialized [ 4.299682] kernel: Bluetooth: HCI socket layer initialized [ 4.299685] kernel: Bluetooth: L2CAP socket layer initialized [ 4.299691] kernel: Bluetooth: SCO socket layer initialized [ 5.822591] kernel: [BT_RFKILL]: Enter rfkill_rk_init [ 5.822597] kernel: [WLAN_RFKILL]: Enter rfkill_wlan_init [ 5.823354] kernel: [WLAN_RFKILL]: Enter rfkill_wlan_probe [ 5.823394] kernel: [WLAN_RFKILL]: can't find rockchip,grf property [ 5.823401] kernel: [WLAN_RFKILL]: wlan_platdata_parse_dt: wifi_chip_type = ap6275p [ 5.823406] kernel: [WLAN_RFKILL]: wlan_platdata_parse_dt: enable wifi power control. [ 5.823412] kernel: [WLAN_RFKILL]: wlan_platdata_parse_dt: wifi power controled by gpio. [ 5.823458] kernel: [WLAN_RFKILL]: wlan_platdata_parse_dt: WIFI,host_wake_irq = 8, flags = 0. [ 5.823468] kernel: [WLAN_RFKILL]: wlan_platdata_parse_dt: The ref_wifi_clk not found ! [ 5.823473] kernel: [WLAN_RFKILL]: rfkill_wlan_probe: init gpio [ 5.823480] kernel: [WLAN_RFKILL]: rfkill_set_wifi_bt_power: 1 [ 5.823485] kernel: [WLAN_RFKILL]: Exit rfkill_wlan_probe [ 5.824968] kernel: [BT_RFKILL]: bluetooth_platdata_parse_dt: get property: uart_rts_gpios = 148. [ 5.825045] kernel: [BT_RFKILL]: bluetooth_platdata_parse_dt: get property: BT,reset_gpio = 21. [ 5.825063] kernel: [BT_RFKILL]: bluetooth_platdata_parse_dt: get property: BT,wake_gpio = 150. [ 5.825081] kernel: [BT_RFKILL]: bluetooth_platdata_parse_dt: get property: BT,wake_host_irq = 0. [ 5.825187] kernel: [BT_RFKILL]: Request irq for bt wakeup host [ 5.825276] kernel: [BT_RFKILL]: ** disable irq [ 5.825419] kernel: [BT_RFKILL]: bt_default device registered. [ 8.815604] kernel: [BT_RFKILL]: bt shut off power I tried rfkill to unblock the device. It can be listed under hciconfig: vnc@orangepi5-plus:~$ sudo rfkill unblock 0 vnc@orangepi5-plus:~$ hciconfig -a hci0: Type: Primary Bus: USB BD Address: 00:00:00:00:00:00 ACL MTU: 0:0 SCO MTU: 0:0 DOWN RX bytes:21 acl:0 sco:0 events:2 errors:0 TX bytes:6 acl:0 sco:0 commands:2 errors:0 Features: 0x00 0x00 0x00 0x00 0x00 0x00 0x00 0x00 Packet type: DM1 DH1 HV1 Link policy: Link mode: PERIPHERAL ACCEPT After rebooting the dmesg shows the firmware is not found. Please advise: vnc@orangepi5-plus:/$ sudo cat /var/log/dmesg | grep "\(luetooth\|RFKILL\)" [sudo] password for vnc: [ 4.304042] kernel: Bluetooth: Core ver 2.22 [ 4.304063] kernel: Bluetooth: HCI device and connection manager initialized [ 4.304067] kernel: Bluetooth: HCI socket layer initialized [ 4.304070] kernel: Bluetooth: L2CAP socket layer initialized [ 4.304076] kernel: Bluetooth: SCO socket layer initialized [ 5.796021] kernel: [BT_RFKILL]: Enter rfkill_rk_init [ 5.796026] kernel: [WLAN_RFKILL]: Enter rfkill_wlan_init [ 5.796715] kernel: [WLAN_RFKILL]: Enter rfkill_wlan_probe [ 5.796743] kernel: [WLAN_RFKILL]: can't find rockchip,grf property [ 5.796749] kernel: [WLAN_RFKILL]: wlan_platdata_parse_dt: wifi_chip_type = ap6275p [ 5.796754] kernel: [WLAN_RFKILL]: wlan_platdata_parse_dt: enable wifi power control. [ 5.796758] kernel: [WLAN_RFKILL]: wlan_platdata_parse_dt: wifi power controled by gpio. [ 5.796795] kernel: [WLAN_RFKILL]: wlan_platdata_parse_dt: WIFI,host_wake_irq = 8, flags = 0. [ 5.796801] kernel: [WLAN_RFKILL]: wlan_platdata_parse_dt: The ref_wifi_clk not found ! [ 5.796804] kernel: [WLAN_RFKILL]: rfkill_wlan_probe: init gpio [ 5.796809] kernel: [WLAN_RFKILL]: rfkill_set_wifi_bt_power: 1 [ 5.796813] kernel: [WLAN_RFKILL]: Exit rfkill_wlan_probe [ 5.797654] kernel: [BT_RFKILL]: bluetooth_platdata_parse_dt: get property: uart_rts_gpios = 148. [ 5.797698] kernel: [BT_RFKILL]: bluetooth_platdata_parse_dt: get property: BT,reset_gpio = 21. [ 5.797709] kernel: [BT_RFKILL]: bluetooth_platdata_parse_dt: get property: BT,wake_gpio = 150. [ 5.797720] kernel: [BT_RFKILL]: bluetooth_platdata_parse_dt: get property: BT,wake_host_irq = 0. [ 5.797785] kernel: [BT_RFKILL]: Request irq for bt wakeup host [ 5.797840] kernel: [BT_RFKILL]: ** disable irq [ 5.797942] kernel: [BT_RFKILL]: bt_default device registered. [ 8.790808] kernel: [BT_RFKILL]: rfkill_rk_set_power: set bt wake_host high! [ 8.842572] kernel: [BT_RFKILL]: rfkill_rk_set_power: set bt wake_host input! [ 8.842598] kernel: [BT_RFKILL]: ENABLE UART_RTS [ 8.952573] kernel: [BT_RFKILL]: DISABLE UART_RTS [ 8.952634] kernel: [BT_RFKILL]: bt turn on power [ 8.952658] kernel: [BT_RFKILL]: Request irq for bt wakeup host [ 8.952693] kernel: [BT_RFKILL]: ** disable irq [ 9.253728] kernel: usb 5-1.1: Product: Bluetooth Radio [ 9.312606] kernel: Bluetooth: hci0: RTL: examining hci_ver=0b hci_rev=000b lmp_ver=0b lmp_subver=8852 [ 9.313357] kernel: rtk_btusb: Realtek Bluetooth USB driver ver 3.1.6d45ddf.20220519-142432 [ 9.313592] kernel: Bluetooth: hci0: RTL: rom_version status=0 version=1 [ 9.313600] kernel: Bluetooth: hci0: RTL: loading rtl_bt/rtl8852bu_fw.bin [ 9.315321] kernel: bluetooth hci0: Direct firmware load for rtl_bt/rtl8852bu_fw.bin failed with error -2 [ 9.315330] kernel: Bluetooth: hci0: RTL: firmware file rtl_bt/rtl8852bu_fw.bin not found [ 11.338412] kernel: Bluetooth: BNEP (Ethernet Emulation) ver 1.3 [ 11.338421] kernel: Bluetooth: BNEP filters: protocol multicast [ 11.338434] kernel: Bluetooth: BNEP socket layer initialized
-
Hello! Shortform: SDCard recreated from .iso image does not boot. #### Detailed: I use an Odroid as my Minecraft server. I have a fast 32GB card in it, and a usb hdd for swap and media files. After the setup was working, and after each update, I pulled the card from the machine (after shutting down) and plugged it into my PC to make a backup: dd if=/dev/sdc bs=4M | gzip -c >/media/backup/odroid.img.gz In case I ever needed to recreate the card, I have this line to run: gunzip -c /media/backup/odroid.img.gz | dd of=/dev/sdc bs=4M /dev/sdc is a placeholder for whichever drive my USB Cardreader is appearign as. I do have a https enabled Apache webserver with some static content, a Mumble voicechat server for gaming voicechat, Dokuwiki for my occasional bouts of hobby writing and a lot of other little tidbits on the machine, such as a VPN and one of these mediaserver thingies for my TV. That is a LOT of hand crafting that went into it over the years, and I am effectively unable to recreate all the little things I added over the years, which is why a new setup is something I am scared shitless imagining. Also, I named every backup separately, so I do have a LOT of backups - my backup drive is 4TB in size and my systems run on average on a space budged of 32 to 64 GB, my home partition being rsynced to a NAS via 1GB ethernet on each shutdown. When my SDCard died after years of trusty service and I replaced it with a newer, faster card, writing the isoimage went smoothly, the ext4 partition was flawless un doing fsck on it before doing sync and then pulling the card. However, the machine doesn't start. Power LED goes on, but nothing else happens. #### The error I see - Power LED on, no Keepalive LED blinking - makes me guess the bootloader isn't - or wasn't - backed up with the method I used. However, the way I use DD I am very sure it should copy the whole drive inclusive the bootloader, grub, lilo, uboot or whatever else there might be on it. Even cloning Amiga HDDs works flawlessly with DD this way. So, assuming I am correct and the way the backup was made was correct: 1) is there a known way to get an image written to SDCard that wil lhave the odroid bootloader workable? 2) is there a trick, like creating a new SDCard from an Armbian image and then copying the /dev/sd*1 partition from the image file to the newly made sdcard, that might get the image working? 3) Which other recommendations or suggestions ( I don't know, like mounting a rewritten image and a newly made SDCard and then doing cp -a /mnt/source/* /mnt/target/ ?) that might help me get my system back to working do you people have? With kind regards, a frustrated SDCard-user (with HDDs doing DD in the manner described above works nicely since almost 20 years for me, cloning systems between machines, replacing deceased drives and so on )
-

Efforts to develop firmware for H96 MAX V56 RK3566 8G/64G
pocosparc replied to Hqnicolas's topic in Rockchip CPU Boxes
@Hqnicolas Nice Job! Sorry I was away for the weekend and I already see that I need to reflash the board. Well I needed to start again with the version 1.2 - I started with Bluetooth and made it work - Although still not sure what is physically written on the chip and how it behaves. I have hcy6335, which in turn should be AP6335 containing the BCM4335 and for Bluetooth BCM4339. Somehow the chip gets represented as hci0: BCM4335A0 (002.001.006) build 0000. I am attaching the hcd file to this post that needs to be copied to the /lib/firmware/brcm. I also changed the dtb for the uart1 as there is no UART1 DMA mode possible otherwise. One just needs to add the dma-names to serial@fe650000 node: serial@fe650000 { compatible = "rockchip,rk3568-uart\0snps,dw-apb-uart"; reg = <0x00 0xfe650000 0x00 0x100>; interrupts = <0x00 0x75 0x04>; clocks = <0x0e 0x11f 0x0e 0x11c>; clock-names = "baudclk\0apb_pclk"; dmas = <0x24 0x02 0x24 0x03>; dma-names = "tx\0rx"; pinctrl-0 = <0x91 0x92 0x93>; pinctrl-names = "default"; reg-io-width = <0x04>; reg-shift = <0x02>; status = "okay"; phandle = <0x10a>; bluetooth { compatible = "brcm,bcm43438-bt"; clocks = <0x94 0x01>; clock-names = "lpo"; device-wakeup-gpios = <0x95 0x11 0x00>; host-wakeup-gpios = <0x95 0x10 0x00>; shutdown-gpios = <0x95 0x0f 0x00>; max-speed = <0x16e360>; pinctrl-names = "default"; pinctrl-0 = <0x96 0x97 0x98>; vbat-supply = <0x23>; vddio-supply = <0x63>; }; }; These are now the dmesg logs that I am getting [ 16.268929] Bluetooth: hci0: BCM: chip id 82 [ 16.269548] Bluetooth: hci0: BCM: features 0x2f [ 16.272162] Bluetooth: hci0: BCM4335A0 [ 16.272173] Bluetooth: hci0: BCM4335A0 (002.001.006) build 0000 [ 16.274413] Bluetooth: hci0: BCM4335A0 'brcm/BCM4335A0.hcd' Patch [ 17.114840] systemd[1]: Finished Armbian memory supported logging. [ 17.152605] systemd[1]: Starting Journal Service... [ 17.299179] systemd[1]: Started Journal Service. [ 17.339995] systemd-journald[632]: Received client request to flush runtime journal. [ 17.369055] Bluetooth: hci0: BCM: features 0x2f [ 17.372008] Bluetooth: hci0: BCM4335B0 JF-LTE MurataXJ AFH_LimitPwr_EDR 2STOPBIT-0343 [ 17.372025] Bluetooth: hci0: BCM4335A0 (002.001.006) build 0353 [ 17.482709] RPC: Registered named UNIX socket transport module. [ 17.482729] RPC: Registered udp transport module. [ 17.482733] RPC: Registered tcp transport module. [ 17.482736] RPC: Registered tcp-with-tls transport module. [ 17.482740] RPC: Registered tcp NFSv4.1 backchannel transport module. [ 18.604874] Bluetooth: BNEP (Ethernet Emulation) ver 1.3 [ 18.604896] Bluetooth: BNEP filters: protocol multicast [ 18.604914] Bluetooth: BNEP socket layer initialized [ 18.647499] Bluetooth: MGMT ver 1.22 ... [ 23.677339] Bluetooth: RFCOMM TTY layer initialized [ 23.677399] Bluetooth: RFCOMM socket layer initialized [ 23.677430] Bluetooth: RFCOMM ver 1.11 h96-tvbox-3566-wifi:~:% hciconfig -a hci0: Type: Primary Bus: UART BD Address: 43:35:B0:07:1F:AC ACL MTU: 1021:8 SCO MTU: 64:1 UP RUNNING RX bytes:4846 acl:0 sco:0 events:556 errors:0 TX bytes:71684 acl:0 sco:0 commands:556 errors:0 Features: 0xbf 0xfe 0xcf 0xff 0xdf 0xff 0x7b 0x87 Packet type: DM1 DM3 DM5 DH1 DH3 DH5 HV1 HV2 HV3 Link policy: RSWITCH SNIFF Link mode: PERIPHERAL ACCEPT Name: 'h96-tvbox-3566-wifi' Class: 0x6c0000 Service Classes: Rendering, Capturing, Audio, Telephony Device Class: Miscellaneous, HCI Version: 4.0 (0x6) Revision: 0x161 LMP Version: 4.0 (0x6) Subversion: 0x4106 Manufacturer: Broadcom Corporation (15) h96-tvbox-3566-wifi:~:% bluetoothctl Agent registered [CHG] Controller 43:35:B0:07:1F:AC Pairable: yes [bluetooth]# show Controller 43:35:B0:07:1F:AC (public) Name: h96-tvbox-3566-wifi Alias: h96-tvbox-3566-wifi Class: 0x006c0000 Powered: yes Discoverable: no DiscoverableTimeout: 0x000000b4 Pairable: yes UUID: A/V Remote Control (0000110e-0000-1000-8000-00805f9b34fb) UUID: Handsfree Audio Gateway (0000111f-0000-1000-8000-00805f9b34fb) UUID: PnP Information (00001200-0000-1000-8000-00805f9b34fb) UUID: Audio Sink (0000110b-0000-1000-8000-00805f9b34fb) UUID: Headset (00001108-0000-1000-8000-00805f9b34fb) UUID: A/V Remote Control Target (0000110c-0000-1000-8000-00805f9b34fb) UUID: Generic Access Profile (00001800-0000-1000-8000-00805f9b34fb) UUID: Audio Source (0000110a-0000-1000-8000-00805f9b34fb) UUID: Generic Attribute Profile (00001801-0000-1000-8000-00805f9b34fb) UUID: Device Information (0000180a-0000-1000-8000-00805f9b34fb) Modalias: usb:v1D6Bp0246d0540 Discovering: no Roles: central Roles: peripheral Advertising Features: ActiveInstances: 0x00 (0) SupportedInstances: 0x05 (5) SupportedIncludes: tx-power SupportedIncludes: appearance SupportedIncludes: local-name [bluetooth]# scan on Discovery started [CHG] Controller 43:35:B0:07:1F:AC Discovering: yes [NEW] Device 4C:BA:D7:02:F5:B7 4C-BA-D7-02-F5-B7 @ning @Hqnicolas UART1 speed is set to max-speed = <1500000>; but according to the datasheet (still no clue if it is the right one) we can go up to 4 MBit/s. Another thing is the schematics that I found somewhere on the internet, but still they are using some AP6xxx wifi/BT chip. Need to dive into this, but hey, now we see the missing components needed for SD-Card slot. Heartbeat is a nice thing, but I will try to enable the backlight blue LEDs, WiFi runniung, and then try to get some HDMI audio out of this thing. BCM4335A0.hcd p562297-AP6335 datasheet_V1.3_02102014.pdf ROC-3566-PC-V10-20210419.pdf -
Hello fellow Sunxi forum members, Some may know me from previous Armbian adventures, primarily Orange Pi Zero 3... but I have jumped brands for a change of scenery (but not SoC). When researching H61X based boards for the Zero 2 and Zero 3 development we were doing in another thread, I found the Sipeed LonganPi 3H, which is a relatively new board that took a while to find. My first impressions are that is really well made, and packs a lot in to the Raspberry Pi Zero style profile (although it also has a daughter board). It was shipped quickly in a nice quality hard plastic storage case and.. best of all.. it has two hardware buttons.. so I can reset! (very useful when you are rebooting endlessly). You can find a review of the board here: https://www.cnx-software.com/2023/12/29/sipeed-longan-pi3h-a-raspberry-pi-zero-sized-board-with-gigabit-ethernet-wifi-6-hdmi-and-usb-ports/ There has been some great development on GitHub here (and the documentation on their site is also good) https://github.com/sipeed/LonganPi-3H-SDK https://wiki.sipeed.com/hardware/en/longan/h618/lpi3h/1_intro.html I basically started this thread as I thought I would look outside of the Orange Pi's I had and see if I could get the SDK build working in the Armbian framework. It should be noted that the SDK builds are standalone and use slightly dated uboot and kernel, but I was keen to at least get the builds working in Armbian so I can start iterating and improving. I want it to be very clearly known that I am just migrating the great work from the above Sipeed GitHub repo (their scripts work really cleanly), and will slowly work through issues that I identify as I go. Currently I have migrated all the patches over (named the same as the original repo) until a clean/bootable build is achieved and then I will look at cleaning up the patch structure (although, in all honesty I prefer the numeric patch ordering to what exists currently in the sunxi patching directories.. but that's another discussion). My preliminary porting work to the Armbian build framework can be found here and is configured to only support edge with a wip board configuration for the Longan Pi 3H. https://github.com/pixdrift/armbian_build/tree/longanpi_3h Status: - The Armbian build completely cleanly for both the uboot (held back) and mainline kernel builds for 6.7.2 kernel. - Of the patches from the SDK repository, roughly 10 don't currently apply (not as bad as it sounds) - I have made some minor updates to two patches, and added comments for all problematic/failing patches - Many of the patches are related to CPU Frequency scaling, and I expect these are failing because CPU frequency patches are already in Armbian (I will confirm in future) - The build currently boots a separate boot partition, and that boot partition is using MBR (not GPT) as I had issues with the boot loader locating the GPT partition (haven't looked closely at this) The good news is.. I have the board booting, with 6.7.2 and I get serial output for the boot. The bad news is, it immediately and abruptly decides that the GPU has hit a temperature threshold and shuts down the device (corrupting the FS in the process). On subsequent reboots, fsck is launched to repair the filesystem and GPU hits temperature threshold. On investigation, I don't believe the GPU is actually hot, it's just the configuration has an issue and it's likely reporting a very high temperature value. I will try and confirm this as it may be a patch not applied correctly for GPU? The following is the log from the serial output First boot: =========== U-Boot SPL 2024.01-rc2-armbian (Jan 24 2024 - 11:15:42 +0000) DRAM: 4096 MiB Trying to boot from MMC1 NOTICE: BL31: v2.10.0 (debug):armbian NOTICE: BL31: Built : 10:42:19, Jan 24 2024 NOTICE: BL31: Detected Allwinner H616 SoC (1823) NOTICE: BL31: Found U-Boot DTB at 0x4a083600, model: LonganPi 3H INFO: ARM GICv2 driver initialized INFO: Configuring SPC Controller INFO: PMIC: Probing AXP305 on RSB ERROR: RSB: set run-time address: 0x10003 INFO: Could not init RSB: -65539 INFO: BL31: Platform setup done INFO: BL31: Initializing runtime services INFO: BL31: cortex_a53: CPU workaround for erratum 855873 was applied INFO: BL31: cortex_a53: CPU workaround for erratum 1530924 was applied INFO: PSCI: Suspend is unavailable INFO: BL31: Preparing for EL3 exit to normal world INFO: Entry point address = 0x4a000000 INFO: SPSR = 0x3c9 INFO: Changed devicetree. U-Boot 2024.01-rc2-armbian (Jan 24 2024 - 11:15:42 +0000) Allwinner Technology CPU: Allwinner H616 (SUN50I) Model: LonganPi 3H DRAM: 4 GiB Core: 48 devices, 19 uclasses, devicetree: separate WDT: Not starting watchdog@30090a0 MMC: mmc@4020000: 0, mmc@4022000: 1 Loading Environment from FAT... Unable to read "uboot.env" from mmc0:1... In: serial@5000000 Out: serial@5000000 Err: serial@5000000 Net: eth0: ethernet@5020000 Unknown command 'usb' - try 'help' Hit any key to stop autoboot: 0 switch to partitions #0, OK mmc0 is current device Scanning mmc 0:1... Found U-Boot script /boot.scr 3259 bytes read in 1 ms (3.1 MiB/s) ## Executing script at 4fc00000 U-boot loaded from SD Boot script loaded from mmc 129 bytes read in 1 ms (126 KiB/s) 30310 bytes read in 5 ms (5.8 MiB/s) Working FDT set to 4fa00000 Failed to load '/dtb/allwinner/overlay/-fixup.scr' 18400262 bytes read in 762 ms (23 MiB/s) 23103496 bytes read in 957 ms (23 MiB/s) Moving Image from 0x40080000 to 0x40200000, end=41880000 ## Loading init Ramdisk from Legacy Image at 4ff00000 ... Image Name: uInitrd Image Type: AArch64 Linux RAMDisk Image (gzip compressed) Data Size: 18400198 Bytes = 17.5 MiB Load Address: 00000000 Entry Point: 00000000 Verifying Checksum ... OK ## Flattened Device Tree blob at 4fa00000 Booting using the fdt blob at 0x4fa00000 Working FDT set to 4fa00000 Loading Ramdisk to 48e73000, end 49fff3c6 ... OK Loading Device Tree to 0000000048e03000, end 0000000048e72fff ... OK Working FDT set to 48e03000 Starting kernel ... done. Begin: Mounting root file system ... Begin: Running /scripts/local-top ... done. Begin: Running /scripts/local-premount ... Scanning for Btrfs filesystems done. [ 2.498172] thermal thermal_zone0: gpu-thermal: critical temperature reached, shutting down [ 2.506572] reboot: HARDWARE PROTECTION shutdown (Temperature too high) [ 2.519090] reboot: Power down done. Second boot: ============ Begin: Mounting root file system ... Begin: Running /scripts/local-top ... done. Begin: Running /scripts/local-premount ... Scanning for Btrfs filesystems done. [ 2.475525] thermal thermal_zone0: gpu-thermal: critical temperature reached, shutting down Begin: Will now [ 2.484056] reboot: HARDWARE PROTECTION shutdown (Temperature too high) check root file system ... fsck from util-linux [ 2.495463] reboot: Power down 2.38.1 Next steps: I am currently running on coffee fumes.. but when I my cognition returns, I plan to work through the remaining patches I have flagged as problematic in series.armbian in my branch. Potentially from there I will reach out to the Sipeed developers if I can't find anything obvious that is causing the above temperature issues . If that fails, I will look to hack up the image to disable the thermal protection code that is shutting the board down so I can boot and get more information about this issue (but this obviously risks the board being damaged). Asking for assistance: If you have any idea what might be causing the temp issue (ie. where to look) drop a message. I am sure I will get to it eventually when I have time, but assistance on where to focus my attention (which module/configuration components) would be a great help. That being said, I haven't looked at any of the currently failing patches so may be a quick fix! If you have one of these boards (even if you aren't a developer) please sign up to the Armbian forums and let me know, it's always great to have other people available for testing
-
These instructions are for Amlogic CPUs for TV Boxes. Note: If you have previously run other distributions on the box such as coreelec the below installation will not work. You will need to restore the original android firmware before attempting the install. coreelec changes the boot environment in ways that are incompatible with these Armbian builds. Download links: Weekly Community Rolling Builds: https://www.armbian.com/amlogic-s9xx-tv-box/ or build your own image using the Armbian build framework Once you download your chosen build, you need to burn the image to an SD card. Generally balenaEtcher is recommended as it does a verification of the burn. Also be sure to use high quality SD cards. Once you have the SD card with your chosen build, then you need to edit the boot configuration file on the SD card. In the BOOT partition of the SD card there will be a file /boot/extlinux/extlinux.conf, that you need to edit. There will also be a extlinux.conf.template file to use as a reference. You will need to add a line into the extlinux.conf file for the Device Tree (dtb) file you will be using for your box. Place this line before the APPEND line as shown in the .template file. Basically you need to have the correct dtb for your box. You may need to attempt to use different dtb files until you find the one that works the best for your box's hardware (there are a bunch of dtb files in /boot/dtb/amlogic/... to try depending on your cpu architecture and hardware). It is unlikely that there will be a matching dtb file for your TV box. The idea is to find the one that works best for your box. This may mean that you try booting with different dtb files until you fine one that works good enough for your needs. By searching the forums you will find information about what dtbs other users have found work best for different boxes. Because you are booting from an SD card, you can easily try different dtb files. The dtd files are named by cpu family. So for example dtb files for the s905x2 cpu are named meson-g12a-*. Below there is a table that shows the identifiers for each familiy (g12a for s905x2 in this case). Next you need to copy the correct uboot for your box. This is needed for how these builds boot on amlogic boxes. There are four different u-boot files located in the /boot directory: u-boot-s905, u-boot-s905x-s912, u-boot-s905x2-s922, u-boot-s905x3 You need to copy (note copy not move) the u-boot file that matches your cpu to a new file named u-boot.ext in the /boot directory So for example with a TX3 mini box that has an s905w cpu you would copy u-boot-s905x-s912 to u-boot.ext: cp u-boot-s905x-s912 u-boot.ext (See table below for more details on which u-boot to use for which cpu) Once you have your SD card prepared you need to enable multiboot on the box. There are different ways documented to do this, but the most common is the "toothpick" method. The "toothpick" method means to hold the reset button while applying power to the box. The reset button is often hidden and located at the back of the audio/video jack connector. By pressing that button with a toothpick or other such pointed device you can enable multiboot. What you need to do is have the box unplugged, have your prepared sd card inserted, then press and hold the button while inserting the power connector. Then after a bit of time you can release the button. (I don't know exactly how long you need to hold the button after power is applied, but if it doesn't work the first time try again holding for longer or shorter times). You should now be booting into armbian/linux. Note that the first boot takes longer as it is enlarging the root filesystem to utilize the entire SD card. After you are satisfied that your box is working correctly for your needs you can optionally copy the installation from the SD card to internal emmc storage (assuming your box has emmc). (Note: Installing to emmc has some risks of bricking your box. Don't do this unless you feel you understand how to reinstall your box's android firmware) You install armbian to emmc by running the shell script in the /root directory: install-aml.sh. Note: It is not possible to install into emmc on boxes with the s905 cpu (s905x, s905w, s905x2, etc however should all be supported). It is recommended that you make a backup of emmc first. Also be prepared if anything goes horribly wrong with your emmc install to reinstall the android firmware using the Amlogic USB Burning Tool to unbrick your device. If you have or can find an original android firmware on the internet and you can generally (but not always) recover a bricked box using the Amlogic tool and the original firmware file. Mapping from CPU to uboot and dtb: u-boot-s905 s905 - gxbb u-boot-s905x2-s912 S905X - gxl S905W - gxl S905D - gxl S905L - gxl S805X - gxl S912 - gxm A311D - gxm u-boot-s905x2-s922 S905X2 - g12a S922 - g12b u-boot-s905x3 S905X3 - sm1 Not supported or not tested S805 - S905W2 - S905X4 - S805X2 - s4 A113D - axg A113X - axg Note: Followup posts in this thread should be limited to comments to improve or better understand these instructions. Other issues should be posted as new questions in the Amlogic CPU Boxes sub-forum.
-
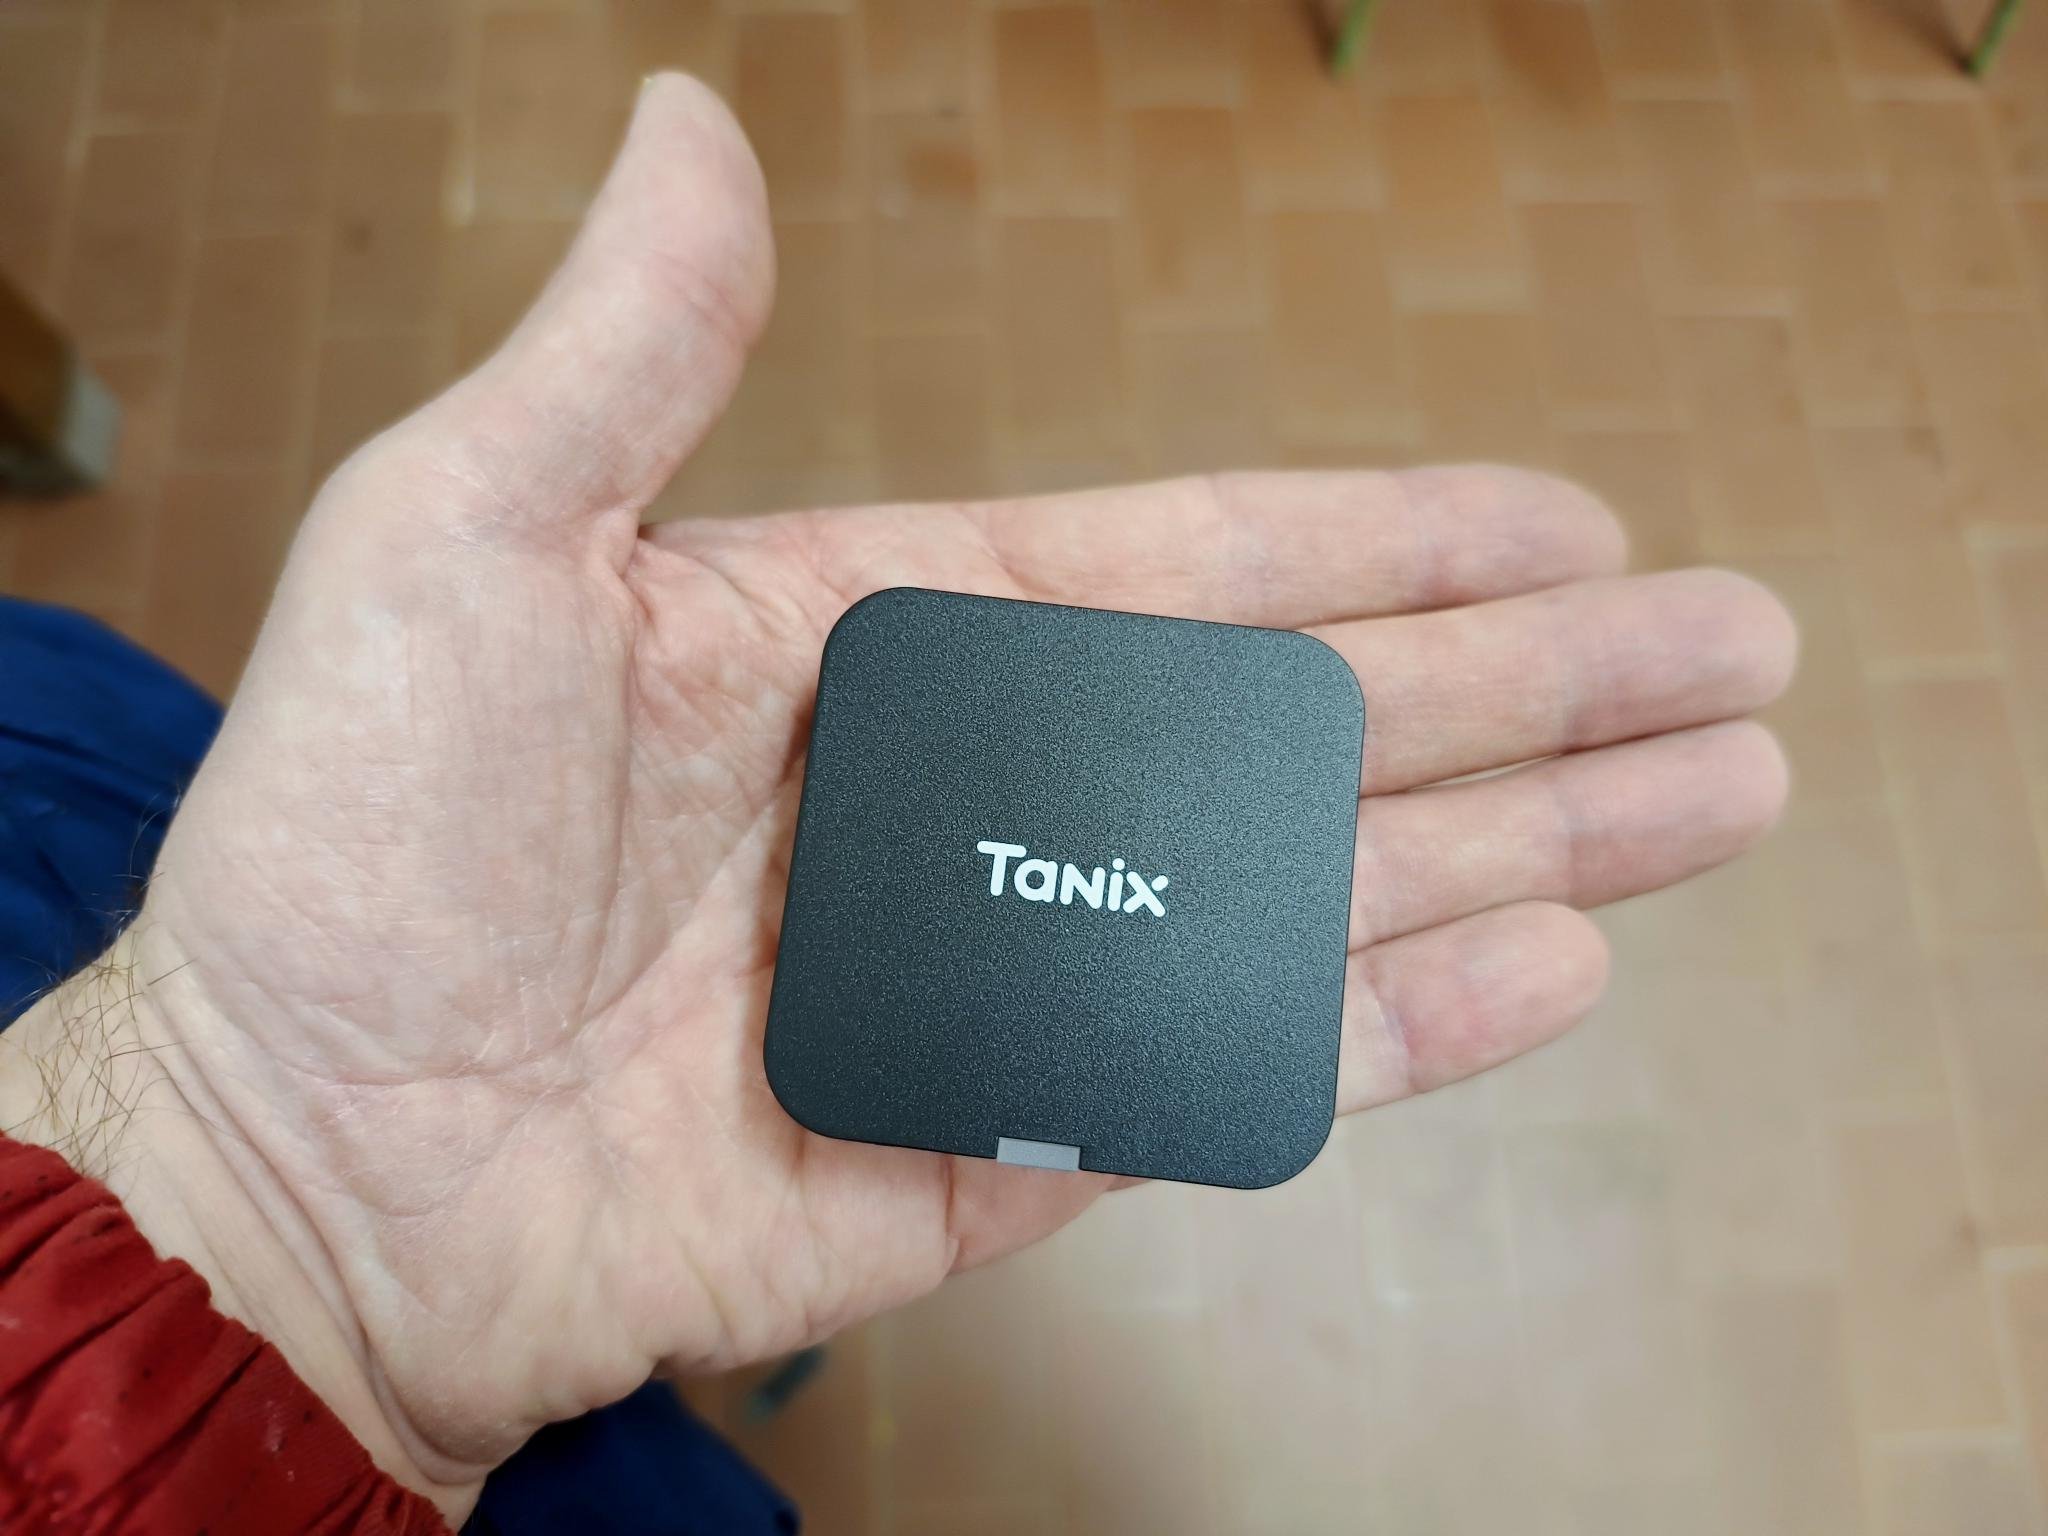
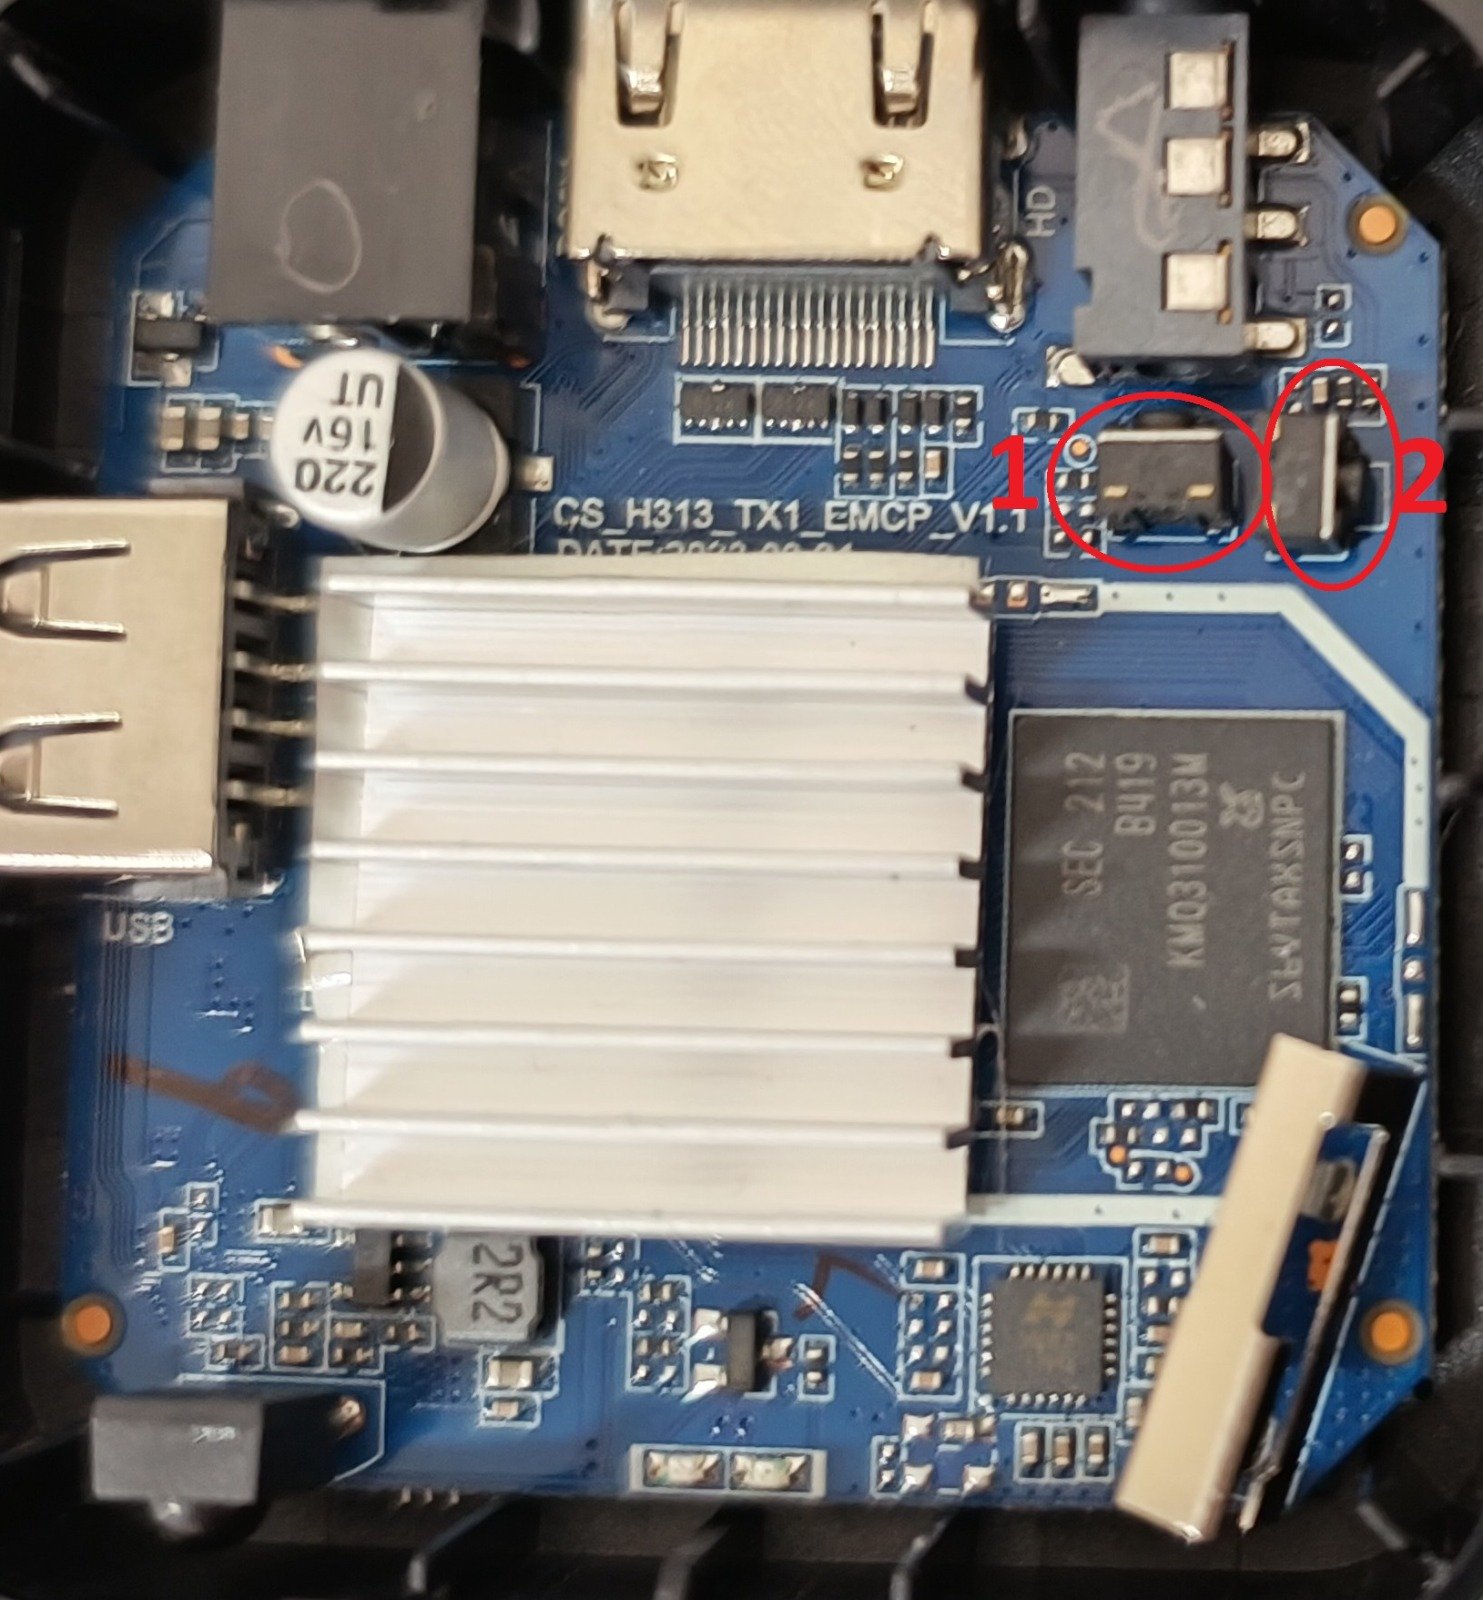
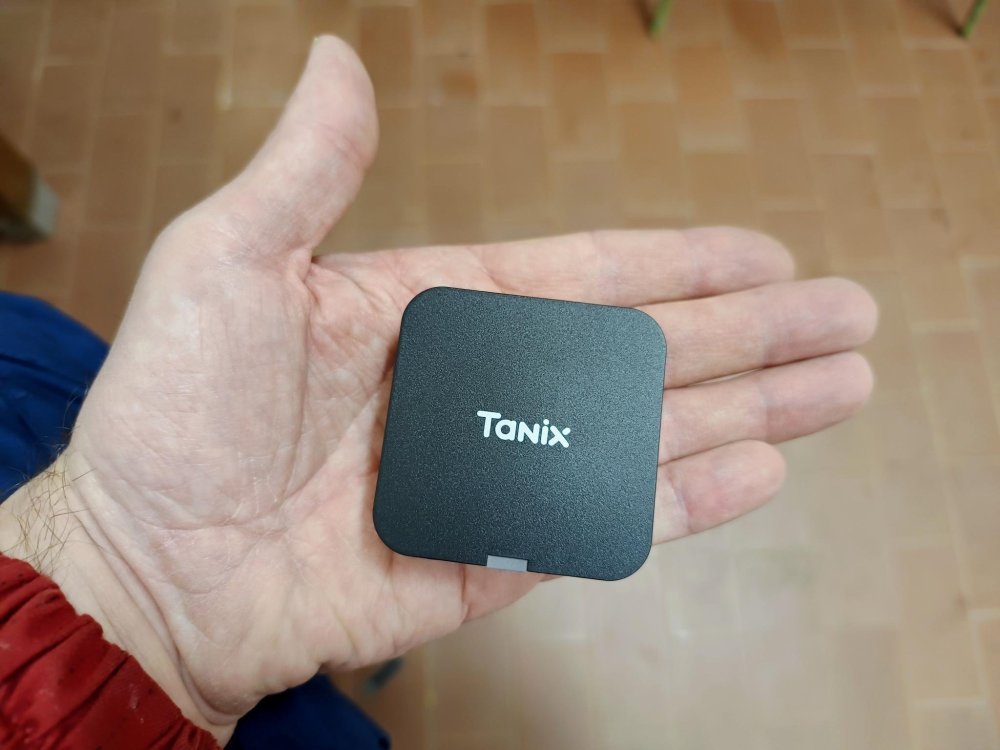
I would like to know if anyone has had the opportunity to try the new Tanix TX1. The dimensions are really small, only 58mm x 58mm x 25mm and it only has 1 USB port in addition to the HDMI port and the classic power jack. I know there are no Armbian images for H313 soc yet, too bad. This small TV box could be interesting for creating small servers connected exclusively via WiFi. Button 1 is the flash button, while button 2 is used to enter recovery mode. I tried images for H313 miniarch and others for H616 but I can't boot in any way. I'm using a USB stick obviously without using a USB hub but only the USB stick and for now only Android starts.

-
 I needed a kernel upgrade to be able to run some applications. I value stability over cutting edge features so I decided to try the Debian image. However I detected a few things that are not working properly. 1. USB almost never works. Most of the time my very plain USB keyboard won't be detected. There is an error message right at the start of the boot sequence "Failed to get keyboard state from device[...]". I have to shutdown and start multiple times by plugging off the power cable and I also keep trying different USB ports. Some rare times the keyboard will work though, even with the above error message. Even rarely I don’t see the error message at the boot start ( I get a confirmation that the keyboard was detected). This of course while the keyboard is plugged in before connecting the power plug. I found this comment but clearly the problem now is not plugging in the USB cable after booting. Also there is a mention about a note on this requirement in the downloads page, but I wasn’t able to find it? Then after I managed to setup the basics, I found this recent thread and I would like to know if the suggested fix is the recommended solution. Also I removed the J1 jumper from the board after reading in the official product page that I should remove it to save power in case I don’t use the USB OTG port for power supply (I use a dedicated power cable via the small round connector between the HDMI and the Ethernet ports). Also, would removing or placing the jumper matter for this case? 2. The first time I installed the Armbian image I must have made a mistake and the language got set to my local language, but I prefer English. I tried to change this using 'armbian-config' but it wouldn’t stick. I could see the changes on screen after I made my selection, but if I exited and started the config tool again, it would show the default value again, instead of my previous choice. The only way I could see the changes taking effect was after I followed the instructions here, specifically the BASH script in xinitrc . At this point the language issue was fixed but the home folders were not in English, so I figured it wouldn’t take long to try a fresh setup again and so I etched the image again and this time the correct settings were applied. But the issue of not being able to change locale via the tools provided should remain valid. 3. I installed X11vnc to access remotely the same desktop I would have with a monitor connected to the C2. This was the setup I had before with the official Hardkernel images and this was working properly. The issue now is that with a monitor connected I do get via X11vnc the same screen (showing the Armbian Linux penguin), but if I reboot with the monitor disconnected I get a very small window insted, and this time with the xfce wallpaper. I can resize this window with the ratio settings in the control panel, but what I would really like is to have the same desktop, whether a monitor is connected or not, as I had before. I noticed the installation doesn’t create a Xorg.conf file, and I don't want to start tinkering by myself because I need the machine in working condition atm. I found these instructions that involve using a dummy monitor setting, but I am unsure if this would yield the result I’m looking for. If someone is able to provide good directed advice I would prefer that than start changing settings without really knowing if they are going to fix the issue or not. 4. The network connector shows a notification on the top right corner about the wired connection and a button offering the option to not show the notification again, but the button doesn’t do anything and I get the notification again after every boot. Does the Ubuntu image handle these issues better? I could maybe post this in 4 separate threads if it would be better to follow up on the discussions? Thanks.
 -
thanks for the reply @SteeMan . I don't have the connector for uart, but I should be able to post a video clip (hopefully with OK quality) later today. I will get a USB UART connector over the weekend. When you turn on the power for one of these sorts of boards, is it normal for the led to just stay red for 5+ seconds ? From what I can see, it's actually only spending a few seconds in u-boot before it starts showing the systemd services (the messages like "[ OK ] ...") I'm starting to wonder if it's my power supply..
-
It appears that the overlays=usbhost0 usbhost1 usbhost2 usbhost3 mentioned in the readme at https://github.com/srepac/kvmd-armbian is not necessary for rk3318-box. As you said, setting dr_mode to peripheral works for both the usb2 port and the usb3 port. Not tried both in peripheral mode at the same time, as the other port would be in use for the usb hdmi capture 😉 Behaviour is the same (or at least while running the 6.8.4 edge kernel) when using usb2 or usb3 port for otg hid. It appears the two sets of kvmd files (parts in /usr/local/lib/python3.11/ and parts in /usr/lib/python3/) didn't go too well together and I just had to restart from clean image and only use srepac version. Sometimes the hid keyboard/mouse don't survive a host reboot. I've seen the same when using pikvm on an older pi3b with the pico hid, if you connect the pico to the pi's 5v line through a diode. Disconnecting otg cable's 5v wire appears to make this more reliable here as well, and also wouldn't backfeed the rk3318-box through the host's usb ports. That gives random weird issues anyway, and the rk3318-box would even continue running when you disconnect the rk3318-box's barrel plug. But some parts would probably fail due to lack of stable power supply, and random issues would arise until powercycled properly. So thanks a lot @jock for your assistance!
-
 Attaching full dmesg from working 6.1.50 system. As you can see, I have things in red (errors). I have ASIC board connected via GPIO (not used) and USB (fully operational). Crashes with 6.6.16 system happened with no USB connected at all, only GPIO (because that's how I power Orange board). So, something must be happening around that, if you can't reproduce it. Previous versions always worked just fine, since I started using this Apollo device 2-3 years ago. I always used USB connection though, I only have GPIO connected (and power) because they are in one physical enclosure. dmesg.txt
 -
Thanks for your reply! Upgrade from kernel 6.1.50 to 6.6.16 is a major thing, I would have thought? It could be related to GPIO pins I have plugged in (and not using). Orange Pi board is connected to an ASIC board, by company Futurebit.io, it's called Apollo and it's a Bitcoin miner. I only get power from it, but I don't use any pins connected by serial connector, because I use this device through USB instead. If I disconnect Orange from it, I will have to figure out an extra cable to power the Orange board, which I didn't need to do in my years of using this device. This device is creating some error and debug entries in dmesg (that's my interpretation of what I see in dmesg), but never caused any instability. But now, something does.
-
I've this old tv box from a brazilian brand, called Intelbras IZY Play, the OEM appears to be SDMC, with the codename DV8038, it uses the s805x SoC. From what I've looked, it should be compatible using the files meson-gxl-s805x-p241.dtb u-boot-s905x-s912 The device does not have an SD card slot, so i'm trying to do it with a flash drive, however, after flashing it with balenaEtcher and doing the necessary changes to the files in my Windows PC, I cannot get it to boot, it justs enters a loop of showing the splash screen, turning off, showing the splash screen, and so on. I'm trying to turn it on pressing the hidden button that it has between the usb ports with a paper clip while I connect the power cable, if I do that without the USB stick on, it boots into a sort of recovery/fastboot screen similar to what android phones have. I've tried all variants of Armbian Bookworm, and I'm flashing Jammy as I write this post to test it as well, if it does work I will update the post.
-
@jock I knew something was off.....that's why I was seeing Random characters output when I echo ..thanks for telling me that and it also explains why I get permission denied sometimes. ...guess I still need to make it where it's a virgin uart with no influence on debug too! I thought it was just a console control. Yeah this took extra steps but it frees up a USB port on the box itself for keyboard and mouse with out using a hub and it sorta copies a pi now and I had all this laying around anyways so. Update:1 Ok successfully fixed the issue, disabled all access to that uart part temporarily. Was able to successfully communicate to the Arduino through nanpy. No more permission issues. This is super cool. Now the Arduino works like an extension to the TV box. The processing power of the TV box is way better than the Arduinos so this opens up a bit of a cool niche use case. I'll call it THE ARMBIAN PI.. Still dont have wifi though. I ran the config and such but wifi isn't being able to run. Not sure what's stopping that but I'm sure it's not too hard to fix. Update:2 Finally I do see one more serial port that I have yet to figure out what exactly it's for. But this gives me another idea to attach one more Arduino or to connect directly to a 3d printer. It shows up as a device in the serial list tree. Got any idea what it is? Would it might be the IR port?
-
a device hooked up on the microusb OTG port does not power up anymore (webcam, used to work a long time ago then I did system update but did not configure the webcam again, until now...) bruno@orangepione:~$ sudo cat /sys/kernel/debug/gpio [sudo] password for bruno: gpiochip0: GPIOs 0-223, parent: platform/1c20800.pinctrl, 1c20800.pinctrl: gpio-15 ( |orangepi:red:status ) out lo gpio-166 ( |cd ) in lo ACTIVE LOW gpio-204 ( |usb0_id_det ) in lo IRQ gpiochip1: GPIOs 352-383, parent: platform/1f02c00.pinctrl, 1f02c00.pinctrl: gpio-354 ( |usb0-vbus ) out lo gpio-355 ( |sw4 ) in hi IRQ ACTIVE LOW gpio-358 ( |vdd-cpux ) out hi gpio-362 ( |orangepi:green:pwr ) out hi Looks like no power on usb0, which should be enabled in host mode I enabled in armbian-config hardware configuration usbhost 0 to 4 (shows in armbianEnv.txt ) I edited sun8i-h3-orangepi-one.dtb so that usb0 dr_mode is set to "host" (like shown here https://forum.armbian.com/topic/4814-orange-pi-one-usb-otg/?do=findComment&comment=44756 ) I perused this thread https://forum.armbian.com/topic/8686-orange-pi-lite-using-micro-usb-otg-as-host-for-usb-camera/ and verified handles and setting seem to match. Seems no matter what, usb0 is not powered. What am I missing ? Any help greatly appreciated... sun8i-h3-orangepi-one.dtb sun8i-h3-orangepi-one.dts
-

How to install armbian to Amlogic S805 android box
codiflow replied to remolaan's topic in Amlogic CPU Boxes
Maybe we can bundle our effords regarding a working S805 image? I also have hundreds of new TV sticks (not boxes) with an Amlogic S805 (Meson 8B). The original Android ROM has the codename stvm8b. Currently I only have a working Android 4.2.2 image with a patched kernel for real 1080p output which can be flashed using TWRP onto the internal eMMC. I really would love to get some kind of more recent and non-Android image up and running. It's a real struggle to get any custom images as most links are dead already which makes it more complicated. Currently I have full UART access to the device and I'm able to interact with the uBoot shell. I also see the full kernel output of the working Android image and have a root shell there. But as others already pointed out kernel 3.10 is way to old to be used in production. So "porting" a more recent kernel would be great. My main goal is to get a Linux image up and running on the box which makes it still useful as device for digital signage or as a small webserver. Some more details on the hardware: ro.product.name=stvm8b ro.product.device=stvm8b ro.product.board=stvm8b ro.product.cpu.abi=armeabi-v7a ro.board.platform=meson8 uBoot output dropping to shell: QA5:A;SVN:B72;POC:1FF;STS:0;BOOT:0;INIT:0;READ:0;CHECK:0;PASS:0; no sdio debug board detected TE : 76654 BT : 15:34:06 May 13 2015 ##### VDDEE voltage = 0x044c CPU clock is 792MHz DDR mode: 32 bit mode DDR size: 1GB (auto) DDR check: Pass! DDR clock: 636MHz with 2T mode DDR pll bypass: Disabled DDR init use : 14831 us HHH Boot From SDIO C SD_boot_type: 00000002 card_type: 00000003 0x0000009f ucl decompress...pass 0x12345678 Boot from internal device 1st eMMC on SDIO C TE : 301370 System Started U-Boot Version: 2011.03-ad3b84b(20150513.153356) clr h-ram DRAM: 1 GiB relocation Offset is: 2feb4000 show partition table: part: 0, name : logo, size : 2000000 part: 1, name : recovery, size : 2000000 part: 2, name : misc, size : 2000000 part: 3, name : boot, size : 2000000 part: 4, name : system, size : 40000000 part: 5, name : cache, size : 20000000 part: 6, name : backup, size : 20000000 part: 7, name : data, size : end aml_card_type=0x0 MMC: [mmc_register] add mmc dev_num=0, port=1, if_type=6 [mmc_register] add mmc dev_num=1, port=2, if_type=6 SDIO Port B: 0, SDIO Port C: 1 power init out reg=c110804c,value=dfffffff IR init done! register usb cfg[0][1] = 3ff6c19c register usb cfg[0][2] = 3ff6c184 NAND: EMMC BOOT: not init nand do not init nand : cause boot_device_flag without nand get_boot_device_flag: init_ret -1 get_boot_device_flag EMMC BOOT: Emmckey: Access range is illegal! [mmc_init] SDIO Port C:1, if_type=7, initialized OK! [mmc_get_partition_table] skip cache partition. Partition table get from SPL is : name offset size flag =================================================================================== 0: bootloader 0 400000 0 1: reserved 2400000 4000000 0 2: cache 6c00000 20000000 2 3: env 27400000 800000 0 4: logo 28400000 2000000 1 5: recovery 2ac00000 2000000 1 6: misc 2d400000 2000000 1 7: boot 2fc00000 2000000 1 8: system 32400000 40000000 1 9: backup 72c00000 20000000 1 10: data 93400000 13ec00000 4 mmc read lba=0x12000, blocks=0x1 mmc read lba=0x12001, blocks=0x1 mmc_read_partition_tbl: mmc read partition OK! eMMC/TSD partition table have been checked OK! i=0,register --- emmc_key MMC BOOT, emmc_env_relocate_spec : env_relocate_spec 59 set_storage_device_flag: store 2 bad chip version!!! efuse mac is : ac:db:da:3d:c4:e5 set ethaddr is : ac:db:da:3d:c4:e5 usid is MH0507015420365 mmc flash is used high freq info->dtbversion = 1025 boardname=stvm8b boardtype=m8b_dongle wifi=rtl8189es dtbtype=stvm8b_dongle_1g Multi dtb tool version: v2 . Multi dtb detected, support 5 dtbs. aml_dt soc: stvm8b platform: dongle variant: 1g dtb 0 soc: stvm8b plat: dongle vari: 1g dtb 1 soc: stvm8b plat: dongle vari: 512m dtb 2 soc: stvm8b plat: normal vari: 1g dtb 3 soc: stvm8b plat: normal vari: 1gcm dtb 4 soc: stvm8b plat: normal vari: 512mcm Find match dtb: 0 vpu clk_level in dts: 3 set vpu clk: 182150000Hz, readback: 182150000Hz(0x701) Net: Meson_Ethernet init suspend firmware done. (ret:0) cvbs trimming.1.v5: 0xa0, 0x0 preboot new... check board version... bad chip version!!! efuse mac is : ac:db:da:3d:c4:e5 set ethaddr is : ac:db:da:3d:c4:e5 usid is MH0507015420365 mmc flash is used high freq info->dtbversion = 1025 boardname=stvm8b boardtype=m8b_dongle wifi=rtl8189es dtbtype=stvm8b_dongle_1g Hardware version information has been written and the check is successful hdmi tx power init mode = 8 vic = 16 set HDMI vic: 16 mode is: 8 viu chan = 1 config HPLL config HPLL done reconfig packet setting done Hit Enter key to stop autoboot -- : 1 tstc enter exit abortboot: 1 The original name was "MyGica ATV185" and each device has a Quad-Core processor (Cortex A5, 1 GHz), 1 GB RAM, 8 GB internal eMMC storage, a WIFI module, 1x USB2.0, 1x microSD slot, 1x HDMI plug and 1x microUSB as power supply. The device should be the same like the ODroid C1 Would love to participate in the process of creating a useful image for the S805 platform and especially for this piece of hardware. -
Some more details: Ethernet is 100 Mbps (hardware). I have been struggling at first with armbian booting to a blank colored screen, with random color (pink, light blue, whatever). Turns out, my power supply cable was faulty and the ground connection was interrupted. This created an awkward situation where the power was circulating through the ground of the HDMI connection. Surprisingly this worked for the first stages of booting but soon would trigger the blank screen (I guess at the loading of the kernel framebuffer). as it should be known by reading the installation guides on the forum, the installation to eMMC must be done with the dedicated script, and not through armbian config; in the latter case, the device will be bricked. Of course I learned that the hard way. In my experience, re-flashing the original firmware via USB did not work, but it worked through the SD card. Hunting down the original Android image can be challenging as most links are dead/expired. I am attaching a `sbc-bench` run. The device is slow-ish but possibly usable for light tasks. Still, I think it's amazing I could salvage it, so thanks to the armbian community! leelbox-s1.txt
-
Hello, I'm trying to install Armbian using `armbian-install` on NVMe, with bootloader on eMMC. I have installed 64GB Foresee eMMC module and 256GB WD SN530 2242 SSD. When I boot from SD card, both storages are detected. Using fdisk, I made them both `dos` (mbr) partitioned. Then I invoke `armbian-install`, it proceeds without any problems using eMMC+sata/nvme/usb option, and I have now 512 MB boot partition on eMMC, the rest of eMMC space as secondary, f2fs partition, and ext4 partition nvme0n1p1 containing the rest of the system. I power the system off, take the SD card out, and boot again.. and I'm stuck in initramfs. From it, I can mount the nvme0n1p1 manually without problems, so the partition is readable and mountable. When I mount nvme0n1p1 as `/` and try to `exit` from initramfs, I am getting kernel panic, but I don't know if it's related or not. It seems to be not a PSU issue (I tried a few 5V 2-3A), not an SD card issue (the system boots and works fine from it), nor the eMMC issue (I installed the system onto the 64GB eMMC only, without nvme, and it worked as well). Tried installing both Armbian_community_24.5.0-trunk.6_Orangepi3b_bookworm_legacy_5.10.160_minimal and Armbian_23.11.1_Orangepi3b_bookworm_edge_6.6.2, both exhibit the same behavior. What's wrong with me and what can I do to fix the boot? I searched for solutions around, but did not find any similar...
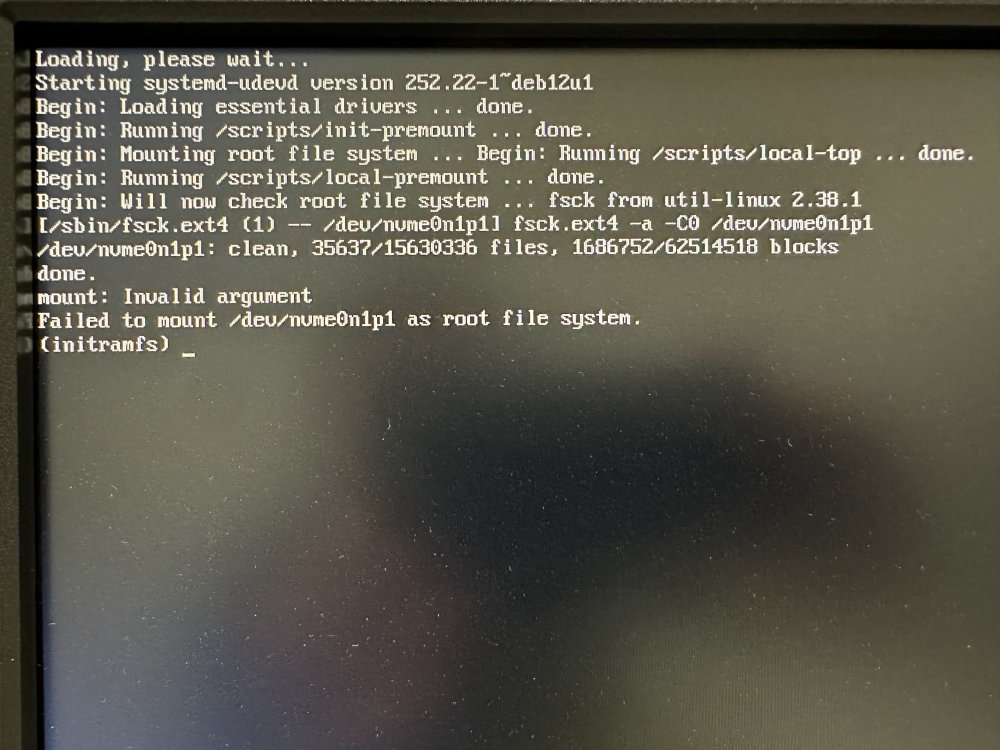
-
 OK, so still at the nothing happens stage for me. Nothing on the HDMI or LCD. evtest comes back with /dev/input/event0: DELL DELL USB Keyboard /dev/input/event3: BRLTTY 6.5 Linux Screen Driver Keyboard Whatever that BRLTTY is (something to do with TTY service?), doesn't seem to be anything to do with the touch screen, as it doesn't show any input when I try it (though if the pins aren't right that could be it). gpioinfo for chip1 has 32 lines, I'm assuming that's where the GPIO would show up for the screen, but it says they're all unused. Chip0 has 287 lines, most seem to be unnamed/unused (see bottom for examples). After dinner, I'll see if I can get the HDMI to come back. I guess the next step is to check the pinouts on my OPiZ3 compared with the screen and with the pinout above where it's said to have worked. For reference, I'm using the latest image that @pixdrift provided in another thread (bookworm edge 6.7.4). However, I may try the previous one, as now that I look at it, the one I'm using now appears to have something to do with audio. Also, I went into Armbian config and turned on all the options for SPI and the TFT options as well. Maybe I'll go back and turn TFT off and run the command that added the DTS again. When I tried that it said it was already configured so might be interfering and not loading that DTS. line 64: unnamed kernel input active-high [used] line 65: unnamed unused input active-high line 66: unnamed kernel input active-high [used] line 67: unnamed kernel input active-high [used] line 68: unnamed kernel input active-high [used] line 69: unnamed unused input active-high line 70: unnamed unused input active-high line 71: unnamed unused input active-high line 72: unnamed unused input active-high line 73: unnamed "interrupt" input active-high [used] line 74: unnamed unused input active-high line 75: unnamed unused input active-high line 76: unnamed "red:status" output active-high [used] line 77: unnamed "green:power" output active-high [used] line 78: unnamed unused input active-high line 79: unnamed unused input active-high line 80: unnamed "regulator-usb1-vbus" output active-high [used] ... line 192: unnamed kernel input active-high [used] line 193: unnamed kernel input active-high [used] line 194: unnamed kernel input active-high [used] line 195: unnamed kernel input active-high [used] line 196: unnamed kernel input active-high [used] line 197: unnamed kernel input active-high [used] line 198: unnamed unused input active-high line 199: unnamed unused input active-high line 200: unnamed unused input active-high line 201: unnamed unused input active-high line 202: unnamed unused input active-high line 203: unnamed unused input active-high line 204: unnamed unused input active-high line 205: unnamed unused input active-high line 206: unnamed unused input active-high line 207: unnamed unused input active-high line 208: unnamed unused input active-high line 209: unnamed unused input active-high line 210: unnamed "reset" output active-low [used]
 -
 Hello, I've problem... Message from syslogd@rock-5b at Feb 23 21:58:00 ... kernel:[ 443.674152] Internal error: Oops: 0000000096000004 [#1] PREEMPT SMP Message from syslogd@rock-5b at Feb 23 21:58:00 ... kernel:[ 443.674152] Internal error: Oops: 0000000096000004 [#1] PREEMPT SMP Message from syslogd@rock-5b at Feb 23 21:58:00 ... kernel:[ 443.718480] Code: b40001b3 f1036273 d503201f 54000140 (f9402261) Message from syslogd@rock-5b at Feb 23 21:58:00 ... kernel:[ 443.718480] Code: b40001b3 f1036273 d503201f 54000140 (f9402261) I have exactly zero experience with debugging this. But from my trial-error it will have something to do with NVME as this is the only thing that remains. This error happen after copying data to SSD in M.2 slot. I tried copying USB -> SSD and SFTP -> SSD . Happens everytime after about 5 GB is copied. Configuration: * Rock Pi 5B, 32 GB RAM * SSD: Samsung 990 PRO 2TB * Power Supply: Dummy 12V DC adapter 3A * Up-to-date Armbian with 6.8.0-rc1-edge-rockchip-rk3588 * Latest bootloader in NAND * Boot from NVME The only NOT up-to-date thing is the Samsung firmware. I haven't found a way how to update it inside the Pi. What can I do? Please help.
 -
thats look like a power or thermal problem maybe , did you managed to try (sdcard or usb) with cpu-stability to overlays= line in /boot/armbianEnv.txt or verbosity=7 and look in the Serial log maybe still always same step where it break hope you have a serial adapter at the box
-
I have a brand new VIM4 NPU bare board in fanless aluminum case with power supply and Khadas cable. Khadas Ubuntu versions with gnome desktop work perfectly without any slowdown in both emmc and sd version but armbian desktops do not work! Only xfce (via oowow or latest armbian.com version) launches after several minutes but then presents slowdowns. All versions with cinnamon (oblique lines) and gnome (armbian logo) freeze after launching the desktop environment whether with an installation on emmc sd or usb… No problems with server versions, only desktop versions… I wonder if it is the fact of not having a fan and/or the NPU chip that makes the Armbian desktops incompatible?